
Related Manuals for Marantz CR401


Summary of Contents for Marantz CR401
- Page 1 CLASS 1 LASER PRODUCT KLASSE 1 LASER PRODUKT I.H.T. IEC 825 Model CR401 User Guide CD Receiver...
- Page 2 Marantz. seguro o se ponga en contacto con Marantz. VIKTIGT IMPORTANTE Fö att garantin skall gälla är det kundens sak att Cuando solicite el servicio otorgado por la framställa bevis och datum om köpet.
- Page 3 The CR401 is in conformity with the EMC directive and low-voltage directive. Français Le CR401 est conforme à la directive EMC et à la directive sur les basses tensions. Deutsch Das Modell CR401 entspricht den EMC-Richtlinien und den Richtlinien für Niederspannungsgeräte.
- Page 4 Español Svenska ADVERTENCIAS - No exponga el equipo a la lluvia ni a la - Utsätt inte utrustningen för regn eller fukt. humedad. - Ta inte bort utrustningens hölje. - No extraiga la tapa del equipo. - För inte in föremål i utrustningen genom - No introduzca nada en el interior del equipo a ventilationshålen.
-
Page 5: Table Of Contents
TABLE OF CONTENTS FEATURES...1 BEFORE USE...2 PART NAME AND FUNCTIONS ...5 FRONT PANEL ...5 REAR PANEL ...6 REMOTE CONTROL ...7 CONNECTIONS ...8 CONNECTING THE ANTENNA TERMINALS ...8 CONNECTING SPEAKERS...9 CONNECTING ANALOG / DIGITAL COMPONENTS ...10 BASIC OPERATION ...11 CD OPERATION...12 PLAYING CD ...12 DISPLAYING INFORMATION ...14 TUNER OPERATION ...15... -
Page 6: Before Use
7 Do Not Touch Hot Spots During and Immediately After Use During and immediately after use, the CR401 is hot in areas other than the controls and rear panel connection jacks. Do not touch hot spots and especially the top panel. Contact with hot areas 0.2 m or... -
Page 7: Notes About The Discs
file and folder structure is very complicated, When a disc has a piece of plastic tape or rental the CR401 may not be able to read or play all of CD label with paste protruding from the edge or when a disc still bears traces of sticky tape or the MP3 files on the disc. -
Page 8: Loading Batteries
7 Loading batteries 7 Operating range of the remote control unit Before using the supplied remote control unit for the first time, load the batteries in the remote • Point the remote control unit at the remote control unit. The batteries provided are used to sensor on the main unit as shown on the verify the operations of the remote control unit only. -
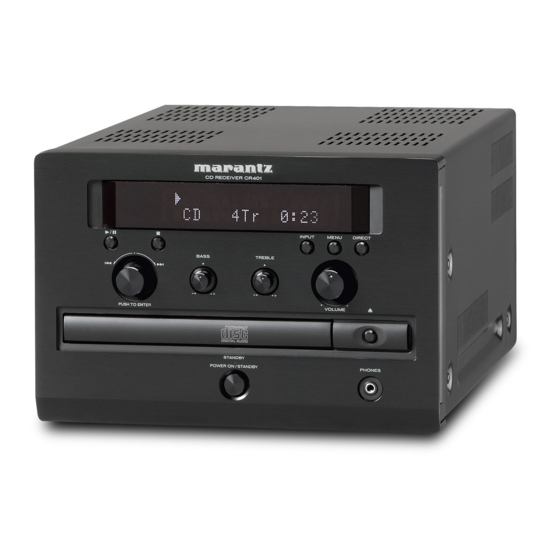
Page 9: Part Name And Functions
PART NAME AND FUNCTIONS FRONT PANEL CD RECEIVER CR401 CD RECEIVER CR401 INPUT INPUT BASS BASS TREBLE TREBLE PUSH TO ENTER PUSH TO ENTER STANDBY STANDBY POWER ON / STANDBY POWER ON / STANDBY q POWER ON/STANDBY button Press to turn power ON and press again to switch to STANDBY mode. -
Page 10: Rear Panel
CD Recoder and the OUT jacks to MD or CD Recorder input jacks. f AC Power cable Connect to an AC power outlet. CR401 to be powered by AC230V 50Hz. g DVD IN Jacks Connect the IN jacks to the output jacks of DVD player. -
Page 11: Remote Control
Use the SHIFT button and the Preset channel buttons during this time to designate the desired preset channel. ⁄6 DAB button This button does not function on CR401. ⁄7 SLEEP button Used with the Sleep Timer function. ⁄8 SHIFT button Used to select the memory groups, A (1 ~ 10), B (1 ~ 10), ... -
Page 12: Connections
ANTENNA COAXIAL cable DIGITAL DIGITAL TAPE TAPE SPEAKERS SPEAKERS FM indoor antenna MODEL NO. CR401 (Supplied) Use tape or a pin to fasten the tip of the AC IN AC IN antenna to the wall, a rack, etc. AM outdoor antenna... -
Page 13: Connecting A Subwoofer
• Be careful not to short the positive and negative connections. Doing so may damage the CR401. • Don’t connect more than one wire to each speaker terminal. Doing so may damage the CR401. -
Page 14: Connecting Analog / Digital Components
DVD PLAYER Optical Digital Output The CR401’s optical digital output has a shutter- type cover that opens when an optical plug is inserted and closes when it's removed. Push a plug in all the way. -
Page 15: Basic Operation
To turn on the CR401, press the POWER ON/STANDBY switch q or button z. You can connect a pair of stereo headphones to • The CR401 comes on, the display lights up, the CR401’s PHONES jack for private listening, as and the Standby indicator goes off. shown. -
Page 16: Cd Operation
OPEN/CLOSE 0 button r again to close the On the CR401: tray. • Turn the Easy JOG 4/¢ knob !5 to select a • Be sure to put 8 cm discs in the center of the track for playback. - Page 17 (This does not affect program playback.) • The program is deleted when the disc tray is opened or select the CD normal play mode by MODE button ,. ⁄0 ⁄2 CD RECEIVER CR401 CD RECEIVER CR401 INPUT INPUT MENU MENU...
-
Page 18: Displaying Information
CD OPERATION 7 MP3 Disc DISPLAYING INFORMATION Elapsed track time: This section explains how to display various information, including the remaining track time, The length of time that the current track has remaining disc time, and ID3 tag for MP3 tracks. been playing (default display). -
Page 19: Tuner Operation
• The frequency changes continuously when AUTO TUNING mode the 1 button ⁄1 or ¡ button ⁄2 on the remote control unit is held in. CD RECEIVER CR401 CD RECEIVER CR401 tuned off. BASS BASS TREBLE... - Page 20 7 Recalling preset stations (FM/AM) Use the “Auto tuning” or “Manual tuning” operation to tune in the station to be preset in On the CR401: the memory. Press the POWER ON/STANDBY switch q to Press the MENU button u or n to select turn on the power.
- Page 21 5 or ∞ button c. The RDS search automatically begins and the “RDS Search” blinks. • If no TP station is found with above operation, all the reception bands are searched. CD RECEIVER CR401 CD RECEIVER CR401 INPUT INPUT MENU...
- Page 22 The above is an example for when there is TP data but no RT data. w PTY: The program type of the tuned in broadcast is displayed. e CT: The current time is displayed. CD RECEIVER CR401 CD RECEIVER CR401 INPUT INPUT MENU MENU DIRECT...
-
Page 23: Other Operation
OTHER OPERATION 7 Muting the CR401 SETTING THE CLOCK Use this function to mute the output of the CR401 7 Present time setting temporarily. • To operate the timer program, you must set the Press the MUTE button m. present time. -
Page 24: Timer Programs
OTHER OPERATION 7 Timer Program Setting TIMER PROGRAMS 7 About the Timer Programs • You must set the clock time before you set the timer programs. • This unit has three timer programs so that you • You need to store preset stations before you set can turn it on and off automatically at certain the timer programs. -
Page 25: Last Function Memory
• If step 3 does not work,start over from step 1. • If the microprocessor has been initialized all the button settings are reset to the default values (the values set upon shipment from the factory). CD RECEIVER CR401 CD RECEIVER CR401 BASS BASS... -
Page 26: Troubleshooting
CD playback skips? direction. Noise is generated. Cause Measures • A strong light source is • Make sure that the CR401 is interfering with the CR401’s not subjected to direct sunshine remote sensor. or inverter-type fluorescent lights. Relocate if necessary. - Page 27 Abnormal Behavior: The CR401 contains a microcomputer for signal processing and control functions. In very rare situations, severe interference, noise from an external source, or static electricity may cause it to lockup. In the unlikely even that this should happen, unplug the power cord from the wall outlet, wait at least five seconds, and then plug it back in again.
-
Page 28: Specifications & Dimensional Drawings
In the event of difficulty, refer to your dealer or write directly to the nearest location to you that is listed on the Marantz Authorized Service Station list. If writing, please include the model and serial number of the equipment together with a full description of what you think is abnormal about the equipment's behaviour. - Page 29 You can find your nearest authorized distributor or dealer on our website. U.S.A. Marantz America, Inc. 1100 Maplewood Drive, Itasca, IL 60143, U.S.A. EUROPE Marantz Europe B.V. P.O. Box 8744, 5605 LS Eindhoven, The Netherlands Printed in China is a registered trademark.