Makita 4304 Instruction Manual
Variable speed
Hide thumbs
Also See for 4304:
- Instruction manual (24 pages) ,
- Instruction manual (45 pages) ,
- User manual (8 pages)
Advertisement
Quick Links
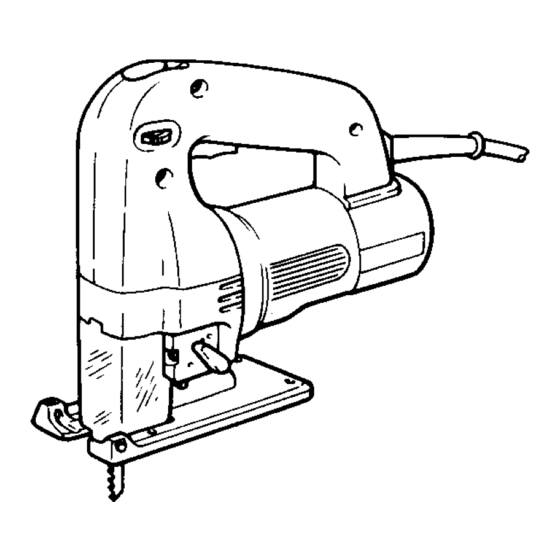
Jig Saw
Model
4304
4305
MODEL 4304
MODEL 4305
Variable Speed
Variable Speed
Length
Max.
cutting capacities
Strokes
Overall
Net
of stroke
Wood
Mild steel
Aluminum
per minute
length
weight
249 mm
(9-314")
2.3 kg
285 mm
(5.1 lbs)
111-1/4")
(::,yg,,
500
-
3,000
26"
135"
1 0 "
(1")
(5-5/16'7
13/8")
INSTRUCTION MANUAL
4304
4305
DOUBLE
INSULATION
SPECIFICATIONS
*
Manufacturer reserves the right to change specifications without notice.
Note: Specifications may differ from country to country.
WARNING: For your personal safety, READ and UNDERSTAND before using.
SAVE THESE INSTRUCTIONS FOR FUTURE REFERENCE.
Advertisement

Related Manuals for Makita 4304


Summary of Contents for Makita 4304
- Page 1 WARNING: For your personal safety, READ and UNDERSTAND before using. SAVE THESE INSTRUCTIONS FOR FUTURE REFERENCE. Max. cutting capacities Mild steel Aluminum (::,yg,, 1 0 " 13/8") Jig Saw MODEL 4304 Variable Speed MODEL 4305 Variable Speed 4305 DOUBLE INSULATION Strokes Overall length...
- Page 2 GENERAL SAFETY RULES WARNING! Read and understand all instructions. Failure to follow all instructions listed below, may result in electric shock, fire and/or serious personal injury. SAVE THESE INSTRUCTIONS READ ALL INSTRUCTIONS. 1. Keep your work area clean and well lit. Cluttered benches and dark areas invite accidents.
- Page 3 Avoid accidental starting. Be sure switch is off before plugging in. Carrying with tools your finger on the switch or plugging in tools that have the switch on invites accidents. 12. Remove adjusting keys or switches before turning the tool on. A wrench or a key that is left attached t o a rotating part of the tool may result in personal injury.
- Page 4 ADDITIONAL SAFETY RULES Avoid cutting nails. Inspect for and remove all nails from the workpiece before operation. Don't cut hollow pipe. Do not cut oversize workpiece. 4. Check for the proper clearance beneath the workpiece before cutting so that the blade will not strike the floor, workbench, etc. Always wear eye protection conforming Severe eye injury could result.
- Page 5 The followings show the symbols used for tool. ____ /min volts amperes herts kilograms hours minutes seconds alternating current direct current no load speed alternating or direct current Class II Construction splash-proof construction watertight construction revolutions or reciprocation per minute number of blow...
- Page 6 Installing or removing the saw CAUTION: Always be sure that the tool the blade. To install the blade, loosen the screw on With the blade teeth facing forward, insert the blade into the blade holder as far as will go. Make sure that the back edge of the blade fits properly in the groove of the roller.
- Page 7 Installing the universal shank jig saw blade CAUTION Always be sure that the tool the blade. If the universal blade clamp is used, you can use blades of other makes which have a universal shank like the one shown in...
- Page 8 Position Cutting action straight line cutting action Smallorbit cutting action Large orbit cutting action To start the tool, simply pull the trigger. Release the trigger to stop. For continuous operation, pull the trigger and move the lock lever backward. To stop the tool from the locked position, pull the trigger fully, then release it.
- Page 9 Speed adjusting dial The tool speed can be adjusted and maintained between 500 and minute by turning the adjusting dial. The dial 4304 Refer to the table right to select the proper speed for the workpiece to be cut. However, the appropriate speed may differ with the type or thickness of the work- piece.
- Page 10 Then tighten the bolt to secure the base. Flush cutting Loosen the bolt on the bottom of the tool and slide the base all the way back. Then tighten the bolt to secure the base. For 4304 Edge of motor housing Graduations slot...
- Page 11 For internal cutouts without a lead-in cut from an edge, predrill starting hole more than 12 mm (15/32") in diameter. Insert the blade into this hole and hold the tool firmly against the workpiece to start your cut. For 4304 Starting hole Plung cutting You need not bore a starting hole or make a lead-in cut if you carefully do as follows: 1.
- Page 12 Finishing edges To trim edges or make slight dimensional adjustments, run the blade lightly along the cut edges. Metal cutting Always use a suitable coolant (cutting oil) when cutting metal. Failure to do so will cause significant blade wear. The underside of the workpiece can be greased instead of using a coolant.
- Page 13 Guide rule (rip fence; optional accessory) When cutting widths of under (5-29/32") repeatedly, use of the guide rule will assure fast, clean, straight cuts. To install loosen the bolt on the front of the base. Slip in the guide rule and secure the bolt.
- Page 14 Always be sure that the tool inspection or maintenance. To maintain product SAFETY and RELlABl LITY, repairs, carbon brush inspection and replacement, any other maintenance or adjustment should be performed by Makita Authorized or Factory Service Centers, always using Makita replacement parts. Hex wrench...
- Page 15 ACCESSORIES CAUTION: These accessories or attachments are recommended for use with your Makita tool specified in this manual. The use of any other accessories or attachments might present a risk of injury to persons. The accessories or attachments should be used only in the proper and intended manner.
- Page 16 Jig saw blade Blade type Wood and plywood No. 51 60 mm thick NO. 58 15/32" - 2-3/6"1 4 - 3 0 mm thick 15/32" 1-1/8") thick No. 6 - 1 0 1118" - 2-316'7 3 - 3 0 mm thick No.
- Page 17 JIG SAW Model 4304 Note: The switch, noise suppressor and other part configurations may differ from country to country.
- Page 18 Hex Socket Head 8011 M5x8 Motor Housing Carbon Brush Brush Holder Name Plate Rear Cover Tapping Screw Flange PT 4x30 Makita Label Tapping Screw Flange PT 4x60 Rubber Ring 19 country differ tram Country Flange PT 4x20 M4x16 IWith Washer)
- Page 19 JIG SAW Model 4305 Note: The switch, noise suppressor and other part configurations may differ from country to country.
- Page 20 MAKlTA L I M r r E D ONE YEAR WARRANTY Warranty Policy Every Makita tool is thorou ly inspezted and tested before leaving the factory. It is warranted be free of defects from w o r & k p and materials for the period of ONE YEAR from the original purchrsc.