Table of Contents
Advertisement
Advertisement
Table of Contents

Related Manuals for Tera TR-590

Summary of Contents for Tera TR-590
- Page 1 TERA TERA www.tera.co www.tera.co User Manual User Manual TR-590 TR-590...
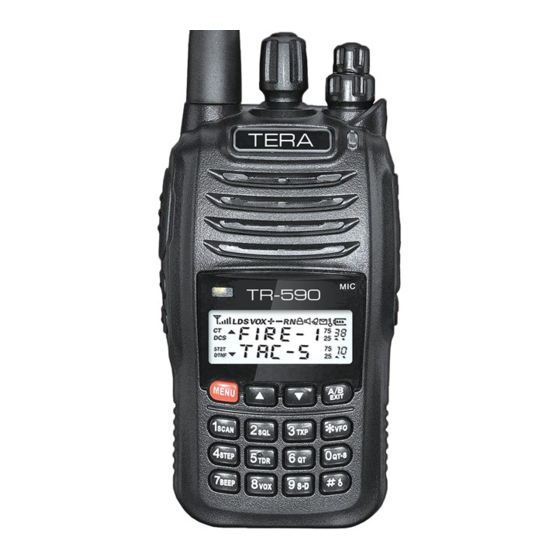
- Page 2 TERA Thank you for purchasing TERA model TR-590. This dual-band VHF/UHF two-way radio features up to 200 channels, 5 watt output, alpha-numeric display and true dual receive. This radio can operate up to 20 hours on a single charge with its included 1600 mAh Li-ion battery.
-
Page 3: Initial Programming
In addition, after you READ this radio with software, first make your programming and frequency changes, then send this edited file back to your radio. Please contact the dealer you purchased this radio from or TERA should you have any questions. - Page 4 TERA Online Service and Support The TERA website provides additional information about obtaining service or support for the TERA line of two-way radios and accessories. Visit: www.tera.co TERA...
- Page 5 Only qualified TERA technicians are allowed to service this two-way radio. Do not disassemble the radio by yourself as it will void the warranty. Use only the TERA brand battery pack and desk charger, so as to not damage the transceiver.
-
Page 6: Table Of Contents
Flashlight Set (MENU 16) ......... 33 Function Shortuts Process ....... 20 Auto Backlight Set (MENU 17) ......33 Functions Operating Instructions ....25 RxTxLED (MENU 18) ........... 34 Scan Mode (MENU 0) ......... 25 FM Radio (MENU 19).......... 34 TERA... - Page 7 Memory Channel Store (MENU 32) ....41 Memory Channel Delete (MENU 33) .... 41 Reset ................ 42 Reverse Frequency Function ......42 Main Band Operation A/B Switch ....42 VFO or Memory Channel Mode ...... 43 Wired Clone ............44 TR-590...
- Page 8 Please unpack the radio and the included accessories. We recommend that you check the box for the items listed below to ensure everything is in the box. Please contact your dealer should any items be missing from the box. TERA...
-
Page 9: Included In Box
Included In Box TERA Radio Antenna Battery Charger TERA Belt Clip Hand Strap User Manual TR-590... -
Page 10: Getting Acquainted
5. If the battery life quickly runs down even if it is fully and correctly charged, this means the battery life is over and this battery will need replacing. Please contact your authorized TERA dealer to purchase a new battery. -
Page 11: Charge Operation
Treat any battery carefully especially when placing it into pocket, wallet or other metal container as they can short out. Charge Operation Please charge as follows: 1. Turn off the radio. 2. Plug the AC connector of adapter into an AC output socket TR-590... - Page 12 1. The battery is not fully charged from the factory. Please charge the battery before initial use or after long-period of storage. 2. Repeat charging 2 to 3 times will make the battery reach its best capacity. Please replace or TERA...
-
Page 13: Antenna Information
When storing radio for more then 3 weeks at a time, it is best to remove the TERA battery from radio. This will maintain a full charge in battery so it’s ready for use. Batteries will hold a charge 6-12 months when removed from radio. -
Page 14: Radio Overview
Channel or Function Number Channel Scan / Add Channel Number Signal Strength Indication Transmitter-Working Busy Channel Lock / Unlock Receive-Working Indicative Narrowband Channels A/B Switch Battery Status Indicator: Full Battery exhausted. Please change out battery or charge it. Power Remaining TERA... - Page 15 Earphone / Speaker Mic Jack Antenna Channel Selector Flashlight Function Key Number Keys TERA TERA TERA Up/Down key Powe r Switch / Volume Control of the top frequency Volume Control of the bottom frequency LED Indicator Speaker Microphone Exit Lock TR-590...
-
Page 16: Basic Operations
Rotate the top right knob counter-clockwise until a “Ka Ta” sound means to turn off the radio. Volume Adjustment Rotate the power control button/volume controller clockwise to turn on the radio, rotate further to adjust the desired volume. TERA... -
Page 17: Monitor Function
2. If LED flashes red during TX, the battery needs re-charging. The radio can not transmit when battery is low. Reduce your TX power level or recharge the battery as soon as possible. Receive A Call Release [PTT] key to receive a call. Adjust squelch in programing to recieve signal. TR-590... -
Page 18: Factory Default
The User can set customization features for side key (SK1, SK2) with the software. Long-press can set the following function: Choose: Momentary monitoring; Timer; Scan; FM Radio; Anti-interference scanning; Alarm; Flashlight Short-press can set the following function: Choose: Quiet monitoring; Timer; Scan; FM Radio; Anti-interference scanning; Alarm; TERA... - Page 19 TR-590...
-
Page 20: Function Shortuts Process
“MENU” + “7” “MENU” Press “MENU” “A/B EXIT” 50 sets of CTCSS tones (67.0Hz~254.1Hz) CTCSS/DCS to select tone. 105 sets digital tones (D023N~ Tone Press # to D754N) 105 sets reverse digital choose between tones (D023I~D754I) CTCSS, DCS, OFF TERA... - Page 21 “MENU” + “13” “MENU” Press CTCSS / DCS Tone Scanning “MENU” “A/B EXIT” Tone Search to select 14 Power-Up “MENU” + “14” “MENU” Press “1” “2” or “3” startup tones. “MENU” “A/B EXIT” Sound Default selection is “1”. to select TR-590...
- Page 22 20 FM Radio “MENU” + “20” “MENU” Press ON: receive “MENU” “A/B EXIT” Monitor Mode OFF: receive disabled to select 21 Timer “MENU” + “21” “MENU” Press ON: turn on “MENU” “A/B EXIT” OFF: turn off to select TERA...
- Page 23 Turns off CTCSS TX before unkey “MENU” “A/B EXIT” Eliminate Default is off to select 28 RX Power “MENU” + “28” “MENU” Press OFF: close “MENU” “A/B EXIT” Save SIMPLE: regular power to select consumption AUTO: smart power consumption TR-590...
- Page 24 Delete All menu operation is to press “MENU” key to confirm, and press “Exit” key to quit. Use knob or keys to select, long-press 2 sec. into quick select mode in the select interface of menu. TERA...
-
Page 25: Functions Operating Instructions
Among them, level 0 is always open squelch. A setting of “5” is the default squelch set- ting for this radio. Press “MENU”+ number 1 in standby mode, screen displays: Then, press “MENU”, arrow points to number 4, press to select squelch level, then press “MENU” to confirm, press “EXIT” back to standby mode. TR-590... -
Page 26: Transmit Power Selection (Menu 2)
Press “MENU” + number 3 in standby mode, screen displays: Then, press “MENU”, arrow points “5K” place, press to select required step frequency, press “Menu” to confirm, press “EXIT” back to standby. There are eight step frequencies to select: 2.5K, 5K, 6.25K, 10K, 12.5K, 25K, 50K, 100K Hz TERA... -
Page 27: Wide / Narrow Band Set (Menu 4)
Press “MENU” + number 5 in standby mode, screen displays: Then, press “ Menu”, arrow points “00.000” place, press to select frequency of Shift Frequency, or input it by keyboard, press “Menu” to confirm, press “EXIT” back to standby. TR-590... -
Page 28: Repeater Offset Frequency Dir (Menu 6)
Press “MENU” + number 7 in standby mode, screen displays: Right after, press “ MENU”, arrow points “OFF”, and press # key to select CTCSS or DCS Receive code, or press to select one of 67.0 Hz/D023N/D023I , press “MENU” to confirm, press “EXIT” back to standby. TERA... -
Page 29: Transmit Ctcss / Dcs Code (Menu 8)
Press “MENU” + number 9 in standby mode, screen displays: Then, press “MENU”, arrow points “ON”, press to select ON to add current channel into scan list , or select “OFF” to delete current channel from scan list, press “MENU” to confirm, press “EXIT” back to standby. TR-590... -
Page 30: Scan Method (Menu 10)
“KEY” which will lock the keypad but user can still rotate top channel knob. “DIAL” locks the top selector knob but keypad is still active. “ALL” locks the keypad and top selector knob. Default selection is “ KEY” which locks the keypad only. TERA... -
Page 31: Keyboard Auto-Lock (Menu 12)
DCSI: reverse digital tamper-proof code. It shows “CT” sign when scan CTCSS, shows “DCS” sign when scan DCS N, shows “search” when searching, then screen displays CTCSS or DCS code scanned. Press “MENU”, then rotate the top selector knob to select “Menu 13”, screen displays: TR-590... -
Page 32: Bootsnd (Menu 14)
Press “MENU”, then rotate the top selector knob to select “Menu 15”, screen displays: Then, press “MENU”, arrow points “ON”, press to select OFF, turn off beep tone, or select ON, turn on the beep tone, press “MENU” again to confirm selection and exit the menu. TERA... -
Page 33: Flashlight Set (Menu 16)
Press “MENU”, then rotate the top selector knob to select “Menu 17”, screen displays: Then, press “MENU”, arrow points “KEY”, press to select one of these options: AUTO- KEY / OFF / AUTOALL, press “MENU” to confirm, press “EXIT” back to standby. TR-590... -
Page 34: Rxtxled (Menu 18)
Press “MENU”, then rotate the top selector knob to select “Menu 19”, screen displays: Next, press “MENU”, arrow points “ON” place, press to select ON to turn on this function or select “OFF” to this function OFF, press “MENU” to confirm, press “EXIT” to return to standby. TERA... -
Page 35: Fm Radio (Menu 20)
“OFF” to turn this function OFF, press “MENU” to confirm, press “EXIT” to return to standby. Press # to start/stop timer. Press “EXIT” to clear timer. Press “EXIT” two times to cancel timer and return to normal operation. TR-590... -
Page 36: Single / Dual Display Mode (Menu 22)
Press “MENU” then rotate the top selector knob to select “Menu 23”. Right after, press the “MENU” button and rotate the top selector knob the select (VOLTAGE or BLANK). After making a selection press “MENU” again to confirm selection and exit the menu. TERA... -
Page 37: Transmit Time Out Timer (Menu 24)
Press “MENU”, then rotate the top selector knob to select “Menu 25”, screen displays: Then, press “MENU”, arrow points “OFF”, press to select one of OFF / WAVE mode, press “MENU” to confirm, press “EXIT” back to standby. TR-590... -
Page 38: Squelch Mode (Menu 26)
Press “MENU”, then rotate the top selector knob to select “Menu 27”, screen displays: Then, press “MENU”, arrow points “ON”, press to select ON to turn on this function or select “OFF” to this function OFF, press “MENU” to confirm, press “EXIT” to return to standby. TERA... -
Page 39: Power Save (Menu 28)
Press “MENU”, then rotate the top selector knob to select “Menu 29”, screen displays: Soon after, press “MENU”, arrow points “OFF”, press to select OFF to close VOX or select level 1~9 to turn on VOX level, press “MENU” to confirm, press “EXIT” to return back to standby. TR-590... -
Page 40: Vox Delay (Menu 30)
Then, press “MENU”, arrow points down and character position starts to blink. Press to select character (“0~9”, ” A~Z”, ” -“), then press “*” to move left, press “#” to move right, press “MENU” to confirm selection, press “EXIT” back to standby. TERA... -
Page 41: Memory Channel Store (Menu 32)
Press “MENU”, then rotate the top selector knob to select “Menu 33”, screen displays: Next, press “MENU”, arrow points to “CH-001”, press to select the channel you want to delete, press “MENU” to confirm, press “EXIT” back to standby. TR-590... -
Page 42: Reset
Main Band Operation A/B Switch MR mode/ VFO mode, press “EXIT” key will switch between top and bottom display. A triangle symbol “ “ and “ “ will appear on top of the screen, which represents current frequency. TERA... -
Page 43: Vfo Or Memory Channel Mode
In MR mode, use the keyboard to input pre-set oper- ation frequency. In Channel Name mode, if there is no such option as setting channel name then the screen will display “CH-N”. N stands for the current channel. TR-590... -
Page 44: Wired Clone
2. Connect source radio and target radio with clone cable, and turn target radio on. 3. Hold down [Side Key] on Source Radio, then power TERA TERA it up. About 3 seconds later, the LED glows red, which means the Source Radio is ready for cloning. -
Page 45: Troubleshooting
1. Tighten the antenna 1. Screw antenna down until snug 2. The local radio FM signal is too 2. Move to place where radio weak signal is strong 3. Press key to reset radio, then press key to select the radio frequency TR-590... - Page 46 Receive voice or interferences 1. You may set a wrong frequency 1. Double check your frequency, 2. Others on that frequency use change to a different one, the same CTCSS/CDCSS tone if needed 2. Choose a different CTCSS/ CDCSS tone TERA...
-
Page 47: Specification
124x62x36 mm Dimension Output Power VHF: 5/3/.5 W; UHF: 5/2/.5 W Modulation Wide / Narrow Band Max. Deviation ≤±5 KHz for Wide Band ≤±2.5 KHz for Narrow Band Note Without notice, specification are subject to change, according to technological improvements. TR-590... - Page 48 TERA...
-
Page 49: Optional Accessories
Optional Accessories Ext Gain Antenna USB Programming Cable Cloning Cable Stubby Antenna TR-590... -
Page 50: Service And Support
3. Repair or Replacement is available provided the original purchaser’s sales receipt copy is included when the radio or accessories are sent in for repairs. 4. Replacement and repair or radios and accessories is provided at the discretion of TERA radio 5. - Page 51 7. Warranty is void if the TERA label or Serial Number label is missing or torn off. Caution 1. Read the user manual before use the radio.
-
Page 52: Terms Of Warranty
5. The cost of materials and labor for repair are covered in warranty. 6. Warranty is void in case that the TERA mark or the serial-number mark is torn off. 7. Warranty is void in cases below: 1) Beyond the warranty period;... - Page 53 8) Product with unclear purchasing date on original sales receipt. 9) Battery under such conditions: a. Any damages or unsealing to the battery pack; b. Defects or damages to battery because of charging with improper equipment or use beyond regulated maintain condition; 10) Abrasion under normal use. TR-590...
-
Page 54: Warning Notes
Every effort has been made to ensure that the information in this document is complete, accurate, and up to-date. TERA Radio assumes no responsibility for the results of errors beyond its control. The manufacturer of this equipment also cannot guarantee that changes in the equipment made by non-authorized users will not affect the information in it. -
Page 55: Safety
Safety The TERA TR-590 handheld transceiver has been carefully designed to provide you with years of safe, reliable operation. As with all electrical equipment, however, there are a few basic precautions you should take to avoid hurting yourself or damaging the radio: •... - Page 56 This could result in short circuiting the battery. • Be certain that your power source matches the rating listed for the supplied battery charger (AC adapter). If you are not sure, check with your authorized TERA dealer. TERA...
- Page 57 • Avoid damaging the power cable of the battery charger. Do not step on or place anything on it as this could result in a damaged charger power cord. This product complies with the requirements of the Council Directives 89/336/EEC and 73/23/EEC on the approximation of the laws of the member states relating to electromagnetic compatibility and low voltage.