
Related Manuals for Tera TR-7200 VHF

Summary of Contents for Tera TR-7200 VHF
- Page 1 TERA TERA www.tera.co www.tera.co User Manual User Manual TR-7200 VHF TR-7200 VHF TR-7400 UHF TR-7400 UHF...
- Page 2 TERA...
-
Page 3: Introduction
Transceiver Introduction The TERA DMR Transceiver is a high-performance digital and analog portable unit. Model TR-7200 provides up to 5 watts of power output on the VHF band (136-174 MHz), and Model TR-7400 provides up to 4 watts of power output on the UHF band (400-470 MHz). Operating... -
Page 4: Tera Features
TERA Thank you for purchasing TERA Model TR-7400/TR-7200 DMR radios. These radios are built to commercial DMR standards, which ensure worldwide operation and compatibility. Some key features include: • Motorola / Hytera compatibility • IP67 waterproof • 1,024 individual channels / 64 Zones •... -
Page 5: Included In Box
Included In Box Thank you for choosing the TERA DMR radio. Immediately upon receipt of your radio, open the package and inspect the radio for any signs of shipping damage. Please confirm that all the items listed below are in the box. - Page 6 Only qualified TERA technicians are allowed to service this two-way radio. Do not disassemble the radio by yourself as it will void the warranty. Use only the TERA brand battery pack and desk charger, so as to not damage the transceiver.
-
Page 7: Table Of Contents
Content Introduction ............3 Scan ................. 26 TERA Features ............. 4 Radio Settings ............27 Included In Box ............. 5 Keypad Programming ......... 28 Battery Information ..........8 Editing an Existing Channel ......28 Charge Operation..........9 Programming a New Channel ...... -
Page 8: Battery Information
Battery Information Please use and charge only a TERA approved battery. Attempting to use a different battery type may result in overheating or explosion of the battery, causing damage to the radio and the potential for physical injury. Notes: 1. Do not short-circuit the battery terminals or dispose the battery in fire. Never attempt to disassemble the battery pack. -
Page 9: Charge Operation
Warning: Conductive metals such as jewelry, keys or decorating lace may result in short circuit and generate a large quantity of heat when coming in contact with battery electrodes. Treat any battery carefully especially when placing it into pocket, wallet or other metal container as it can short out. - Page 10 1. The battery is not fully charged from the factory. Please charge the battery before initial use or after long-period of storage. 2. Repeat charging 2 to 3 times will make the battery reach its best capacity. Please replace or charge the battery if battery power is low after repeated charges. TERA...
-
Page 11: Attaching The Battery
Push the battery latch toward the “Lock” mark to lock it. When storing radio for more then 3 weeks at a time, it is best to remove the TERA battery from radio. This will maintain a full charge in battery so it’s ready for use. Batteries will hold a charge... -
Page 12: Attaching/Removing The Antenna
Insert the antenna into the connector on the radio while holding the antenna at its base. Rotate the antenna clockwise to secure it to the radio. Removing the Antenna Rotate the antenna counter-clockwise (turning it at its base) until the antenna is free from the radio. TERA TERA TERA... -
Page 13: Installing The Belt Clip & Hand Strap
Installing the Belt Clip Installing Belt Clip Remove screws from rear of radio and align belt clip over rear holes in case and place belt clip over holes and replace screws. Notes: 1. If using a belt clip, please mount the belt clip onto the back before installing the battery pack. -
Page 14: Radio Overview
Radio Overview TERA TERA... -
Page 15: Radio Callouts
Radio Callouts Part Name Part Name Part Name Top Orange Programmable Speaker Belt Clip Button Push-To-Talk Button Tricolor LED Indicator Battery Side Key 2 Programmable Antenna OLED display Button Side Key 1 Programmable Volume Knob Belt Clip Screws Button Channel Selector Knob Accessory Jack Microphone Battery Latch... -
Page 16: Status Indicators
Current channel is set to transmit with Low Tx Power Current channel is set to transmit with High Tx Power Battery Status More bars indicate more battery power left Tones Radio Silence Mode is ON Radio Silence Mode is OFF TERA... -
Page 17: Turning The Radio On/Off
OFF. Volume Adjustment Rotate the volume control clockwise or counter-clockwise TERA to adjust the desired volume. Selecting a Channel Rotate the “Channel Selector” knob to a desired channel. A channel can either be Analog or Digital. -
Page 18: Selecting A Zone
Selecting a Zone A Zone is a group of channels grouped together. The TERA DMR radio has 64 Zones. A Zone can have the maximum of 16 analog and/or digital channels. Program Settings Zone Accessing a Zone: From the Main Menu Screen, scroll up to select Zone, then press OK to enter. -
Page 19: Menu Navigation
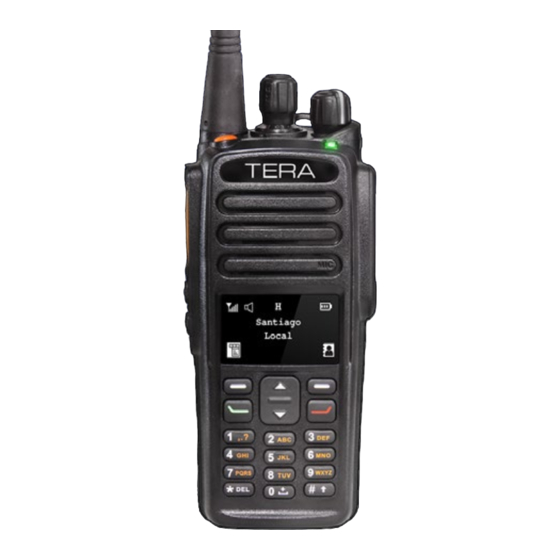
Menu Navigation Message Contact Manual Dial Santiago Call Logs Local Main Menu Scan Program Settings Menu display functions can be enabled / disabled in software. Zone... -
Page 20: Messages
Manual Dial Inbox Inbox Each message function can perform any of these Write operations: Reply/Forward/Edit/Delete. Outbox Inbox Write Create a text message up to 150 characters and send Write it to an individual user. Outbox TERA... - Page 21 Outbox Inbox The Outbox can save up to 15 sent messages. When Write the Outbox is full, the oldest entry will be automatically deleted. Each message can have these operations: Outbox Resend / Forward / Edit / Delete. Quick Text Quick Text Under this option there are 15 messages that you can pre-define in software.
-
Page 22: Contact / Talkgroup
Please note that due to the limits of the radio you will Alaska not hear the responding audio. To receive a specific Talkgroup audio the TERA DMR radio provides for a Arizona Field Programmable Receive Group ID function. See Receive Group ID section. - Page 23 Slot and Color Code. Group ID Please note that due to the limits of the radio you will not hear the responding audio. To receive a specific Talkgroup audio the TERA DMR radio provides for a Field Programmable Receive Group ID function.
-
Page 24: Receive Group Id
Receive Group ID Program The TERA DMR radio allows one Receive Group to be Settings entered from the Keypad. Zone From the main Menu scroll up and select Program. Next select Radio Channel Radio Radio ID Then select RCV Group ID. - Page 25 Enter the Talkgroup (Group ID) that you would like to RCV Group ID monitor. Make sure to cancel with a 0 after use. Note the repeater must be programmed on the correct frequency, Slot and Color Code. Call Logs Contact To access this item, press the Menu key in idle mode Manual Dial and then select “Call Logs.
-
Page 26: Scan
This option is used to enable or disable the function. Scan List Scan Switch To access this item, press the Menu key and then Scan List select “Scan, ” then click on “Scan List. ” Scan List is predefined in software. TERA... -
Page 27: Radio Settings
Settings Scan Radio Info Program Radio ID Software Version Settings Firmware Version Model Number Parameter TOT Time out timer (1-180 seconds) TX Power (High / Low) VOX (ON / OFF) Settings menu functions can be enabled Tone / disabled in software. Silence Keypad tone Keytone ON/OFF... -
Page 28: Keypad Programming
Select either an analog or digital channel to be edited. Select PROGRAM Channel - Analog Channel - Digital Frequency Frequency RX Frequency RX Frequency TX Frequency TX Frequency CTCSS / DCS Slot Slot 1 Slot 2 Color Code 0 - 15 TERA... -
Page 29: Programming A New Channel
2. Add a new analog or digital channel from the keypad. In order to add either a new Analog or Digital channel, the base channel formatting must be predefined, as the attributes are different for digital and analog channels. Zone 64 is predefined with 5 Digital channels (Digital 1-5) and 5 Analog (Analog 1-5). -
Page 30: Initial Programming
In addition, after you READ this radio with software, first make your programming and frequency changes, then send this edited file back to your radio. Please contact the dealer you purchased this radio from or TERA should you have any questions. -
Page 31: Attaching The Programming Cable
1. Remove the screw on the side accessory jack cover. 2. Slide the tip of the programming cable up into the slide slot. 3. Align and tighten the accessory screw. Note TERA TERA Side cover must be replaced to maintain IP 67 rating in operation... -
Page 32: Software Basic Settings
Software Basic Settings The TERA programming software offers many features for Commercial and Amateur users. In General Settings / Common Settings / Radio Alias / Power-on Screen you can enter your Department Unit Number or Amateur Radio callsign. In the menu settings many features can be enabled / disabled from the display menu. -
Page 33: Worldwide Amateur Contact Database
/dmrx.net/dmrx-map.html Worldwide Amateur Contact Database The TERA DMR radios contain a separate database memory for importing and displaying Amateur DMR individual IDs, call sign and user name in comma-delimited format (.csv) Please reference in the software DMR / Contact Sheet for import and export... -
Page 34: Software Overview
Software Overview The TERA programming software was developed to maximize all the functions of the TERA DMR radio. Programming can be as simple as a few channels or developed to include all 64 Zones of 16 channels totaling 1,024 unique channels. - Page 35 Example of the “Add” function in duplicating row data Next enter the Talkgroup names for each of the 16 channels. Then go back to the first channel and expand the row by clicking on >> to select a programmed Contact that matches the Channel Name, that was previously entered.
-
Page 36: Zone Organization
A key feature is the organization of Zones in the software. Zones can be moved up and down in any order and added or deleted. A unique feature is that channels follow the Zones when the Zones are moved, thereby allowing the channels to be inserted and not having to be in numerical order. TERA... -
Page 37: Contact Sheet Database Import
Talkgroup and Personal frequent IDs are located in the Talkgroup/Contact database and are not merged into the Contact Sheet. Download the Contact Sheet database to your desktop or a specific folder for importing. In the following example the folder is named TERA DMR. The TERA software will look for the .csv file. - Page 38 After selecting the file you will see the database starting to load. TERA...
- Page 39 Since the Amateur database is ever growing and large, it may take a minute for the database to appear in the display window.
- Page 40 After the database appears in the Contact Sheet window, select the Write button to import the database into the radio. TERA...
-
Page 41: Programmable Buttons
Programmable Buttons For convenience, you may program the Side Key 1, Side Key 2 and the top Orange Button to one of the functions listed below: Shortcut Name Description Disable Disable a private contact Enable Enable a private contact Check Check a private contact Alert Initiates an alert call... - Page 42 The top and side keys are programmable in software by long and short press. TERA...
-
Page 43: Monitoring & Screen Saver Function
Monitoring Function The TERA DMR radio has a monitoring function that can be enabled via software on either side or top key button. By default the top key button is programmed to initiate the Digital Monitor. When enabled this function will let you monitor a frequency by Slot and Color Code. All digital transmission can be monitored by slot 1 or 2. -
Page 44: Optional Accessories
Optional Accessories The optional accessories listed below may enhance operation of this radio. The use of only approved TERA quality accessories will ensure optimum communications effectiveness VHF / UHF Antenna G-Hook Lapel Mic Covert Clear Acoustic Tube Earphone Mic Heavy Duty Speaker Mic... -
Page 45: Care And Maintenance
Care and Maintenance Question and Answer Condition Analysis Solution The equipment can The battery may be improperly installed. Remove the battery and attach it again. not be powered on. The battery may be fully discharged. Recharge or replace the battery. The battery may suffer from poor contact Clean the battery contacts. -
Page 46: Terms Of Warranty
5. The cost of materials and labor for repair is covered in warranty. 6. Warranty is void in case that the TERA mark or the serial-number mark is torn off. 7. Warranty is void in cases below: 1) Beyond the warranty period;... - Page 47 4) Defects or damages because of incorrect testing, operation, repair, installation, reconfiguration or adjustment; 5) Defects or damages to antenna because of non-material or non-processing problems; 6) Defects or damages because of unauthorized repair and disassembling; 7) Product that the serial-number mark is torn off or unable to identify; 8) Product with unclear purchasing date on original sales receipt.
-
Page 48: Online Service And Support
Every effort has been made to ensure that the information in this document is complete, accurate, and up to-date. TERA Radio assumes no responsibility for the results of errors beyond its control. The manufacturer of this equipment also cannot guarantee that changes in the equipment made by non-authorized users will not affect the information in it. - Page 49 • Do not keep the radio with the antenna very close to, or touching exposed parts of the body, while transmitting. TERA radios will perform best, if you speak 2-4 inches away from the microphone and the radio is vertical.
- Page 50 This could result in short circuiting the battery. • Be certain that your power source matches the rating listed for the supplied battery charger (AC adapter). If you are not sure, check with your authorized TERA dealer. TERA...
- Page 51 • Avoid damaging the power cable of the battery charger. Do not step on or place anything on it as this could result in a damaged charger power cord. This product complies with the requirements of the Council Directives 89/336/EEC and 73/23/EEC on the approximation of the laws of the member states relating to electromagnetic compatibility and low voltage.
-
Page 52: General Specifications
Analog: above 11 h, Digital: above 16 h Frequency Stability ±1.0 ppm Antenna Impedance 50 Ω Dimensions (H x W x D) 126 x 53 x 34 mm Weight 310 g OLED Display 1.54” FCC ID VHF: 2ACK8TR7200 / UHF: 2ACK8TR7400 TERA... - Page 53 Receiver Sensitivity (Analog) 0.22 µV (12 dB SINAD)/0.3 µV (20 dB SINAD) Sensitivity (Digital) 0.22 µV /BER 5% Selectivity TIA-603 ETSI 60 dB @12.5 kHz/70 dB @20/25 kHz Intermodulation TIA-603 ETSI 70 dB @12.5/20/25 kHz/65 dB @12.5/20/25 kHz 40 dB @12.5 kHz/43 dB @20 kHz/45 dB @25 kHz Rated Audio Power Output 1.5 W Rated Audio Distortion...
-
Page 54: Environmental Specifications
American Military Standard MIL-STD-810 C/D/E/F/G Dust & Water Intrusion IP67 standard Humidity Per MIL-STD-810 C/D/E/F/G standard Shock & Vibration Per MIL-STD-810 C/D/E/F/G standard All specifications are tested according to applicable standards, and subject to change without notice due to continuous development. TERA... - Page 55 Notes...
- Page 56 Radio Model: Radio Serial No: Purchase Date: Dealer: TERA...
- Page 58 © 2016 ver. 4.16...