Toshiba MMY-MAP0806HT8P-E Owner's Manual
Hide thumbs
Also See for MMY-MAP0806HT8P-E:
- Service manual (351 pages) ,
- Installation manual (88 pages)
Table of Contents
Advertisement
AIR CONDITIONER (MULTI TYPE)
Owner's Manual
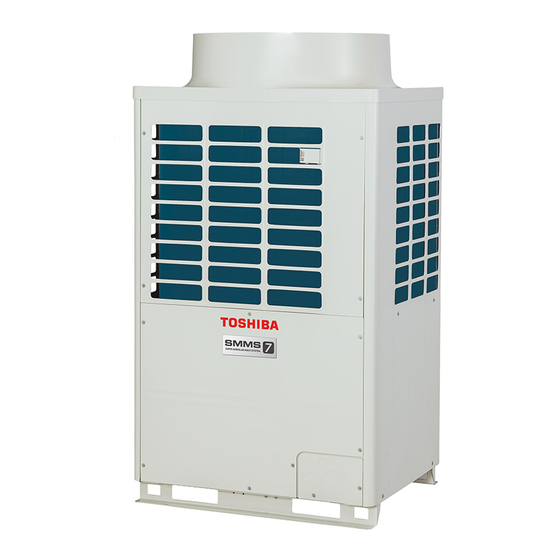
Outdoor Unit
Model name:
<Heat Pump Model>
<Cooling Only Model>
MMY-MAP0806HT8P-E
MMY-MAP0806T8P-E
MMY-MAP1006HT8P-E
MMY-MAP1006T8P-E
MMY-MAP1206HT8P-E
MMY-MAP1206T8P-E
MMY-MAP1406HT8P-E
MMY-MAP1406T8P-E
MMY-MAP1606HT8P-E
MMY-MAP1606T8P-E
MMY-MAP1806HT8P-E
MMY-MAP1806T8P-E
MMY-MAP2006HT8P-E
MMY-MAP2006T8P-E
MMY-MAP2206HT8P-E
MMY-MAP2206T8P-E
MMY-MAP0806HT8JP-E
MMY-MAP0806T8JP-E
MMY-MAP1006HT8JP-E
MMY-MAP1006T8JP-E
MMY-MAP1206HT8JP-E
MMY-MAP1206T8JP-E
MMY-MAP1406HT8JP-E
MMY-MAP1406T8JP-E
MMY-MAP1606HT8JP-E
MMY-MAP1606T8JP-E
MMY-MAP1806HT8JP-E
MMY-MAP1806T8JP-E
MMY-MAP2006HT8JP-E
MMY-MAP2006T8JP-E
MMY-MAP2206HT8JP-E
MMY-MAP2206T8JP-E
For commercial use
English
Advertisement
Table of Contents

Related Manuals for Toshiba MMY-MAP0806HT8P-E


-
![Air Conditioner Toshiba Super Modular Unit MMU-AP0091H Installation Manual]()
-
![Air Conditioner Toshiba MMU-AP0091H Owner's Manual]()
-
![Air Conditioner Toshiba MMY-MAP0804HT8JP Service Manual]()
Summary of Contents for Toshiba MMY-MAP0806HT8P-E
- Page 1 AIR CONDITIONER (MULTI TYPE) Owner’s Manual Outdoor Unit For commercial use Model name: <Heat Pump Model> <Cooling Only Model> MMY-MAP0806HT8P-E MMY-MAP0806T8P-E MMY-MAP1006HT8P-E MMY-MAP1006T8P-E MMY-MAP1206HT8P-E MMY-MAP1206T8P-E MMY-MAP1406HT8P-E MMY-MAP1406T8P-E MMY-MAP1606HT8P-E MMY-MAP1606T8P-E MMY-MAP1806HT8P-E MMY-MAP1806T8P-E MMY-MAP2006HT8P-E MMY-MAP2006T8P-E MMY-MAP2206HT8P-E MMY-MAP2206T8P-E MMY-MAP0806HT8JP-E MMY-MAP0806T8JP-E MMY-MAP1006HT8JP-E MMY-MAP1006T8JP-E MMY-MAP1206HT8JP-E...
-
Page 2: Table Of Contents
– 1 – Contents Original instruction Thank you very much for purchasing TOSHIBA Air Conditioner. 1 Precautions for safety ....................3 Please read this owner’s manual carefully before using your Air Conditioner. • Be sure to obtain the “Owner’s manual” and “Installation manual” from contractor (or dealer). -
Page 3: Warning Indications On The Air Conditioner Unit
Toshiba Carrier Corporation or, alternatively, he or she has been instructed in such matters by an might be the burst. individual or individuals who have been trained and is thus thoroughly acquainted with the knowledge related to this work. -
Page 4: Precautions For Safety
– 3 – Installation Precautions for safety • Only a qualified installer(*1) or qualified service person(*1) is allowed to carry out the electrical work of the air conditioner. Under no The manufacturer shall not assume any liability for the damage circumstances must this work be done by an unqualified individual caused by not observing the description of this manual. - Page 5 • Do not move or repair any unit by yourself. Since there is high voltage Repairs inside the unit, you may get electric shock when removing the cover • When you have noticed that some kind of error (such as when an and main unit.
- Page 6 – 5 – before cleaning. Otherwise, injury may result as the fan is rotating CAUTION at high speed inside the unit. • Do not put a water container such as a vase on the unit. Water To disconnect the appliance from the main supply intrusion into the unit may occur and it may cause deterioration of •...
- Page 7 ■ ■ Information on the transportation, handling and storage of the Connectable indoor units carton Model type Model Name Examples of indication on the carton 4-way cassette MMU-AP✽✽✽✽H✽ Compact 4-way cassette MMU-AP✽✽✽✽MH✽ Symbol Description Symbol Description Symbol Description 2-way cassette MMU-AP✽✽✽✽WH MMU-AP✽✽✽✽YH✽...
-
Page 8: Part Names Of Outdoor And Indoor Units
– 7 – ◆ 2-way Cassette Type Part names of outdoor and indoor units Earth screw ■ Equipped on the electrical control Outdoor unit Return air grille box. Air in the room is taken in through here. Air discharge Warm air comes out when cooling, and cool air Discharge louver when heating. - Page 9 ◆ Concealed Duct Standard Type ◆ Slim Duct Type MMD-AP✽✽✽H✽ Air discharge Earth screw Connect a discharge duct. Equipped on the electrical control Return air grille box. The return air duct is connected. Electrical control box The earth screw is provided in the Air fi...
-
Page 10: Part Names And Functions Of The Remote Controller
– 9 – ◆ Floor Standing Concealed Type Part names and functions of the remote Drain funnel (with strainer) controller Accessory to be attached at the site Air discharge Air fi lter Earth screw Filters out dust. This remote controller can control up to 8 indoor units. Equipped on the electrical (Inside the return air grille) ■... - Page 11 ■ Operation section Once the settings have been confi gured, all you need to do is push the button from then on. Swing indicator UNIT No. display Displayed during up/down movement of the Displays the number of the indoor unit selected. louver.
-
Page 12: Basic Operation
– 11 – Basic operation • When you use the air conditioner for the fi rst time or change the settings, follow the procedures below. From next time, pushing the button starts running of the air conditioner with the chosen settings. ■... -
Page 13: Timer Operation
■ ■ Changing the set temperature Power save operation Timer operation Push the “TEMP. ” buttons. Select a timer type from the following three: (Max. 168 hours) Push to increase the temperature, and decrease the temperature. (The set temperature OFF timer : Stops running after the specifi... -
Page 14: Installation
– 13 – Installation Notes on operations and performance ■ ■ ■ Be careful of operation sounds Check before operation Protective device Ask the installation company about important points of general instruction. (High pressure switch) • Locate the unit in a place secure enough so that the •... -
Page 15: Louver Direction
■ Cooling / Heating operations Louver direction Each unit can be controlled individually. However, indoor units connected to the same outdoor unit ■ 4-way cassette type, 2-way cannot perform cooling and heating simultaneously. NOTE When you attempt simultaneous operation, indoor cassette type, 1-way cassette To improve the cooling/heating performance, change units performing cooling are stopped, and the running... - Page 16 – 15 – ■ ◆ To stop swinging 4-way cassette type only Push the button. Push the button to confi rm the direction of the selected louver. ◆ To set the louvers individually Push the button to fi nish the setting. Push the button at the desired position Each time you push the button, the indication...
- Page 17 ▼ Cyclic swing (Recommended for cooling) ◆ Setting the louver lock ◆ Releasing the louver lock All four louvers swing at different times like waves. Set “0000” in Step 4 of “Setting the louver lock”. Push and hold the button (right side mark disappears of the button) for at least 4 seconds while running is stopped.
-
Page 18: Way Cassette Type
– 17 – ■ ■ 4-way cassette type 2-way cassette type NOTE NOTE 1. When sending air downward, bend the louvers ▼ When cooling ▼ When cooling To improve the cooling/heating performance, change evenly as shown in the following fi gure. If the air Point the louver horizontally. -
Page 19: Ceiling Type
■ ■ ■ ■ Ceiling type 1-way cassette (YH series), 1-way cassette type Floor standing type and fl oor standing types (YH series) Vertical adjustment Vertical adjustment Vertical adjustment ◆ Setting the direction and ▼ When cooling ▼ When cooling swinging Point the louver horizontally to send cool air across the Move the louver manually and point it horizontally to... -
Page 20: Tips For Saving Energy And Comfortable Performance
– 19 – ■ Floor standing cabinet type ◆ Changing the air discharge Tips for saving energy and comfortable Follow the procedure below to change the air performance discharge: ▼ When cooling Remove the two fi xing screws of the air Move the louver manually and point it horizontally to discharge. -
Page 21: Maintenance
◆ Floor standing cabinet type Vacuum dust or brush clean. Maintenance • If heavily stained, it is more effective to wash in Push down the upper part of the return air lukewarm water mixed with neutral detergent. grille slightly, and then pull it toward you to •... -
Page 22: Troubleshooting
– 21 – ■ ■ Cleaning the indoor unit and Before the cooling season Troubleshooting remote controller Ask a qualifi ed service person to clean the drain When the following symptoms are found, check the points described below before asking repair servicing. •... -
Page 23: Specifi Cations
• A foreign matter or water fall inside the air conditioner. Cooling Heating • When the air conditioner does not operate even after the cause of the protective device activation has been MMY-MAP0806HT8P-E removed. MMY-MAP0806HT8JP-E (The operation lamp and on the remote controller are fl ashing. When... -
Page 24: Declaration Of Conformity
– 23 – Declaration of Conformity Manufacturer: TOSHIBA CARRIER (THAILAND) CO., LTD. 144 / 9 Moo 5, Bangkadi Industrial Park, Tivanon Road, Tambol Bangkadi, Amphur Muang, Pathumthani 12000, Thailand Authorized Nick Ball Representative / Toshiba EMEA Engineering Director TCF holder: Toshiba Carrier UK Ltd. - Page 25 Information according to EMC Directive 2004 / 108 / EC (Name of the manufacturer) TOSHIBA CARRIER (THAILAND) CO., LTD. 144 / 9 Moo 5, Bangkadi Industrial Park, Tivanon Road, (Address, city, country) Tambol Bangkadi, Amphur Muang, Pathumthani 12000, Thailand (Name of the Importer / Distributor in EU) Toshiba Carrier UK Ltd.


