Table of Contents
Advertisement
Available languages
Available languages
AIR CONDITIONER (MULTI TYPE)
Installation Manual
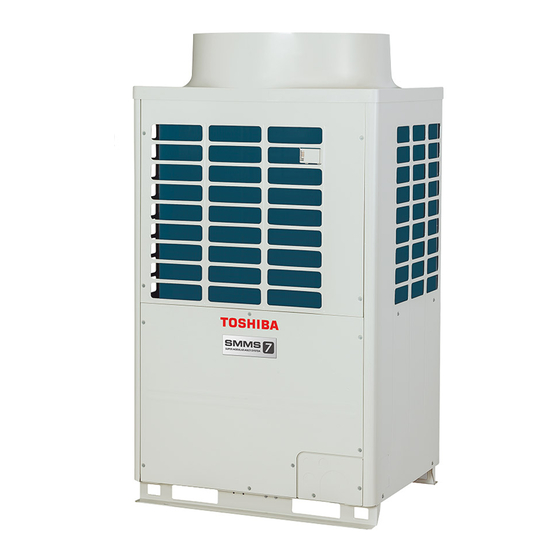
Outdoor Unit
Model name:
<Heat Pump Model>
MMY-MAP0806HT8P-E
MMY-MAP1006HT8P-E
MMY-MAP1206HT8P-E
MMY-MAP1406HT8P-E
MMY-MAP1606HT8P-E
MMY-MAP1806HT8P-E
MMY-MAP2006HT8P-E
MMY-MAP2206HT8P-E
MMY-MAP0806HT8JP-E
MMY-MAP1006HT8JP-E
MMY-MAP1206HT8JP-E
MMY-MAP1406HT8JP-E
MMY-MAP1606HT8JP-E
MMY-MAP1806HT8JP-E
MMY-MAP2006HT8JP-E
MMY-MAP2206HT8JP-E
1117101201-3 EN.indd 1
1117101201-3 EN.indd 1
For commercial use
<Cooling Only Model>
MMY-MAP0806T8P-E
MMY-MAP1006T8P-E
MMY-MAP1206T8P-E
MMY-MAP1406T8P-E
MMY-MAP1606T8P-E
MMY-MAP1806T8P-E
MMY-MAP2006T8P-E
MMY-MAP2206T8P-E
MMY-MAP0806T8JP-E
MMY-MAP1006T8JP-E
MMY-MAP1206T8JP-E
MMY-MAP1406T8JP-E
MMY-MAP1606T8JP-E
MMY-MAP1806T8JP-E
MMY-MAP2006T8JP-E
MMY-MAP2206T8JP-E
1117101201-3
English
Installation Manual
1
8/8/2559 BE 3:49 PM
8/8/2559 BE 3:49 PM
Advertisement
Table of Contents

Related Manuals for Toshiba MMY-MAP0806HT8P-E


-
![Air Conditioner Toshiba Super Modular Unit MMU-AP0091H Installation Manual]()
-
![Air Conditioner Toshiba MMU-AP0091H Owner's Manual]()
-
![Air Conditioner Toshiba MMY-MAP0804HT8JP Service Manual]()
Summary of Contents for Toshiba MMY-MAP0806HT8P-E
- Page 1 1117101201-3 AIR CONDITIONER (MULTI TYPE) Installation Manual Outdoor Unit For commercial use Model name: <Heat Pump Model> <Cooling Only Model> MMY-MAP0806HT8P-E MMY-MAP0806T8P-E MMY-MAP1006HT8P-E MMY-MAP1006T8P-E MMY-MAP1206HT8P-E MMY-MAP1206T8P-E MMY-MAP1406HT8P-E MMY-MAP1406T8P-E MMY-MAP1606HT8P-E MMY-MAP1606T8P-E MMY-MAP1806HT8P-E MMY-MAP1806T8P-E MMY-MAP2006HT8P-E MMY-MAP2006T8P-E MMY-MAP2206HT8P-E MMY-MAP2206T8P-E MMY-MAP0806HT8JP-E MMY-MAP0806T8JP-E MMY-MAP1006HT8JP-E MMY-MAP1006T8JP-E...
-
Page 2: Table Of Contents
Toshiba Address setting . - Page 3 Warning indications on the air conditioner unit Definition of Protective Gear When the air conditioner is to be transported, installed, maintained, repaired or removed, wear protective gloves and ‘safety’ work clothing. Warning indication Description In addition to such normal protective gear, wear the protective gear described below when undertaking the special work detailed in the table below.
-
Page 4: Precautions For Safety
• If using separately sold products, make sure to use Toshiba in injury. specified products only. Using unspecified products may cause •... - Page 5 Selection of installation location Installation • If you install the unit in a small room, take appropriate measures • Follow the instructions in the Installation Manual to install the air to prevent the refrigerant from exceeding the limit concentration conditioner. Failure to follow these instructions may cause the even if it leaks.
- Page 6 – 5 – • After the installation work, confirm that refrigerant gas does • Use wiring that meets the specifications in the Installation not leak. If refrigerant gas leaks into the room and flows near Manual and the stipulations in the local regulations and laws. a fire source, such as a cooking range, noxious gas may be Use of wiring which does not meet the specifications may give generated.
- Page 7 Test run • If you have discovered that the fan grille is damaged, do not • Before operating the air conditioner after having completed the approach the outdoor unit but set the circuit breaker to the OFF work, check that the electrical parts box cover of the indoor unit position, and contact a qualified service person(*1) to have the and service panel of the outdoor unit are closed, and set the repairs done.
- Page 8 • La personne d’entretien qualifiée est une personne qui installe, répare, entretient, déplace et enlève les climatiseurs fabriqués par Toshiba Carrier Corporation. Il ou elle a été formé pour installer, réparer, entretenir, déplacer et enlever the power supply line of this conditioner.
- Page 9 Indications d’avertissement relatives au climatiseur Définition de l’équipement de protection Lorsque le climatiseur doit être transporté, installé, entretenu, réparé ou enlevé, portez des gants de protection et des vêtements de travail de “sécurité”. Indication d’avertissement Description En plus de cette tenue de protection normale, portez la tenue de protection décrite ci-dessous lorsque vous entreprenez les travaux spéciaux détaillés dans le tableau ci-dessous.
-
Page 10: Consignes De Sécurité
à ce qu’elles soient conformes aux prescriptions • Lors d’un travail en hauteur, placez un panneau indicateur afin que de Toshiba. L’utilisation d’une pièce non conforme peut être la personne ne s’approche du lieu de travail, avant de commencer le source d’un incendie, d’une secousse électrique, d’une fuite... - Page 11 Sélection du lieu d’installation Installation • Si vous installez l’unité dans une petite pièce, prenez les • Suivez les instructions du Manuel d’installation pour installer mesures nécessaires pour éviter que le réfrigérant ne dépasse le climatiseur. Ne pas suivre ces instructions peut entraîner la la concentration limite même en cas de fuite.
- Page 12 – 11 – • Après l’installation, assurez-vous que le gaz réfrigérant ne fuit • Utilisez un câblage respectant les spécifications du Manuel pas. Si le gaz réfrigérant fuit dans la pièce et s’écoule à proximité d’installation et les dispositions des réglementations et de la d’une source inflammable, telle qu’une cuisinière, un gaz nocif législation locales.
- Page 13 Essai de fonctionnement • Si vous avez découvert que la grille de ventilation est • Avant de faire fonctionner le climatiseur après avoir terminé endommagée, n’approchez pas de l’unité extérieure et réglez le le travail, assurez-vous que le couvercle du boîtier des pièces coupe-circuit en position OFF, ensuite, contactez une personne électriques de l’unité...
- Page 14 • Der Installationsfachmann, dem es erlaubt ist, Arbeiten in der Höhe auszuführen, ist im Zusammenhang mit Arbeiten in der Höhe an Klimageräten der Toshiba Carrier Corporation geschult oder wurde in diesem Zusammenhang von • Cet appareil doit être connecté au secteur via un interrupteur einer geschulten Person oder geschulten Personen unterwiesen und verfügt aufgrund dessen über gründliche...
- Page 15 Definitionen zur Schutzkleidung Warnanzeigen an der Klimaanlage Bei Transport, Einbau, Wartung, Reparatur und Ausbau des Klimageräts sind Schutzhandschuhe und Sicherheitsarbeitskleidung zu tragen. Warnanzeige Beschreibung Neben dieser normalen Schutzausrüstung wird für die in der Tabelle unten aufgeführten Spezialarbeiten die jeweils genannte Schutzausrüstung benötigt. Wer auf Schutzausrüstung verzichtet, geht ein hohes Risiko ein, denn die Ausrüstung schützt vor Verletzungen, WARNUNG WARNING...
-
Page 16: Sicherheitsvorkehrungen
• Verwenden Sie im Fall, dass Sie getrennt erhältliche Produkte • Stellen Sie vor dem Beginn von Höhenarbeiten ein Warnschild verwenden, nur von Toshiba angegebene Produkte. Die auf, damit sich niemand dem Arbeitsbereich nähert. Teile oder Verwendung nicht angegebener Produkte kann zu Bränden, andere Gegenstände können von oben herunterfallen und u. - Page 17 Auswahl des Installationsortes Installation • Wenn Sie die Anlage in einem kleinen Raum installieren, • Installieren Sie die Klimaanlage entsprechend den Anweisungen ergreifen Sie angemessene Vorsichtsmaßnahmen, damit im Installationshandbuch. Bei Missachtung dieser Anweisungen die Kühlmittelkonzentration auch bei Kühlmittelaustritt den kann das Gerät hinunterfallen, umkippen oder Geräusche, Sicherheitsgrenzwert nicht überschreitet.
- Page 18 – 17 – • Vergewissern Sie sich daher nach der Installation noch einmal, • Beachten Sie beim Legen von elektrischen Leitungen dass kein Kühlmittel austreten kann. Wenn Kühlmittelgase die Spezifikationen im Installationshandbuch sowie die austreten und in einen Raum mit einem Herd oder Ofen Bestimmungen der lokalen Gesetze und die Rechtsvorschriften.
- Page 19 Testlauf • Wenn das Ventilatorgitter beschädigt ist, das Außengerät • Bevor Sie die Klimaanlage nach Abschluss der Arbeiten selbst nicht anrühren, sondern den Schutzschalter ausschalten betreiben, stellen Sie sicher, dass die Abdeckung des und einen Kundendienstfachmann (*1) rufen. Stellen Sie den Elektrokastens am Innengerät und das Wartungspaneel Schutzschalter erst wieder auf die Position ON (ein), nachdem des Außengeräts geschlossen sind, und stellen Sie den...
- Page 20 è stato addestrato a lavorare a svolgere i lavori di gestione del refrigerante e di posa dei tubi direttamente da Toshiba Carrier Corporation o da uno o più individui in Spezialwerkzeuge erforderlich.
- Page 21 Definizione di attrezzatura protettiva Indicazioni di avvertimento sul condizionatore d’aria Prima di procedere alle operazioni di trasporto, installazione, manutenzione, riparazione o rimozione del condizionatore d’aria è necessario indossare sempre guanti e abbigliamento protettivi. In aggiunta ai normali dispositivi di protezione, indossare i dispositivi di protezione descritti di seguito, prima di procedere Indicazione di avvertimento Descrizione all’esecuzione dei lavori speciali elencati nella tabella sottostante.
-
Page 22: Precauzioni Per La Sicurezza
• In caso d’uso di parti da acquistare a parte è necessario provocare lesioni personali. che siano del tipo specificato da Toshiba. L’uso di parti non • Quando si lavora in altezza, sistemare un cartello in modo che esplicitamente autorizzate può divenire causa d’incendio, scosse nessuno si avvicini alla sede dei lavori, prima di procedere con i lavori. - Page 23 Selezione della sede di installazione Installazione • Se si installa l’unità in una stanza piccola, adottare le misure • Attenersi alle istruzioni nel Manuale di installazione per installare appropriate affinché, in caso di perdita di refrigerante, la il condizionatore d’aria. La mancata osservanza di queste concentrazione di quest’ultimo nella stanza non superi il limite istruzioni potrebbe infatti causare la caduta o il ribaltamento delle consentito.
- Page 24 – 23 – • Una volta completata l’installazione è quindi di estrema • Utilizzare cablaggi che soddisfino le specifiche nel Manuale di importanza verificare che non vi siano perdite. Qualora si installazione e le direttive delle norme e nelle leggi locali. L’uso verifichi una perdita di gas refrigerante in una stanza e il gas di cablaggi che non soddisfino le specifiche potrebbe provocare entri in contatto con delle fiamme, ad esempio in una cucina, si...
- Page 25 Prova di funzionamento • Se la griglia della ventola è danneggiata, non avvicinarsi all’unità • Prima di far funzionare il condizionatore d’aria, dopo aver completato esterna ma portare l’interruttore in posizione OFF (spento) il lavoro, verificare che il coperchio della cassetta dei componenti e rivolgersi al personale di assistenza qualificato (*1) perché...
- Page 26 Toshiba Carrier Corporation, o, de otro modo, habrá sido instruida en dichas operaciones por otra u otras personas que hayan recibido formación en la materia y que por tanto posean amplios conocimientos relativos a dichas quelle usate con il refrigerante di tipo convenzionale.
- Page 27 Definición del equipo de protección Indicaciones de advertencia en la unidad de aire acondicionado Cuando vaya a proceder al traslado, instalación, mantenimiento, reparación o retirada del aparato de aire acondicionado, utilice guantes protectores y ropa de trabajo de “seguridad”. Indicación de advertencia Descripción Además de este equipo protector habitual, utilice el equipo protector que se describe a continuación cuando emprenda las operaciones especiales que se detallan en la tabla siguiente.
-
Page 28: Precauciones De Seguridad
• Si utiliza productos que se venden por separado, asegúrese ponga un aviso para que nadie se acerque al lugar de trabajo. de utilizar sólo productos especificados por Toshiba. El uso Desde lo alto podrían caer piezas u otros objetos que causarían de productos no especificados puede provocar incendios,... - Page 29 Selección del lugar de instalación Instalación • Si instala la unidad en una habitación pequeña, tome las • Siga las instrucciones del manual de instalación para instalar medidas apropiadas para impedir que el refrigerante sobrepase el aparato de aire acondicionado. Si no se cumplen estas la concentración límite aunque tenga fugas.
- Page 30 – 29 – • Tras la instalación, asegúrese de que no existen fugas de gas • Use cables que cumplan con las especificaciones del manual de refrigerante. Si se produce una fuga de gas refrigerante en la instalación y las estipulaciones de las normas y leyes locales. habitación y hay una fuente de fuego próxima, como una cocina, El uso de cables que no cumplen con las especificaciones podría generarse gas nocivo.
- Page 31 Prueba de funcionamiento • Si detecta que la rejilla del ventilador está dañada, no se dirija • Antes de utilizar el aparato de aire acondicionado después de a la unidad exterior, sino desconecte el disyuntor, y póngase completar el trabajo de instalación, verifique que la cubierta de la en contacto con una persona de mantenimiento cualificada (*1) caja de componentes eléctricos de la unidad interior y del panel para que la repare.
- Page 32 Toshiba Carrier Corporation. Esta pessoa deve ter formação para instalar, dar manutenção a, mudar de lugar e remover ares condicionados fabricados pela Toshiba Carrier Corporation ou, como de conexión del orificio de carga de la unidad principal y las alternativa, deve ter sido instruída nessas operações por parte de indivíduos com a formação devida e, portanto,...
- Page 33 Definição do Equipamento de Protecção Indicações de Aviso sobre o Ar Condicionado Aquando do transporte, instalação, manutenção, reparação ou remoção do ar condicionado, use luvas e vestuário de protecção. Além do equipamento de protecção normal, use o equipamento de protecção descrito abaixo, se levar a cabo os trabalhos Indicação de aviso Descrição especiais detalhados na tabela abaixo.
-
Page 34: Precauções De Segurança
• Se utilizar produtos vendidos separadamente, certifique-se de • Quando trabalhar em lugares altos, coloque um sinal no local utilizar somente produtos especificados pela Toshiba. Utilizar para que ninguém se aproxime do local de trabalho antes de produtos não especificados pode causar um incêndio, choque continuar com o trabalho. - Page 35 Selecção do local de instalação Instalação • Se instalar a unidade numa sala pequena, tome as medidas • Siga as instruções fornecidas no Manual de Instalação para adequadas para evitar que o refrigerante exceda o limite instalar o ar condicionado. O incumprimento destas instruções de concentração mesmo em caso de derrame.
- Page 36 – 35 – • Após o trabalho de instalação, confirme que não haja nenhuma • Utilize cablagens que cumpram as especificações fornecidas no fuga do gás refrigerante. Se houver uma fuga de gás refrigerante Manual de Instalação e as condições nas leis e regulamentos para o compartimento que entre em contacto com uma chama, locais.
- Page 37 Teste de funcionamento • Se descobrir que a grelha da ventoinha está danificada, não • Antes de utilizar o ar condicionado após a conclusão do se aproxime da unidade exterior, mas coloque o disjuntor trabalho, verifique se a tampa da caixa do equipamento eléctrico na posição desligada e contacte um técnico de assistência da unidade interior e o painel de serviço da unidade exterior qualificado (*1) para proceder à...
- Page 38 Deze persoon is opgeleid voor koel- en leidingenwerkzaamheden aan de airconditioners gemaakt door Toshiba Carrier Corporation. Deze persoon kan ook iemand zijn die in • Para a conexão da tubagem, utilize uma tubagem nova e limpa dergelijke taken is geïnstrueerd door een persoon of personen die zijn opgeleid en is dus goed op de hoogte van de...
- Page 39 Definitie van beschermende kleding Waarschuwingsaanduidingen op de airconditioner Wanneer de airconditioner wordt vervoerd, geïnstalleerd, onderhouden, gerepareerd of verwijderd, draag beschermende handschoenen en veiligheidswerkkleding. Draag naast dergelijke normale beschermende kleding de hieronder beschreven beschermende uitrusting bij het uitvoeren Waarschuwingsaanduiding Beschrijving van speciale taken zoals aangegeven in onderstaande tabel. Niet dragen van de juiste beschermende uitrusting is gevaarlijk omdat u dan meer blootstaat aan letsel, brandwonden, WAARSCHUWING WARNING...
-
Page 40: Veiligheidsvoorzorgen
U zou er af kunnen vallen of een voorwerp kan van de waterlekkage, extra lawaai en/of trillingen veroorzaken. buiteneenheid af vallen en letsel veroorzaken. • Gebruik uitsluitend de door Toshiba gespecificeerde, los verkrijgbare • Bij het werken op hoogte dient u een waarschuwingsbord te onderdelen en producten. Het gebruik van nietgespecificeerde... - Page 41 Keuze van de installatieplaats Installatie • Als u het apparaat installeert in een kleine kamer, dient u • Bij het installeren van de airconditioner volgt u de aanwijzingen maatregelen te treffen om bij lekkage van koelmiddel in elk geval in de installatiehandleiding. Het systeem zou kunnen vallen, te zorgen dat de kritieke dampspanning in de kamer niet wordt kantelen of extra ruis, trillingen, waterlekkage en andere overschreden.
- Page 42 – 41 – • Controleer na het installeren dat er geen koelmiddel lekt. • Gebruik bedrading die voldoet aan de specificaties in de Wanneer ontsnapt gasvormig koelmiddel in de buurt of in contact installatiehandleiding en de ter plaatse geldende voorschriften komt met open vuur, zoals bij een gasfornuis, kunnen giftige en wetten.
- Page 43 Testen • Als u bemerkt dat het ventilatierooster is beschadigd, blijft • Nadat u de werkzaamheden hebt voltooid dient u voor het u uit de buurt van de buitenunit, zet de stroomonderbreker inschakelen van de airconditioner eerst te controleren of het op de positie OFF (UIT) en neem contact op met bevoegd deksel van de elektriciteitskast van de binneneenheid en het onderhoudspersoneel (*1) om de reparaties uit te voeren.
- Page 44 (R410A) nodig. εκπαιδευτεί στην εγκατάσταση, συντήρηση, αλλαγή θέσης και αφαίρεση των κλιματιστικών που κατασκευάζει η Toshiba Carrier Corporation ή, εναλλακτικά, έχει διδαχθεί αυτές τις εργασίες από άτομα που έχουν εκπαιδευτεί και • Gebruik voor het verbinden nieuwe en schone leidingen die είναι...
- Page 45 Ορισμός εξοπλισμού προστασίας Προειδοποιητικές ενδείξεις πάνω στην κλιματιστική μονάδα Όταν πραγματοποιείται μεταφορά, εγκατάσταση, συντήρηση, επισκευή ή αφαίρεση του κλιματιστικού, να φοράτε προστατευτικά γάντια και ρουχισμό εργασίας “ασφαλείας”. Εκτός από τον συνηθισμένο προστατευτικό εξοπλισμό, να φοράτε τον προστατευτικό εξοπλισμό που περιγράφεται Προειδοποιητική...
-
Page 46: Προφυλαξεισ Για Ασφαλεια
• Εάν χρησιμοποιείτε προϊόντα που πωλούνται ξεχωριστά, φροντίστε πλησιάζει κανείς στον χώρο των εργασιών, πριν προχωρήσετε να είναι αποκλειστικά και μόνο προϊόντα με προδιαγραφές Toshiba. στην εκτέλεση των εργασιών. Εξαρτήματα και άλλα αντικείμενα Η χρήση απροσδιόριστων προϊόντων ενδέχεται να προκαλέσει... - Page 47 Επιλογή θέσης εγκατάστασης Εγκατάσταση • Σε περίπτωση εγκατάστασης της μονάδας σε μικρό δωμάτιο, • Ακολουθήστε τις οδηγίες που αναγράφονται στο Εγχειρίδιο φροντίστε για τη λήψη κατάλληλων μέτρων, ώστε το ψυκτικό Εγκατάστασης για να εγκαταστήσετε το κλιματιστικό. Η μη υγρό να μην υπερβεί το όριο συγκέντρωσης ακόμη και σε τήρηση...
- Page 48 – 47 – • Μετά τις εργασίες εγκατάστασης, βεβαιωθείτε ότι δεν υπάρχει • Να χρησιμοποιείτε καλωδιώσεις οι οποίες πληρούν τις διαρροή του ψυκτικού αερίου. Τυχόν διαρροή του ψυκτικού αερίου προδιαγραφές του Εγχειριδίου Εγκατάστασης και τις απαιτήσεις στο χώρο και κίνησή του κοντά σε πηγή φωτιάς, όπως εστία των...
- Page 49 Δοκιμαστική λειτουργία • Αν διαπιστώσετε ότι η γρίλια του ανεμιστήρα έχει βλάβη, μην • Μόλις ολοκληρωθούν οι εργασίες και πριν θέσετε το κλιματιστικό πλησιάσετε την εξωτερική μονάδα, αλλά θέστε το διακόπτη σε λειτουργία, βεβαιωθείτε ότι το κάλυμμα του κιβωτίου κυκλώματος στη θέση OFF και επικοινωνήστε με έναν ηλεκτρικών...
- Page 50 квалификацию, предусмотренную местным законодательством и нормативами, и представляет собой лицо, обученное вопросам прокладки трубок хладагента и обращению с хладагентом, связанным с кондиционерами производства компании Toshiba Carrier Corporation, или же он был научен таким вопросам лицом или лицами, Για να αποσυνδέσετε τη συσκευή από την κύρια παροχή...
- Page 51 Определение средств индивидуальной защиты Предупреждающие символы на корпусе кондиционера При перевозке, установке, техническом обслуживании, ремонте или демонтаже кондиционера следует носить защитные рукавицы и спецодежду. В дополнение к обычным средствам индивидуальной защиты нужно пользоваться средствами индивидуальной Предупреждающий символ Описание защиты, указанными ниже, при выполнении специальных работ, перечисленных в таблице ниже. Если...
-
Page 52: Правила Техники Безопасности
причинить травму. обязательно используйте только изделия, указанные • До начала выполнения высотных работ нужно выставить компанией Toshiba. Использование изделий, не указанных производителем, может привести к пожару, поражению предупреждающий знак, чтобы никто не приближался к зоне электрическим током, утечке воды или другим поломкам. - Page 53 Выбор места установки Установка • При установке в небольшом помещении нужно принять • При установке кондиционера следуйте указаниям меры к тому, чтобы даже в случае утечки хладагента не руководства по установке. Несоблюдение этих инструкций создавалась его предельная концентрация в воздухе может...
- Page 54 – 53 – • По окончании монтажных работ убедитесь в отсутствии • Используйте электропроводку, которая отвечает техническим характеристикам, приведенным в данном руководстве по утечек хладагента. Утечка хладагента и формирование его установке, а также местным нормативам и требованиям потока в непосредственной близости от источников огня, законодательства.
- Page 55 Пробный пуск • Если вы обнаружили повреждение решетки • Перед тем как запускать кондиционер после окончания работ воздухозаборника, не подходите к наружному блоку, вместо на нем, проверьте, что крышка электрического отделения этого установите сетевой выключатель в положение OFF внутреннего блока и служебная панель наружного блока (ВЫКЛ) и...
-
Page 56: Accessory Parts
– 55 – Accessory parts ВНИМАНИЕ Установка кондиционера с новым типом хладагента Part name Q’ty Shape Usage • ДАННЫЙ КОНДИЦИОНЕР РАБОТАЕТ С НОВЫМ Owner’s Manual – (Be sure to hand it to the customers.) ХЛАДАГЕНТОМ НА ОСНОВЕ ХФУ (R410A), НЕ Installation Manual –... -
Page 57: Installation Of New Refrigerant Air Conditioner
Installation of new refrigerant air conditioner Selection of installation place This air conditioner adopts the new HFC refrigerant (R410A) which does not deplete the ozone layer. Upon customer’s approval, install the air conditioner in a place which satisfies the following conditions: •... - Page 58 – 57 – Installation space q Combination of outdoor units Model name Unit 1 Unit 2 Unit 3 Leave space necessary for running, installation and servicing. (Standard type) MMY-MAP0806* MMY-MAP0806* – – Air discharge MMY-MAP1006* MMY-MAP1006* – – Air intake MMY-MAP1206* MMY-MAP1206* –...
-
Page 59: Carrying In The Outdoor Unit
Carrying in the outdoor unit Weight centre and weight CAUTION ¿ Weight centre of an outdoor unit Handle the outdoor unit carefully, observing the following items. • When using a forklift or other machinery for loading/unloading in transportation, insert the fork of the forklift into Anchor bolt position Anchor bolt position Anchor bolt position... -
Page 60: Installation Of The Outdoor Unit
– 59 – Installation of the outdoor unit • Anchor bolt positions are as shown below: 310 or 310 or Continuous hole more more WARNING (15 x 20 long hole) • Be sure to install the outdoor unit in a place able to bear its weight. If strength is insufficient, the unit may fall down resulting in human injury. - Page 61 5. Be careful of the connecting arrangement of the header unit and follower units. Set the outdoor units in order of When drawing pipes downward capacity from the one with the largest capacity. (A (Header unit) ≥ B ≥ C) [Vertical connection of branch units] •...
-
Page 62: Refrigerant Piping
– 61 – Refrigerant piping REQUIREMENT • For Brazing work of the refrigerant pipes, be sure to use nitrogen gas in order to prevent oxidation of the inside of the pipes; otherwise clogging of the refrigerating cycle due to oxidized scale may occur. WARNING •... - Page 63 (Unit: mm) Pipe-diameter Type Draw-out forward Draw-out downward Connected section Liquid External size Internal size Cut the L-shaped pipe at the horizontal Cut the L-shape pipe at the vertical straight Standard outer dia. Min. depth of Min. thickness of connected straight section, then braze the supplied section, then braze the supplied attachment Standard outer dia.
- Page 64 – 63 – Table 1 Header Follower Follower unit A unit B unit C Capacity code Indoor unit Equivalent to capacity rank Equivalent to HP capacity Outdoor unit *005 1.25 (2) Balance pipes Ø9.5 (1) Outdoor unit connecting pipes 11.2 (3) Main piping (8) Outdoor unit connection piping kit (For linking of outdoor units)
- Page 65 Piping parts Name Selection of pipe size Remarks Piping parts Name Selection of pipe size Remarks Connecting pipe size of outdoor unit Connecting pipe size of indoor unit Type Gas side Liquid side Liquid Capacity rank Gas side side MMY-MAP0806* Ø19.1 Ø12.7 Outdoor unit...
- Page 66 – 65 – Allowable length of refrigerant pipes and allowable height ¿ Cautions for installation difference between units • Set the outdoor unit first connected to the bridging pipe to the indoor units as the header unit. • Install the outdoor units in order of their capacity codes: A (header unit) ≥ B ≥ C •...
- Page 67 Airtightness test Able to detect a serious leakage 1. Apply pressure 0.3MPa (3.0kg/cm G) for 5 minutes or more. 2. Apply pressure 1.5MPa (15kg/cm G) for 5 minutes or more. After the refrigerant piping has been finished, execute an airtight test. For an airtight test, connect a nitrogen gas canister as shown in the figure on this page and apply pressure.
- Page 68 – 67 – Vacuum drying Adding refrigerant • Be sure to perform vacuuming from both liquid and gas sides. After finishing vacuuming, exchange the vacuum pump with a refrigerant canister and start additional charging of • Be sure to use a vacuum pump equipped with the counter-flow prevention function so that oil in the pump will refrigerant.
- Page 69 Table 2 Full opening of the valve Air to Air Heat Standard Fresh Air Intake Hot Water Open the valves of the outdoor unit fully. Additional refrigerant charge amount Indoor unit exchanger with Indoor unit Indoor Unit Module DX-coil MAP140 Additional refrigerant charge amount kg/HP MAP080...
- Page 70 – 69 – F-GAS label Heat insulation for pipe This product contains fluorinated greenhouse gases • Apply heat insulation of pipe separately at the liquid, gas, and balance sides. • Chemical Name of Gas R410A • Be sure to use thermal insulator resistant up to 120°C or higher for pipes at the gas side. •...
-
Page 71: Electric Wiring
Electric wiring ¿ Power wiring selection • Select the power supply cabling of each outdoor unit from the following specifications: Cable 5-core, in conformance with design H07 RN-F or 60245 IEC 66. WARNING • To decide nominal cross sectional area of conductor, refer to following table of Maximum Overcurrent Protection (Amps). - Page 72 – 71 – Specifications for communication wiring ¿ Design of communication wiring Summary of communication wiring Header outdoor Follower outdoor Central control controller U1 U2 S U3 U4 U5 U6 S U1 U2 S U3 U4 U5 U6 S Circuit breaker Main switch (Earth leakage breaker) (Fuse)
- Page 73 Be sure to keep the rule of below tables about size and length of communication wiring. ¿ Group control through a Remote Controller Group control of multiple indoor units (8 units) through a single remote controller switch Central control controller Indoor unit Super modular multi system No.1...
- Page 74 – 73 – Screw size and tightening torque Tightening torque Screw size (N•m) Power supply terminal block Power supply terminal 2.5 to 3.0 Earth screw 5.5 to 6.6 Clamp filter (only MAP180 to MAP220 type) ¿ Communication wire connection Cord clamps Get the communication wire through the cutout on the side of the electrical control box and connect it to the communication wire terminals, then fix it with the communication cable clamp.
-
Page 75: Address Setting
Address setting Regulation of high frequency wave On this unit, it is required to set the addresses of the indoor units before starting air conditioning. This equipment complies with IEC 61000-3-12 provided that the short-circuit power Ssc is greater than or equal to Ssc Set the addresses following the steps below. - Page 76 – 75 – ¿ Address setting procedure 1 ¿ Address setting procedure 2 Turn on indoor units first, and then turn on outdoor units. Set a system address for each system using SW13 and 14 on the interface P.C. board on the header outdoor unit of each system.
- Page 77 SW13 SW14 Connect the relay connectors between the [U1, U2] and [U3, U4] terminals of the header Line (system) address outdoor unit of each refrigerant line. ― ― ― ™ ™ Í Í ™ ™ Í ™ Í ™ ― ―...
- Page 78 – 77 – Switch setting (setting example when controlling 2 or more refrigerant lines centrally) CAUTION Outdoor units (setting manually) *The items in bold font must be set manually. Relay connector connection Never connect relay connectors between the [U1, U2] and [U3, U4] terminals before completing address setting of Outdoor unit’s Follower Follower...
- Page 79 Confirming the indoor unit To find an indoor unit’s position from its <Line (system) address> NOTE address addresses and the position 1. Do not use address numbers 29 or 30 when setting Push the TEMP. buttons q When checking unit numbers controlled as a system addresses using the remote controller.
- Page 80 – 79 – Changing the indoor unit q To change all the indoor unit addresses Push the button (left side of the using an arbitrary wired remote controller. address using a remote button) repeatedly to select another indoor CODE No. (The method is available when the addresses DATA SETTING...
- Page 81 Central control Resetting the address controller Push the button. (Resetting to the factory • The address of one of the indoor units connected to the selected refrigerant line is default (address undecided)) Header Header Header indicated on the LCD display and the fan and Follower unit Follower unit unit...
-
Page 82: Test Run
– 81 – Test run ¿ When executing a test run using 2, 4 NOTE TEMP. ON / OFF the interface P.C. board on the • The running mode follows the mode setting on the Before test run TIMER SET outdoor unit remote controller of the target indoor unit. - Page 83 <Corrective trial> Interface PC board SW04 SW05 SW15 q Start operation Push switch Push switch Set the rotary switches on the interface P.C. board of the header outdoor unit as below. D600 D601 D602 D603 D604 When in “COOL” mode: SW01=[2], SW02=[5], SW03=[1]. 7-segment 7-segment When in “HEAT”...
-
Page 84: Troubleshooting
– 83 – Troubleshooting Check code Indication on 7-segment display on the outdoor unit Check code name In addition to the CODE No. on the remote controller of an indoor unit, you can diagnose failure type of an outdoor Auxiliary code unit by checking the 7-segment display on the interface P.C. -
Page 85: Machine Card And Logbook
Machine card and logbook Check code Indication on 7-segment display on the outdoor unit Check code name Machine card Auxiliary code 01: Compressor 1 Heat sink overheat error 02: Compressor 2 After test run, fill the items on the machine card and paste the card on an accessible place on the product securely Detected indoor unit address Indoor overflow error before delivery to the customer. - Page 86 – 85 – WARNINGS ON REFRIGERANT LEAKAGE Check of Concentration Limit Important The room in which the air conditioner is to be installed NOTE 2 : requires a design that in the event of refrigerant gas The standards for minimum room volume are as follows. leaking out, its concentration will not exceed a set (1) No partition (shaded portion) limit.
- Page 87 MEMO MEMO – 86 – 1117101201-3 EN.indd 86 1117101201-3 EN.indd 86 8/8/2559 BE 3:49 PM 8/8/2559 BE 3:49 PM...
- Page 88 144 / 9 Moo 5, Bangkadi Industrial Park, Tivanon Road, Tambol Bangkadi, Amphur Muang, Pathumthani 12000, Thailand 1117101201-3 1117101201-3 EN.indd 87 1117101201-3 EN.indd 87 8/8/2559 BE 3:49 PM 8/8/2559 BE 3:49 PM...


