Table of Contents
Advertisement
Fully Automatic Washing Machine
Operating Instructions
NA - F90H2
Model No.
Thank you very much for purchasing Panasonic Product.
Before operating this washing machine, please read these instructions completely,
paying special attentions to Safety & General Precautions.
W9901-7LEN0
T0911-1012
Printed in Thailand
NA-F90H2_EN_AR-PE-V2.indd 1
11/23/11 3:41:02 PM
Advertisement
Table of Contents

Related Manuals for Panasonic NA-F90H2


Summary of Contents for Panasonic NA-F90H2
-
Page 1: Operating Instructions
Fully Automatic Washing Machine Operating Instructions NA - F90H2 Model No. Thank you very much for purchasing Panasonic Product. Before operating this washing machine, please read these instructions completely, paying special attentions to Safety & General Precautions. W9901-7LEN0 T0911-1012 Printed in Thailand NA-F90H2_EN_AR-PE-V2.indd 1... -
Page 2: Table Of Contents
Contents ITEM PAGE Safety & General Precautions Name of parts Procedures before washing Determining load and detergent levels with the Quick Indication Laundry Detergent How to use liquid detergent How to use bleach How to use softener How to use powdered synthetic detergent How to use powdered detergent “Economy’’... -
Page 3: Safety & General Precautions
Safety & General Precautions To prevent the risk of danger or material loss or damage to the user of others, make sure to follow the precautions described below. CAUTION WARNING May cause a serious injury or death. May cause physical injury or damage other items. WARNING Never disassemble, repair or remodel this When you are cleaning your washing... - Page 4 WARNING Do not damage the power cord and Remove any dust which may accumulate power plug. around the power cord. (Do not damage, modify, immoderately bend, When dust has accumulated on and around twist, pull, or bundle the power cord, do not the power plug, and the dust gets damp or put the power cord and power plug close to wet, the insulation plug become defective...
-
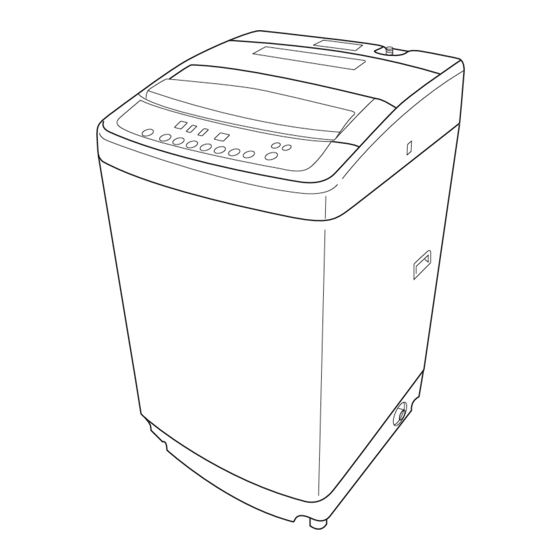
Page 5: Name Of Parts
Name of parts Ag Air–Filter is to eliminate Detergent & Softener Drawer the particulate matter from Leveller the air and make the filter Lint Filter A antibacterial with Ag effect. (It’s not meant to make Lint Filter B clothes antibacterial directly.) Bleach / Liquid Ag Air-Filter Detergent Inlet... -
Page 6: Determining Load And Detergent Levels With The Quick Indication
Determining load and detergent levels with the Quick Indication Put the laundry into the Allow the machine to churn the Detergent volume indications. machine. laundry for 5 seconds. Press the [Power On] button The pulsator operates for about A lamp will light up indicating and then press the [Start/ 5 seconds without any water in the appropriate water level and... -
Page 7: How To Use Liquid Detergent
How to use liquid detergent [NOTE] Put in the liquid detergent according to the water level into the bleach / liquid detergent • Liquid detergent, like powdered inlet. detergent is not easily dissolved and can leave scum along the Bleach / Liquid Detergent Inlet inside of the washing tub, so be sure to rinse thoroughly. -
Page 8: How To Use Powdered Detergent
How to use powdered detergent How to dissolve 1. Fill the washing machine tub with water one level below the water level that will be used. (For low water level setting, the same water level will be used.) 2. Add the powdered detergent and let the machine run for about 3 minutes. 3. -
Page 9: Operations Panel
NA-F90H2_EN_AR-PE-V2.indd 9 11/23/11 3:41:28 PM... -
Page 10: Miscellaneous Ag Crystal Shower Course
Ag Crystal Shower Course Keep clothes clean with Ag Crystal Shower. Press the [Power On] button and put in the laundry. Press the [Program] button and select • [Ag Crystal Shower] Course can be used with only “Normal’’, “Blanket”, “Delicate’’, “Extra Rinse” and “Normal’’, “Blanket”, “Delicate”, “Extra “Soak”... -
Page 11: Options Normal Course
Normal Course Suitable for normal washing of casual laundry. Press the [Power On] button and put in the laundry. Press the [Start/Pause] button. • The light will indicate “Normal’’ Course automatically. • The machine will measure the load size without water (laundry sensing). -
Page 12: Delicate Course
Delicate Course Suitable for washing soft laundry. Remark: Amount of laundry that can be washed at one time : 4.2 kg Press the [Power On] button and put in the laundry. Press the [Program] button 2 times for • The light will indicate “Delicate’’ Course. •... -
Page 13: Blanket Course
Blanket Course Suitable for slow and gentle washing such as Blanket, using high water level. Press the [Power On] button and put in • Fold the Blanket or put into the laundry net as recommended below. the laundry. Press the [Program] button 4 times for •... -
Page 14: Soak Course
Soak Course This process to wash heavily soiled laundry. Remarks : The laundry will be soaked for an hour after feeding water. Press the [Power On] button and put in the laundry. Press the [Program] button 5 times for • The light will indicate “Soak’’... -
Page 15: Reserve Program
Reserve Program You can select the finishing of the washing course between 2 to 24 hours (for Soak Course 3 to 24 hours) from the current time. (Sometimes the operation exceeding the reserve time because of the water feeding and draining condition.) [Reserve] Program only can use for Normal, Speedy Extra Rinse and Soak Course. -
Page 16: Child Lock Program
Child Lock Program This is an emergency alarming mode with a continuous buzzer sounds when child open the lid during operation to prevent a child from drowning (condition where there is a water inside the tub) by falling into the tub which contains water. Close the lid to stop the buzzer. -
Page 17: Choosing Your Own Laundry Setting
Choosing Your Own Laundry Setting You can select Program to wash your own laundry according to your preferences. Wash To reuse the wash water. • After washing, the wash water is left in the tub and the machine stop operation. •... -
Page 18: Maintenance: Tub Dry
Maintenance To prevent from fungus growth at the outer tub area. “Tub Dry” Remark: Please be informed do not put laundry inside the tub during this Program. Press the [Power On] button. Press the [Program] button 6 times • The [Tub Hygiene] light will be indicated. for [Tub Hygiene] Course. -
Page 19: Please Observe The Following Instructions
Please observe the following Instructions If the spinner tub does not stop within Do not spray anything or pour water 15 seconds after you open the lid over the lid. during spinning, immediately stop • Do not put water, pesticides, using the machine, and contact your hair products, deodorants, or dealer for repair. -
Page 20: How To Install
How to install In the event that the installation, test run and inspection of the washing machine are not carried out following the installation method outlined in this manual, the manufacturer will not be liable for any accident or damage caused. Placement •... -
Page 21: Connect The Water Supply Hose
Connect the water supply hose The new hose-sets supplied with the appliance are to be used and that old hose-sets should not be reused. 1. Loosen the 4 screws on the water tap adaptor just enough to slip the adaptor over the mouth of the faucet. 2. -
Page 22: Changing The Position Of The Drain Hose
Changing the position of the drain hose Depending on the drain location, the position of the drain hose can be changed to the left side of the washing machine. Changing the position from the right to the left side Remove the screw affixing the part A connection port. -
Page 23: Troubleshooting
Troubleshooting The following symptoms are not trouble. Symptoms Causes Machine begins filling water in the • When the laundry amount is large at the HIGH water level, the middle of the wash. machine sometimes fills automatically. When level goes down, the machine fills automatically. -
Page 24: Error Indication
See page 16 for the reset method of an alarm. • In case of H displays such as “H01”, with no buzzer sounds pull out the power plug, and contact your dealer for service. Specifications Model NA-F90H2 220 – 240 V Voltage 50 Hz Power consumption...