Magnavox 27MDTR20 Owner's Manual
Color tv with built-in vcr and dvd player
Hide thumbs
Also See for 27MDTR20:
- User manual (84 pages) ,
- Quick use manual (4 pages) ,
- Specifications (1 page)
Table of Contents
Advertisement
Available languages
Available languages
Quick Links
T0006UG_6006UG_EN_1.qx3
O
WNER
19MDTR20
27MDTR20
C
OLOR
DVD P
AND
04.5.12
10:09 AM
Page 1
'
M
S
ANUAL
TV
WITH BUILT-IN
LAYER
T
HANK YOU FOR CHOOSING
R
Q
-U
G
EAD YOUR
UICK
SE
QUICK TIPS THAT MAKE USING YOUR
I
F YOU HAVE READ YOUR INSTRUCTIONS AND STILL NEED ASSISTANCE
YOU MAY ACCESS OUR ONLINE HELP AT WWW
1-800-705-2000
OR CALL
VCR
M
AGNAVOX
N
?
EED HELP FAST
/
O
'
M
UIDE AND
OR
WNER
S
M
AGNAVOX PRODUCT MORE ENJOYABLE
.
MAGNAVOX
WHILE WITH YOUR PRODUCT
.
ANUAL FIRST FOR
.
,
.
COM
.
Advertisement
Chapters
Table of Contents

Related Manuals for Magnavox 27MDTR20


Summary of Contents for Magnavox 27MDTR20
- Page 1 T0006UG_6006UG_EN_1.qx3 04.5.12 ’ WNER ANUAL 19MDTR20 27MDTR20 OLOR WITH BUILT-IN DVD P EAD YOUR QUICK TIPS THAT MAKE USING YOUR F YOU HAVE READ YOUR INSTRUCTIONS AND STILL NEED ASSISTANCE YOU MAY ACCESS OUR ONLINE HELP AT WWW OR CALL...
- Page 2 Return your Product Registration Card today to get the very most from your purchase. Registering your model with MAGNAVOX makes you eligible for all of the valuable benefits listed below, so don't miss out. Complete and return your Product Registration Card at once to ensure:...
-
Page 3: Safety And General Information 3
P.O. Box 14810 Knoxville,TN 37914-1810 (865) 521-4316 Manufactured under license from Dolby Laboratories. "Dolby" and the double-D symbol are trademarks of Dolby Laboratories. Copyright 2004 Magnavox. All rights reserved. 10:09 AM Page 3 Safety and General Information 3 This Class B digital apparatus complies with Canadian... -
Page 4: Table Of Contents
T0006UG_6006UG_EN_1.qx3 04.5.12 4 Table of Contents General Information Safety and General Information ....3 Table of Contents ......4 Introduction . -
Page 5: Introduction 5
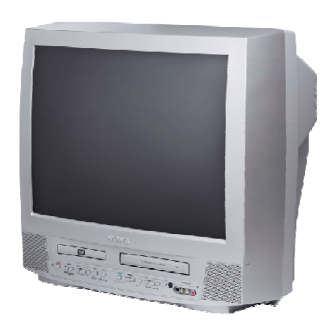
T0006UG_6006UG_EN_1.qx3 04.5.12 Welcome to your TV/VCR/DVD owner’s manual. This manual describes the 19MDTR20 and 27MDTR20.These two models are different in size, but operate identically.The 27MDTR20 is illustrated in this manual. Features - TV/VCR • Automatic Channel Setup • Automatic Head Cleaner •... -
Page 6: Playable Discs And Videotapes
DVD may be listed on the DVD or on the Disc case. Videotapes Magnavox recommends you use only videotapes that have the videotapes may have poor picture quality and cause excessive deposits on the video heads.The warranty may not cover such damage. -
Page 7: Before Using The Tv/Vcr/Dvd 7
T0006UG_6006UG_EN_1.qx3 04.5.12 Remote Control Battery Installation Remove the battery compartment lid on the bottom of the remote control. Slide the lid down and off. Follow the direction of the arrow on the lid. Place two AA batteries inside the battery com- partment. -
Page 8: Hooking Up The Tv/Vcr/Dvd
T0006UG_6006UG_EN_1.qx3 04.5.12 8 Hooking Up the TV/VCR/DVD Hook up your TV/VCR/DVD using one of the connections shown. Hooking Up Your TV/VCR/DVD with a Cable TV Signal or Outdoor Antenna Hooking Up Your TV/VCR/DVD with a Cable Box/Satellite Receiver To view any channel, set the TV/VCR/DVD to the output channel (channel 03 or 04) of the Cable Box/Satellite Receiver.Then, select chan- nels at the Cable Box/Satellite Receiver. - Page 9 T0006UG_6006UG_EN_1.qx3 04.5.12 Hooking Up Your TV/VCR/DVD with an Indoor Antenna To install an indoor antenna or “rabbit ears” (not supplied), connect the antenna wire to the ANT(enna) Jack on the back of the TV/VCR/DVD as shown. Extend the antenna and adjust its length, direction, and angle for the clearest picture.
-
Page 10: Optional Connections
T0006UG_6006UG_EN_1.qx3 04.5.12 10 Optional Connections Digital Stereo Hookups You can connect the TV/VCR/DVD to a Stereo that has a Digital Coaxial In jack. Use this hookup if you want to hear the TV/VCR/DVD sound through the Stereo instead. Use these connections for a Dolby Digital-compatible Stereo or for a Receiver that has a Mini-Disc or Digital Audio Tape deck. -
Page 11: Watching Tv 11
T0006UG_6006UG_EN_1.qx3 04.5.12 The unit selects available TV channels automatically when you connect an Antenna or Cable TV signal to it.To reset TV channels, see page 18. If you are using a Cable Box or Satellite Receiver, you do not need to set channels at the TV/VCR/DVD. Press STANDBY-ON to turn on the TV/VCR/DVD. -
Page 12: Playing A Videotape
T0006UG_6006UG_EN_1.qx3 04.5.12 12 Playing a Videotape Follow these steps to simply play a videotape. Videotape play- back options are on pages 34-40. Insert a videotape in the cassette compart- ment of the TV/VCR/DVD. The power will come on. If the tape’s record tab is missing, play should start automatically. -
Page 13: Playing A Disc 13
T0006UG_6006UG_EN_1.qx3 04.5.12 Before you begin, turn on the power of other equipment con- nected to the TV/VCR/DVD. Set a stereo (if applicable) to the correct sound source or channel. Details are on page 10. Press STANDBY-ON to turn on the TV/VCR/DVD. -
Page 14: Remote Control Buttons
T0006UG_6006UG_EN_1.qx3 04.5.12 14 Remote Control Buttons PICTURE Button Press to access the picture controls. Details are on page 25. STANDBY-ON Button Press to turn on or off the TV/VCR/DVD. Number Buttons TV Mode: Press two digits to access a specific channel. Press 0 before the number of a single-digit channel. - Page 15 T0006UG_6006UG_EN_1.qx3 04.5.12 ZOOM Button Press to enlarge the picture during DVD playback. Details are on page C.RESET (counter reset) Button Press to reset the tape counter to 0:00:00. Details are on page 36. Press to cancel a timer recording. Details are on page 31. SPEED Button Press to choose a tape recording speed (SP or SLP).
-
Page 16: Front Panel
T0006UG_6006UG_EN_1.qx3 04.5.12 16 Front Panel Cassette Compartment Insert a videotape here. Disc tray Insert a Disc here. CHANNEL K/L Buttons Press to select TV channels. Details are on page 11. OPEN/CLOSE A Button (DVD) Press to open or close the disc tray. Details are on page 13. -
Page 17: T0006Ug_6006Ug_En_1.Qx3 04.5.12 10:09 Am
T0006UG_6006UG_EN_1.qx3 04.5.12 10:09 AM Page 17 Rear Panel 17 ANT. AUDIO OUT COAXIAL ANT. Jack (Antenna In) Connect an antenna or Cable TV signal here. This brings TV channels to the TV/VCR/DVD. If you do not connect an antenna or Cable TV signal to the TV/VCR/DVD (or connect to a Cable Box/Satellite Receiver through this jack), you will not receive any TV channels. -
Page 18: Menu Language, Resettingtv Channels
T0006UG_6006UG_EN_1.qx3 04.5.12 18 Menu Language, Resetting TV Channels Menu Language This affects the language of the TV/VCR/DVD’s setup menus and on-screen display terms.This does not alter the language of TV programming, videotapes, Discs, or closed captioning. Press SETUP once so the TV/VCR SETUP menu appears. -
Page 19: Adding/Deleting Channels 19
T0006UG_6006UG_EN_1.qx3 04.5.12 You can delete TV channels you no longer receive or seldom watch. Or, you can add more channels if the TV/VCR/DVD did not memorize all your favorite channels. ● Before you begin, press SELECT to put the TV/VCR/DVD in TV/VCR mode.The red VCR/TV light will appear. -
Page 20: Setting The Clock
T0006UG_6006UG_EN_1.qx3 04.5.12 20 Setting the Clock Manual Clock Setting You must set the clock before you can do a timer recording. Set the clock manually. Afterward, use Auto Clock to monitor the time. Details are on pages 22-23. If you do not receive a PBS station that carries time signals, you cannot use Auto Clock. - Page 21 T0006UG_6006UG_EN_1.qx3 04.5.12 While the DAY space is flashing, press ▲ or ▼ until the correct day appears.Then, press B. An abbreviation for the selected day of the week will appear. – MANUAL CLOCK SET – MONTH DAY YEAR 05 / 07 - - - - - - - HOUR MINUTE...
-
Page 22: Auto Clock Setting
T0006UG_6006UG_EN_1.qx3 04.5.12 22 Setting the Clock (cont’d) Auto Clock Setting You can have the TV/VCR/DVD adjust the clock using your PBS channel. Once you set the clock manually, the TV/VCR/DVD will monitor the correct time and date broad- cast by the PBS station. Before you begin ... -
Page 23: Setting The Clock
T0006UG_6006UG_EN_1.qx3 04.5.12 If you already know your PBS channel number, skip ahead to step 8. If you do not know the channel number of your PBS station, press ▼ to select AUTO CLOCK CH SEARCH.Then press ENTER. – SETTING CLOCK – AUTO CLOCK [ON] AUTO CLOCK CH SEARCH... -
Page 24: Daylight-Savings Time
T0006UG_6006UG_EN_1.qx3 04.5.12 24 Daylight-Savings Time When Daylight-Savings Time (D.S.T.) is ON, the clock will move forward one hour on the first Sunday in April and move back one hour on the last Sunday in October. To turn Daylight-Savings Time ON or OFF, follow the steps below. -
Page 25: Status Displays, Picture Controls 25
TV/VCR/DVD away from the appli- ance. If the color is still not correct, turn off the power for 30 minutes (for 27MDTR20) or disconnect the power cord for 30 minutes (for 19MDTR20).After 30 min- utes, try using the unit again. -
Page 26: Videotape Recording
T0006UG_6006UG_EN_1.qx3 04.5.12 26 Videotape Recording Place a tape with its record tab intact in the cassette compartment of the TV/VCR/DVD. The TV/VCR/DVD power will come on. If the power is already on and a videotape is in the unit, make sure the unit is in TV/VCR mode. Press SELECT so the red VCR/TV light appears on the front of the unit. -
Page 27: One-Touch Recording 27
T0006UG_6006UG_EN_1.qx3 04.5.12 A One-Touch Recording (OTR) is an immediate timed recording from 30 minutes to eight hours long. Before you begin ... ● Turn on the TV/VCR/DVD. ● Press SELECT to put the unit in TV/VCR mode. The red VCR/TV light will appear on the front of the unit. Insert a videotape with its erase prevention tab in place. -
Page 28: Timer Recording
T0006UG_6006UG_EN_1.qx3 04.5.12 28 Timer Recording Follow the steps below to program the TV/VCR/DVD to record TV programs while you’re away from home. The TV/VCR/DVD will record and turn itself off automatically. You can set a maximum of eight timer recordings. Before you begin, make sure ... - Page 29 T0006UG_6006UG_EN_1.qx3 04.5.12 While DATE is selected, press ▲ or ▼ until the correct date appears. Recording will happen once. – TIMER PROGRAMMING – DATE BEGIN - - - - - - - - - - - - - - - - - - - - - Or, to record a program at the same time on...
-
Page 30: Helpful Hints
T0006UG_6006UG_EN_1.qx3 04.5.12 30 Timer Recording (cont’d) While END is selected, press ▲ or ▼ to select the hour at which you want recording to stop. AM or PM will appear with the hour. Then, press B and press ▲ or ▼ to select the minute at which you want recording to end. - Page 31 T0006UG_6006UG_EN_1.qx3 04.5.12 Extending a Timer Recording To make a Timer Recording start and end later than originally scheduled, follow these steps. With the unit on, press SETUP. Press ▲ or ▼ to select TIMER PRO- GRAMMING. Press ENTER. Press RECORD, then press ▲ or ▼ to select the desired program. Press RECORD again.
-
Page 32: Timer Recording Auto Return
T0006UG_6006UG_EN_1.qx3 04.5.12 32 Timer Recording Auto Return Use this feature to rewind the tape to the beginning of a completed timer recording. Press SETUP. Press ▲ or ▼ to select USER’S SET UP. Then, press ENTER. – TV/VCR SETUP – TIMER PROGRAMMING SETTING CLOCK CHANNEL SET UP... -
Page 33: Rerecording (Tape Duplication) 33
T0006UG_6006UG_EN_1.qx3 04.5.12 AUDIO and VIDEO OUT Jacks on source unit (VCR or Camcorder) AUDIO VIDEO VIDEO OUT to VIDEO In Make the connections shown above. Use audio and video cables (not supplied). Connect the source unit (VCR or Camcorder) to a power source after connections are made. -
Page 34: Repeat Play
T0006UG_6006UG_EN_1.qx3 04.5.12 34 Repeat Play Repeat Play allows you to play a videotape continuously. ALL REPEAT will repeatedly play the tape from the beginning to the end. BLANK REPEAT will repeatedly play the tape from its beginning to the first part that is blank for more than 10 seconds. -
Page 35: Rental Play 35
T0006UG_6006UG_EN_1.qx3 04.5.12 This function enables you to improve picture quality when playing worn cassettes such as rented videotapes. Press SETUP. Press ▲ or ▼ to select USER’S SET UP. Then, press ENTER. – TV/VCR SETUP – TIMER PROGRAMMING SETTING CLOCK CHANNEL SET UP USER'S SET UP V-CHIP SET UP... -
Page 36: Zero Return, Sleep Timer
T0006UG_6006UG_EN_1.qx3 04.5.12 36 Zero Return, Sleep Timer Zero Return The videotape counter shows the elapsed recording or play- back time in hours, minutes, and seconds from the point at which the counter was set to zero.The counter time will not change on a blank tape or blank portions on a tape.The “–”... -
Page 37: Time Search 37
T0006UG_6006UG_EN_1.qx3 04.5.12 Time Search lets you quickly advance the videotape to a posi- tion simply by entering the amount of playback time you want to skip. In the example below,Time Search is set to 2 hours, 50 min- utes from the present position. Insert a videotape. -
Page 38: Index Search
T0006UG_6006UG_EN_1.qx3 04.5.12 38 Index Search This feature lets you quickly rewind or fast forward to the start of recordings. ● Index Marks are made automatically at the start of all recordings.They are not made where recording pauses. The time gap between Index Marks should be greater than one minute for SP recording and three minutes for SLP recording.This means recordings should be one (SP) or three (SLP) minutes long. -
Page 39: Videotape Playback Features 39
T0006UG_6006UG_EN_1.qx3 04.5.12 Slow Motion Press k (pause) during play to pause the videotape.Then press i / g to start slow motion. Sound will be mute during slow motion. Slow motion will stop automatically after five minutes to prevent damage to the tape. Press PLAY B to return to normal playback. -
Page 40: Automatic Operation Features
T0006UG_6006UG_EN_1.qx3 04.5.12 10:09 AM Page 40 40 Automatic Operation Features The following videotape features are available. Automatic Rewind, Eject, Off When you play, fast forward, or record a videotape to its end, the TV/VCR/DVD will rewind the tape, stop, turn itself off, and eject the tape. -
Page 41: Closed Captions 41
T0006UG_6006UG_EN_1.qx3 04.5.12 Follow the steps below to select closed captions for TV pro- gramming. Not all TV programs and commercials have closed captions or all types of closed captions (second language, half-screen text, etc.). If closed captioning is not broadcast, you cannot receive it.This does not indicate a problem with the TV/VCR/DVD. -
Page 42: Setting V-Chip
T0006UG_6006UG_EN_1.qx3 04.5.12 42 Setting V-Chip TV Rating Settings V-CHIP enables parents to prevent their children from watching inappropriate material on TV.V-CHIP reads the rat- ings for programming (except for news and sports programs, unedited movies on premium cable channels, and Emergency Broadcast System signals), then denies access to program- ming if the program’s rating meets the limitations you select. - Page 43 T0006UG_6006UG_EN_1.qx3 04.5.12 Press ▲ or ▼ to select the TV Rating level at which you want to block viewing, then press ENTER once. If you press ENTER again, the subrat- ings for that category will appear. Details are on pages 44-45. When you select the rating category and set it to BLOCK, the higher ratings will turn to BLOCK auto- matically.
- Page 44 T0006UG_6006UG_EN_1.qx3 04.5.12 44 Setting V-Chip (cont’d) TV Rating Subratings When you select TV-Y7,TV-PG,TV-14, or TV-MA, you can use the subratings to block specific elements of program- ming, such as language or violence. Press SETUP. Press ▲ or ▼ to select V-CHIP SET UP. Press ENTER.
- Page 45 T0006UG_6006UG_EN_1.qx3 04.5.12 Press ▲ or L to select the rating you wish to adjust.Then, press ENTER twice to go to its subratings. TV-Y7 [BLOCK] [BLOCK] ● When you select TV-Y7: Press ▲ or ▼ to select FV (Fantasy Violence, violence that seems realistic to young children).
- Page 46 T0006UG_6006UG_EN_1.qx3 04.5.12 46 Setting V-Chip (cont’d) MPAA Rating Settings You can block TV channel viewing according to the Motion Picture Association ratings.To do so, follow these steps. Press SETUP. Press ▲ or ▼ to select V-CHIP SET UP. Then, press ENTER. –...
-
Page 47: Setting V-Chip
T0006UG_6006UG_EN_1.qx3 04.5.12 Changing the Access Code Although the default code 0000 is supplied with the TV/VCR/DVD, you can set your own access code. Press SETUP . Press ▲ or ▼ to select V-CHIP SET UP . Then, press ENTER. Press the Number buttons to enter the old access code. -
Page 48: Multi-Channel Television Sound
T0006UG_6006UG_EN_1.qx3 04.5.12 48 Multi-Channel Television Sound Press DISPLAY to see the sound status. During TV viewing, press DISPLAY twice. During tape play, press DISPLAY once. STOP 12:00AM CH 123 HIFI STEREO/SAP COUNT 0:00:00 When a TV program is broadcast in stereo, STEREO appears in the top right corner of the screen.When a TV program is broadcast in second audio, SAP appears in the top right corner of the screen.When a TV pro-... - Page 49 T0006UG_6006UG_EN_1.qx3 04.5.12 Multi-Channel Television Sound (cont’d) 49 Selecting HiFi or Monaural Sound You can play videotapes in either High Fidelity (HIFI) or Monaural (MONO or single-channel) sound.To do so, follow these steps. Press SETUP. Press ▲ or ▼ to select USER’S SET UP. Then, press ENTER.
- Page 50 T0006UG_6006UG_EN_2.qx3 04.5.12 50 Multi-Channel Television Sound (cont’d) Setting the TV/VCR/DVD to receive or record TV programs in Stereo, Second Audio, or Monaural Sound Because TV channels can broadcast in Stereo or Second Audio, set the TV/VCR/DVD to receive and record the chan- nels in the sound mode you prefer.
-
Page 51: Dvd Disc Menus,Title Menus 51
T0006UG_6006UG_EN_2.qx3 04.5.12 Disc Menus Some DVDs contain menus that describe the contents of the Disc or allow you to customize Disc playback. For example, the menu may offer choices for subtitle languages, special features, or scene selection. To use the DVD Disc menu and select playback features, fol- low these steps. -
Page 52: Fast Forward/Reverse Search
T0006UG_6006UG_EN_2.qx3 04.5.12 52 Fast Forward/Reverse Search ● Before you begin, press SELECT to put the TV/VCR/DVD in DVD mode. The green DVD light will appear on the front of the TV/VCR/DVD. During playback, press and hold i/g or j/h for a few seconds. Use i/g for a for- ward search. -
Page 53: Title/Chapter Playback, Specific Time Playback 53
T0006UG_6006UG_EN_2.qx3 04.5.12 Title/Chapter Playback, Specific Time Playback 53 Title/Chapter Playback ● Before you begin, press SELECT to put the TV/VCR/DVD in DVD mode. The green DVD light will appear on the front of the TV/VCR/DVD. During DVD play, press SEARCH MODE until CH (for Chapter) or TT (for Title) appears on the TV. -
Page 54: Track Play
T0006UG_6006UG_EN_2.qx3 04.5.12 54 Track Play There are three ways to play a specific Audio CD, Video CD (without PBC), MP3, or JPEG Track: Use the Number buttons, the SEARCH MODE button, or i/g and j/h . ● Before you begin, press SELECT to put the TV/VCR/DVD in DVD mode. -
Page 55: Paused And Step-By-Step Play, Resume On 55
T0006UG_6006UG_EN_2.qx3 04.5.12 Paused and Step-by-Step Play, Resume On 55 Paused and Step-by-Step Play ● Before you begin, press SELECT to put the TV/VCR/DVD in DVD mode. The green DVD light will appear on the front of the TV/VCR/DVD. During Disc play, press F (pause). Play will pause and the sound will be mute. -
Page 56: Repeat,A-B Repeat
T0006UG_6006UG_EN_2.qx3 04.5.12 56 Repeat, A-B Repeat Repeat ● Before you begin, press SELECT to put the TV/VCR/DVD in DVD mode. The green DVD light will appear on the front of the TV/VCR/DVD. During play, press REPEAT until the repeat mode you want appears on the TV. On a DVD, select CHAPTER,TITLE, or OFF. -
Page 57: Markers 57
T0006UG_6006UG_EN_2.qx3 04.5.12 Use Markers to remember your favorite places on a DVD, Audio CD, or Video CD (without PBC). To set the Markers, follow these steps. ● Before you begin, press SELECT to put the TV/VCR/DVD in DVD mode.The green DVD light will appear on the front of the TV/VCR/DVD. -
Page 58: Subtitles, Camera Angles
T0006UG_6006UG_EN_2.qx3 04.5.12 58 Subtitles, Camera Angles Subtitles You can select a language for DVD subtitles during playback. You may select only the subtitles that are available on the DVD. ● Before you begin, press SELECT to put the TV/VCR/DVD in DVD mode. The green DVD light will appear on the front of the TV/VCR/DVD. -
Page 59: Slow Motion, Zoom 59
T0006UG_6006UG_EN_2.qx3 04.5.12 Slow Motion Press F (pause) during DVD or Video CD play. Press and hold i/D or H/h for a few seconds. Slow motion play will begin. Press i/D or H/h repeatedly to play the DVD forward or backward at approximately 1/16, 1/8, or 1/2 the nor- mal speed. -
Page 60: Parental Password
T0006UG_6006UG_EN_2.qx3 04.5.12 60 Parental Password The Parental feature prevents viewing of DVDs that exceed your rating limits. This feature will not limit viewing if the DVD is not rated or coded. Check your DVDs and settings before letting children access the TV/VCR/DVD. Follow these steps to change your password. - Page 61 T0006UG_6006UG_EN_2.qx3 04.5.12 Press p to select CHANGE, then press ENTER. PARENTAL PARENTAL LEVEL ALL CHANGE ENTER Press the Number buttons to enter a four-digit password. The password numbers will appear on the screen. Write down the password so you will not forget it.
-
Page 62: Parental Levels
T0006UG_6006UG_EN_2.qx3 04.5.12 62 Parental Levels Follow these steps to set the rating level for your DVDs. DVDs whose ratings exceed the level you set will not play. ● Before you begin, press SELECT to put the TV/VCR/DVD in DVD mode. The green DVD light will appear on the front of the TV/VCR/DVD. -
Page 63: Parental Levels
T0006UG_6006UG_EN_2.qx3 04.5.12 Press o or p to select a level, then press ENTER. The rating levels continue on two menu screens. Press o or p repeatedly to move to the next or previous screen to find the rating level you want. -
Page 64: Audio Language, Stereo Sound
T0006UG_6006UG_EN_2.qx3 04.5.12 64 Audio Language, Stereo Sound Audio Language You can select a language for DVDs during play if multiple languages are available. ● Before you begin, press SELECT to put the TV/VCR/DVD in DVD mode. The green DVD light will appear on the front of the TV/VCR/DVD. -
Page 65: Random Play, Programmed Play 65
T0006UG_6006UG_EN_2.qx3 04.5.12 Random Play You may play Audio CD, JPEG, or MP3 Tracks in Random order instead of the order in which they are recorded (1,2,3...). ● Before you begin, press SELECT to put the TV/VCR/DVD in DVD mode. The green DVD light will appear on the front of the TV/VCR/DVD. -
Page 66: Mp3/Jpeg Playback
T0006UG_6006UG_EN_2.qx3 04.5.12 66 MP3/JPEG Playback The DVD Player will play MP3 and JPEG files that you record and finalize on a CD-RW (Compact Disc-Rewritable) or CD-R (Compact Disc-Recordable). These Discs may contain pictures in a JPEG format or audio Tracks in an MP3 format. For example, you may have photo- graphic film developed by a retailer that places the pictures on a CD-R for you. -
Page 67: Mp3/Jpeg Displays 67
T0006UG_6006UG_EN_2.qx3 04.5.12 You can review MP3 and JPEG Track (File) information dur- ing playback. ● Before you begin, press SELECT to put the TV/VCR/DVD in DVD mode. The green DVD light will appear on the front of the TV/VCR/DVD. Press DISPLAY during play. The current Track name will show on the TV screen. -
Page 68: Language Settings
T0006UG_6006UG_EN_2.qx3 04.5.12 68 Language Settings You can use the LANGUAGE settings to select different lan- guages for the Audio or Subtitles of DVDs, as well as languages for DVD Disc menus. ● Before you begin, press SELECT to put the TV/VCR/DVD in DVD mode. - Page 69 T0006UG_6006UG_EN_2.qx3 04.5.12 Press o or p to select a language, then press ENTER. The language lists may continue on multiple screens. Press o or p to move to the other screens. ● If you select OTHER, press four Number buttons to enter the code for the language you desire.
-
Page 70: Display Settings
T0006UG_6006UG_EN_2.qx3 04.5.12 70 Display Settings You can change the TV Aspect ratio, Still Mode clarity, Angle Icon availability, and Automatic Power Off features of the DVD Player in the Display menu. ● Before you begin, press SELECT to put the TV/VCR/DVD in DVD mode. -
Page 71: Display Settings
T0006UG_6006UG_EN_2.qx3 04.5.12 Press o or p to select an item, then press ENTER. ● If you selected TV MODE, press o or p to select a setting, then press ENTER. Choose 4:3 LETTER BOX if you want to see the entire, widened picture with black bars at the top and bottom of the screen. -
Page 72: Audio Settings
T0006UG_6006UG_EN_2.qx3 04.5.12 72 Audio Settings Change Audio settings based on other equipment you con- nected to the TV/VCR/DVD or according to your Disc sound features. These settings only affect the Audio from the DVD Player of the TV/VCR/DVD. ● Before you begin, press SELECT to put the TV/VCR/DVD in DVD mode. -
Page 73: On-Screen Displays 73
T0006UG_6006UG_EN_2.qx3 04.5.12 DVD Display ● Before you begin, press SELECT to put the TV/VCR/DVD in DVD mode. The green DVD light will appear on the front of the TV/VCR/DVD. Press DISPLAY repeatedly to see the following displays during DVD play. CH 7/49 0:01:46 - 0:03:27 CH (Chapter): Current Chapter number... -
Page 74: Black Level,Virtual Surround, Initializing
T0006UG_6006UG_EN_2.qx3 04.5.12 74 Black Level,Virtual Surround, Initializing Black Level Adjust Black Level to brighten the DVD and Video CD picture during playback. During DVD or Video CD play, press MODE so the Black Level icon shows on the TV screen. Within 10 seconds, press ENTER repeatedly to choose ON or OFF. -
Page 75: Glossary 75
T0006UG_6006UG_EN_2.qx3 04.5.12 AUDIO In Jacks: red and white jacks on the front of the TV/VCR/DVD which are used to receive or record audio from another source (VCR, Camcorder, etc.). Automatic Channel Setup: process in which the TV/VCR/DVD memorizes all available TV channels.Then, when you push the CH. ▲/▼ buttons, you only scan through channels you receive. -
Page 76: Helpful Hints
T0006UG_6006UG_EN_2.qx3 04.5.12 76 Helpful Hints If you are having problems with your product, check this list of problems and possible solutions before requesting service.You may be able to solve the problem yourself. Location For safe operation and satisfactory performance of your TV/VCR/DVD, remember the following: •... -
Page 77: Helpful Hints
T0006UG_6006UG_EN_2.qx3 04.5.12 Disc cannot play. • Insert a playable Disc. Make sure the Disc is labelled for Region 1 or ALL regions and is NTSC compatible. Details are on page six. • Place the Disc correctly in the Disc tray. If the Disc is one-sided, place the Disc in the tray with the label facing up. -
Page 78: Specifications
T0006UG_6006UG_EN_2.qx3 04.5.12 78 Specifications General TV/VCR 19MDTR20 CRT: 19 inch in-line gun 90˚ deflection tube 27MDTR20 CRT: 27 inch in-line gun 110˚ deflection tube Closed Caption system: §15.119/FCC Video Heads: Rotary four-head Tape width: 1/2 inch Tape speeds 33.40 mm/sec. -
Page 79: Limited Warranty 79
(90) days, Magnavox will no longer be responsi- ble for charges incurred. PARTS: For a period of one (1) year, Magnavox will sup- ply, at no charge, new or rebuilt replacement parts in exchange for defective parts. Magnavox authorized ser- vice centers will provide removal and installation of the parts under the specified labor warranty. -
Page 80: Index
T0006UG_6006UG_EN_2.qx3 04.5.12 80 Index a-b repeat ....56 angle button ....15, 58 ant(enna) jack . - Page 81 LEA PRIMERO LA GUÍA DE USO RÁPIDO Y/O EL MANUAL DEL PROPIETARIO PARA OBTENER CONSEJOS RÁPIDOS QUE LE PERMITIRÁN DISFRUTAR AÚN MÁS DE SU PRODUCTO MAGNAVOX. SI YA HA LEÍDO SUS INSTRUCCIONES Y TODAVÍA NECESITA AYUDA, VISITE NUESTRA DIRECCIÓN WWW.MAGNAVOX.COM O LLAME AL 1-800-705-2000 CON SU PRODUCTO JUNTO A USTED.
- Page 82 Al registrar su modelo con MAGNAVOX usted cumplirá con los requisitos para obtener todos los valiosos ben- eficios que se indican a continuación, ¡no se los pierda! Llene y devuelva su tarjeta de registro del producto...
-
Page 83: Seguridad E Información General
Knoxville,TN 37914-1810 (865) 521-4316 Fabricado bajo licencia de Dolby Laboratories. “Dolby” y el símbolo de doble D son marcas registradas de Dolby Laboratories. Derecho de autor 2004 Magnavox.Todos los derechos reservados. 10:13 AM Page 3 Seguridad e información general 3 Este aparato digital clase B está... - Page 84 T0006UG_6006UG_SP_1.qx3 04.5.12 4 Tabla de contenidos Información general Seguridad e información general ....3 Tabla de contenidos ......4 Introducción .
-
Page 85: Introducción 5
T0006UG_6006UG_SP_1.qx3 04.5.12 Bienvenido a su manual de instrucciones del TV/VCR/DVD Este manual describe los modelos 19MDTR20 y 27MDTR20. Estos dos modelos son diferentes en tamaño, pero funcionan de forma idéntica. En este manual se muestra el modelo 27MDTR20. Funciones:TV/VCR • Ajuste automático de canal •... -
Page 86: Discos Y Cintas De Video Reproducibles
DVD puede aparecer en el mismo DVD o en la caja del disco. Cintas de video Magnavox le recomienda usar sólo cintas de video que tengan la marca ble que otras cintas de video tengan una calidad de imagen deficiente y dejen demasi- ados depósitos en los cabezales del video. -
Page 87: Antes De Usar El Tv/Vcr/Dvd 7
T0006UG_6006UG_SP_1.qx3 04.5.12 Instalación de baterías del control remoto Saque la tapa del compartimiento de las baterías en la parte inferior del control remoto. Deslice la tapa hacia abajo y sáquela. Siga la dirección de la flecha que se encuentra en la tapa. Coloque dos baterías AA dentro del compar- timiento de baterías. -
Page 88: Conexión Del Tv/Vcr/Dvd
T0006UG_6006UG_SP_1.qx3 04.5.12 8 Conexión del TV/VCR/DVD Conecte el TV/VCR/DVD usan- do una de las conexiones que se muestran. Conexión del TV/VCR/DVD con una señal de televisión por cableo antena exterior Conexión del TV/VCR/DVD con una caja de cable/receptor satelital Para ver cualquier canal, ajuste el TV/VCR/DVD en el canal de salida (canal 03 ó... - Page 89 T0006UG_6006UG_SP_1.qx3 04.5.12 Conexión del TV/VCR/DVD (continuación) 9 Conexión del TV/VCR/DVD con una antena interior Para instalar una antena interior o antena en “V” (no se incluye), conecte el cable de la ante- na al enchufe ANT (antena) que se encuentra en la parte posterior del TV/VCR/DVD como se muestra.
-
Page 90: Conexiones Opcionales
T0006UG_6006UG_SP_1.qx3 04.5.12 10 Conexiones opcionales Conexiones estéreo digitales Puede conectar el TV/VCR/DVD a un estéreo que tenga un enchufe de entrada coaxial digital. Use esta conexión si desea escuchar el sonido del TV/VCR/DVD a través del estéreo. Use estas conexiones para un estéreo compatible con Dolby Digital o para un receptor que tenga Mini- Disc o un lector de cintas de audio digital. -
Page 91: Ver Tv 11
T0006UG_6006UG_SP_1.qx3 04.5.12 Esta unidad selecciona automáticamente los canales de TV cuando usted la conecta una antena o un receptor de TV por cable. Para reponer los canales de TV, vea la página 18. Si está utilizando un receptor de TV por cable o un receptor de satélite no necesita establecer los canales en el TV/VCR/DVD. - Page 92 T0006UG_6006UG_SP_1.qx3 04.5.12 12 Reproducir una cinta de video Siga estos pasos para sólo reproducir una cinta de video. Las opciones de reproducción de cintas de video se encuentran en las páginas 34 a 40. Inserte una cinta de video en el compartimien- to del casete del TV/VCR/DVD.
-
Page 93: Reproducción De Un Disco 13
T0006UG_6006UG_SP_1.qx3 04.5.12 Antes de comenzar, encienda los otros equipos que estén conectados al TV/VCR/DVD.Ajuste un estéreo (si se aplica) a la fuente o canal de sonido correcto. Los detalles se encuentran en la página 10. Presione STANDBY-ON para encender el TV/VCR/DVD. -
Page 94: Botones Del Control Remoto
T0006UG_6006UG_SP_1.qx3 04.5.12 14 Botones del control remoto Bóton PICTURE Presione para acceder a los controles de imagen. Los detalles se encuentran en la página 25. Bóton STANDBY-ON Presione para encender/apagar el TV/VCR/DVD. Botones de número Modo TV: Presione dos dígitos para acceder a un canal específico. - Page 95 T0006UG_6006UG_SP_1.qx3 04.5.12 Botones del control remoto (continuación) 15 Bóton ZOOM Presione para ampliar la imagen durante la reproducción de DVD. Los detalles se encuentran en la página 59. Bóton C.RESET (counter reset) Presione para reajustar el contador de cinta en 0:00:00. Los detalles se encuentran en la página 36.
-
Page 96: Panel Delantero
T0006UG_6006UG_SP_1.qx3 04.5.12 16 Panel delantero Compartimiento del casete Inserte una cinta de video aquí. Bandeja de discos Inserte un Disco aquí. Botones CHANNEL o/ p Presione para seleccionar los canales de TV. Los detalles se encuentran en la página 11. Botón OPEN/CLOSE A (DVD) Presione para abrir o cerrar la bandeja de discos. -
Page 97: Panel Posterior 17
T0006UG_6006UG_SP_1.qx3 04.5.12 10:13 AM Page 17 Panel posterior 17 ANT. AUDIO OUT COAXIAL Enchufe ANT (entrada de antena) Conecte aquí una antena o señal de televisión por cable. Esto trae los canales al TV/VCR/DVD (o se conecta a una caja de cable/receptor satelital a través de este enchufe), no recibirá... -
Page 98: Idioma Del Menú, Reajuste De Los Canales De Tv
T0006UG_6006UG_SP_1.qx3 04.5.12 18 Idioma del menú, reajuste de los canales de TV Idioma del menú Esto afecta al idioma de los menús de preparación del TV/VCR/DVD y a los términos del despliegue en pantalla. No altera el idioma de la programación del TV, las cinta de video, los discos o los subtítulos encapsulados. -
Page 99: Agregar/Borrar Canales 19
T0006UG_6006UG_SP_1.qx3 04.5.12 Puede borrar los canales de TV que ya no reciba o no vea siempre. O puede agregar más canales si el TV/VCR/DVD no memorizó todos sus canales favoritos. ● Antes de comenzar, presione SELECT para poner el TV/VCR/DVD en el modo TV/VCR. Aparecerá la luz roja de VCR/TV. -
Page 100: Ajuste Del Reloj
T0006UG_6006UG_SP_1.qx3 04.5.12 20 Ajuste del reloj Ajuste manual del reloj Debe ajustar el reloj antes de realizar una grabación con tem- porizador. Ajuste manualmente el reloj. Después, use Reloj aut. para monitorear la hora. Los detalles se encuentran en las páginas 22 y 23. - Page 101 T0006UG_6006UG_SP_1.qx3 04.5.12 Mientras destelle el espacio DIA, presione ▲ o ▼ hasta que aparezca el día correcto. Luego, presione B. Aparecerá una abreviatura del día de la semana seleccionado. – AJUSTE MANUAL RELOJ – AÑO 05 / 07 - - - - - - - HORA MINUTO...
- Page 102 T0006UG_6006UG_SP_1.qx3 04.5.12 22 Ajuste del reloj (continuación) Ajuste automático del reloj Puede hacer que el TV/VCR/DVD ajuste el reloj usando el canal PBS. Una vez que ajuste manualmente el reloj, el TV/VCR/DVD monitoreará la transmisión de la hora y fecha correcta de la estación PBS.
- Page 103 T0006UG_6006UG_SP_1.qx3 04.5.12 Si ya sabe el número del canal PBS, continúe con el paso 8. Si no lo sabe, presione ▼ para seleccionar BUSQ. AUTO RELOJ CA. Luego, presione ENTER. – AJUSTE RELOJ – RELOJ AUT. [ON] BUSQ. AUTO RELOJ CA. CAN.
-
Page 104: Horario De Verano
T0006UG_6006UG_SP_1.qx3 04.5.12 24 Horario de verano Cuando el horario de verano (D.S.T.) esté ON, el reloj se adelantará una hora el primer domingo de abril y se atrasará una hora el último domingo de octubre. Para activar o desactivar el horario de verano, siga estos pasos. -
Page 105: Pantallas De Estado, Controles De Imagen 25
TV/VCR/DVD lejos del aparato. Si el color aún no es el correcto, apague el equipo durante 30 minutos (para el 27MDTR20) o desconecte el cable de suministro eléctrico durante 30 minutes (para el 19MDTR20). Después de 30, minutos intente usar nuevamente la unidad. -
Page 106: Grabación
T0006UG_6006UG_SP_1.qx3 04.5.12 26 Grabación de cintas de video Coloque una cinta con esta lengüeta de grabación intacta en el compartimiento del casete del TV/VCR/DVD. Se encenderá el TV/VCR/DVD. Si ya está encendido y en la unidad hay una cinta de video, asegúrese que la unidad se encuentre en el modo TV/VCR. -
Page 107: Grabación De Un Toque
T0006UG_6006UG_SP_1.qx3 04.5.12 Una Grabación de un toque (OTR) es una grabación tempo- rizada inmediata de 30 minutos a ocho horas de duración. Antes de comenzar... ● Encienda el TV/VCR/DVD. ● Presione SELECT para poner la unidad en el modo TV/VCR. La luz roja de VCR/TV aparecerá... -
Page 108: Grabación Con Temporizador
T0006UG_6006UG_SP_1.qx3 04.5.12 28 Grabación con temporizador Siga estos pasos para programar el TV/VCR/DVD y grabar programas de TV cuando esté fuera de su hogar. El TV/VCR/DVD grabará y se apagará automáticamente. Puede programar un máximo de ocho grabaciones con tem- porizador. - Page 109 T0006UG_6006UG_SP_1.qx3 04.5.12 Grabación con temporizador (continuación) 29 Mientras se selecciona FECHA, presione ▲ o ▼ hasta que aparezca la fecha correcta. Se grabará sólo una vez. – COMO PROGRAMAR – FECHA INICIO FINAL - - - - - - - - - - - - - - - - - -...
- Page 110 T0006UG_6006UG_SP_1.qx3 04.5.12 30 Grabación con temporizador (continuación) Mientras selecciona FINAL, presione ▲ o ▼ para seleccionar la hora final de la grabación. Aparecerá AM o PM junto a la hora. Luego, presione B y presione ▲ o ▼ para selec- cionar el minuto final de la grabación.
- Page 111 T0006UG_6006UG_SP_1.qx3 04.5.12 Grabación con temporizador (continuación) 31 Extensión de la grabación con temporizador Para hacer que la grabación con temporizador se inicie y finalice después de lo originalmente programado, siga estos pasos. Con la unidad encendida, presione SETUP. Presione ▲ o ▼ para selec- cionar COMO PROGRAMAR.
-
Page 112: Rebobinado Automático De Grabación Con Temporizador
T0006UG_6006UG_SP_1.qx3 04.5.12 32 Rebobinado automático de grabación con temporizador Use esta función para rebobinar la cinta hasta el inicio de una grabación con temporizador completa. Presione SETUP. Presione ▲ o ▼ para seleccionar AJUSTE DE USER. Luego, presione ENTER. — TV/VCR PREP. — COMO PROGRAMAR AJUSTE RELOJ AJUSTE DE CANAL... -
Page 113: Regrabación (Duplicado De Cintas) 33
T0006UG_6006UG_SP_1.qx3 04.5.12 Enchufes AUDIO y VIDEO OUT (salida de audio y video) de la unidad fuente (VCR o Camcorder) AUDIO VIDEO Cable de video de VIDEO OUT (salida de video) a VIDEO In Realice las conexiones como se muestra más arriba. -
Page 114: Repetir
T0006UG_6006UG_SP_1.qx3 04.5.12 34 Repetir Repetir le permite reproducir una cinta de video en forma continua. REPETIR TODO reproducirá repetidamente la cinta desde el comienzo al final. REPETIR ESPACIO repetirá continuamente la cinta desde el comienzo hasta la primera parte de ella que tenga un espacio mayor de 10 segundos. -
Page 115: Cintas Play 35
T0006UG_6006UG_SP_1.qx3 04.5.12 Esta función permite mejorar la calidad de la imagen cuando reproduce un casete usado como cintas alquiladas. Presione SETUP. Presione ▲ o ▼ para seleccionar AJUSTE DE USER. Luego, presione ENTER. — TV/VCR PREP. — COMO PROGRAMAR AJUSTE RELOJ AJUSTE DE CANAL AJUSTE DE USER AJUSTE DE V-CHIP... -
Page 116: Retorno A Cero, Apagado Programado
T0006UG_6006UG_SP_1.qx3 04.5.12 36 Retorno a cero, apagado programado Retorno a cero El contador de cinta de video muestra el tiempo de grabación o reproducción transcurrido en horas, minutos y segundos desde que el contador se ajustó en cero. El contador de tiem- po no cambiará... -
Page 117: Búsqueda De Hora 37
T0006UG_6006UG_SP_1.qx3 04.5.12 Búsqueda de hora le permite avanzar la cinta de video a una posición con sólo ingresar la cantidad de tiempo de reproduc- ción que desea adelantar. En el siguiente ejemplo, Búsqueda de hora se ajusta a 2 horas, 50 minutos desde la posición actual. Inserte la cinta de video. -
Page 118: Busca Hacia Índice
T0006UG_6006UG_SP_1.qx3 04.5.12 38 Busca hacia índice Esta función le permite rebobinar rápidamente o avanzar rápi- do hasta el inicio de las grabaciones. ● Los marcadores de índice se marcan automáticamente al comienzo de todas las grabaciones. No se marcan donde la grabación hace una pausa. -
Page 119: Funciones De Reproducción De Cinta De Video 39
T0006UG_6006UG_SP_1.qx3 04.5.12 Funciones de reproducción de cinta de video 39 Cámara lenta Presione k (pausa) durante la reproducción para poner en pausa la cinta de video. Luego presione i / g para iniciar la reproducción en cámara lenta. El sonido se desactivará mientras la reproducción se encuentre en cámara lenta. -
Page 120: Funciones De Operación Automática
T0006UG_6006UG_SP_1.qx3 04.5.12 40 Funciones de operación automática Están disponibles las siguientes funciones de cinta de video. Rebobinado automático, expulsión, apagado Cuando reproduzca, avance rápido o grabe una cinta de video y ésta se acabe, el TV/VCR/DVD rebobinará la cinta, la parará, se apagará... -
Page 121: Subtítulos Encapsulados 41
T0006UG_6006UG_SP_1.qx3 04.5.12 Siga estos pasos para seleccionar subtítulos encapsulados para la programación de TV. No todos los programas de TV y comerciales tienen subtítulos encapsulados o todos los tipos de subtítulos (segundo idioma, texto de mitad de pantalla, etc.). Si no se transmiten los subtítulos, no puede recibirlos. Esto no indica que exista un problema en el TV/VCR/DVD. -
Page 122: Ajuste De V-Chip
T0006UG_6006UG_SP_1.qx3 04.5.12 42 Ajuste de V-Chip Ajustes de clase de TV V-CHIP permite que los padres eviten que sus hijos vean pro- gramas de TV inapropiados.V-CHIP lee las clases de progra- mación (excepto noticias y programas deportivos, películas sin editar en canales del cable premium y señales de sistemas de transmisión de emergencia), luego niega el acceso a dicha pro- gramación si la clase de programa no cumple con las restric- ciones que seleccione. - Page 123 T0006UG_6006UG_SP_1.qx3 04.5.12 Presione ▲ o ▼ para seleccionar el nivel de Clase de TV que desea bloquear y luego pre- sione ENTER una vez. Si presiona ENTER nueva- mente, aparecerán las subclases para dicha categoría. Los detalles se encuentran en las páginas 44 y 45. Cuando seleccione una categoría de clase y la ajuste en BLOQ., entonces las clases superiores se ajustarán en BLOQ.
- Page 124 T0006UG_6006UG_SP_1.qx3 04.5.12 44 Ajuste de V-Chip (continuación) Subclase de Clase de TV Cuando selecciona TV-Y7,TV-PG,TV-14 ó TV-MA, puede usar las subclases para bloquear elementos específicos de la pro- gramación, tales como lenguaje o violencia. Presione SETUP. Presione ▲ o ▼ para seleccionar AJUSTE DE V-CHIP.
- Page 125 T0006UG_6006UG_SP_1.qx3 04.5.12 Presione ▲ o L para seleccionar la clase que desee ajustar. Luego, presione ENTER dos veces para ir a sus subclases. TV-Y7 [BLOQ.] [BLOQ.] ● Cuando seleccione TV-Y7: Presione ▲ o ▼ para seleccionar FV (Violencia de fantasía, violencia que pueda parecer real a los niños). Luego, presione ENTER para seleccionar BLOQ.
- Page 126 T0006UG_6006UG_SP_1.qx3 04.5.12 46 Ajuste de V-Chip (continuación) Ajuste de clase de MPAA Puede bloquear los canales de TV de acuerdo a las clases establecidas por la Asociación Norteamericana de Cintas Cinematográficas. Para ello, siga estos pasos. Presione SETUP. Presione ▲ o ▼ para seleccionar AJUSTE DE V-CHIP.
- Page 127 T0006UG_6006UG_SP_1.qx3 04.5.12 Cambio del código de acceso Aunque el código predeterminado 0000 está incluido con el TV/VCR/DVD, puede ajustar su propio código de acceso. Presione SETUP . Presione ▲ o ▼ para seleccionar AJUSTE DE V- CHIP . Luego, presione ENTER. Presione los botones de número para ingresar el código de acceso antiguo.
-
Page 128: Sonido De Televisión Multicanal
T0006UG_6006UG_SP_1.qx3 04.5.12 48 Sonido de televisión multicanal Presione DISPLAY para consultar el estado del sonido. Mientras ve TV, presione DISPLAY dos veces. Mientras ve una cinta de video, presione DISPLAY una vez. PARAR 12:00AM CA 123 HIFI ESTEREO/SAP CONTEO 0:00:00 Cuando un programa se transmite en estéreo, ESTEREO aparece en la esquina superior derecha de la pantalla. - Page 129 T0006UG_6006UG_SP_1.qx3 04.5.12 Sonido de televisión multicanal (continuación) 49 Selección de sonido HIFI o monofónico Puede reproducir cintas de video ya sea en sonido de alta fidelidad (HIFI) o monofónicas (MONO o monocanal). Para ello, siga estos pasos. Presione SETUP. Presione ▲ o ▼ para seleccionar AJUSTE DE USER.
- Page 130 T0006UG_6006UG_SP_2.qx3 04.5.12 50 Sonido de televisión multicanal (continuación) Ajuste del TV/VCR/DVD para recibir o grabar programas de TV en sonido estéreo, audio secundario o monofónico Debido a que los canales de TV pueden transmitir en audio estéreo o secundario, ajuste el TV/VCR/DVD para recibir y grabar los canales en el modo de sonido que usted prefiera.
-
Page 131: Menús, Menús De Título 51
T0006UG_6006UG_SP_2.qx3 04.5.12 Menús Algunos DVD contienen menús que describen los con- tenidos del disco o que permiten que usted personalice la reproducción de éste. Por ejemplo, el menú puede ofrecer opciones para los idiomas de los subtítulos, las funciones especiales o la selección de la escena. Para usar el menú del DVD y seleccionar las funciones de reproducción, siga estos pasos. -
Page 132: Búsqueda De Avance/Retroceso Rápido
T0006UG_6006UG_SP_2.qx3 04.5.12 52 Búsqueda de avance/retroceso rápido ● Antes de comenzar, presione SELECT para poner el TV/VCR/DVD en el modo DVD. La luz verde de DVD aparecerá en la parte delantera del TV/VCR/DVD. Durante la reproducción, presione i/g o j/h. Use i/g para una búsqueda hacia delante, y j/h para una búsqueda hacia atrás. -
Page 133: Reproducción De Título/Capítulo, Reproducción De Hora 53
T0006UG_6006UG_SP_2.qx3 04.5.12 Reproducción de título/capítulo, Reproducción de hora 53 Reproducción de título/capítulo ● Antes de comenzar, presione SELECT para poner el TV/VCR/DVD en el modo DVD. La luz verde de DVD aparecerá en la parte delantera del TV/VCR/DVD. Durante la reproducción de DVD, presione SEARCH MODE hasta que aparezca CH (por capítulo) o TT (por título) en la pantalla del TV. -
Page 134: Reproducción De Pista
T0006UG_6006UG_SP_2.qx3 04.5.12 54 Reproducción de pista Hay tres maneras de reproducir un CD de audio, CD de vídeo (sin PBC), MP3 o JPEG en una pista concreta: Use los botones de número, el botón SEARCH MODE o i/g y j/h. ●... -
Page 135: Reproducción Pausada Y Paso A Paso,Reanudación Activada 55
T0006UG_6006UG_SP_2.qx3 04.5.12 Reproducción pausada y paso a paso,Reanudación activada 55 Reproducción pausada y paso a paso ● Antes de comenzar, presione SELECT para poner el TV/VCR/DVD en el modo DVD. La luz verde de DVD aparecerá en la parte delantera del TV/VCR/DVD. Durante la reproducción de un disco, presione F (pausa). -
Page 136: Repetir, Repetir A-B
T0006UG_6006UG_SP_2.qx3 04.5.12 56 Repetir, Repetir A-B Repetir ● Antes de comenzar, presione SELECT para poner el TV/VCR/DVD en el modo DVD. La luz verde de DVD aparecerá en la parte delantera del TV/VCR/DVD. Durante la reproducción, presione REPEAT hasta que aparezca el modo de repetición deseado en el televisor. -
Page 137: Marcadores 57
T0006UG_6006UG_SP_2.qx3 04.5.12 Utilice los marcadores para recordar sus momentos favoritos de un DVD, CD de audio o CD de vídeo (sin PBC). Para fijar los marcadores, siga los siguientes pasos: ● Antes de comenzar, presione SELECT para poner el TV/VCR/DVD en el modo DVD. La luz verde de DVD aparecerá... -
Page 138: Subtítulos, Ángulos De Cámara
T0006UG_6006UG_SP_2.qx3 04.5.12 58 Subtítulos, Ángulos de cámara Subtítulos Durante la reproducción usted puede seleccionar un idioma para los subtítulos del DVD. Sólo puede seleccionar los sub- títulos que están disponibles en el DVD. ● Antes de comenzar, presione SELECT para poner el TV/VCR/DVD en el modo DVD. -
Page 139: Cámara Lenta Y Zoom
T0006UG_6006UG_SP_2.qx3 04.5.12 Cámara lenta Presione F (pausa) durante la reproducción de DVD o CD de vídeo. Pulse y mantenga pulsado i/g o j/h durante unos pocos segundos. La reproducción a cámara lenta empezará. Pulse repetidamente i/g o j/h para reproducir el DVD hacia delante o hacia atrás a 1/16, 1/8 o 1/2 de la velocidad normal. -
Page 140: Código De Acceso Paterno
T0006UG_6006UG_SP_2.qx3 04.5.12 60 Código de acceso paterno La función Paterno evita la visualización de DVD que sobrepasen sus restricciones de clase. Esta función no limi- tará la visualización si el DVD no está clasificado o codifica- do. Revise los DVD y los ajustes antes de permitir el acceso de menores al TV/VCR/DVD. - Page 141 T0006UG_6006UG_SP_2.qx3 04.5.12 Código de acceso paterno (continuación) 61 Presione p para seleccionar CAMBIO, luego presione ENTER. PATERNO NIVEL PATERNO TODO CAMBIO ENTER Presione los botones de número para introducir un código de acceso de cuatro dígitos. Los números del código de acceso aparecerán en la pantalla. Escriba el código de acceso para que no lo olvide.
-
Page 142: Niveles Paternos
T0006UG_6006UG_SP_2.qx3 04.5.12 62 Niveles paternos Siga estos pasos para ajustar el nivel de clase para los DVD. Los DVD cuyas clases sobrepasen el nivel que ajustó no se reproducirán. ● Antes de comenzar, presione SELECT para poner el TV/VCR/DVD en el modo DVD. La luz verde de DVD aparecerá... - Page 143 T0006UG_6006UG_SP_2.qx3 04.5.12 Presione o o p para seleccionar un nivel, luego presione ENTER. Los niveles de clase con- tinúan en dos pantallas de menú. Presione o o p repetidamente para desplazarse a la pantalla siguiente o anterior para encontrar el nivel de clase que desea. Después de tomar la decisión, aparecerá...
-
Page 144: Audio, Sonido Estéreo
T0006UG_6006UG_SP_2.qx3 04.5.12 64 Audio, Sonido estéreo Audio Puede seleccionar un idioma para los DVD durante la repro- ducción si es que se encuentran disponibles varios idiomas. ● Antes de comenzar, presione SELECT para poner el TV/VCR/DVD en el modo DVD. La luz verde de DVD aparecerá... -
Page 145: Reproducción Aleatoria, Reproducción Programada 65
T0006UG_6006UG_SP_2.qx3 04.5.12 Reproducción aleatoria, Reproducción programada 65 Reproducción aleatoria Podrá reproducir pistas de CD de audio, JPEG, o MP3 en orden aleatorio en vez del orden en que fueron grabadas (1,2,3...). ● Antes de comenzar, presione SELECT para poner el TV/VCR/DVD en el modo DVD. -
Page 146: Reproducción De Mp3/Jpeg
T0006UG_6006UG_SP_2.qx3 04.5.12 66 Reproducción de MP3/JPEG El reproductor de DVD reproducirá archivos MP3 y JPEG que grabe y finalice en un CD-RW (disco compacto regrabable) o CD- R (disco compacto grabable). Estos discos pueden contener imágenes en formato JPEG o pistas de audio en formato MP3. -
Page 147: Pantallas De Mp3/Jpeg 67
T0006UG_6006UG_SP_2.qx3 04.5.12 Puede revisar información de la pista MP3 y del archivo JPEG durante la reproducción. ● Antes de comenzar, presione SELECT para poner el TV/VCR/DVD en el modo DVD. La luz verde de DVD aparecerá en la parte delantera del TV/VCR/DVD. Presione DISPLAY durante la reproducción. -
Page 148: Ajustes De Idioma
T0006UG_6006UG_SP_2.qx3 04.5.12 68 Ajustes de idioma Puede utilizar los ajustes de IDIOMA para seleccionar distintos idiomas para el audio o los subtítulos de los DVD, al igual que para los idiomas de los menús del DVD. ● Antes de comenzar, presione SELECT para poner el TV/VCR/DVD en el modo DVD. - Page 149 T0006UG_6006UG_SP_2.qx3 04.5.12 Presione o o p para seleccionar un idioma, luego presione ENTER. Las listas de idiomas continuarán en varias pantallas. Presione o o p para desplazarse a las otras pantallas. ● Si selecciona OTRA, presione cuatro botones de números para introducir el código para el idioma que desee.
-
Page 150: Ajustes De Pantalla
T0006UG_6006UG_SP_2.qx3 04.5.12 70 Ajustes de pantalla En el menú Pantalla podrá cambiar la relación de aspecto de la TV, la claridad del modo vista fija, la disponibilidad del icono de ángulo, y las funciones de auto apagado del menú del reproductor de DVD. ●... - Page 151 T0006UG_6006UG_SP_2.qx3 04.5.12 Presione o o p para seleccionar un elemento, luego presione ENTER. ● Ii seleccionó el ASPECTO TV, presione o o p para seleccionar un ajuste, luego presione ENTER. Escoja 4:3 LETTER BOX si desea ver la imagen completa y ampliada con las barras negras arriba y debajo de la pantalla.
-
Page 152: Ajustes De Audio
T0006UG_6006UG_SP_2.qx3 04.5.12 72 Ajustes de audio Modifique los ajustes de audio basándose en el otro equipo que haya conectado al TV/VCR/DVD o según las funciones de sonido del disco. Estos ajustes sólo afectarán al audio del reproductor de TV/VCR/DVD. ● Antes de comenzar, presione SELECT para poner el TV/VCR/DVD en el modo DVD. -
Page 153: Despliegues En Pantalla 73
T0006UG_6006UG_SP_2.qx3 04.5.12 Pantalla de DVD ● Antes de comenzar, presione SELECT para poner el TV/VCR/DVD en el modo DVD. La luz verde de DVD aparecerá en la parte delantera del TV/VCR/DVD. Presione DISPLAY repetidamente para ver las siguientes pantallas durante la reproducción del DVD. -
Page 154: Virtual Surround
T0006UG_6006UG_SP_2.qx3 04.5.12 74 Nivel de negro,Virtual Surround, Inicializar Nivel de negro Ajuste el nivel de negro para dar más brillo a la imagen del DVD y CD de vídeo durante la reproducción. Durante la reproducción de un DVD, CD de Vídeo presione MODE de modo que se muestre el icono de nivel de negro en la esquina superior izquierda de la pantalla del TV. -
Page 155: Glosario 75
T0006UG_6006UG_SP_2.qx3 04.5.12 Agudeza: su ajuste suaviza o aclara la imagen en la pantalla. Ajuste automático de canal: proceso en el que el TV/VCR/DVD memo- riza todos los canales de TV disponibles. Luego, cuando presiona los botones CH. ▲/▼ , sólo podrá explorar los canales que recibe. Auxiliar (AUX): El canal en el cual ajustó... -
Page 156: Consejos Útiles
T0006UG_6006UG_SP_2.qx3 04.5.12 76 Consejos útiles Si tiene algún problema con su producto, revise la siguiente lista de problemas y posibles soluciones antes de solicitar servicio. Puede que usted sea capaz de resolver el problema por sí solo. Ubicación Para obtener un funcionamiento seguro y un desempeño satisfactorio del TV/VCR/DVD, recuerde lo siguiente: •... - Page 157 T0006UG_6006UG_SP_2.qx3 04.5.12 El TV/VCR/DVD no tiene imagen. • Ajuste la antena o revise la conexión de televisión por cable o de la señal satelital. Si usa una caja de cable/receptor satelital, ajuste el TV/VCR/DVD en el canal 3, 4 ó AUX. Los detalles se encuentran en las páginas ocho y nueve.
-
Page 158: Especificaciones
T0006UG_6006UG_SP_2.qx3 04.5.12 78 Especificaciones Generales TV/VCR 19MDTR20 CRT: Cañón en línea de19 pulgadas, tubo de desviación de 90˚ 27MDTR20 CRT: Cañón en línea de27 pulgadas, tubo de desviación de 110˚ Sistema de subtítulos: §15.119/FCC Cabezales del video: Cuatro cabezales rotativos... -
Page 159: Garantía Limitada 79
Magnavox. Después de un período de noventa (90) días, Magnavox no será responsable de los gastos en que se incurra. PIEZAS: Durante un período de un (1) año, Magnavox proporcionará, sin ningún costo, piezas de repuesto... -
Page 160: Índice
T0006UG_6006UG_SP_2.qx3 04.5.12 80 Índice agudeza ....25 ajuste de la hora ...20-23 ajuste de v-chip .