Magnavox 19MDTR20 Owner's Manual
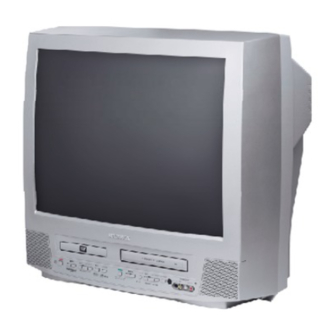
Color tv with built-in vcr and dvd player
Hide thumbs
Also See for 19MDTR20:
- Service manual (399 pages) ,
- Manual del usuario (87 pages) ,
- Owner's manual (160 pages)
Table of Contents
Advertisement
19MDTR20(1-49).QX33
03.3.28 11:52
O
'
WNER
19MDTR20/27MDTR20
C
OLOR
DVD P
AND
Page 1
M
S
ANUAL
TV
WITH BUILT-IN
LAYER
N
EED
M
AGNAVOX REPRESENTATIVES ARE READY TO HELP YOU WITH ANY
QUESTIONS ABOUT YOUR NEW PRODUCT
C
, F
-
ONNECTIONS
IRST
TIME
W
E WANT YOU TO START ENJOYING YOUR NEW PRODUCT RIGHT AWAY
C
ALL US BEFORE YOU CONSIDER RETURNING THE PRODUCT
1-800-705-2000
O
R VISIT US ON THE WEB AT WWW
VCR
H
? C
!
ELP
ALL US
. W
E CAN GUIDE YOU THROUGH
S
,
F
ETUP
AND ANY OF THE
EATURES
.
MAGNAVOX
I
MPORTANT
R
W
R
ETURN YOUR
ARRANTY
EGISTRATION
S
EE WHY INSIDE
.
.
.
.
COM
!
C
10
ARD WITHIN
DAYS
.
.
Advertisement
Table of Contents

Related Manuals for Magnavox 19MDTR20


Summary of Contents for Magnavox 19MDTR20
- Page 1 19MDTR20(1-49).QX33 03.3.28 11:52 ’ WNER ANUAL 19MDTR20/27MDTR20 OLOR WITH BUILT-IN DVD P AGNAVOX REPRESENTATIVES ARE READY TO HELP YOU WITH ANY QUESTIONS ABOUT YOUR NEW PRODUCT ONNECTIONS E WANT YOU TO START ENJOYING YOUR NEW PRODUCT RIGHT AWAY ALL US BEFORE YOU CONSIDER RETURNING THE PRODUCT...
- Page 2 Return your Warranty Registration card today to ensure you receive all the benefits you’re entitled to. Once your MAGNAVOX purchase is registered, you’re eligible to receive all the privileges of own- ing a MAGNAVOX product. So complete and return the Warranty Registration Card enclosed with your purchase at once.
-
Page 3: Safety And General Information 3
Philips Consumer Electronics P.O. Box 14810 Knoxville, TN 37914-1810 (865) 521-4316 As an E ® Partner, Magnavox has determined that this product meets the E NERGY gy efficiency. E ® is a U.S. registered mark. Using products with the E NERGY Saving energy reduces air pollution and lowers utility bills. -
Page 4: Table Of Contents
19MDTR20(1-49).QX33 03.3.28 11:52 4 Table of Contents General Information Safety and General Information ....3 Table of Contents ......4 Introduction . -
Page 5: Introduction 5
19MDTR20(1-49).QX33 03.3.28 11:52 Welcome to your TV/VCR/DVD owner’s manual. This manual describes the 19MDTR20 and 27MDTR20. These two models are different sizes, but they operate identically. The 27MDTR20 is illustrated in this manual. Features - TV/VCR • Automatic Channel Setup •... -
Page 6: Playable Discs And Videotapes
DVD may be listed on the DVD or on the Disc case. Videotapes Magnavox recommends you use only videotapes that have the videotapes may have poor picture quality and cause excessive deposits on the video heads. The warranty may not cover such damage. -
Page 7: Before Using The Tv/Vcr/Dvd 7
19MDTR20(1-49).QX33 03.3.28 11:52 Remote Control Battery Installation Remove the battery compartment lid on the bottom of the remote control. Slide the lid down and off. Follow the direction of the arrow on the lid. Place two AA batteries inside the battery com- partment. -
Page 8: Hooking Up The Tv/Vcr/Dvd
19MDTR20(1-49).QX33 03.3.28 11:52 8 Hooking Up the TV/VCR/DVD Hook up your TV/VCR/DVD using one of the connections shown. Hooking Up Your TV/VCR/DVD with a Cable TV Signal or Outdoor Antenna Hooking Up Your TV/VCR/DVD with a Cable Box/Satellite Receiver To view any channel, set the TV/VCR/DVD to the output channel (channel 03 or 04) of the Cable Box/Satellite Receiver. - Page 9 19MDTR20(1-49).QX33 03.3.28 11:52 Hooking Up Your TV/VCR/DVD with an Indoor Antenna To install an indoor antenna or “rabbit ears” (not supplied), connect the antenna wire to the ANT(enna) Jack on the back of the TV/VCR/DVD as shown. Extend the antenna and adjust its length, direction, and angle for the clearest picture.
-
Page 10: Optional Connections
19MDTR20(1-49).QX33 03.3.28 11:52 10 Optional Connections Analog Stereo Hookups If you want to hear the TV/VCR/DVD sound through a stereo instead, make this connection. Complete the antenna/Cable TV connections. Details are on pages eight- nine. Connect red and white audio... -
Page 11: First-Time Setup,Watching Tv 11
19MDTR20(1-49).QX33 03.3.28 11:52 The TV/VCR/DVD can memorize available TV channels. If you are using a Cable Box or Satellite Receiver, you do not need to set channels at the TV/VCR/DVD. Set the TV/VCR/DVD to the output channel of the Cable Box or Satellite Receiver (channel 03 or 04 or AUX). -
Page 12: Playing A Videotape
19MDTR20(1-49).QX33 03.3.28 11:52 12 Playing a Videotape Follow these steps to simply play a videotape. Videotape play- back options are on pages 34-40. Insert a videotape in the cassette compartment of the TV/VCR/DVD. The power will come on. If the tape’s record tab is missing, play should start auto- matically. -
Page 13: Playing A Disc 13
19MDTR20(1-49).QX33 03.3.28 11:52 Before you begin, turn on the power of other equipment con- nected to the TV/VCR/DVD. Set a stereo (if applicable) to the correct sound source or channel. Details are on page 10. Press STANDBY-ON to turn on the TV/VCR/DVD. -
Page 14: Remote Control Buttons
19MDTR20(1-49).QX33 03.3.28 11:52 14 Remote Control Buttons PICTURE Button Press to access the picture controls. Details are on page 25. STANDBY-ON Button Press to turn on or off the TV/VCR/DVD. Number Buttons TV Mode: Press two digits to access a specific channel. Press 0 before the number of a single-digit channel. -
Page 15: Remote Control Buttons
19MDTR20(1-49).QX33 03.3.28 11:52 ZOOM Button Press to enlarge the picture during DVD playback. Details are on page C.RESET (counter reset) Button Press to reset the tape counter to 0:00:00. Details are on page 36. Press to cancel a timer recording. -
Page 16: Front Panel
19MDTR20(1-49).QX33 03.3.28 11:52 16 Front Panel Cassette Compartment Insert a videotape here. Disc tray Insert a Disc here. CHANNEL K/L Buttons Press to select TV channels. Details are on page 11. OPEN/CLOSE A Button (DVD) Press to open or close the disc tray. -
Page 17: Rear Panel 17
19MDTR20(1-49).QX33 03.3.28 11:52 Page 17 Rear Panel 17 ANT. AUDIO OUT COAXIAL ANT. Jack (Antenna In) Connect an antenna or Cable TV signal here. This brings TV channels to the TV/VCR/DVD. If you do not connect an antenna or Cable TV signal to the TV/VCR/DVD (or connect to a Cable Box/Satellite Receiver through this jack), you will not receive any TV channels. -
Page 18: Menu Language, Resettingtv Channels
19MDTR20(1-49).QX33 03.3.28 11:52 18 Menu Language, Resetting TV Channels Menu Language This affects the language of the TV/VCR/DVD’s setup menus and on-screen display terms. It does not alter the language of TV programming, videotapes, Discs, or closed captioning. Press SETUP once so the TV/VCR SETUP menu appears. -
Page 19: Adding/Deleting Channels 19
19MDTR20(1-49).QX33 03.3.28 11:52 You can delete TV channels you no longer receive or seldom watch. Or, you can add more channels if the TV/VCR/DVD did not memorize all your favorite channels. Before you begin, press SELECT to put the TV/VCR/DVD in TV/VCR mode. The red VCR/TV light will appear. -
Page 20: Setting The Clock
19MDTR20(1-49).QX33 03.3.28 11:52 20 Setting the Clock Manual Clock Setting You must set the clock before you can do a timer recording. Set the clock manually. Afterward, use Auto Clock to moni- tor the time. Details are on pages 22-23. - Page 21 19MDTR20(1-49).QX33 03.3.28 11:52 While the DAY space is flashing, press L or M until the correct day appears. Then, press B. An abbreviation for the selected day of the week will appear. – MANUAL CLOCK SET – MONTH DAY YEAR...
-
Page 22: Auto Clock Setting
19MDTR20(1-49).QX33 03.3.28 11:52 22 Setting the Clock (cont’d) Auto Clock Setting You can have the TV/VCR/DVD adjust the clock using your PBS channel. Once you set the clock manually, the TV/VCR/DVD will monitor the correct time and date broad- cast by the PBS station. -
Page 23: Setting The Clock
19MDTR20(1-49).QX33 03.3.28 11:52 If you already know your PBS channel number, skip ahead to step 8. If you do not know the channel number of your PBS station, press M to select AUTO CLOCK CH SEARCH. Then press ENTER. – SETTING CLOCK –... -
Page 24: Daylight-Savings Time
19MDTR20(1-49).QX33 03.3.28 11:52 24 Daylight-Savings Time When Daylight-Savings Time (D.S.T.) is ON, the clock will move forward one hour on the first Sunday in April and move back one hour on the last Sunday in October. To turn Daylight-Savings Time ON or OFF, follow the steps below. -
Page 25: Status Displays, Picture Controls 25
If this happens, move the TV/VCR/DVD away from the appliance. If the color is still not correct, turn off the power for 30 minutes (for 27MDTR20) or dis- connect the power cord for 30 minutes (19MDTR20).After 30 minutes, try using the unit again. -
Page 26: Videotape Recording
19MDTR20(1-49).QX33 03.3.28 11:52 26 Videotape Recording Place a tape with its record tab intact in the cassette compartment of the TV/VCR/DVD. The TV/VCR/DVD power will come on. If the power is already on and a videotape is in the unit, make sure the unit is in TV/VCR mode. -
Page 27: One-Touch Recording 27
19MDTR20(1-49).QX33 03.3.28 11:52 A One-Touch Recording (OTR) is an immediate timed recording from 30 minutes to eight hours long. Before you begin ... Turn on the TV/VCR/DVD. Press SELECT to put the unit in TV/VCR mode. The red VCR/TV light will appear on the front of the unit. -
Page 28: Timer Recording
19MDTR20(1-49).QX33 03.3.28 11:52 28 Timer Recording Follow the steps below to program the TV/VCR/DVD to record TV programs while you’re away from home. The TV/VCR/DVD will record and turn itself off automatical- ly. You can set a maximum of eight timer recordings. - Page 29 19MDTR20(1-49).QX33 03.3.28 11:52 While DATE is selected, press L or M until the correct date appears. Recording will happen once. – TIMER PROGRAMMING – DATE BEGIN - - - - - - - - - - - - - - -...
-
Page 30: Helpful Hints
19MDTR20(1-49).QX33 03.3.28 11:52 30 Timer Recording (cont’d) While END is selected, press L or M to select the hour at which you want recording to stop. AM or PM will appear with the hour. Then, press B and press L or M to select the minute at which you want recording to end. - Page 31 19MDTR20(1-49).QX33 03.3.28 11:52 Extending a Timer Recording To make a Timer Recording start and end later than originally scheduled, follow these steps. With the unit on, press SETUP. Press L or M to select TIMER PRO- GRAMMING. Press ENTER. Press RECORD, then press L or M to select the desired program.
-
Page 32: Timer Recording Auto Return
19MDTR20(1-49).QX33 03.3.28 11:52 32 Timer Recording Auto Return Use this feature to rewind the tape to the beginning of a completed timer recording. Press SETUP. Press L or M to select USER’S SET UP. Then, press ENTER. – TV/VCR SETUP –... -
Page 33: Rerecording (Tape Duplication) 33
19MDTR20(1-49).QX33 03.3.28 11:52 AUDIO and VIDEO OUT Jacks on source unit (VCR or Camcorder) AUDIO VIDEO VIDEO OUT to VIDEO In Make the connections shown above. Use audio and video cables (not supplied). Connect the source unit (VCR or Camcorder) to a power source after connections are made. -
Page 34: Repeat Play
19MDTR20(1-49).QX33 03.3.28 11:52 34 Repeat Play Repeat Play allows you to play a videotape continuously. ALL REPEAT will repeatedly play the tape from the begin- ning to the end. BLANK REPEAT will repeatedly play the tape from its beginning to the first part that is blank for more than 10 seconds. -
Page 35: Rental Play 35
19MDTR20(1-49).QX33 03.3.28 11:52 This function enables you to improve picture quality when playing worn cassettes such as rented videotapes. Press SETUP. Press L or M to select USER’S SET UP. Then, press ENTER. – TV/VCR SETUP – TIMER PROGRAMMING SETTING CLOCK... -
Page 36: Zero Return, Sleep Timer
19MDTR20(1-49).QX33 03.3.28 11:52 36 Zero Return, Sleep Timer Zero Return The videotape counter shows the elapsed recording or play- back time in hours, minutes, and seconds from the point at which the counter was set to zero. The counter time will not change on a blank tape or blank portions on a tape. -
Page 37: Time Search 37
19MDTR20(1-49).QX33 03.3.28 11:52 Time Search lets you quickly advance the videotape to a posi- tion simply by entering the amount of playback time you want to skip. In the example below, Time Search is set to 2 hours, 50 min- utes from the present position. -
Page 38: Index Search
19MDTR20(1-49).QX33 03.3.28 11:52 38 Index Search This feature lets you quickly rewind or fast forward to the start of recordings. Index Marks are made automatically at the start of all recordings. They are not made where recording pauses. The time gap between Index Marks should be greater than one minute for SP recording and three minutes for SLP recording. -
Page 39: Videotape Playback Features 39
19MDTR20(1-49).QX33 03.3.28 11:52 Slow Motion Press k (pause) during play to pause the videotape. Then press i / g to start slow motion. Sound will be mute during slow motion. Slow motion will stop automatically after five minutes to prevent damage to the tape. -
Page 40: Automatic Operation Features
19MDTR20(1-49).QX33 03.3.28 11:52 Page 40 40 Automatic Operation Features The following videotape features are available. Automatic Rewind, Eject, Off When you play, fast forward, or record a videotape to its end, the TV/VCR/DVD will rewind the tape, stop, turn itself off, and eject the tape. -
Page 41: Closed Captions 41
19MDTR20(1-49).QX33 03.3.28 11:52 Follow the steps below to select closed captions for TV pro- gramming. Not all TV programs and commercials have closed captions or all types of closed captions (second language, half-screen text, etc.). If closed captioning is not broadcast, you cannot receive it. -
Page 42: Setting V-Chip
19MDTR20(1-49).QX33 03.3.28 11:52 42 Setting V-Chip TV Rating Settings V-CHIP enables parents to prevent their children from watching inappropriate material on TV. V-CHIP reads the ratings for programming (except for news and sports pro- grams, unedited movies on premium cable channels, and Emergency Broadcast System signals), then denies access to programming if the program’s rating meets the limitations... - Page 43 19MDTR20(1-49).QX33 03.3.28 11:52 Press L or M to select the TV Rating level at which you want to block viewing, then press ENTER once. If you press ENTER again, the subrat- ings for that category will appear. Details are on pages 44-45.
- Page 44 19MDTR20(1-49).QX33 03.3.28 11:52 44 Setting V-Chip (cont’d) TV Rating Subratings When you select TV-Y7, TV-PG, TV-14, or TV-MA, you can use the subratings to block specific elements of program- ming, such as language or violence. Press SETUP. Press L or M to select V-CHIP SET UP.
- Page 45 19MDTR20(1-49).QX33 03.3.28 11:52 Press L or L to select the rating you wish to adjust. Then, press ENTER twice to go to its subratings. TV-Y7 [BLOCK] [BLOCK] When you select TV-Y7: Press L or M to select FV (Fantasy Violence, vio- lence that seems realistic to young children).
- Page 46 19MDTR20(1-49).QX33 03.3.28 11:52 46 Setting V-Chip (cont’d) MPAA Rating Settings You can block TV channel viewing according to the Motion Picture Association ratings. To do so, follow these steps. Press SETUP. Press L or M to select V-CHIP SET UP.
-
Page 47: Setting V-Chip
19MDTR20(1-49).QX33 03.3.28 11:52 Changing the Access Code Although the default code 0000 is supplied with the TV/VCR/DVD, you can set your own access code. Press SETUP. Press L or M to select V-CHIP SET UP. Then, press ENTER. Press the Number buttons to enter the old access code. -
Page 48: Multi-Channel Television Sound
19MDTR20(1-49).QX33 03.3.28 11:52 48 Multi-Channel Television Sound Press DISPLAY to see the sound status. During TV viewing, press DISPLAY twice. During tape play, press DISPLAY once. STOP 12:00AM CH 123 HIFI STEREO/SAP COUNT 0:00:00 When a TV program is broadcast in stereo, STEREO appears in the top right corner of the screen. - Page 49 19MDTR20(1-49).QX33 03.3.28 11:52 Multi-Channel Television Sound (cont’d) 49 Selecting HiFi or Monaural Sound You can play videotapes in either High Fidelity (HIFI) or Monaural (MONO or single-channel) sound. To do so, fol- low these steps. Press SETUP. Press L or M to select USER’S SET UP.
-
Page 50: Multi-Channel Television Sound
19MDTR20(50-80).QX33 03.3.28 11:59 50 Multi-Channel Television Sound (cont’d) Setting the TV/VCR/DVD to receive or record TV programs in Stereo, Second Audio, or Monaural Sound Because TV channels can broadcast in Stereo or Second Audio, set the TV/VCR/DVD to receive and record the channels in the sound mode you prefer. -
Page 51: Disc Menus,Title Menus 51
19MDTR20(50-80).QX33 03.3.28 11:59 Disc Menus Some DVDs contain menus that describe the contents of the Disc or allow you to customize Disc playback. For example, the menu may offer choices for subtitle languages, special features, or scene selection. To use the DVD Disc menu and select playback features, follow these steps. -
Page 52: Fast Forward/Reverse Search
19MDTR20(50-80).QX33 03.3.28 11:59 52 Fast Forward/Reverse Search During Disc play, press and hold i/g or j/h on the remote for two seconds. During DVD play, pressing and holding i/g or j/h will forward or reverse the picture at two, eight, 50, or 100 times the normal playback speed. -
Page 53: Title/Chapter Playback,Time Playback 53
19MDTR20(50-80).QX33 03.3.28 11:59 Title/Chapter Playback,Time Playback 53 Title/Chapter Playback During DVD play, press SEARCH MODE until CH (for Chapter) or TT (for Title) appears on the TV screen. The number of available Titles or Chapters will appear at the right ( /4, for example). -
Page 54: Track Play
19MDTR20(50-80).QX33 03.3.28 11:59 54 Track Play There are three ways to play a Track on an Audio CD. Use the Number buttons, the SEARCH MODE button, or i/g and j/h . Before you begin, press SELECT to put the TV/VCR/DVD in DVD mode. Make sure an Audio CD is in the disc tray. -
Page 55: Paused And Step-By-Step Play, Resume On 55
19MDTR20(50-80).QX33 03.3.28 11:59 Paused and Step-by-Step Play, Resume On 55 Paused and Step-by-Step Play During Disc play, press F (pause). Play will pause and the sound will be mute. When playing a DVD, press F (pause) repeat- edly to see the picture advance one frame (or step) at a time. -
Page 56: Repeat Play, A-B Repeat Play
19MDTR20(50-80).QX33 03.3.28 11:59 56 Repeat Play, A-B Repeat Play Repeat Play During DVD or Audio CD play, press REPEAT until the repeat mode you want appears on the TV. On a DVD, select CHAPTER, TITLE, or OFF. On an Audio CD, select TRACK, ALL (all Tracks on the Disc), or OFF. -
Page 57: Markers 57
19MDTR20(50-80).QX33 03.3.28 11:59 Use Markers to remember your favorite places on an Audio CD or DVD. To set the Markers, follow these steps. Play the Disc to within 30 seconds prior to the point at which you want to set the Marker. During play, press SEARCH MODE until the Markers appear at the top of the TV screen. -
Page 58: Subtitles, Camera Angles
19MDTR20(50-80).QX33 03.3.28 11:59 58 Subtitles, Camera Angles Subtitles You can select a language for DVD subtitles during playback. You may select only the subtitles that are available on the Disc. During play, press SUBTITLE to select a subti- tle language. The number of available languages appears at the right of the subtitle display. -
Page 59: Slow Motion, Zoom 59
19MDTR20(50-80).QX33 03.3.28 11:59 Slow Motion Press F (pause) during DVD play. Press and hold i/D or H/h for two sec- onds. Slow motion play will begin. Press and hold i/D or H/h repeatedly during slow motion play to play the DVD forward or backward at 1/16, 1/8, or 1/2 the normal speed. -
Page 60: Parental Password
19MDTR20(50-80).QX33 03.3.28 11:59 60 Parental Password The Parental feature prevents viewing of DVDs that exceed your rating limits. This feature will not limit viewing if the DVD is not rated or coded. Check your DVDs and settings before letting children access the TV/VCR/DVD. Follow these steps to change your password. - Page 61 19MDTR20(50-80).QX33 03.3.28 11:59 Press p to select CHANGE, then press ENTER. PARENTAL PARENTAL LEVEL ALL CHANGE Press the Number buttons to enter a four-digit password. The password numbers will appear on the screen. Write down the password so you will not for- get it.
-
Page 62: Parental Levels
19MDTR20(50-80).QX33 03.3.28 11:59 62 Parental Levels Follow these steps to set the rating level for your DVDs. DVDs whose ratings exceed the level you set will not play. Before you begin, press SELECT to put the TV/VCR/DVD in DVD mode. -
Page 63: Parental Levels
19MDTR20(50-80).QX33 03.3.28 11:59 Press o or p to select a level, then press ENTER. The rating levels continue on two menu screens. Press o or p repeatedly to move to the next or previous screen to find the rating level you want. -
Page 64: Audio Language, Stereo Sound
19MDTR20(50-80).QX33 03.3.28 11:59 64 Audio Language, Stereo Sound Audio Language You can select a language for DVDs during play if multiple languages are available. During DVD play, press AUDIO repeatedly to choose one of the available languages. The new audio will be heard. The display will disappear after about five seconds. -
Page 65: Random Play, Programmed Play 65
19MDTR20(50-80).QX33 03.3.28 11:59 Random Play You may play the Tracks of an Audio CD in Random order instead of the order in which they are recorded (1,2,3...). You can also use this feature for JPEG and MP3 files. While play is stopped, press MODE until the RANDOM screen appears. -
Page 66: Mp3/Jpeg Playback
19MDTR20(50-80).QX33 03.3.28 11:59 66 MP3/JPEG Playback The DVD Player will play MP3 or JPEG files that you record and finalize on a CD-RW (Compact Disc-Rewritable) or CD-R (Compact Disc-Recordable). These Discs may contain pictures in a JPEG format or audio Tracks in an MP3 format. -
Page 67: Mp3/Jpeg Displays 67
19MDTR20(50-80).QX33 03.3.28 11:59 You can review MP3 and JPEG Track (File) information dur- ing playback. Press DISPLAY until the current Track/File number, total Tracks/Files available, and elapsed playing time of the current Track appear. The elapsed playing time will not show during JPEG play. -
Page 68: Language Settings
19MDTR20(50-80).QX33 03.3.28 13:07 68 Language Settings You can use the LANGUAGE settings to select different lan- guages for the Audio or Subtitles of DVDs, as well as languages for DVD Disc menus. Before you begin, press SELECT to put the TV/VCR/DVD in DVD mode. - Page 69 19MDTR20(50-80).QX33 03.3.28 11:59 Press o or p to select a language, then press ENTER. The language lists may continue on multi- ple screens. Press o or p to move to the other screens. If you select OTHER, press four Number buttons to enter the code for the language you desire.
-
Page 70: Display Settings
19MDTR20(50-80).QX33 03.3.28 11:59 70 Display Settings You can adjust TV Mode, Angle Icon, and Automatic Power Off in the Display menu. Before you begin, press SELECT to put the TV/VCR/DVD in DVD mode. When play is stopped, press SETUP twice. -
Page 71: Display Settings
19MDTR20(50-80).QX33 03.3.28 11:59 Press o or p to select an item, then press ENTER. If you selected TV MODE, press o or p to select a setting, then press ENTER. Choose 4:3 LETTER BOX if you want to see the entire, widened picture with black bars at the top and bottom of the screen. -
Page 72: Audio Settings
19MDTR20(50-80).QX33 03.3.28 11:59 72 Audio Settings Change Audio settings based on other equipment you con- nected to the TV/VCR/DVD or according to your Disc sound features. Before you begin, press SELECT to put the TV/VCR/DVD in DVD mode. While play is stopped, press SETUP twice. The QUICK SETUP screen will appear. -
Page 73: On-Screen Displays 73
19MDTR20(50-80).QX33 03.3.28 11:59 DVD Display Press DISPLAY repeatedly to see the following displays during DVD play. CH 7/49 0:01:46 - 0:03:27 CH (Chapter): Current Chapter number / total Chapters 0:00:00 - 1:23:45 TT (Title): Current Title number / Total Titles Press DISPLAY repeatedly or press RETURN to remove the display. -
Page 74: Black Level,Virtual Surround
19MDTR20(50-80).QX33 03.3.28 11:59 74 Black Level,Virtual Surround Black Level Adjust Black Level to brighten the DVD picture. During DVD play, press MODE so the Black Level icon shows in the top left corner of the TV screen. Within 10 seconds, press ENTER to choose ON or OFF. -
Page 75: Glossary 75
19MDTR20(50-80).QX33 03.3.28 11:59 AUDIO In Jacks: red and white jacks on the front of the TV/VCR/DVD which are used to receive or record audio from another source (VCR, Camcorder, etc.). Automatic Channel Setup: process in which the TV/VCR/DVD memo- rizes all available TV channels. Then, when you push the CH. L/M buttons, you only scan through channels you receive. -
Page 76: Helpful Hints
19MDTR20(50-80).QX33 03.3.28 11:59 76 Helpful Hints If you are having problems with your product, check this list of problems and possible solutions before requesting service. You may be able to solve the problem yourself. Location For safe operation and satisfactory performance of your TV/VCR/DVD, remember the following: •... -
Page 77: Helpful Hints
19MDTR20(50-80).QX33 03.3.28 11:59 Disc cannot play. • Insert a playable Disc. Make sure the Disc is labelled for Region 1 or ALL regions and is NTSC compatible. Details are on page six. • Place the Disc correctly in the Disc tray. If the Disc is one-sided, place the Disc in the tray with the label fac- ing up. -
Page 78: Specifications
19MDTR20(50-80).QX33 03.3.28 11:59 78 Specifications General TV/VCR CRT: 19 inch in-line gun, 19MDTR20: 90˚ deflection tube 27MDTR20: 27 inch in-line gun, 110˚ deflection tube Closed Caption system: §15.119/FCC Video Heads: Rotary four-head 1/2 inch Tape width: Tape speeds 33.40 mm/sec. -
Page 79: Limited Warranty 79
TV/VCR/DVD COMBINATION 90 Days Free Labor/One Year Parts Exchange The 27MDTR20 can be repaired in-home. The 19MDTR20 should be carried in for repair. attempt to provide service (although there may be a delay if the appropriate spare parts and technical manual(s) are not readily available). -
Page 80: Index
19MDTR20(50-80).QX33 03.3.28 11:59 80 Index a-b repeat ....56 angle button ....15, 58 ant(enna) jack .