Table of Contents
Advertisement
Quick Links
Advertisement
Table of Contents

Related Manuals for Clevo TN120R


Summary of Contents for Clevo TN120R
- Page 1 Version V09.2.03...
- Page 3 Preface Notice The company reserves the right to revise this publication or to change its contents without notice. Information contained herein is for reference only and does not constitute a commitment on the part of the manufacturer or any subsequent vendor. They assume no responsibility or liability for any errors or inaccuracies that may appear in this publication nor are they in anyway responsible for any loss or damage resulting from the use (or misuse) of this publication.
-
Page 4: Fcc Statement
Preface FCC Statement (Federal Communications Commission) You are cautioned that changes or modifications not expressly approved by the party responsible for compliance could void the user's authority to operate the equipment. This equipment has been tested and found to comply with the limits for a Class B digital device, pursuant to Part 15 of the FCC Rules. -
Page 5: Fcc Rf Radiation Exposure Statement
Preface FCC RF Radiation Exposure Statement: This Transmitter must not be co-located or operating in conjunction with any other antenna or transmitter. This equipment complies with FCC RF radiation exposure limits set forth for an uncontrolled environment. This equipment should be installed and operated with a minimum distance of 20 centimeters between the radiator and your body. -
Page 6: Important Safety Instructions
Preface IMPORTANT SAFETY INSTRUCTIONS Follow basic safety precautions, including those listed below, to reduce the risk of fire, electric shock, and injury to persons when using any electrical equipment: Do not use this product near water, for example near a bath tub, wash bowl, kitchen sink or laundry tub, in a wet basement or near a swimming pool. -
Page 7: Instructions For Care And Operation
Preface Instructions for Care and Operation The notebook computer is quite rugged, but it can be damaged. To prevent this, follow these suggestions: Don’t drop it, or expose it to shock. If the computer falls, the case and the components could be damaged. Do not expose the computer Do not place it on an unstable Do not place anything heavy... - Page 8 Preface Avoid interference. Keep the computer away from high capacity transformers, electric motors, and other strong magnetic fields. These can hinder proper performance and damage your data. Follow the proper working procedures for the computer. Shut the computer down properly and don’t forget to save your work.
-
Page 9: Power Safety
Preface Power Safety The computer has specific power requirements: • Only use a power adapter approved for use with this computer. • Your AC/DC adapter may be designed for international travel but it still requires a Power Safety steady, uninterrupted power supply. If you are unsure of your local power specifications, Warning consult your service representative or local power company. -
Page 10: Battery Precautions
Preface Battery Precautions • Only use batteries designed for this computer. The wrong battery type may explode, leak or damage the computer. • Do not remove any batteries from the computer while it is powered on. • Do not continue to use a battery that has been dropped, or that appears damaged (e.g. bent or twisted) in any way. Even if the computer continues to work with a damaged battery in place, it may cause circuit damage, which may possibly result in fire. -
Page 11: Cleaning
Preface Cleaning Do not apply cleaner directly to the computer; use a soft clean cloth. Do not use volatile (petroleum distillates) or abrasive cleaners on any part of the computer. Servicing Do not attempt to service the computer yourself. Doing so may violate your warranty and expose you and the computer to electric shock. -
Page 12: Travel Considerations
Preface Travel Considerations Packing As you get ready for your trip, run through this list to make sure the system is ready to go: Check that the battery pack and any spares are fully charged. Power off the computer and peripherals. Close the display panel and make sure it’s latched. - Page 13 Preface On the Road In addition to the general safety and maintenance suggestions in this preface, and Chapter 8: Troubleshooting, keep these points in mind: Hand-carry the notebook - For security, don’t let it out of your sight. In some areas, computer theft is very common.
- Page 14 Preface Developing Good Work Habits Developing good work habits is important if you need to work in front of the computer for long periods of time. Improper work habits can result in discomfort or serious injury from repetitive strain to your hands, wrists or other joints.
-
Page 15: Lcd Screen Care
Preface Lighting Proper lighting and comfortable display viewing angle can reduce eye strain and muscle fatigue in your neck and shoulders. • Position the display to avoid glare or reflections from overhead lighting or outside sources of light. • Keep the display screen clean and set the brightness and contrast to levels that allow you to see the screen clearly. •... - Page 16 Preface...
-
Page 17: Table Of Contents
Preface Contents Notice .................I Tablet PC Input Panel ..........1-11 FCC Statement .............II System Map: LCD Panel Open ........1-12 FCC RF Radiation Exposure Statement: ....III LED Indicators ............1-13 Instructions for Care and Operation ......V Keyboard ..............1-14 Power Safety .............VII Function Keys &... - Page 18 Preface Inserting and Removing ExpressCards .......2-7 New Battery ..............3-12 Touchpad and Buttons/Mouse ........2-8 Recharging the Battery with the AC/DC Adapter ..3-12 Audio Features ...............2-9 Proper handling of the Battery Pack ......3-13 Tablet PC Options ............2-10 Battery FAQ ..............3-14 Adding a Printer ............2-15 Drivers &...
- Page 19 Preface Bluetooth Module ............4-8 Mode Selection [AHCI] ..........5-9 PC Camera Module ............4-8 Reset Configuration Data (Advanced Menu) ....5-10 3.75G/HSPA Module ..........4-8 Boot-time Diagnostic Screen (Advanced Menu) ..5-10 Wireless LAN Module ..........4-8 Legacy OS Boot (Advanced Menu) ......5-10 Fingerprint Reader Module ........4-8 Power On Boot Beep (Advanced Menu) .....5-10 Intel Turbo Memory Technology Driver ....4-8 Battery Low Alarm Beep (Advanced Menu) ....5-10...
- Page 20 Preface Bluetooth Module ............7-2 Intel Turbo Memory Module ........7-45 Bluetooth Configuration in Windows Vista ....7-3 Intel Turbo Memory Setup ........7-46 PC Camera Module ............7-6 Intel Turbo Memory Driver Installation ....7-47 PC Camera Driver Installation ........7-7 Troubleshooting 3.75G/HSPA Module ...........7-14 USIM Card Installation ..........7-15 Overview ................8-1 3G Watcher Application ..........7-18 Basic Hints and Tips ............8-2...
- Page 21 Preface Specifications Windows XP Information Processor ............... C-2 Tablet PC Features ............D-2 Core Logic ..............C-2 On-Screen Menu ............D-3 LCD ................C-2 DVD Regional Codes ...........D-4 Memory ................. C-3 Windows XP Start Menu & Control Panel ....D-5 Video Adapter ............... C-3 Touchpad and Buttons/Mouse ........D-6 Security .................
- Page 22 Preface Driver Installation Procedure ........D-32 PC Camera Module ............. D-35 Bluetooth Module ............D-41 3.75G/HSPA Module ..........D-46 Wireless LAN Module ..........D-49 Fingerprint Reader Module ......... D-52 Fingerprint Control Center Features ......D-55...
-
Page 23: Quick Start Guide
Quick Start Guide Chapter 1: Quick Start Guide Overview This Quick Start Guide is a brief introduction to the basic features of your computer, to navigating around the computer and to getting your system started. The remainder of the manual covers the following: •... -
Page 24: Advanced Users
Quick Start Guide Advanced Users If you are an advanced user you may skip over most of this Quick Start Guide. However you may find it useful to refer to “What to Install” on page 4 - “BIOS Utilities” on page 5 - 1 “Upgrading The Computer”... -
Page 25: Not Included
Quick Start Guide Not Included Operating Systems (e.g. Windows Vista/Windows XP) and applications (e.g. word processing, spreadsheet and database programs) have their own manuals, so please consult the appropriate manuals. Drivers If you are installing new system software, or are re-configuring your computer for a different system, you will need to install the drivers listed in Table 4 - 1, on page 4 - 3. -
Page 26: System Software
Quick Start Guide System Software Your computer may already come with system software pre-installed. Where this is not the case, or where you are re-configuring your computer for a different system, you will find the following operating systems are sup- ported. -
Page 27: System Startup
Quick Start Guide System Startup Remove all packing materials and place the computer on a stable surface. Securely attach any peripherals you want to use with the notebook (e.g. keyboard and mouse) to their ports. Attach the AC/DC adapter to the DC-In jack at the rear of the computer, then plug the AC power cord into an outlet, and connect the AC power cord to the AC/DC adapter. -
Page 28: Operating System Setup
Quick Start Guide Operating System Setup If you are installing new system software, or are re-configuring your computer for a different system, make sure you configure the appropriate OS setting in the BIOS before installing a new operating system. 1. Start-up the computer and press <F2> to enter the BIOS. 2. -
Page 29: Rotating The Lcd Panel
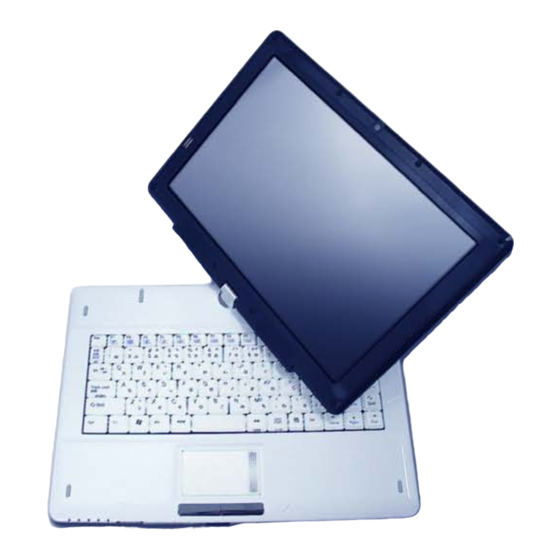
Quick Start Guide Rotating The LCD Panel You can use the computer either in Notebook Mode, or in Tablet Mode. To put the computer into Tablet Mode: Raise the lid/LCD panel Carefully rotate the lid/LCD panel fully in the (clockwise) direction indicated by the arrow , until it is unable to rotate any further Carefully push the lid/LCD panel down into Tablet Mode... -
Page 30: Tablet Notebook Input
Quick Start Guide Tablet Notebook Input Use the stylus pen provided to interact with the computer in the same way you would use the mouse (tap twice to double-click and keep the pen in contact with the screen to right-click). Before using the stylus pen you should calibrate the touch screen. - Page 31 Quick Start Guide 4. Use the stylus pen to touch the blinking symbol until symbol changes color (maintain contact until the symbol stops blinking) and you will be prompted to lift up the pen. 5. Repeat the process for all the remaining screen points. 6.
-
Page 32: Stylus Pen Input
Quick Start Guide Stylus Pen Input Configure the stylus pen input settings from the Pen and Input Devices control panel in Windows Vista. Access the control panel as follows: Click Start, and click Control Panel (or point to Settings and click Control Panel). Click Mobile PC and double-click Pen and Input Devices (or just double-click Pen and Input Devices Click Touch (tab). -
Page 33: Tablet Pc Input Panel
Quick Start Guide Tablet PC Input Panel When not in use the Tablet PC Input Panel (not available in Windows Vista Home Basic Edition) docks at the side of the screen (and may be docked at either side of the screen at any height) with just a small portion visible. Move the pen over the TIC and then tap it to activate it. -
Page 34: System Map: Lcd Panel Open
Quick Start Guide System Map: LCD Panel Open Figure 1 - 8 LCD Panel Open Wireless Device Built-In PC Camera Operation Aboard (Optional) Aircraft The use of any portable elec- Fingerprint Reader tronic transmission devices Module (Optional) aboard aircraft is usually prohib- Menu &... -
Page 35: Led Indicators
Quick Start Guide LED Indicators Icon Color Description The two sets of LED indicators (LED Status Indica- Orange DC Power is Plugged In tors and LED Power & Communication Indicators) on the computer display helpful information about the Green The Computer is On current status of the computer. -
Page 36: Keyboard
Quick Start Guide Keyboard The keyboard has a numerical keypad for easy numeric data input, and features function keys to allow you to change operational features instantly (see Figure 1 - 9). See Table 1 - 4, on page 1 - 15 for details of the function/ hot key indicators. -
Page 37: Function Keys & Visual Indicators
Quick Start Guide Function Keys & Visual Indicators The function keys (F1 - F12 etc.) will act as hot keys when pressed while the Fn key is held down. In addition to the basic function key combinations; visual indicators (see the table below) are available when the Hot Key driver is in- “Hot Key AP”... -
Page 38: On-Screen Menu
Quick Start Guide On-Screen Menu Pressing the Menu button on the computer will bring up the On-Screen Menu buttons (make sure you install the menu driver - see “Hot Key AP” on page 4 - 6). Use the stylus pen to touch any of the buttons to activate the control (note the ON/OFF buttons do not display the current power status of the modules, but the power status that will be executed when you tap the button e.g. -
Page 39: System Map: Front & Rear Views
Quick Start Guide System Map: Front & Rear Views Figure 1 - 10 Front & Rear Views LED Power & Com- munication Indica- tors Power Switch S/PDIF-Out Jack Microphone-In Jack Headphone-Out Jack 7-in-1 Card Reader Stylus Pen Holder 7-in-1 Card Reader Security Lock Slot 2 * USB 2.0 Ports The card reader allows you to use the most popular digital storage card formats:... -
Page 40: System Map: Left & Right Views
Quick Start Guide System Map: Left & Right Views Figure 1 - 11 Left & Right Views Mini-IEEE 1394 Stylus Pen Holder Port Optical Device Drive Bay (for CD/ Mini-IEEE DVD Device - see 1394 port only page supports SELF 1 * USB 2.0 Port POWERED IEEE RJ-11 Phone Jack... - Page 41 Quick Start Guide Disk Eject Warning Changing DVD Regional Codes Don’t try to eject a CD/DVD while the system is access- Go to the Control Panel and double-click Device Man- ing it. This may cause the system to “crash”. Stop the ager (Hardware and Sound), then click the + next to disk first then eject it, or press the stop button twice.
-
Page 42: System Map: Bottom View
Quick Start Guide System Map: Bottom View Figure 1 - 12 Bottom View Battery The CPU is not a user Hard Disk Bay serviceable part. Open- Cover ing this compartment, or (3.75G Module accessing the CPU in Location) any way, may violate RAM &... -
Page 43: Windows Vista Start Menu & Control Panel
Quick Start Guide Windows Vista Start Menu & Control Panel Most of the control panels, utilities and programs within Windows Vista (and most other Windows versions) are accessed from the Start menu. When you install programs and utilities they will be installed on your hard disk drive, and a shortcut will usually be placed in the Start menu and/or the desktop. -
Page 44: Video Features
Quick Start Guide Video Features You can switch display devices, and configure display options, from the Display Settings control panel (in Per- sonalization) in Windows Vista as long as the appropriate Intel video driver is installed. For more detailed vid- eo information see “Intel Video Driver Controls”... - Page 45 Quick Start Guide Figure 1 - 14 - Display Properties Desktop Intel Display Mode Description Single Mode One of the connected displays is used as the display device Intel(R) Dual Display Clone Mode Both connected displays output the same view and may be configured independently Extended Desktop Mode Both connected displays are treated as separate devices, and act as a virtual desktop Table 1 - 6 - Display Options...
-
Page 46: Power Options
Quick Start Guide Power Options The Power Options (Hardware and Sound menu) control panel icon in Windows (see page 21) allows you to configure power management features for your computer. You can conserve power by means of power plans and configure the options for the power button, sleep button, computer lid (when closed), display and sleep mode from the left menu. -
Page 47: Features & Components
Features & Components Chapter 2: Features & Components Overview Read this chapter to learn more about the following main features and components of the computer: • Hard Disk Drive • Optical (CD/DVD) Device • 7-in-1 Card Reader • ExpressCard Slot •... -
Page 48: Hard Disk Drive
Features & Components Hard Disk Drive The hard disk drive is used to store your data in the computer. The hard disk can be Power Safety taken out to accommodate other 2.5" serial (SATA) hard disk drives (see “Storage” on page C - 3) with a height of 9.5 mm. -
Page 49: Optical (Cd/Dvd) Device
Features & Components Optical (CD/DVD) Device There is a bay for a 5.25" optical (CD/DVD) device (12.7mm height). The actual de- Sound Volume vice will depend on the module you purchased (see “Storage” on page C - 3). The Adjustment optical device is usually labeled “Drive D:”... -
Page 50: Handling Cds Or Dvds
Features & Components Handling CDs or DVDs Proper handling of your CDs/DVDs will prevent them from being damaged. Please follow the advice below to make sure that the data stored on your CDs/DVDs can be CD Emergency Eject accessed. If you need to manually eject a CD (e.g. -
Page 51: Dvd Regional Codes
Features & Components DVD Regional Codes To change the DVD regional codes see “Changing DVD Regional Codes” on page 1 - DVD Regional Coding Table 2 - 1 Region Geographical Location DVD Regional Coding USA, Canada Western Europe, Japan, South Africa, Middle East &... -
Page 52: 7-In-1 Card Reader
Features & Components 7-in-1 Card Reader The card reader allows you to use some of the latest digital storage cards. Push the Card Reader Cover card into the slot and it will appear as a removable device, and can be accessed in the same way as your hard disk (s). -
Page 53: Expresscard Slot
Features & Components ExpressCard Slot The computer is equipped with an ExpressCard/34/54 slot that reads Express Card/ ExpressCard 34 and ExpressCard/54 formats. ExpressCards are the successors to PCMCIA (PC Slot Cover Cards). Make sure you install the Card Reader driver (see “Card Reader”... -
Page 54: Touchpad And Buttons/Mouse
Features & Components Touchpad and Buttons/Mouse The Touchpad is an alternative to the mouse; however, you can also add a mouse to Mouse Driver your computer through one of the USB ports. The Touchpad buttons function in much the same way as a two-button mouse. If you are using an exter- nal mouse your operat- Once you have installed the Touchpad driver (see... -
Page 55: Audio Features
Features & Components Audio Features You can configure the audio options on your computer from the Sound control Sound Volume panel in Windows, or from the Realtek HD Audio Manager icon in the taskbar/ Adjustment control panel (right-click the taskbar icon to bring up an audio menu). -
Page 56: Tablet Pc Options
Features & Components Tablet PC Options Chapter 1 contains information on rotating the screen into Tablet mode (see “Ro- Windows Vista tating The LCD Panel” on page 1 - 7), Tablet PC input (see “Tablet PC Input” on Home Basic Edition page 1 - 8) and the On-Screen Menu functions (see “On-Screen Menu”... - Page 57 Features & Components Flicks Flicks are quick gestures that can be assigned various actions (similar to quickly drawing a line in one of eight directions). It is important that the motion is straight Pen Flick Training and quick. Configure flicks from the Pen and Input Devices control panel (see page Click Practice using 11).
- Page 58 Features & Components Handwriting Recognition You can teach the computer to recognize your handwriting in order to help to mini- mize data entry errors when using the writing or character pads. Handwriting Recognition Help Open the Tablet PC Input Panel (see “Tablet PC Input Panel”...
- Page 59 Features & Components Other Useful Windows Vista Features for Tablet PC Users Multi-Select Files in Windows Explorer The option to multi-select files in Windows Explorer in Windows Vista is very useful when using a pen as your input device. Click Start, and click Control Panel (or point to Settings and click Control Panel). Click Appearance and Personalization and click Folder Options (or just double-click Folder Options).
- Page 60 Features & Components Internet Explorer Panning Hand Tool Internet Explorer has a Panning Hand tool that allows easier navigation of Inter- net webpages. Simply click the Panning Hand icon in the Command Bar to activate the tool. The hand icon will appear to allow you to pan around the webpage, however the icon will change to a pointed finger icon when you move across a link.
-
Page 61: Adding A Printer
Features & Components Adding a Printer The most commonly used peripheral is a printer. The following conventions will Parallel Printer help you to add a printer; however it is always best to refer to the printer manual for specific instructions and configuration options. After setting up the print- er attach the parallel ca- USB Printer... - Page 62 Features & Components 2 - 16...
-
Page 63: Power Management
Power Management Chapter 3: Power Management Overview OS Note Power management To conserve power, especially when using the battery, your computer power man- functions will vary slight- agement conserves power by controlling individual components of the computer ly depending on your (the monitor and hard disk drive) or the whole system. -
Page 64: The Power Sources
Power Management The Power Sources The computer can be powered by either an AC/DC adapter or a battery pack. AC/DC Adapter Use only the AC/DC adapter that comes with your computer. The wrong type of AC/ DC adapter will damage the computer and its components. Attach the AC/DC adapter to the DC-in jack at the rear of the computer. -
Page 65: Turning On The Computer
Power Management Turning on the Computer Now you are ready to begin using your computer. To turn it on slide the power Shut Down switch on the front panel to the left and release it. Note that you should al- When the computer is on, you can use the power switch as a Sleep/Hibernate hot- ways shut your comput- er down by choosing the... -
Page 66: Power Plans
Power Management Power Plans The computer can be configured to conserve power by means of power plans. You Resuming can use (or modify) an existing power plan, or create a new one. Operation The settings may be adjusted to set the display to turn off after a specified time, and Table 3 - 1, on to send the computer into Sleep after a period of inactivity. - Page 67 Power Management Each Windows power plan will also adjust the processor performance of your ma- chine in order to save power. This is worth bearing in mind if you are experiencing any reduced performance (especially under DC/battery power). Choose High performance for maximum performance when the computer is pow- ered from an AC power source.
-
Page 68: Power-Saving States
Power Management Power-Saving States You can use power-saving states to stop the computer’s operation and restart where Power Button you left off. Sleep is the default power-saving state in Windows Vista. The Power Button Earlier versions of Windows used Stand By and Hibernate as system power-saving the Start Menu (in Clas- sic View use the Shut states. -
Page 69: Hibernate
Power Management Hibernate Hibernate uses the least amount of power of all the power-saving states and saves all of your information on a part of the hard disk before it turns the system off. If a power failure occurs the system can restore your work from the hard disk; if a power failure occurs when work is saved only to memory, then the work will be lost. -
Page 70: Configuring The Power Buttons
Power Management Configuring the Power Buttons The power switch (power button)/sleep button (Fn + F4 key combo) and closed lid Password may be set to send the computer in to a power-saving state. Protection It is recommended that you enable a password on wake up in order to protect your data. -
Page 71: Resuming Operation
Power Management Resuming Operation You can resume operation from power-saving states by sliding the power switch, or in some cases pressing the sleep button (Fn + F4 key combo). Closing the Lid If you have chosen to Power Status To Resume Icon Color send the computer to... -
Page 72: Battery Information
Power Management Battery Information Please follow these simple guidelines to get the best use out of your battery. Low Battery Warning Battery Power When the battery is criti- Your computer’s battery power is dependent upon many factors, including the pro- cally low, immediately grams you are running, and peripheral devices attached. -
Page 73: Conserving Battery Power
Power Management Conserving Battery Power • Use a power plan that conserves power (e.g Power saver), however note that this may have an affect on computer performance. Windows Mobility Center • Lower the brightness level of the LCD display. The system will decrease LCD brightness slightly to save power when it is not powered by the AC/DC adapter. -
Page 74: Battery Life
Power Management Battery Life Battery life may be shortened through improper maintenance. To optimize the life and improve its performance, fully discharge and recharge the battery at least once every 30 days. We recommend that you do not remove the battery yourself. If you do need to re- move the battery for any reason see “Removing the Battery”... -
Page 75: Proper Handling Of The Battery Pack
Power Management Proper handling of the Battery Pack • DO NOT disassemble the battery pack under any circumstances • DO NOT expose the battery to fire or high temperatures, it may explode Caution • DO NOT connect the metal terminals (+, -) to each other Danger of explosion if battery is incorrectly re- placed. -
Page 76: Battery Faq
Power Management Battery FAQ How do I completely discharge the battery? Use the computer with battery power until it shuts down due to a low battery. Don’t turn off the computer even if a message indicates the battery is critically low, just let the computer use up all of the battery power and shut down on its own. - Page 77 Power Management Scroll down to Battery and click + to expand the battery options. Choose the options below (click Yes if a warning appears). Figure 3 - 8 Power Options Advanced Settings - Battery • Low battery levels = 0% •...
- Page 78 Power Management How do I fully charge the battery? When charging the battery, don’t stop until the LED charging indicator light changes from orange to green. How do I maintain the battery? Completely discharge and charge the battery at least once every 30 days or after about 20 partial discharges.
-
Page 79: Drivers & Utilities
Drivers & Utilities Chapter 4: Drivers & Utilities What to Install This chapter deals with installing the drivers and utili- ties essential to the operation or improvement of some The Device Drivers & Utilities + User’s Manual disc of the computer’s subsystems. The system takes ad- contains the drivers and utilities necessary for the vantage of some newer hardware components for proper operation of the computer. -
Page 80: Driver Installation
Drivers & Utilities Driver Installation Check the driver installation order from Table 4 - 1, on page 4 - 3 (the drivers must be installed in Insert the Device Drivers & Utilities + User’s Manual this order) which is the same as that listed in the disc and click Install Drivers (button), or Option Driv- Drivers Installer menu below. - Page 81 Drivers & Utilities Manual Driver Installation Driver Name Page # Click Browse CD (button) in the Drivers Installer ap- plication and browse to the executable file in the ap- Chipset Page 4 - 5 propriate driver folder. Video Page 4 - 5 Touch Panel Page 4 - 5 Windows Update...
-
Page 82: Updating/Reinstalling Individual Drivers
Drivers & Utilities Updating/Reinstalling Individual Drivers User Account Control (Win Vista) If you wish to update/reinstall individual drivers it If a User Account Control prompt appears as part of may be necessary to uninstall the original driver.To do the driver installation procedure, click Continue/Al- this go to the Control Panel in the Windows OS and low, and follow the installation procedure as directed. -
Page 83: Driver Installation Procedure
Drivers & Utilities Driver Installation Procedure Chipset Insert the Device Drivers & Utilities + User’s Manual 1. Click 1.Install Chipset Driver > Yes. disc and click Install Drivers (button), or Option Driv- 2. Click Next > Yes > Next > Next. ers (button) to access the optional driver menu. -
Page 84: Card Reader
Drivers & Utilities Card Reader 1394 Filter Driver 1. Click 5.Install Card Reader Driver > Yes. 1. Click 9.Install 1394 Filter Driver > Yes. 2. Click Install > Finish. 2. Click Install > Finish. Audio 1. Click 6.Install LAN Driver > Yes. 1. -
Page 85: Optional Drivers
Drivers & Utilities Optional Drivers See the pages indicated for the driver installation pro- cedures for any modules included in your purchase op- Windows Update tion. After installing all the drivers make sure you enable Windows Update in order to get all the latest security updates etc. -
Page 86: Bluetooth Module
Drivers & Utilities Bluetooth Module Fingerprint Reader Module Note: The operating system is the default setting for See the introduction in “Fingerprint Reader Module” Bluetooth control in Windows Vista, and does not re- on page 7 - 40, and check the installation procedure. quire a driver. -
Page 87: Bios Utilities
BIOS Utilities Chapter 5: BIOS Utilities Overview BIOS Settings Warning This chapter gives a brief introduction to the computer’s built-in software: Incorrect settings can cause your system to Diagnostics: The POST (Power-On Self Test) malfunction. To correct mistakes, return to Set- up and restore the Set- Configuration: The Phoenix SecureCore(tm) Setup Utility up Defaults with <F9>. -
Page 88: The Power-On Self Test (Post)
BIOS Utilities The Power-On Self Test (POST) Each time you turn on the computer, the system takes a few seconds to conduct a POST Screen POST, including a quick test of the on-board RAM (memory). The screen below will appear if you have enabled the Boot-time Diagnostic Screen (see “Boot-time 1.BIOS information Diagnostic Screen (Advanced Menu)”... -
Page 89: Failing The Post
BIOS Utilities Failing the POST Errors can be detected during the POST. There are two categories, “fatal” and “non- fatal”. Fatal Errors These stop the boot process and usually indicate there is something seriously wrong with your system. Take the computer to your service representative or authorized service center as soon as possible. -
Page 90: The Setup Program
BIOS Utilities The Setup Program The Phoenix SecureCore(tm) Setup Utility tells the system how to configure itself and manage basic features and subsystems (e.g. port configuration). Entering Setup To enter Setup, turn on the computer and press F2 during the POST. The prompt (Press F2 to Enter Setup) seen on page 5 - 2 is usually present for a few seconds... -
Page 91: Setup Screens
BIOS Utilities Setup Screens The following pages contain additional advice on portions of the Setup. Setup Menus Along the top of the screen is a menu bar with menu headings. When you select a Setup menus heading, a new screen appears. Scroll through the features listed on each screen to shown in this section are make changes to Setup. -
Page 92: Main Menu
BIOS Utilities Main Menu Phoenix SecureCore(tm) Setup Utility Figure 5 - 2 Main Main Advanced Security Boot Exit Main Menu Item Specific Help System Time: [22:12:05] System Date: [12/10/2008] <Tab>, <Shift Tab>, or SATA Port 1 [FUJITSU MHY2160BH-(P] <Enter> selects field. SATA Port 2 [TSSTcorp CDDVDW TS-L] System Memory... -
Page 93: Sata Port1/2 (Main Menu)
BIOS Utilities SATA Port1/2 (Main Menu) Pressing Enter opens the sub-menu to show the configuration of a HDD/optical De- vice on the computer’s SATA Port 1 or SATA Port 2. Use the Auto (Type:) setting to have the items configured automatically for you. System/Extended Memory: (Main Menu) This item contains information on the system memory, and is not user configurable. -
Page 94: Advanced Menu
BIOS Utilities Advanced Menu Phoenix SecureCore(tm) Setup Utility Main A A dvanced Advanced Security Boot Exit Item Specific Help Advanced Chipset Control Installed O/S: [Vista] Select options for SATA Mode Selection: [AHCI] Advanced Chipset DFOROM(Robson) Support: [Enabled] features. Figure 5 - 3 Reset Configuration Data: [No] Boot-time Diagnostic Screen:... -
Page 95: Installed O/S (Advanced Menu)
BIOS Utilities Installed O/S (Advanced Menu) This setting tells the computer what kind of operating system you’re using. Make sure you choose the correct setting for your O/S in order to prevent system problems. Note: If you select the Vista O/S then the SATA Mode Selection menu will become available. -
Page 96: Reset Configuration Data (Advanced Menu)
BIOS Utilities Reset Configuration Data (Advanced Menu) This item is set to No as default. You can change the setting to Yes if you have in- stalled a new add-on which has reconfigured the system, resulting in such a serious system conflict that the operating system is unable to boot. -
Page 97: Security Menu
BIOS Utilities Security Menu Phoenix SecureCore(tm) Setup Utility Main Advanced Security S S e e c c u u r r i i t t y y Boot Exit Security Menu Item Specific Help The changes you make Supervisor Password Is: Clear User Password Is: Clear... -
Page 98: Set User Password (Security Menu)
BIOS Utilities Set User Password (Security Menu) You can set a password for user mode access to the Phoenix SecureCore Setup Utility. This will not affect access to the computer OS, (only the Setup utility) unless Password Warning you choose to set a Password on Boot (see below). Many menu items in the Phoenix If you set a boot pass- SecureCore Setup Utility cannot be modified in user mode. -
Page 99: Boot Menu
BIOS Utilities Boot Menu Phoenix SecureCore(tm) Setup Utility Figure 5 - 5 Main Advanced Security Boot Exit Boot Menu Item Specific Help Boot priority order: IDE CD: TSSTcorp CDDVDW TS-L633A-( Keys used to view or USB CDROM: configure devices: IDE HDD: FUJITSU MHY2160BH-(PM) Up and Down arrows PCI BEV: Realtek Boot Agent select a device. -
Page 100: Exit Menu
BIOS Utilities Exit Menu Figure 5 - 6 Phoenix TrustedCore(tm) Setup Utility Main Advanced Security Boot Exit Exit Menu Item Specific Help Exit Saving Changes Exit System Setup and Exit Discarding Changes save your changes to Load Setup Defaults CMOS. Discard Changes Save Changes Help... -
Page 101: Upgrading The Computer
Upgrading The Computer Chapter 6: Upgrading The Computer Overview This chapter contains information on upgrading the computer. Follow the steps out- Warranty Warning lined to make the desired upgrades. If you have any trouble or problems you can con- tact your service representative for further help. Before you begin you will need: Please check with your service representative... -
Page 102: When Not To Upgrade
Upgrading The Computer When Not to Upgrade These procedures involve opening the system’s case, adding and sometimes replac- ing parts. You should not perform any of these upgrades if: Power Safety Warning • Your system is still under warranty or a service contract Before you undertake •... -
Page 103: Removing The Battery
Upgrading The Computer Removing the Battery If you are confident in undertaking upgrade procedures yourself, for safety reasons Warranty Warning it is best to remove the battery. Turn the computer off, and turn it over. Please check with your Slide the latch in the direction of the arrow. -
Page 104: Upgrading The Hard Disk Drive
Upgrading The Computer Upgrading the Hard Disk Drive The hard disk drive can be taken out to accommodate other 2.5" serial (SATA) hard HDD System disk drives with a height of 9.5mm (h) (see “Storage” on page C - 3). Follow your Warning operating system’s installation instructions, and install all necessary drivers and util- ities (see... - Page 105 Upgrading The Computer Grip the tab and slide the hard disk in the direction of arrow Lift the hard disk up and out of the computer Reverse the process to install a new hard disk drive. Figure 6 - 3 Removing the Hard Disk Upgrading the Hard Disk Drive 6 - 5...
- Page 106 Upgrading The Computer Remove screws & , and the hard disk cover Reverse the process to install a new hard disk drive. Figure 6 - 4 Removing the Hard Disk Cover 6 - 6 Upgrading the Hard Disk Drive...
-
Page 107: Upgrading The Optical (Cd/Dvd) Device
Upgrading The Computer Upgrading the Optical (CD/DVD) Device Turn off the computer, and turn it over and remove the battery. Locate the RAM & CPU bay cover and remove screws Carefully (a fan and cable are attached to the under side of the cover) lift up the bay cover. - Page 108 Upgrading The Computer Remove the screw at point , and use a screwdriver to carefully slide out the optical device. Insert the new device and replace the optical device screw Reconnect the fan cable before replacing the bay cover ( Figure 6 - 5 on page 6 - Replace the bay cover and screws.
-
Page 109: Upgrading The System Memory (Ram)
Upgrading The Computer Upgrading the System Memory (RAM) Turn off the computer, and turn it over and remove the battery. Locate the RAM & CPU bay cover and remove screws System Memory Carefully (a fan and cable are attached to the under side of the cover) lift up The computer has two the bay cover. - Page 110 Upgrading The Computer Gently pull the two release latches on the sides of the memory socket in the direction indicated by the arrows ( & Figure 6 - The RAM module will pop-up, and you can remove it. Contact Warning Pull the latches to release the second module if necessary.
- Page 111 Upgrading The Computer Insert a new module holding it at about a 30° angle and fit the connectors firmly into the memory slot. The module’s pin alignment will allow it to only fit one way. Make sure the module Figure 6 - 9 is seated as far into the slot as it will go.
- Page 112 Upgrading The Computer 6 - 12...
-
Page 113: Modules & Options
Modules & Options Chapter 7: Modules & Options Wireless Device Overview Operation Aboard This chapter contains information on the following modules, which may come with Aircraft your computer, depending on the configuration purchased. If you are unsure please The use of any portable contact your service representative. - Page 114 Modules & Options Bluetooth Module The operating system’s Bluetooth Devices control panel is used to configure the Wireless Device Bluetooth settings in Windows Vista, and therefore does not require a driver. Use Operation Aboard the Fn + F12 key combination (see “Function Keys &...
-
Page 115: Bluetooth Module
Modules & Options Bluetooth Configuration in Windows Vista Setup your Bluetooth Device so the Computer Can Find it Turn your Bluetooth device (e.g. PDA, mobile phone etc.) on. Bluetooth Taskbar Make the device discoverable (to do this check your device documentation). Icon To Turn the Bluetooth Module On If you cannot see the... - Page 116 Modules & Options To Add a Bluetooth Device Access the Bluetooth Devices control panel. Click Options (tab), and make sure that Allow Bluetooth devices to connect to this computer check box (Connections) has a tick inside it. Click Devices (tab), and then click Add. The Add Bluetooth Device Wizard will appear.
- Page 117 Modules & Options To Change Settings for the Bluetooth Device Access the Bluetooth Devices control panel. Click on the device you want to change and click Properties to: Bluetooth Help • Change the name of the device (click General, type a new name and click OK). •...
-
Page 118: Pc Camera Module
Modules & Options PC Camera Module The PC Camera module uses the BisonCap application to capture video files and to Latest PC Camera take pictures. Before installing the driver, make sure that the optional PC Camera is Driver Information Check the Device Driv- ers &... -
Page 119: Pc Camera Driver Installation
Modules & Options PC Camera Driver Installation 1. Insert the Device Drivers & Utilities + User’s Manual disc into the CD/ DVD drive. 2.0M PC Camera 2. Click Option Drivers (button). Screen Refresh 3. Click 1.Install WebCam Driver > Yes. The 2.0M PC Camera 4. - Page 120 Modules & Options PC Camera Audio Setup If you wish to capture video & audio with your camera, it is necessary to setup the audio recording options in Windows. Click Start, and click Control Panel (or point to Settings and click Control Panel).
- Page 121 Modules & Options Figure 7 - 5 Audio Setup for PC Camera Right-click PC Camera Module 7 - 9...
- Page 122 Modules & Options BisonCap BisonCap is a video viewer for general purpose video viewing and testing, and for capturing video files to .avi format. Pre-Allocating File Space Run the BisonCap program from the Start > Programs/All Programs > Bison- Cam menu (it is recommended that you set the capture file before the capture You may pre-allocate process - see Set Capture File below).
- Page 123 Modules & Options Reducing Video File Size Note that capturing high resolution video files requires a substantial amount of disk space for each file. After recording video, check the video file size (right-click the file and select Properties) and the remaining free space on your hard disk (go to My Computer, right-click the hard disk, and select Properties).
- Page 124 Modules & Options Eliminating Screen Flicker If you find that the video screen in the BisonCap program is flickering, you can try to adjust the setting in the Video Capture Filter options. Run the BisonCap program. Go to Options and scroll down to select Video Capture Filter..Click either 50Hz or 60Hz under Frequency in Property Page (tab).
- Page 125 Modules & Options Zoom The BisonCap program allows you to zoom the camera in and out. Run the BisonCap program. Go to Zoom and select Zoom Out/Zoom In. Figure 7 - 7 Zoom/Setting Taking Still Pictures Snapshot Folder The BisonCap program allows you to take still pictures. The Snapshot folder’s default location is on the Run the BisonCap program.
-
Page 126: 7 - 14 3.75G/Hspa Module
Modules & Options 3.75G/HSPA Module If you have included an optional 3.75G or HSPA modem (High Speed Packet Ac- cess) module (see “Communication” on page A - 5 for specification details) in your purchase option, you will have the appropriate software provided for your module. Follow the instructions on page 7 - 14 to install the USIM card (supplied by your... -
Page 127: Usim Card Installation
Modules & Options USIM Card Installation Turn off the computer, and turn it over and remove the battery. Locate the hard disk bay cover and remove screws & Power Safety Remove the hard disk bay cover Warning Grip the tab and slide the hard disk in the direction of arrow to remove it. - Page 128 Modules & Options Insert the USIM card as you would into your mobile phone. Slide the SIMLOCK in the direction of the arrow (Figure 7 - 9) in order to release the lock and lift it up. Figure 7 - 9 SIMLOCK Unlock Insert the USIM card as illustrated in (Figure 7 -...
- Page 129 Modules & Options Close the SIMLOCK by pushing it in the direction of the arrow in Figure 7 - Figure 7 - 11 SIMLOCK Lock A 3.75G module is pictured on the left, and the installed USIM card on the right in Figure 7 - Figure 7 - 12...
-
Page 130: 3G Watcher Application
Modules & Options 3G Watcher Application With the 3.75G module and USIM card (provided by your service provider) in- stalled you may then install the 3G Watcher application. The 3G Watcher applica- Wireless Device tion allows you to directly access your 3.75G internet service from the computer. Operation Aboard Aircraft 3G Watcher Application Installation... -
Page 131: Setting Up A Carrier Profile
Modules & Options Setting Up a Carrier Profile Although the connection information is stored on the USIM card supplied by the ser- vice provider, you may need to set up the appropriate carrier profile in 3G Watcher. Power on the 3.75G module using the Fn + key combination. - Page 132 Modules & Options You can then enter a new profile name or choose a profile from the drop-down list provided by the software (see the sidebars for information on the profile details). Figure 7 - 14 User Options Profile Information Profile Details Click General and/or Ad- vanced (and the sub-...
- Page 133 Modules & Options Connecting to the Service Provider Power on the 3.75G module using the Fn + key combination. You can access the 3G Watcher application from the Start menu (Start > Programs/All Programs > Sierra Wireless > 3G Watcher), or by double-clicking the desktop icon The software will run and display the service provider name (see “Setting Up a...
- Page 134 Modules & Options When the connection is successful a taskbar notification will appear (as below). Figure 7 - 18 Connected Taskbar Notification You can then access the internet, download e-mail etc. as per any internet connection. While you are connected the taskbar icon will be green (it will be red when the program is running but not connected).
- Page 135 Modules & Options 12. If you click the 3G Watcher close icon a message will be displayed asking you to click OK to confirm the program exit. Figure 7 - 20 Exit Warning 13. Exiting the program DOES NOT turn off the 3.75G module, and you will need to press the Fn + key combination to turn off the module (pay careful attention to this aboard aircraft - see...
-
Page 136: Short Messaging Service
Modules & Options Short Messaging Service In addition to standard internet services you may also send and receive SMS text messages using the 3G Watcher program, if your service supports SMS. Reading SMS Messages The SMS message indicator in the main window will notify you of any new messages received. -
Page 137: Hspa Modem
Modules & Options HSPA Modem With the HSPA modem module and USIM card (supplied by your service provider) installed you may then install the HSPA modem interface. The HSPA modem inter- Wireless Device face application allows you to directly access your HSPA internet service from the Operation Aboard computer. -
Page 138: Hspa Modem Interface
Modules & Options HSPA Modem Interface The connection information is stored on the USIM card supplied by the service pro- vider. HSPA Modem Help Power on the HSPA modem module using the Fn + key combination. To get help on HSPA Access the HSPA Modem interface from the Start menu (Start >... - Page 139 Modules & Options Click Connect to connect to your service provider. Figure 7 - 22 Connecting to Network The message “Network is connected” will be displayed when the network connection is successful. Figure 7 - 23 Network is Connected You can then access the internet, download e-mail etc. as per any internet connection.
-
Page 140: Adding A Profile
Modules & Options While you are connected the upper right corner of the HSPA Modem interface will display the upload and download rates, and the taskbar icon will display the Figure 7 - 24 connection speed. Uploading/ Downloading Rates and Speed 10. - Page 141 Modules & Options Click Add (button) and input any Network Settings required by your service provider. Click OK to save the profile. Figure 7 - 26 Network Settings & Profiles You can Edit or Delete profiles from the Profiles tab. To use a profile click to select it, and then click Apply (button) and the settings will be transferred to Connection Manager.
-
Page 142: Contacts
Modules & Options Contacts Access the HSPA Modem interface from the Start menu (Start > Programs/All Programs > HSPA Modem > HSPA Modem), or by clicking the desktop icon. Click Contacts (button). Figure 7 - 27 Network Settings & Profiles Click Refresh (button) to download the contacts from the USIM card to the computer. -
Page 143: Messages
Modules & Options Messages Access the HSPA Modem interface from the Start menu (Start > Programs/All Programs > HSPA Modem > HSPA Modem), or by clicking the desktop icon. SMS Service Click Messages (button). In addition to standard in- ternet services you may also send and receive SMS text messages us- ing the HSPA Modem in-... -
Page 144: Settings
Modules & Options Click to select a contact from the list and then click Add (button) and the phone number will automatically be added to the recipient field. Type the message information into the message body and click Send (button) to send it, or Save to draft (button) to save the message. - Page 145 Modules & Options Click OK alongside any of the options to configure the settings. The Network can be configured for an Automatic (usually from the USIM card) or Manual connection. The Network Mode can be configured for any appropriate mode required. Figure 7 - 30 Settings - Network/ Network Mode...
-
Page 146: Wireless Lan Module
Modules & Options Wireless LAN Module If you have included an Intel® Wi-Fi Link 5100/5300 Series (802.11 a/g/n) WLAN Wireless Device module, or 3rd Party 802.11b/g WLAN module in your purchase option, make sure Operation Aboard that the Wireless LAN module is on before installing the driver. Aircraft The use of any portable Use the Fn + F11 key combination (see... -
Page 147: 802.11 B/G Wlan Driver Installation
Modules & Options 802.11 b/g WLAN Driver Installation 1. Make sure the module is powered on, and then insert the Device Drivers & Utilities + User’s Manual disc into the CD/DVD drive. 2. Click Option Drivers (button). 3. Click 3.Install Wireless Lan driver > Yes. 4. -
Page 148: Connecting To A Wireless Network
Modules & Options Connecting to a Wireless Network Make sure the Wireless LAN module is turned on. Click the taskbar wireless icon , and then click Connect to a network (or right- click the icon , and then click Connect to a network). Figure 7 - 31 Taskbar Menus Click icon... - Page 149 Modules & Options Click a network, and then click Connect. If you do not see a network you want to connect to, click Set up a connection or network (a list of options will appear allowing manual searching, and creating a new network).
- Page 150 Modules & Options To disconnect from the wireless network you can click the taskbar wireless icon , and then select Connect or disconnect to access the network menu, and click Disconnect (or right-click the icon , and then click Disconnect from). Security Enabled Networks You should try to make...
-
Page 151: Windows Mobility Center
Modules & Options Windows Mobility Center The Windows Mobility Center control panel provides an easy point of access for information on battery status, power plans used and wireless device status etc. To access the Windows Mobility Center: Click Start, and click Control Panel (or point to Settings and click Control Panel). -
Page 152: Fingerprint Reader Module
Modules & Options Fingerprint Reader Module If you have included the fingerprint reader in your purchase option you will need to Help & Manual install the driver as per the instructions below. Right-click the taskbar icon Make sure you have administrator’s rights to your computer, and have a Windows to bring up the menu to password enabled for full security protection. -
Page 153: User Enrollment
Modules & Options User Enrollment Click Start > Programs/All Programs > Protector Suite QL > User Enrollment, or double click the taskbar icon (click Start fingerprint enrollment). On the first run of the program you will be asked to click the button to accept the license, and then click OK. - Page 154 Modules & Options Click Next > Next (if you have the “Run interactive tutorial” tickbox selected you will run through the Fingerprint Tutorial). 10. Click Next for each window of the tutorial (you can click the button to “skip Fingerprint tutorial”...
- Page 155 Modules & Options 17. Right-click the taskbar icon to Start Control Center to allow you to Edit Fingerprints, register applications, manage Password Bank, File Safe and access the Help menu etc. You can also run the Control Center etc. from the Protector Suite QL item in the Programs/All Programs menu.
-
Page 156: Fingerprint Control Center Features
Modules & Options Fingerprint Control Center Features Application Launcher The Application Launcher allows you to register applications to be launched when assigned to a particular finger. Simply copy the application icon on to one of the reg- istered fingers and ten click OK to close the application window. Once registered the application will launch when you swipe the appropriate finger across the sensor. -
Page 157: Intel Turbo Memory Module
Modules & Options Intel Turbo Memory Module If you have included an Intel Turbo Memory (Robson) NAND flash memory card module in your purchase option, then you will need to enable the option in the BIOS (see “Advanced Menu” on page 5 - 8 ) BEFORE installing the Windows Vista op- erating system software (do not enable this option in Windows XP or on a Windows Vista operating system that has been installed without the option enabled). -
Page 158: Intel Turbo Memory Setup
Modules & Options Intel Turbo Memory Setup Start-up your notebook computer and press <F2> to enter the BIOS. Use the arrow keys to select the Advanced menu heading. Intel Turbo Memory Use the arrow keys to select (highlight in white) the Installed O/S, and select Vista. -
Page 159: Intel Turbo Memory Driver Installation
Modules & Options As the computer starts up, press a key when you see the message "Press any key to boot from CD or DVD". 10. The system software will prompt you through the installation procedure (see the ReadyBoost Issue Microsoft Windows Vista OS documentation for more details). - Page 160 Modules & Options Intel Turbo Memory Dashboard (User Pinning Supported Only) The Intel Turbo Memory Dashboard allows you to pin an application or file to load into the Intel Turbo Memory NAND cache for performance acceleration. Help ® Run the Intel Turbo Memory Dashboard from the Programs/All Programs Click the Help icon ®...
- Page 161 Modules & Options Pinning an Application (User Pinning Supported Only) 1. The Intel ® Turbo Memory Dashboard allows you to select files and applications to accelerate and therefore open faster and display quicker. Unpinning an 2. Applications will be listed in the Applications Window on the right. Application 3.
- Page 162 Modules & Options Custom File Sets (User Pinning Supported Only) A Custom File Set allows you to group applications and files to accelerate. These sets can be moved easily in and out of the Accelerated Window which is of benefit when space is limited.
- Page 163 Modules & Options Intel Turbo Memory Console (All Modules) 1. Run the Intel ® Turbo Memory Console from the Programs/All Pro- grams menu (Intel ® Turbo Memory). Intel Turbo Memory 2. You can enable/disable Windows ReadyBoost and Windows ReadyDrive Console from the Intel ®...
- Page 164 Modules & Options 7 - 52...
-
Page 165: Troubleshooting
Troubleshooting Chapter 8: Troubleshooting Overview Should you have any problems with your computer, before consulting your service representative, you may want to try to solve the problem yourself. This chapter lists some common problems and their possible solutions. This can’t anticipate every problem, but you should check here before you panic. If you don’t find the answer in these pages, make sure you have followed the instructions carefully and observed the safety precautions in the preface. -
Page 166: Basic Hints And Tips
Troubleshooting Basic Hints and Tips Many of the following may seem obvious but they are often the solution to a problem when your computer ap- pears not to be working. • Power - Is the computer actually plugged into a working electrical outlet? If plugged into a power strip, “LED Indi- make sure it is actually working. -
Page 167: Backup And General Maintenance
Troubleshooting Backup and General Maintenance • Always backup your important data, and keep copies of your OS and programs safe, but close to hand. Don’t forget to note the serial numbers if you are storing them out of their original cases, e.g. in a CD wal- let. -
Page 168: Viruses
Troubleshooting Viruses • Install an Anti-Virus program and keep the definitions file (the file which tells your program which viruses to look for) up to date. New computer viruses are discovered daily, and some of them may seriously harm your computer and cause you to lose data. Anti-Virus programs are commercially available and the defini- tions file updates are usually downloadable directly from the internet. -
Page 169: Upgrading And Adding New Hardware/Software
Troubleshooting Upgrading and Adding New Hardware/Software • Do not be tempted to make changes to your Windows Registry unless you are very sure of what you are doing, otherwise you will risk severely damaging your system. • Don’t open your computer or undertake any repair or upgrade work if you are not comfortable with what you are doing. - Page 170 Troubleshooting • Thoroughly check any recent changes you made to your system as these changes may affect one or more system components, or software programs. If possible, go back and undo the change you just made and see if the problem still occurs. •...
-
Page 171: Problems And Possible Solutions
Troubleshooting Problems and Possible Solutions Problem Possible Cause - Solution You turned on the power Battery missing / incorrectly installed. Check the battery bay, make sure the battery is present and but it doesn’t work. seated properly (the design of the battery only allows it to go in one way). Make sure there’s nothing interfering with the battery contacts. - Page 172 Troubleshooting Problem Possible Cause - Solution The computer feels too Make sure the computer is properly ventilated and the Vent/Fan intakes are not blocked. If this hot. doesn’t cool it down, put the system into Hibernate mode or turn it off for an hour. Make sure the computer isn’t sitting on a thermal surface (see “Overheating”...
- Page 173 Troubleshooting Problem Possible Cause - Solution forget boot If you forget the password, you may have to discharge the battery of the CMOS. Contact your password. service representative for help. Password Warning If you choose to set a boot password, NEVER forget your password. The consequences of this could be serious. If you cannot remember your boot password you must contact your vendor and you may lose all of the information on your hard disk.
- Page 174 Troubleshooting Problem Possible Cause - Solution Unwelcome numbers If the LED is lit, then Num Lock is turned ON (see “LED Indicators” on page 1 - 14). appear when typing. Other Keyboards If your keyboard is damaged or you just want to make a change, you can use any standard USB keyboard. The system will detect and enable it automatically.
- Page 175 Troubleshooting Problem Possible Cause - Solution The PC Camera module The module is off. Press the Fn + F10 key combination, or On-Screen Menu button, in order to cannot be detected. enable the module (see “Function Keys & Visual Indicators” on page 1 - 16).
- Page 176 Troubleshooting 8 - 12...
-
Page 177: Interface (Ports & Jacks)
Interface (Ports & Jacks) Appendix A: Interface (Ports & Jacks) Overview The following chapter will give a quick description of the interface (ports & jacks) which allow your computer to communicate with external devices, connect to the internet etc. Interface (Ports & Jacks) A - 1... -
Page 178: Notebook Ports And Jacks
Interface (Ports & Jacks) Notebook Ports and Jacks Item Description Card Reader Port The card reader allows you to use some of the latest digital storage cards. Push the card into the slot and it will appear as a removable device. DC-In Jack Plug the supplied AC/DC adapter into this jack to power your computer. - Page 179 Interface (Ports & Jacks) Item Description Mini-IEEE 1394 Port This allows high-speed connection to various peripheral devices, e.g. external disk drives and digital cameras (see note below). IEEE 1394 The Mini-IEEE 1394 port only supports SELF POWERED IEEE 1394 devices. Make sure you install the IEEE 1394 filter driver (see page RJ-11 Modem Jack This port connects to the built-in modem.
- Page 180 Interface (Ports & Jacks) Item Description USB 2.0/1.1 Ports These USB 2.0 compatible ports (USB 2.0 is fully USB 1.1 compliant) are for low-speed peripherals such as keyboards, mice or scanners, and for high-speed peripherals such as external HDDs, digital video cameras or high-speed scanners etc. Devices can be plugged into the computer, and unplugged from the computer, without the need to turn the system off (if the power rating of your USB device is 500mA or above, make sure you use the power supply which comes with the device).
-
Page 181: Intel Video Driver Controls
Intel Video Driver Controls Appendix B: Intel Video Driver Controls The basic settings for configuring the LCD are outlined in “Video Features” on page 1 - DVMT Notes Intel Video Driver Installation DVMT is not local video Make sure you install all the drivers in the order indicated in Table 4 - 1, on page 4 - memory. -
Page 182: Intel Graphics Properties
Intel Video Driver Controls Intel Graphics Properties More advanced video configuration options are provided by the Intel(R) Graphics Taskbar Icon Media Accelerator Driver for Mobile. The Intel GMA control “Video Features” on page 1 - 23 Open the Display Settings control panel (see panel can also be ac- and click Advanced Settings (button). - Page 183 Intel Video Driver Controls You may make changes to the devices, color, schemes, Hot Keys etc. by clicking the appropriate menu item or button. Click Information (button) to obtain useful in- formation about the graphics properties of the computer, and see the Support tab in Help Menus Information to get weblinks to the latest information on the Intel Website.
-
Page 184: Scheme Options
Intel Video Driver Controls Scheme Options Use Scheme Options to configure quick settings for applications which require spe- cific resolution and color settings in order to run properly e.g. games, multimedia Application.exe programs. To set the scheme options: You will need to locate the actual application Open the Display Settings control panel and click Advanced Settings (button). -
Page 185: Attaching Other Displays
Intel Video Driver Controls Attaching Other Displays Besides the built-in LCD, you can also use an external monitor/flat panel display, Function Key connected to the external monitor port at the rear of the computer, as your display Combination device. The following are the display options: You can use the Fn + F7 The built-in LCD OR an external monitor/flat panel display connected to the exter- key combination to tog-... - Page 186 Intel Video Driver Controls ® Configuring from Intel GMA Driver for Mobile Go to the Intel Graphics Properties control panel (see “Intel Graphics Proper- ties” on page B - 2) and click Display Devices. Operating Mode Click to choose the display option from the Operating Mode menu. Click Apply (and OK to confirm the settings change) and OK (button).
-
Page 187: Display Modes
Intel Video Driver Controls Display Modes Single Display Screen Rotation and Only one of your attached displays is used. External Displays If you have rotated the Intel(R) Dual Display Clone (mirrored) screen on the notebook, This mode will drive multiple displays with the same content. Each device may be and then wish to switch configured independently for different resolutions, refresh rates, color quality etc. - Page 188 Intel Video Driver Controls To Enable Intel(R) Dual Display Clone Attach your external monitor to the external monitor port, and turn it on. Go to the Intel Graphics Properties control panel (see “Intel Graphics Properties” on page B - 2) and click Display Devices. Click to choose Intel(R) Dual Display Clone (Operating Mode).
- Page 189 Intel Video Driver Controls To Enable Extended Desktop Attach your external monitor to the external monitor port, and turn it on. Go to the Intel Graphics Properties control panel (see “Intel Graphics Display Settings Properties” on page B - 2) and click Display Devices. Extended Desktop Click to choose Extended Desktop (Operating Mode).
- Page 190 Intel Video Driver Controls Using Windows Vista to Enable Extended Mode Attach your external display to the external monitor port, and turn it on. If a New Display Detected window does not appear in Windows Vista, go to the Display Settings Windows Mobility Center control panel (Mobile PC >...
- Page 191 Intel Video Driver Controls Using Display Settings to Enable Extended Mode Attach your external display to the external monitor port, and turn it on. Open the Display Settings control panel (see “Video Features” on page 1 - 23). Click the monitor icon (e.g. ), and make sure you have checked “Extend my Windows desktop onto this monitor.”...
- Page 192 Intel Video Driver Controls B - 12...
-
Page 193: Specifications
Specifications Appendix C: Specifications Latest Specification Information The specifications listed in this Appendix are correct at the time of going to press. Certain items (particularly processor types/ speeds and CD/DVD device types) may be changed, delayed or updated due to the manufacturer's release schedule. Check with your service center for details. -
Page 194: Processor
Specifications Feature Specification Processor Intel® Core™2 Duo Processor 45nm (45 Nanometer) Process Technology 35W - (478-pin) Micro-FC-PGA Package - Socket-P 6MB On-die L2 Cache & 1066MHz FSB T9400/ T9600 2.53/ 2.8 GHz Intel® Core™2 Duo Processor 45nm (45 Nanometer) Process Technology 25W - (478-pin) Micro-FC-PGA Package - Socket-P 6MB On-die L2 Cache &... -
Page 195: Memory
Specifications Feature Specification Memory Two 200 Pin SO-DIMM Sockets Supporting DDRII (DDR2) 667/ 800 MHz Two 64-bit Wide DDRII (DDR2) Data Channels Memory Expandable up to 4GB (512/ 1024/ 2048 MB DDRII Modules) Supports Dual Channel DDRII (DDR2) SDRAM 2GB OR 4GB Intel® Turbo Memory Module (Option) Video Adapter Intel GMA X4500HD Integrated Video Shared Memory Architecture - Supports up to 256MB of Video Memory (dynamically allocated from... -
Page 196: Interface
Specifications Feature Specification Keyboard & Winkey Keyboard Built-In Touchpad with Scrolling Function Pointing Device Stylus Pen for Touch Panel 2 Built-In Instant Keys (Menu, Rotation) Interface Three USB 2.0 Ports One RJ-11 Modem Jack One Headphone-Out Jack One RJ-45 LAN Jack One Microphone-In Jack One DC-in Jack One S/PDIF Out Jack... -
Page 197: Communication
Specifications Feature Specification Communication 56K Plug and Play Fax Modem 10M/ 100M/ 1000M Base-TX Ethernet LAN Note: The 3.75G Wireless LAN Module Options: Intel Turbo Intel® WiFi Link 5300 Series (3*3 - 802.11a/g/n) PCie Wireless LAN Half Mini- Memory Modules Card Module (Option) cannot coexist. -
Page 198: Weight
Specifications Feature Specification Operating Windows® Vista 32-bit (with Service Pack 1) Systems Windows® XP (with Service Pack 3) Supported Dimensions 306mm (w) * 224mm (d) * 35 - 37.5mm (h) 2.1 kg With 4 Cell Battery and ODD & Weight Optional Optical Drive Module Options: Bluetooth V2.1 + EDR (Enhanced Data Rate) -
Page 199: Windows Xp Information
Windows XP Information Appendix D: Windows XP Information This Appendix contains information (including control panel information, driver installation etc.) for users of the Windows XP OS. D - 1... -
Page 200: Tablet Pc Features
Windows XP Information Tablet PC Features Windows XP supports limited Tablet PC functions. See “Rotating The LCD Panel” Screen Rotation & on page 1 - 7 for information on how to put the computer into Tablet PC mode. Re-Calibration Make sure you install the Touch Panel driver (see “Touch Panel”... -
Page 201: On-Screen Menu
Windows XP Information On-Screen Menu Pressing the Menu button on the computer will bring up the On-Screen Menu buttons (make sure you install the hot key driver - see “Hot Key AP” on page D - 33). Use the stylus pen to touch any of the buttons to activate the control (note the ON/OFF buttons do not display the current power status of the modules, but the power sta- tus that will be executed when you tap the button e.g. -
Page 202: Dvd Regional Codes
Windows XP Information DVD Regional Codes Changing DVD Regional Codes Go to the Control Panel and double-click System > Hardware (tab), click Device Manager, then click the + next to DVD/CD-ROM drives. Double-click on the DVD-ROM device to bring up the Properties dialogue box, and select the DVD Region (tab) to bring up the control panel to allow you to adjust the regional code. -
Page 203: Windows Xp Start Menu & Control Panel
Windows XP Information Windows XP Start Menu & Control Panel Most of the control panels, utilities and programs within Windows XP (and most other Windows versions) are accessed from the Start menu. When you install programs and utilities they will be installed on your hard disk drive, and a shortcut will usually be placed in the Start menu and/or the desktop. -
Page 204: D - 6 Touchpad And Buttons/Mouse
Windows XP Information Touchpad and Buttons/Mouse The Touchpad is an alternative to the mouse; however, you can also add a mouse to your computer through one of the USB ports. The Touchpad buttons function in much the same way as a two-button mouse. Once you have installed the Touchpad driver (see “Touchpad”... -
Page 205: Function Keys & Visual Indicators
Windows XP Information Function Keys & Visual Indicators The function keys (F1 - F12 etc.) will act as hot keys when pressed while the Fn key is held down. In addition to the basic function key combinations; visual indicators (see the table below) are available when the hot key driver is in- stalled ( see “Hot Key AP”... -
Page 206: D - 8 Audio Features
Windows XP Information Audio Features You can configure the audio options on your computer from the Sounds and Audio Devices Windows con- trol panel, or from the Realtek HD Audio Manager icon in the taskbar/control panel (this will bring up the Realtek Audio Configuration menus). -
Page 207: Video Features
Windows XP Information Video Features You can switch display devices, and configure display options, from the Display Properties control panel in Win- dows as long as the appropriate Intel video driver is installed. To access Display Properties in Windows: Click Start, point to Settings and click Control Panel (or just click Control Panel). Double-click Display (icon) - In the Appearances and Themes category. -
Page 208: Display Properties
Windows XP Information Display Properties Taskbar Icon The Intel GMA control panel can also be ac- cessed by clicking the icon in the taskbar and selecting Graphics Properties from menu. If you cannot see the tray icon click the “Show Tray Icon”... -
Page 209: Intel Gma Driver Controls
Windows XP Information Intel GMA Driver Controls Access the Intel GMA control panel as indicated on page D - 9. You may make changes to the Display Devices, Display Settings, Color Correction, Hot Keys etc. by clicking the appropriate menu item. Help Menus Right-click on many of the items in the tabs to bring up the... - Page 210 Windows XP Information Scheme Options Use Scheme Options to configure quick settings for applications which require spe- cific resolution and color settings in order to run properly e.g. games, multimedia Application.exe programs. To set the scheme options: You will need to locate 1.
- Page 211 Windows XP Information Display Devices & Options Besides the built-in LCD you can also use an external monitor/flat panel display con- nected to the external monitor port as your display device. The following are the dis- Function Key play options: Combination You can use the Fn + F7 Intel Display Mode...
- Page 212 Windows XP Information Attaching Other Displays (Intel GMA) Attach your external display to the external monitor port or HDMI-Out port, and turn it on. Go to the Intel GMA control panel and click Display Devices. Click to choose the display option from the Operating Mode menu. Click to choose the display selection from the Display Selection menu.
- Page 213 Windows XP Information To Enable Intel(R) Dual Display Clone (Intel GMA) Attach your external display to the external monitor port or HDMI-Out port, and turn it on. Go to the Intel GMA control panel and click Display Devices. Click to choose Intel(R) Dual Display Clone from the Operating Mode menu. Choose which device is to be the Primary Device from the Display Selection menu.
- Page 214 Windows XP Information To Enable Extended Desktop (Intel GMA) Attach your external display to the external monitor port or HDMI-Out port, and turn it on. Go to the Intel GMA control panel and click Display Devices. Click to choose Extended Desktop from the Operating Mode menu. Choose which device is to be the Primary Device from the Display Selection menu.
- Page 215 Windows XP Information To Enable Extended Desktop (Windows Display Properties) Attach your external display to the external monitor port or HDMI-Out port, and turn it on. Click Start, point to Settings (or click Control Panel) and click Control Panel (if you are in Category View choose Appearance and Themes).
-
Page 216: Power Management Features
Windows XP Information Power Management Features To conserve power, especially when using the battery, your computer uses the ACPI OS Note power management system. Power management conserves power by controlling in- dividual components of the computer (the monitor and hard disk drive) or the whole Power management system. -
Page 217: The Power Sources
Windows XP Information The Power Sources The computer can be powered by either an AC/DC adapter or a battery pack. AC/DC Adapter Use only the AC/DC adapter that comes with your computer. The wrong type of AC/DC adapter will damage the computer and its components. -
Page 218: Turning On The Computer
Windows XP Information Turning on the Computer Now you are ready to begin using your computer. To turn it on slide the power switch Shutdown on the front panel to the left and release it. Note that you should al- When the computer is on, you can use the power switch as a Sleep/Hibernate hot-key ways shut your comput- er down by choosing the... -
Page 219: Power Schemes
Windows XP Information Power Schemes You can set your computer to conserve power through individual components by Resuming means of Power Schemes. You can also adjust the settings for each scheme to set the Operation monitor to turn off after a specified time, and the computer's hard disk motor to turn off if the hard disk drive has not been accessed for a specified period of time (if the Press a key on the key- system reads or writes data, the hard disk motor will be turned back on). - Page 220 Windows XP Information Each Windows Power Scheme will also adjust the processor performance of your machine in order to save pow- er. This is worth bearing in mind if you are experiencing any reduced performance (especially under DC/battery power). Choose the Home/Office Desk scheme for maximum performance when the computer is powered from an AC power source.
-
Page 221: System Power Options
Windows XP Information System Power Options You can use the system power options to stop the computer’s operation and restart where you left off. This sys- tem features Stand by and Hibernate sleep mode levels (Hibernate mode will need to be enabled by clicking the option in the Hibernate tab in the Power Options control panel - see “Hibernate”... - Page 222 Windows XP Information Stand by Stand by saves the least amount of power, but takes the shortest time to return to full operation. During Stand by the hard disk is turned off, and the CPU is made to idle System Resume at its slowest speed.
-
Page 223: Configuring The Power Button
Windows XP Information Configuring the Power Button The power button may be set to send the computer in to either Stand by or Hibernate Sleep Button mode. In Stand by mode, the LED will blink green. In Hibernate mode the LED will be off (battery) or orange (AC/DC adapter). -
Page 224: D - 26 Battery Information
Windows XP Information Battery Information Please follow these simple guidelines to get the best use out of your battery. Low Battery New Battery Warning Always completely discharge, then fully charge, a new battery (see “Battery FAQ” When the battery is criti- on page D - 29 for instructions on how to do this). -
Page 225: Recharging The Battery With The Ac/Dc Adapter
Windows XP Information Battery life may be shortened through improper maintenance. To optimize the life and improve its perfor- mance, fully discharge and recharge the battery at least once every 30 days. We recommend that you do not remove the battery yourself. If you need to remove the battery for any reason, “Removing the Battery”... - Page 226 Windows XP Information Proper handling of the Battery Pack • DO NOT disassemble the battery pack under any circumstances • DO NOT expose the battery to fire or high temperatures, it may explode • DO NOT connect the metal terminals (+, -) to each other Damaged Battery Warning Should you notice any physical defects (e.g.
-
Page 227: Battery Faq
Windows XP Information Battery FAQ How do I completely discharge the battery? Use the computer with battery power until it shuts down due to a low battery. Don’t Caution turn off the computer by yourself even when you see a message that indicates the bat- Danger of explosion if tery is critically low, just let the computer use up all of the battery power and shut battery is incorrectly re-... -
Page 228: D - 30 Driver Installation
Windows XP Information Driver Installation 1. Check the driver installation order from Table D - 4 (the drivers must be installed in this order) which is the Insert the Device Drivers & Utilities + User’s Manual same as that listed in the Drivers Installer menu below. - Page 229 Windows XP Information Updating/Reinstalling Individual Drivers WinXP SP3 Driver Page # If you wish to update/reinstall individual drivers it may be necessary to uninstall the original driver.To do this go Chipset Page D - 32 to the Control Panel in the Windows OS and double- Video Page D - 32 click the Add/Remove Programs item.
-
Page 230: Driver Installation Procedure
Windows XP Information Driver Installation Procedure Chipset Insert the Device Drivers & Utilities + User’s Manual 1. Click 1.Install Chipset Driver > Yes. disc and click Install Drivers (button), or Option Driv- 2. Click Next > Yes > Next. ers (button) to access the optional driver menu. 3. - Page 231 Windows XP Information Modem Hot Key AP 1. Click 4.Install Modem Driver > Yes. 1. Click 7.Install Hotkey AP > Yes. 2. Click OK. 2. Click Next > Install. 3. The modem is ready for dial-up configuration. 3. Click Finish > Finish to restart the computer. 4.
-
Page 232: Pc Camera Module
Windows XP Information Module Drivers PC Camera Module See the following pages for the driver installation pro- “PC Camera Module” on page D - cedures for any of the optional modules included in your purchase configuration. Bluetooth Module Note: The operating system is the default setting for Bluetooth control in Windows XP, and does not re- quire a driver. - Page 233 Windows XP Information PC Camera Module Before installing the optional PC Camera module driver use the Fn + F10 key com- bination (see “Function Keys & Visual Indicators” on page D - 7), or use the On- Taking Still Pictures Screen Menu button (see “On-Screen Menu”...
- Page 234 Windows XP Information PC Camera Audio Setup If you wish to capture video & audio with your camera, it is necessary to setup the audio recording options in Windows. Go to the Start menu and point to Settings (or just click Control Panel) and click Control Panel, then double- click the Sounds &...
- Page 235 Windows XP Information BisonCap BisonCap is a video viewer for general purpose video viewing and testing, and for capturing video files to .avi format. Pre-Allocating File Space Run the BisonCap application from the Start > Programs/All Programs > Bison- Cam menu (it is recommended that you set the capture file before the capture You may pre-allocate process - see Set Capture File below).
- Page 236 Windows XP Information Reducing Video File Size Note that capturing high resolution video files requires a substantial amount of disk space for each file. After recording video, check the video file size (right-click the file and select Properties) and the remaining free space on your hard disk (go to My Computer, right-click the hard disk, and select Properties) If necessary you can remove the recorded video file to a removable medium e.g.
- Page 237 Windows XP Information Eliminating Screen Flicker If you find that the video screen in the BisonCap program is flickering, you can try to adjust the setting in the Video Capture Filter options. Run the BisonCap program. Go to Options and scroll down to select Video Capture Filter..Click either 50Hz or 60Hz under Frequency in Property Page (tab).
- Page 238 Windows XP Information Zoom The BisonCap program allows you to zoom the camera in and out. 1. Run the BisonCap program. 2. Go to Zoom and select Zoom Out/Zoom In. Figure D - 21 Zoom/Setting Snapshot Folder Taking Still Pictures The BisonCap program allows you to take still pictures.
- Page 239 Windows XP Information Wireless LAN, Bluetooth & 3.75G Modules Bluetooth Module The operating system’s Bluetooth Devices control panel is used to configure the Bluetooth settings in Wireless Device Operation Aboard Aircraft Windows XP, and therefore does not require a driver. Use the Fn + F12 key combination (see “Function The use of any portable electronic transmission devices...
- Page 240 Windows XP Information Bluetooth Local Area Connection Icon If you want to display the Local Area Connection icon for the Bluetooth connection in the taskbar, set it up as follows: Wireless Device Operation Aboard 1. Access the Network Connections control panel in Windows (Start > Settings > Aircraft Network Connections OR Start >...
-
Page 241: Bluetooth Configuration In Windows Xp
Windows XP Information Bluetooth Configuration in Windows XP Setup your Bluetooth Device so the Computer Can Find it Turn your Bluetooth device (e.g. PDA, mobile phone etc.) on. Bluetooth Taskbar Make the device discoverable (to do this check your device documentation). Icon To Turn the Bluetooth Module On If you cannot see the... -
Page 242: To Add A Bluetooth Device
Windows XP Information To Add a Bluetooth Device 1. Access the Bluetooth Devices control panel. 2. Click Options (tab), and make sure that Allow Bluetooth devices to connect to this computer check box (Connections) has a tick inside it. 3. Click Devices (tab), and then click Add. 4. - Page 243 Windows XP Information To Change Settings for the Bluetooth Device Access the Bluetooth Devices control panel. Click on the device you want to change and click Properties to: • Change the name of the device (click General, type a new name and click OK). •...
- Page 244 Windows XP Information 3.75G/HSPA Module If you have included an optional 3.75G or HSPA (High Speed Packet Access) module (see “Communication” on page A - 5 for specification details) in your purchase option, you will have the appropriate software provided for your module.
- Page 245 Windows XP Information 3G Watcher Application Installation 1. Enable power to the module by pressing the Fn + key combination (the Wireless Device icon will indicate the module’s power status). Operation Aboard Note: If a Found New Hardware window appears (up to seven windows Aircraft may appear with this message) click Cancel in all windows that appear, and The use of any portable...
- Page 246 Windows XP Information HSPA Modem Interface Installation 1. Enable power to the module by pressing the Fn + key combination (the Wireless Device icon will indicate the module’s power status). Operation Aboard Note: If a Found New Hardware window appears (up to seven windows Aircraft may appear with this message) click Cancel in all windows that appear, and The use of any portable...
- Page 247 Windows XP Information Wireless LAN Module There are 3 Wireless LAN module options available for this computer, depending on Wireless Device your purchase configuration. You may have either an Intel PRO/Wireless Operation Aboard 3945ABG (802.11a/b/g) PCIe WLAN module, Intel PRO/Wireless 4965AGN Aircraft (802.11a/g/n) PCIe WLAN module or 802.11b/g USB WLAN module.
- Page 248 Windows XP Information 802.11 b/g WLAN Driver Installation 1. Make sure the module is powered on, and then insert the Device Drivers & Utilities + User’s Manual disc into the CD/DVD drive. 2. Click Option Drivers (button). 3. Click 3.Install Wireless Lan Driver > Yes. 4.
- Page 249 Windows XP Information Intel WLAN Driver Installation 1. Make sure the module is powered on, and then insert the Device Drivers & Utilities + User’s Manual disc into the CD/DVD drive. 2. Click Option Drivers (button). 3. Click 3.Install Wireless Lan Driver > Yes. 4.
- Page 250 Windows XP Information Fingerprint Reader Module If you have included the fingerprint reader in your purchase option you will need to Help & Manual install the driver as per the instructions below. Right-click the taskbar icon Make sure you have administrator’s rights to your computer, and have a Windows to bring up the menu to password enabled for full security protection.
- Page 251 Windows XP Information User Enrollment Click Start > Programs/All Programs > Protector Suite QL > User Enrollment, or double click the taskbar icon (click Start fingerprint enrollment). On the first run of the program you will be asked to click the button to accept the license, and then click OK. Click Next (the enrollment method will automatically be configured), and then click Finish.
- Page 252 Windows XP Information 10. Repeat the process for all the fingers you wish to enroll (see sidebar), and then click Next > Finish. 11. Click “Help” in the Fingerprint Control Center to get more information on any topic. 12. You can also run the Tutorial, or Introduction (to run the product tour video) to get more information. 13.
-
Page 253: Fingerprint Control Center Features
Windows XP Information Fingerprint Control Center Features Application Launcher The Application Launcher allows you to register applications to be launched when assigned to a particular fin- ger. Simply copy the application icon on to one of the registered fingers and ten click OK to close the application window. - Page 254 Windows XP Information D - 56...