Miele G 4920 Operating Instructions Manual
Hide thumbs
Also See for G 4920:
- Operating instructions manual (84 pages) ,
- Operating instructions manual (92 pages)

Related Manuals for Miele G 4920


Summary of Contents for Miele G 4920
-
Page 1: Operating Instructions
Operating Instructions Dishwasher To prevent accidents and machine damage, read these instructions be‐ fore installation or use. en-US HG05 M.-Nr. 10 014 070... -
Page 2: Table Of Contents
Contents IMPORTANT SAFETY INSTRUCTIONS..............4 Guide to the dishwasher ..................13 Appliance overview....................13 Control panel......................14 Caring for the environment ................. 15 Disposal of packaging material................15 Disposal of your old appliance ................15 Energy-saving dishwashing ................... 15 Before using for the first time................16 Opening the door .................... - Page 3 Contents Options........................38 Short ........................ 38 Turning off the refill indicator.................. 39 Delay Start ......................40 Optimize Standby ....................42 Factory default settings..................43 Program overview ....................44 Cleaning and care ....................45 Cleaning the wash cabinet..................45 Cleaning the door and the door seal ..............45 Cleaning the door front ..................
-
Page 4: Important Safety Instructions
Keep the installation plan and the operating instructions in a safe place and pass them on to any future owner. Miele cannot be held liable for damage caused by non-compli‐ ance with this information. -
Page 5: Correct Use
IMPORTANT SAFETY INSTRUCTIONS Correct use This dishwasher is intended for use in domestic households and similar residential environments. This dishwasher is not suitable for outdoor use. It must only be used as specified in these operating instructions for cleaning domestic dishware and cutlery. - Page 6 IMPORTANT SAFETY INSTRUCTIONS Safety with children Children must be kept away from the appliance unless they are constantly supervised. Children should be supervised to ensure that they do not play with the appliance. Keep small children away from the appliance at all times to avoid the risk of injury.
- Page 7 Miele cannot be held liable for the consequences of an inadequate grounding system (e.g. electric shock). ...
- Page 8 The water pressure (flow pressure at the connection point) must be between 4.35 - 145 psi. A damaged appliance could be dangerous. If the dishwasher gets damaged, turn off the electrical supply and contact Miele.
- Page 9 (turn it off and with‐ draw the plug from the socket). If the connection cable is damaged, it must be replaced with a special cable of the same type (available from Miele) by a Miele-au‐ thorized service technician only.
- Page 10 IMPORTANT SAFETY INSTRUCTIONS Proper installation The dishwasher must be installed and connected in compliance with the installation plan. Be careful when installing the dishwasher. Wear protective gloves to avoid injury on any sharp metal components. The dishwasher must be correctly aligned horizontally to ensure problem-free operation.
- Page 11 IMPORTANT SAFETY INSTRUCTIONS Proper use Do not use solvents in the dishwasher. Danger of explosion! Do not inhale or ingest powder detergent. Dishwasher detergents contain irritant or corrosive ingredients which can cause burning in the nose, mouth, and throat if swallowed, or inhibit breathing. Seek medical attention immediately if detergent has been swallowed or in‐...
- Page 12 Please observe the information given in "Technical data" regard‐ ing the capacity of the dishwasher. Accessories Use only genuine original Miele parts. If spare parts or accesso‐ ries from other manufacturers are used, the warranty may become invalid. Disposal of your old dishwasher ...
-
Page 13: Guide To The Dishwasher
Guide to the dishwasher Appliance overview a Upper spray arm (not visible) f Lower spray arm b Cutlery tray (depending on model) g Filter system c Upper basket h Data plate d Middle spray arm i Rinse aid reservoir e Air intake for drying (depending on j Dual compartment detergent dis‐... -
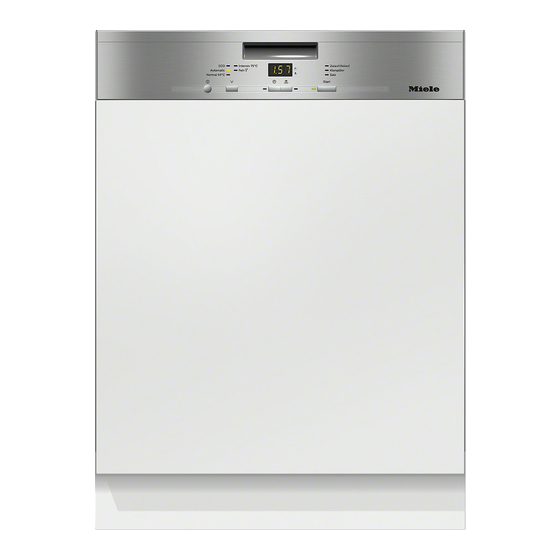
Page 14: Control Panel
Guide to the dishwasher Control panel a Program selection e Short button with indicator light b Time display f Delay Start button with indicator light c Check/Refill indicators g Program selection button d Start button with indicator light h ... -
Page 15: Caring For The Environment
If the water is heated by for ex‐ ample, solar panels, this would be energy efficient. However, if your water is heated by electricity we would recommend con‐ nection to cold water. You can find additional tips on energy- saving dishwashing in "Miele's guide to dishwashing". -
Page 16: Before Using For The First Time
Before using for the first time Opening the door Closing the door Push the baskets in. Then lift the door upwards and push until it clicks into position. Danger of crushing injuries! Do not put your hand inside the door as it is closing. -
Page 17: Before Using The Appliance For The First Time, You Require
Before using for the first time Before using the appliance for Rinse aid the first time, you require: Rinse aid is needed to prevent spotting on dishes and glassware. The rinse aid – Domestic dishwasher detergent is filled in the reservoir and the set –... -
Page 18: Rinse Aid Indicator
Before using for the first time Rinse aid indicator When the Rinse aid indicator lights up, the rinse aid reservoir contains suffi‐ cient rinse aid for 2 - 3 programs only. Add rinse aid. If you consistently use a "Tab" deter‐ gent, you can deactivate the refill indi‐... -
Page 19: Setting The Rinse Aid Dosage
Before using for the first time Setting the rinse aid dosage Turn the dishwasher off with the button, if it is turned on. You can adjust the rinse aid dosage for best results. Press the Start button and, simulta‐ neously, switch the dishwasher on The rinse aid dosage is set in stages using the ... -
Page 20: Loading The Dishwasher
Loading the dishwasher Tips – Make sure that small items cannot fall through the holders in the bas‐ Remove coarse food residues from the kets. dishware. Small items, e.g., lids, should there‐ fore be placed in the cutlery tray or There is no need to rinse items under cutlery basket (depending on model). - Page 21 (e.g., Riedel glassware). – Copper, brass, tin and aluminum – Use detergents with glass protective items may discolor or become matt. additives (e.g., Miele CareCollection – Colors painted over a glaze may fade tabs). after a number of washes.
-
Page 22: Loading Examples
Loading the dishwasher Loading examples Loading for 10 standard place settings with cutlery tray Lower basket Upper basket Cutlery tray (depending on model) - Page 23 Loading the dishwasher Loading for 16 standard place settings with cutlery tray Upper basket Lower basket Cutlery tray (depending on model)
- Page 24 Loading the dishwasher Loading for 10 standard place settings with cutlery basket Lower basket Upper basket Cutlery basket...
- Page 25 Loading the dishwasher Loading for 13 standard place settings with cutlery basket Lower basket Upper basket Cutlery basket...
-
Page 26: Upper Basket
Loading the dishwasher Upper basket Adjustable cup rack (depending on model) For safety reasons, do not oper‐ Raise the rack to make room for tall ate the dishwasher without the upper items. and lower baskets in place (except Glasses can be arranged along the po‐... -
Page 27: Adjusting The Upper Basket
Loading the dishwasher Adjusting the upper basket Dishwashers with cutlery basket (see data plate for model number) In order to gain more space for taller items the upper basket can be adjusted Upper Plate in inches (cm) on three levels with 3/4" (2 cm) be‐ basket Upper basket Lower... -
Page 28: Lower Basket
Loading the dishwasher Lower basket MultiComfort area The rear section of the lower basket is used for washing cups, glasses, plates, pots and pans. Hinged spikes The spikes at the front are used for washing plates, soup bowls, platters, dessert bowls, and saucers. The spikes can be lowered to make more room for large items, e.g. -
Page 29: Cutlery
Loading the dishwasher Cutlery Cutlery tray (depending on model) Arrange the cutlery in the tray as shown. To make unloading much easier, cutlery should be grouped in zones, one for knives, one for forks, one for spoons, etc. Spoon heads should be placed in con‐ tact with at least one of the serrated re‐... -
Page 30: Cutlery Basket (Depending On Model)
Loading the dishwasher Cutlery basket (depending on model) Fit it onto the cutlery basket if re‐ quired. The cutlery basket can be placed any‐ where on the front rows of spikes in the lower basket. To avoid the risk of injury, knives and forks should be placed with the han‐... -
Page 31: Operation
Express program (if availa‐ For optimum cleaning and drying re‐ ble) is used. sults, use Miele dishwasher detergent and add Miele salt and Miele rinse aid Use only the recommended amount separately. See "Optional accesso‐ of detergent. Continued use of too ries."... -
Page 32: Adding Detergent
Operation Adding detergent Add the required amount of detergent and close the flap. Press the opening catch on the de‐ tergent dispenser. The flap will spring Make sure that the detergent packag‐ open. ing is properly closed after use to avoid it getting damp and becoming The flap is always open at the end of a lumpy. -
Page 33: Turning On
Operation Turning on Selecting a program Make sure the spray arms are not ob‐ Choose your program according to the structed. type of load and the degree of soiling. Close the door. The different programs and their uses are described in the Program Over‐... -
Page 34: Starting A Program
Operation Starting a program Time display The duration of the program selected The dishwasher can be started only if appears in hours and minutes in the the door is closed. display before the program begins. Dur‐ ing the program, the time left until the ... -
Page 35: Energy Management
Operation Energy management At the end of the program To save energy, the dishwasher will The program has finished when . switch off automatically 10 minutes af‐ appears in the display. ter the last time a button has been The drying fan may continue to run for pressed or 10 minutes after the end of a few minutes at the end of the pro‐... -
Page 36: Turning Off
Operation Turning off Unloading the dishwasher At the end of a program: Dishes tend to break and chip more easily when they are hot. Allow the The dishwasher can be switched off dishes to cool until they are comforta‐ at any time using the ... -
Page 37: Interrupting A Program
Operation Interrupting a program Changing a program A program will be interrupted as soon If the detergent dispenser flap has as the door is opened. already opened, do not change the program. Close the door and press the Start button. -
Page 38: Options
Options Short The Short option reduces the dura‐ tion of programs in which this option is available. In order to achieve optimum cleaning results, consumption rates are in‐ creased with this option. Turn the dishwasher on with the button. -
Page 39: Turning Off The Refill Indicator
Options Turning off the refill indicator Press the button 9 times. If you consistently use a Tab detergent, The indicator light will flash 9 times you can deactivate the refill indicator if at short intervals. you wish. The flashing sequence in the time dis‐... -
Page 40: Delay Start
Options Delay Start Turn the dishwasher on with the button. You can set the start time for a pro‐ The Start indicator light flashes. gram. The start time can be delayed between 30 minutes and 24 hours. Select the desired program. The delay period is shown in 30 mi‐... - Page 41 Options If Optimize Standby is switched on If you open the door during the delay (see "Options - Optimize Standby"), start time, you must then press the the time display will go out after a few Start button to continue the delay start minutes, leaving just the Start indica‐...
-
Page 42: Optimize Standby
Options Optimize Standby Press the button 8 times. "Optimize Standby" is activated by de‐ The indicator light will flash 8 times fault. at short intervals. To save energy, the dishwasher will The flashing sequence in the display switch off automatically a few minutes shows whether or not Optimize Stand‐... -
Page 43: Factory Default Settings
Options Factory default settings Press the button 19 times. If you have altered any settings from The indicator light will flash once at the factory default, you can reset them a long interval and then 9 times at short back to the factory default settings as intervals. -
Page 44: Program Overview
Program overview Program When to use Program sequence Pre- Main Interim Final Drying wash wash rinse rinse Normal Program for regular use to If re‐ If re‐ completely wash a full load quired quired of normally soiled dish‐ ware with the ability to ad‐ just energy and water con‐... -
Page 45: Cleaning And Care
Cleaning and care Cleaning the door and the door Check and clean your dishwasher seal regularly. This will help avoid prob‐ lems and faults. Bacteria could build up on the door seal and the sides of the dishwasher All surfaces are susceptible to door as these surfaces are outside the scratching. -
Page 46: Cleaning The Door Front
Cleaning and care Cleaning the door front To better maintain your appliance avoid the following: If soiling remains longer, it may – Cleaning products containing soda, happen that the surfaces can be‐ ammonia, acid, or chloride come discolored or changed. –... -
Page 47: Filter System
Cleaning and care Filter system Filter system The filter system in the base of the Turn the dishwasher off. wash cabinet prevents food from being redeposited on dishes. It also protects the circulation pump from damage caused by foreign objects. ... - Page 48 Cleaning and care To clean the inside of the filter, the flap Replace the filter system so that it lies flat in the base of the wash cabi‐ must be opened: net. Press catches together in the di‐ ...
-
Page 49: Cleaning The Spray Arms
Cleaning and care Cleaning the spray arms Particles of food can get stuck in the spray arm jets and bearings. The spray arms should therefore be inspected and cleaned regularly (approx. every 4 - 6 months). Turn the dishwasher off. Remove the spray arms as follows: ... -
Page 50: Frequently Asked Questions
Miele Service. This will save time and money. The following guide may help you to find the reason for a fault, and to correct it. - Page 51 Press the Start button. pears in the display. If the indicator lights flash again, there is a technical fault. Contact Miele Service. Fault : The WaterProof System has reacted. The drain pump is still Turn off the water supply.
-
Page 52: Water Intake Fault
Frequently Asked Questions Water intake fault Problem Possible cause and solution The Intake/Drain indica‐ The water supply is turned off. tor flashes on and off. Turn on the water supply all the way. The dishwasher stops Before fixing the fault: during a program. -
Page 53: General Problems
Frequently Asked Questions General problems Problem Possible cause and solution The indicator lights and The dishwasher has switched off automatically to time display are dark. save energy. Turn the dishwasher on again with the button. Detergent residue is left The dispenser was still damp when detergent was in the dispenser at the added. -
Page 54: Noises
Frequently Asked Questions Noises Problem Possible cause and solution There is a knocking A spray arm is hitting the dishware. noise in the wash cabi‐ Interrupt the program, and rearrange the items net. which are obstructing the spray arm. There is a rattling noise Dishware is moving around in the wash cabinet. -
Page 55: Poor Cleaning Results
Frequently Asked Questions Poor cleaning results Problem Possible cause and solution The dishes are not The dishes were not loaded correctly. clean. See notes in "Loading the dishwasher". The program was not powerful enough. Select a more intensive program (see "Program overview"). - Page 56 Frequently Asked Questions Problem Possible cause and solution Dishware is not dry or The rinse aid dosage is set too low or the rinse aid cutlery and glasses are reservoir is empty. spotty. Replenish the reservoir, increase the dosage, or change the brand of rinse aid (see "Before using for the first time - Rinse aid").
- Page 57 Frequently Asked Questions Problem Possible cause and solution There are rust stains on The affected items are not corrosion resistant. the cutlery. There is no remedy. Purchase cutlery which is dishwasher-safe.
-
Page 58: Frequently Asked Questions
Frequently asked questions Cleaning the drain pump and non-return valve If the water has not been pumped away at the end of a program, the drain pump or the non-return valve might be blocked. They are, however, easy to clean. ... -
Page 59: Customer Service
Miele Service Department at the phone Provider using genuine Miele parts. On‐ number on the back of this booklet. ly genuine Miele parts installed by fac‐ tory trained professionals can guaran‐ tee the safety, reliability, and longevity of your Miele appliance. -
Page 60: Optional Accessories
These and many other useful products and glass protection additives can be ordered via the Miele website or – Phosphate-free - safe for the envi‐ from Miele (see end of this manual for ronment contact details). - Page 61 Optional accessories Dishwasher care products Accessories Miele cleaning and care products pro‐ Some accessories may be supplied as vide optimum care for your dishwasher. standard, depending on model. Dishwasher cleaner Cappuccinatore insert – Cleans the dishwasher effectively The Cappuccinatore insert can be used...
-
Page 63: Installation Instructions
Installation Instructions Please refer to the Installation Diagram supplied with these instructions. To comply with IEC sound testing protocols, please contact Miele for additional instructions. Information is subject to change. Please refer to our website to obtain the most current product specification, technical & warranty information. -
Page 64: Electrical Connection
Technical Service Department: USA: 1-800-999-1360 A damaged power cord must only be CDN: 1-800-565-6435 replaced with a genuine Miele cord by a Miele service technician. Specifications The dishwasher comes equipped with a Grounding instructions 4 ft (1.2 m) powercord with a molded... -
Page 65: Grounding Instructions
Electrical connection Hardwired electrical connection Prior to making a hardwire connec‐ It is possible to hardwire this appliance tion to the terminal, remove the pow‐ to an existing power cable. ercord. Otherwise there will be a risk of electric shock from the attached CAUTION: Before servicing, discon‐... -
Page 66: Water Connection
Water connection Water intake To avoid any damage to the ap‐ pliance, the dishwasher must only be Water in the dishwasher must connected to fully vented pipework. not be used as drinking water. The intake hose must not be –... -
Page 67: Drainage
Water connection Drainage Make sure that there are no kinks in the hose, and that it is not – The machine comes equipped with a squashed or stretched. built-in non-return valve on the dis‐ charge side to prevent waste water from flowing back into the dishwash‐... -
Page 68: Sound Emission Testing
Sound emission testing Prerequisites for sound emission tests Load the dishwasher with 16 standard place settings and use the Normal pro‐ gram. Setup for sound emission tests The dishwasher must be set up according to the following specifications. Install the dishwasher into an analyzing unit. ... - Page 69 Sound emission testing Push the provided fleece strips (depending on model) under the toe-kick until it is flush with the appliance feet . Push the toe-kick into place in such a way that it is flush with the door front .
- Page 70 Sound emission testing Remove the protective film from the provided insulating strip (depending on model) . Push the insulating strip into the front top edge of the toe-kick .
- Page 71 Technical Service. U.S.A. Canada Miele, Inc. Importer Miele Limited National Headquarters 9 Independence Way Headquarters and Miele Centre Princeton, NJ 08540 161 Four Valley Drive Phone: 800-843-7231 Vaughan, ON L4K 4V8 609-419-9898 www.miele.ca 609-419-4298...
- Page 72 G 4920 / G 4925 en-US M.-Nr. 10 014 070 / 03...