Mackie ONYX 1640I User Manual
16-channel premium analog mixer with firewire
Hide thumbs
Also See for ONYX 1640I:
- Bedienungshandbuch (50 pages) ,
- Mode d'emploi (50 pages) ,
- Manual del usuario (50 pages)
Table of Contents
Advertisement
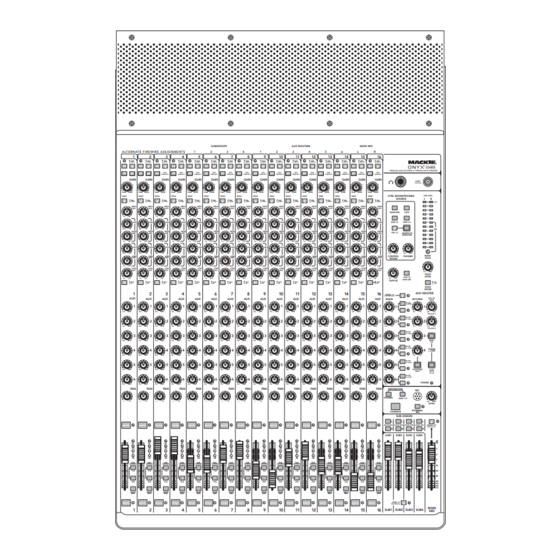
16-Channel Premium Analog Mixer
SUBGROUPS
A LT E R N AT E F I R E W I R E A S S I G N M E N T S
1
2
1
2
3
4
5
6
LINE
LINE
LINE
LINE
LINE
LINE
FW 1
FW 2
FW 3
FW 4
FW 5
FW 6
48V
48V
48V
48V
48V
48V
48V
75Hz
75Hz
75Hz
75Hz
18dB/OCT
18dB/OCT
18dB/OCT
18dB/OCT
GAIN
GAIN
GAIN
GAIN
GAIN
GAIN
30
30
30
30
30
30
U
U
U
U
U
U
20
40
20
40
20
40
20
40
20
40
20
40
20
U
60
U
60
U
60
U
60
U
60
U
60
U
-
20dB
+
40dB
-
20dB
+
40dB
-
20dB
+
40dB
-
20dB
+
40dB
-
20dB
+
40dB
-
20dB
+
40dB
-
20dB
SEND
SEND
SEND
SEND
SEND
SEND
SEND
PRE
PRE
PRE
PRE
PRE
PRE
POST
POST
POST
POST
POST
POST
U
U
U
U
U
U
HIGH
HIGH
HIGH
HIGH
HIGH
HIGH
12kHz
12kHz
12kHz
12kHz
12kHz
12kHz
-15
+15
-15
+15
-15
+15
-15
+15
-15
+15
-15
+15
-15
2k
2k
2k
2k
2k
2k
FREQ
FREQ
FREQ
FREQ
FREQ
FREQ
400
8k
400
8k
400
8k
400
8k
400
8k
400
8k
400
U
U
U
U
U
U
HIGH
HIGH
HIGH
HIGH
HIGH
HIGH
MID
MID
MID
MID
MID
MID
-15
+15
-15
+15
-15
+15
-15
+15
-15
+15
-15
+15
-15
400
400
400
400
400
400
FREQ
FREQ
FREQ
FREQ
FREQ
FREQ
100
2k
100
2k
100
2k
100
2k
100
2k
100
2k
100
U
LOW
U
LOW
U
LOW
U
LOW
U
LOW
U
LOW
MID
MID
MID
MID
MID
MID
-15
+15
-15
+15
-15
+15
-15
+15
-15
+15
-15
+15
-15
U
LOW
U
LOW
U
LOW
U
LOW
U
LOW
U
LOW
80Hz
80Hz
80Hz
80Hz
80Hz
80Hz
-15
+15
-15
+15
-15
+15
-15
+15
-15
+15
-15
+15
-15
OUT
OUT
OUT
OUT
OUT
OUT
EQ
EQ
EQ
EQ
EQ
EQ
EQ
IN
IN
IN
IN
IN
IN
1
2
3
4
5
6
AUX
AUX
AUX
AUX
AUX
AUX
1
1
1
1
1
1
O O
MAX
O O
MAX
O O
MAX
O O
MAX
O O
MAX
O O
MAX
O O
2
2
2
2
2
2
O O
MAX
O O
MAX
O O
MAX
O O
MAX
O O
MAX
O O
MAX
O O
3
3
3
3
3
3
O O
MAX
O O
MAX
O O
MAX
O O
MAX
O O
MAX
O O
MAX
O O
4
4
4
4
4
4
O O
MAX
O O
MAX
O O
MAX
O O
MAX
O O
MAX
O O
MAX
O O
5
5
5
5
5
5
MAX
MAX
MAX
MAX
MAX
MAX
O O
O O
O O
O O
O O
O O
O O
6
6
6
6
6
6
O O
MAX
O O
MAX
O O
MAX
O O
MAX
O O
MAX
O O
MAX
O O
PAN
PAN
PAN
PAN
PAN
PAN
L
R
L
R
L
R
L
R
L
R
L
R
MUTE
MUTE
MUTE
MUTE
MUTE
MUTE
MUTE
OL
OL
OL
OL
OL
OL
+
10
+
10
+
10
+
10
+
10
+
10
0
0
0
0
0
0
-
20
-
20
-
20
-
20
20
-
20
-
SUB
SUB
SUB
SUB
SUB
SUB
ASSIGN
ASSIGN
ASSIGN
ASSIGN
ASSIGN
ASSIGN
1-2
1-2
1-2
1-2
1-2
1-2
3-4
3-4
3-4
3-4
3-4
3-4
MAIN
MAIN
MAIN
MAIN
MAIN
MAIN
MIX
MIX
MIX
MIX
MIX
MIX
SOLO
SOLO
SOLO
SOLO
SOLO
SOLO
SOLO
1
2
3
4
5
6
O W N E R ' S M A N U A L
AUX MASTERS
3
4
1
2
3
4
7
8
9
10
11
12
LINE
LINE
LINE
LINE
LINE
LINE
FW 7
FW 8
FW 9
FW 10
FW 11
FW 12
48V
48V
48V
48V
48V
48V
75Hz
75Hz
75Hz
75Hz
75Hz
75Hz
18dB/OCT
18dB/OCT
18dB/OCT
18dB/OCT
18dB/OCT
18dB/OCT
GAIN
GAIN
GAIN
GAIN
GAIN
GAIN
30
30
30
30
30
30
30
U
U
U
U
U
U
U
40
20
40
20
40
20
40
20
40
20
40
20
60
U
60
U
60
U
60
U
60
U
60
U
+
40dB
-
20dB
+
40dB
-
20dB
+
40dB
-
20dB
+
40dB
-
20dB
+
40dB
-
20dB
+
40dB
-
20dB
SEND
SEND
SEND
SEND
SEND
SEND
PRE
PRE
PRE
PRE
PRE
PRE
POST
POST
POST
POST
POST
POST
U
U
U
U
U
U
U
HIGH
HIGH
HIGH
HIGH
HIGH
HIGH
12kHz
12kHz
12kHz
12kHz
12kHz
12kHz
+15
-15
+15
-15
+15
-15
+15
-15
+15
-15
+15
-15
2k
2k
2k
2k
2k
2k
2k
FREQ
FREQ
FREQ
FREQ
FREQ
FREQ
8k
400
8k
400
8k
400
8k
400
8k
400
8k
400
U
U
U
U
U
U
U
HIGH
HIGH
HIGH
HIGH
HIGH
HIGH
MID
MID
MID
MID
MID
MID
+15
-15
+15
-15
+15
-15
+15
-15
+15
-15
+15
-15
400
400
400
400
400
400
400
FREQ
FREQ
FREQ
FREQ
FREQ
FREQ
2k
100
2k
100
2k
100
2k
100
2k
100
2k
100
U
LOW
U
LOW
U
LOW
U
LOW
U
LOW
U
LOW
U
MID
MID
MID
MID
MID
MID
+15
-15
+15
-15
+15
-15
+15
-15
+15
-15
+15
-15
U
LOW
U
LOW
U
LOW
U
LOW
U
LOW
U
LOW
U
80Hz
80Hz
80Hz
80Hz
80Hz
80Hz
+15
-15
+15
-15
+15
-15
+15
-15
+15
-15
+15
-15
OUT
OUT
OUT
OUT
OUT
OUT
EQ
EQ
EQ
EQ
EQ
EQ
IN
IN
IN
IN
IN
IN
7
8
9
10
11
12
AUX
AUX
AUX
AUX
AUX
AUX
1
1
1
1
1
1
MAX
O O
MAX
O O
MAX
O O
MAX
O O
MAX
O O
MAX
O O
2
2
2
2
2
2
MAX
O O
MAX
O O
MAX
O O
MAX
O O
MAX
O O
MAX
O O
3
3
3
3
3
3
MAX
O O
MAX
O O
MAX
O O
MAX
O O
MAX
O O
MAX
O O
4
4
4
4
4
4
MAX
O O
MAX
O O
MAX
O O
MAX
O O
MAX
O O
MAX
O O
5
5
5
5
5
5
MAX
MAX
MAX
MAX
MAX
MAX
O O
O O
O O
O O
O O
O O
6
6
6
6
6
6
MAX
O O
MAX
O O
MAX
O O
MAX
O O
MAX
O O
MAX
O O
PAN
PAN
PAN
PAN
PAN
PAN
L
R
L
R
L
R
L
R
L
R
L
R
L
MUTE
MUTE
MUTE
MUTE
MUTE
MUTE
OL
OL
OL
OL
OL
OL
+
10
+
10
+
10
+
10
+
10
+
10
0
0
0
0
0
0
-
20
-
20
20
-
-
20
-
20
-
20
SUB
SUB
SUB
SUB
SUB
SUB
ASSIGN
ASSIGN
ASSIGN
ASSIGN
ASSIGN
ASSIGN
1-2
1-2
1-2
1-2
1-2
1-2
3-4
3-4
3-4
3-4
3-4
3-4
MAIN
MAIN
MAIN
MAIN
MAIN
MAIN
MIX
MIX
MIX
MIX
MIX
MIX
SOLO
SOLO
SOLO
SOLO
SOLO
SOLO
7
8
9
10
11
12
with FireWire
MAIN MIX
5
6
L
R
13
14
15
16
LINE
LINE
LINE
LINE
FW 13
FW 14
FW 15
FW 16
48V
48V
48V
PREMIUM ANALOG MIXER w/ PERKINS EQ & FIREWIRE
75Hz
75Hz
75Hz
75Hz
18dB/OCT
18dB/OCT
18dB/OCT
18dB/OCT
GAIN
GAIN
GAIN
GAIN
LAMP
30
30
30
12V 0.5A
U
U
U
40
20
40
20
40
20
40
60
U
60
U
60
U
60
+
40dB
-
20dB
+
40dB
-
20dB
+
40dB
-
20dB
+
40dB
CTRL ROOM/PHONES
0dB=0dBu
SEND
SEND
SEND
SOURCE
L
PRE
PRE
PRE
PRE
POST
POST
POST
POST
U
U
U
HIGH
HIGH
HIGH
HIGH
12kHz
12kHz
12kHz
12kHz
MAIN MIX
TAPE
+15
-15
+15
-15
+15
-15
+15
2k
2k
2k
SUB 1-2
SUB 3-4
FREQ
FREQ
FREQ
FREQ
8k
400
8k
400
8k
400
8k
U
U
U
HIGH
HIGH
HIGH
HIGH
FW 1-2
ASSIGN TO
MID
MID
MID
MID
MAIN MIX
+15
-15
+15
-15
+15
-15
+15
400
400
400
FREQ
FREQ
FREQ
FREQ
2k
100
2k
100
2k
100
2k
O O
MAX
O O
MAX
LOW
U
LOW
U
LOW
U
LOW
CONTROL
PHONES
RUDE
MID
MID
MID
MID
ROOM
SOLO
+15
-15
+15
-15
+15
-15
+15
LOW
U
LOW
U
LOW
U
LOW
80Hz
80Hz
80Hz
80Hz
O O
SOLO
LEVEL
TAPE TO
MAX
+15
-15
+15
-15
+15
-15
+15
O O
MAIN MIX
TAPE IN
OUT
OUT
OUT
OUT
EQ
EQ
EQ
IN
IN
IN
IN
SOLO
MODE
13
14
15
16
AUX MASTER
SENDS 1-6
TO FW 9-14
AUX
AUX
AUX
AUX
SENDS
RETURNS
PRE
POST
1
1
1
1
1
1
SOLO
MAX
O O
MAX
O O
MAX
O O
MAX
O O
+
15
O O
+
10
PRE
POST
2
2
2
2
2
2
SOLO
MAX
O O
MAX
O O
MAX
O O
MAX
O O
15
O O
10
+
+
PRE
POST
3
3
3
3
3
3
SOLO
MAX
O O
MAX
O O
MAX
O O
MAX
O O
+
15
O O
+
10
PRE
POST
4
4
4
4
4
4
SOLO
MAX
O O
MAX
O O
MAX
O O
MAX
O O
+
15
O O
+
10
PRE
POST
5
5
5
5
5
SOLO
MAX
MAX
MAX
MAX
15
CR/PHONES
O O
O O
O O
O O
+
ONLY
PRE
POST
6
6
6
6
6
POWER
SOLO
MAX
O O
MAX
O O
MAX
O O
MAX
O O
15
+
PAN
PAN
PAN
PAN
DESTINATION
MIC
PHONES
AUX 1-6
R
L
R
L
R
L
R
EXTERNAL
TALKBACK
MIC
SUB ASSIGN
L
L
L
L
MUTE
MUTE
MUTE
MAIN MIX
MAIN MIX
MAIN MIX
MAIN MIX
R
R
R
R
SUB1
SUB2
SUB3
SUB4
OL
OL
OL
OL
+
10
+
10
+
10
+
10
0
0
0
0
-
20
-
20
-
20
-
20
SUB
SUB
SUB
SUB
ASSIGN
ASSIGN
ASSIGN
ASSIGN
1-2
1-2
1-2
1-2
3-4
3-4
3-4
3-4
MAIN
MAIN
MAIN
MAIN
MIX
MIX
MIX
MIX
SUBS 1-4
SOLO
SOLO
SOLO
TO FW 5-8
13
14
15
16
SUB1
SUB2
SUB3
SUB4
R
20
CLIP
15
10
6
3
0
2
LEVEL
SET
4
7
10
20
30
MAX
PFL
AFL
EFX TO
MON
O O
+
10
TO AUX 5
O O
10
+
TO AUX 6
SEND
TO
MAIN
SUBS
SUBS
1-2
3-4
MAX
O O
LEVEL
ASSIGN TO
FW 15-16
dB
10
5
U
5
10
20
30
40
50
60
O O
MAIN
MIX
Advertisement
Table of Contents

Related Manuals for Mackie ONYX 1640I


Summary of Contents for Mackie ONYX 1640I
- Page 1 16-Channel Premium Analog Mixer SUBGROUPS A LT E R N AT E F I R E W I R E A S S I G N M E N T S LINE LINE LINE LINE LINE LINE LINE LINE FW 1 FW 2 FW 3 FW 4...
-
Page 2: Important Safety Instructions
(service) dans le livret d'instruction accompagnant l'appareil. Onyx 1640i 20. NOTE: This equipment has been tested and found to comply with the limits for a Class B digital device, pursuant to part 15 of the FCC Rules. -
Page 3: Quick Start
Quick Start We realize that you must be really keen to try out your new mixer. Please read the safety instructions on page 2, then have a look through some of the features and details in this manual. Setup Use the mixer in a nice clean and dry environment, free from dryer lint and dust bunnies. -
Page 4: Introduction
"Planet-Earth" switching power supply for worldwide use Onyx 1640i Deep FireWire Integration The Onyx 1640i is the fl agship mixer of the series, boasting a full 16x16 FireWire interface, allowing for something that a DAW could never do alone: A true tape-style mixdown. - Page 5 Appendix D: Rotopod instructions. Appendix E: FireWire. Appendix F: Modifi cations. Need help with your new mixer? • Visit www.mackie.com and click Sup- port to fi nd: FAQs, manuals, addendums, and other useful information. • Email us at: techmail@mackie.com. • Telephone 1-800-898-3211 to speak with...
-
Page 6: Table Of Contents
36. PAN... 17 37. MUTE ... 17 38. CHANNEL FADER ... 17 39. -20, 0, +10 AND OL LEDS ... 17 Onyx 1640i 40. ASSIGN ... 17 41. SOLO ... 18 CONTROL ROOM/PHONES AND METERS ... 19 42. HEADPHONE OUTPUT ... 19 43. -
Page 7: Hookup Diagrams
FW button ( ) to send main mix to computer via FireWire channels 15 and 16 dock connects to the tape input. Headphones ® Owner's Manual Mackie SRM450v2 Powered Speakers (Stage Monitors) Aux Send 1 SRM150 Powered Monitor for keyboard player... - Page 8 3 for your acoustic guitar. Compressors are connected to inserts 6-8 for your vocals. A stereo compressor is connected to the main inserts. Mackie HR824mk2 powered reference monitors are used for your control room listening. The engineer's headphones are used to monitor levels.
- Page 9 Compressors are connected to inserts 3 and 4 for your vocals. An additional stereo compressor is connected to the main inserts. Mackie HR824mk2 powered reference monitors are used for your control room listening. The engineer's headphones are used to monitor levels.
-
Page 10: Features
As a general guide, you should turn on your mixer fi rst, before any external power amplifi ers or powered speakers, and turn it off last. This will reduce the possibilities of any turn-on, or turn-off thumps in your speakers. Onyx 1640i INSERT INSERT INSERT INSERT... -
Page 11: Mic Inputs
4. MIC INPUTS This is a female XLR connector, that accepts a balanced microphone input from almost any type of microphone. The microphone preamps feature our Onyx design, with higher fi delity and headroom rivaling any standalone mic preamp on the market today. The XLR inputs are wired as follows: Pin 1 = Shield or ground Pin 2 = Positive (+ or hot) -
Page 12: Talkback Mic
(graphic equalizer or compressor/limiter), or directly to the inputs of the main amplifi er. Onyx 1640i 11. MONO OUT This 1/4" TRS output connector provides a balanced or unbalanced line-level signal that is a combination of the left and right main out [10] signals (L+R). -
Page 13: Ctrl-Rm Out
TASCAM standard pinout for analog signal connections (the same standard used on the previous generation Onyx 1640 and other legendary Mackie products). The signal at the Recording Outs comes from one of two places: (1) with the FireWire Send button [27] in... -
Page 14: Channel Controls
“U” like Unity gain HIGH HIGH 12kHz 12kHz Mackie mixers have a “U” symbol on almost every level control. It stands for “unity gain,” meaning no change in FREQ FREQ signal level. The labels on the controls are measured in... -
Page 15: Input (Line Or Fw 1-16)
Another way to consider low-cut’s function is that it actually adds fl exibility during live performances. With the addition of low-cut, you can safely use low equalization on vocals. Many times, bass shelving EQ can really benefi t voices. Trouble is, adding low EQ also boosts stage rumble, mic handling clunks and breath pops from way-down low. -
Page 16: Eq In/Out
EQ [31]. Onyx 1640i 31. HIGH MID EQ LEVEL The high mid EQ provides up to 15 dB of boost or cut at 2.5 kHz, and it is fl... -
Page 17: Pan
Aux Sends 1-6 [19] are line-level outputs, and are used if you want to connect external processors, powered stage monitors, or external power amps with passive stage monitors. Aux Returns 1-4 [18] are line-level inputs, typically used to return the output from external processors back to the main mix. -
Page 18: Solo
The Onyx 1640i is what we call a "true 4-bus mixer." Each channel may be assigned or unassigned to any of the subgroups without affecting the other subgroups or settings within the channel, and each subgroup has its own master fader and dedicated output. -
Page 19: Control Room/Phones And Meters
But what if the engineer needs to hear something other than the main mix in the control room or headphones? With the Onyx 1640i, the engineer has several choices of what to listen to. This is one of those tricky parts, so buckle up. -
Page 20: Tape, Sub 1-4, Fw 1-2
Onyx 1640i 3. If you have tape as your source matrix selection, and then engage this switch, it can create a feedback path between tape in and tape out. -
Page 21: Rude Solo Light
You can get a good mix with peaks fl ashing anywhere between –20 and +10 dB on the meters. Most amplifi ers clip at about +10 dBu, and some recorders aren’t so forgiving either. For best real-world results, try to keep your peaks between “0”... -
Page 22: Aux Master
In this case, the aux returns aren’t used to return the signal. Instead, they can be used as additional stereo inputs, or not used at all. Onyx 1640i 55. MASTER AUX SENDS 1-6 AUX MASTER These knobs provide overall control over the aux send... -
Page 23: Aux Sends 1-6 To Fw 9-14
58. AUX SENDS 1-6 to FW 9-14 This switch allows you to send a copy of the aux send 1-6 outputs via FireWire to a computer. The FireWire output is affected by the channel aux send and master aux send controls. For example, you can set up a software effects processor as follows: •... -
Page 24: Aux Return 4 To Cr/Phones Only
If it does not turn on, make sure the power cord is correctly inserted at both ends, the local AC mains supply is active, and the power switch [2] is on. Onyx 1640i... -
Page 25: Talkback
DESTINATION PHONES AUX 1-6 EXTERNAL TALKBACK Talkback The talkback feature allows the engineer to communicate with the talent either through the phones outputs [42] or the aux 1-6 send outputs [19] using the built-in talkback microphone. This saves a lot of shouting over the audience's heads as you set up the talented one's stage monitors to their peculiarly-picky satisfaction. -
Page 26: Main And Subs Mix
Those seven tracks can now be EQ'd on the Onyx 1640i mixer and routed to subgroups 1-2. These are then transmitted back for recording to your digital audio workstation (DAW) via FireWire. This is called track bounce. -
Page 27: Main Mix
73. MAIN MIX This stereo fader allows you to adjust the levels of the main mix signals sent to the XLR and 1/4" main line-level outputs [8, 10], and the tape outputs [15]. This gives you the ultimate feeling of power and control over the sound levels sent to your audience. -
Page 28: Appendix A: Service Information
Visit the Support section of our website (www.mackie.com) where you will fi nd lots of useful information such as FAQs, documentation and any updated PC drivers etc. You may fi nd the answer to the problem without having to send your mixer away. -
Page 29: Appendix B: Connections
Appendix B: Connections “XLR” Connectors Mackie mixers use 3-pin female “XLR” connectors on all microphone inputs, with pin 1 wired to the grounded (earthed) shield, pin 2 wired to the “high” (”hot” or positive polarity) side of the audio signal and pin 3 wired to the “low”... - Page 30 Using the Send-only on an Insert Jack If you insert a TS (mono) 1⁄4" plug only partially (to the fi rst click) into a Mackie insert jack, the plug will not activate the jack switch and will not open the insert loop in the circuit (thereby allowing the channel signal to continue on its merry way through the mixer).
-
Page 31: Appendix C: Technical Information
Appendix C: Technical Information Specifi cations Noise Characteristics: Equivalent Input Noise (EIN), mic input at insert, 150 Ω source impedance, 20 to 20 kHz: 60 dB (max) gain: 40 dB gain: Output Noise Figure (1/4" Main out, all channels assigned to main, Gain knobs at unity, 20 Hz to 20 kHz): Main Mix knob down, channel Level knobs down: Main Mix knob unity, channel Level knobs down:... - Page 32 Therefore, we reserve the right to change these specifi cations at any time without notice. “Mackie,” and the “Running Man” are registered trademarks of LOUD Technologies Inc. All other brand names mentioned are trademarks or registered trademarks of their respective holders, and are hereby acknowledged.
-
Page 33: Block Diagram
Block Diagram CR in R CR in L logic afl R afl L aux 6 (post) aux 6 (pre) aux 5 (post) aux 5 (pre) aux 4 (post) aux 4 (pre) aux 3 (post) aux 3 (pre) aux 2 (post) aux 2 (pre) aux 1 (post) aux 1 (pre) -
Page 34: Appendix D: Rotopod Instructions
Appendix D: Rotopod Instructions The Pod section of the Onyx 1640i mixer can be fi tted in three different orientations to suit your preference: 1. From the factory, the Pod section has the input and output connections at the rear of the mixer. If you rack mount it, this will take up 16 rack spaces. - Page 35 1. Phillips screwdriver. 2. Pod Relocation Operator's General Journeyman's Certifi cation License (PROGJCL grade III or higher) from a Mackie-accredited Four-Year Pod Relocation Technical Institute. Procedure: 1. Turn off the mixer, and disconnect the power cord, and all connecting cords.
- Page 36 5. Rotate Pod as shown below. Hold both sides of the Pod to keep the travel even. Move the Pod all the way back until it stops and the bottom surface of the Pod is parallel to the bottom of the main unit. Onyx 1640i...
- Page 37 6. The Pod should drop down on to the chassis after a complete rotation. Give 'er a good wriggle if the screw holes do not line up properly. Reattach the recently rotated Pod with the four screws removed in step 3. Attach the rack ears to the mixer using the same silver fl...
- Page 38 1. Phillips screwdriver. 2. Pod Relocation Operator's General Journeyman's Certifi cation License (PROGJCL grade III or higher) from a Mackie-accredited Four-Year Pod Relocation Technical Institute. Procedure: 1. Turn off the mixer, and disconnect the power cord, and all connecting cords.
- Page 39 5. Rotate the Pod arms and reinstall the four arm screws. Rotate the Pod so that the connection jacks are parallel to the top of the mixer. Reinstall the two silver fl athead screws through the side trim and back into the Pod.
- Page 40 6. Attach the two triangular cosmetic pieces with the supplied screws. Place the Pod bucket as shown. Attach the Pod bucket to the mixer using the screws removed in step 3. Screw the Pod bucket to the Pod using the supplied screws. Unscrew the feet from the Pod and reattach them to the Pod bucket. Onyx 1640i...
- Page 41 The trim pieces and remaining screws should be stored away for safekeeping. 8. This step does not exist. You have completly front-mounted the Onyx 1640i Pod section. There is nothing else left to say about it, no more instructions. The thought of an almost nearly blank page is utterly intolerable, though.
-
Page 42: Appendix E: Firewire
Ultimate) Installation for Windows Vista 1. Connect the FireWire cable from your Onyx 1640i to the computer. 2. Power on your Onyx 1640i, or make sure it is powered on. Onyx 1640i 3. The Windows application will start its "Found New Hardware"... - Page 43 Update to fi nd the software, by checking the "No, not at this time" button. Select "Next." ® 5. Insert the CD that came with your Onyx 1640i (if you haven't already). 6. Select “Install the software automatically.” Owner's Manual...
- Page 44 The found new hardware box will appear all over again, so follow these steps and you are almost done. Onyx 1640i 10. The following message confi rms that the new software has been installed successfully and that the found new hardware wizard is complete.
- Page 45 The Onyx 1640i works with Mac OS 10.4.11 and higher. This OS includes the Apple FireWire 2.0 driver. The Onyx 1640i will only work with the 2.0 driver, so if you have an OS before 10.4.11, you will need to check your system for updates from the nice folks at Apple.
-
Page 46: Appendix F: Modifications
Appendix F: Modifi cations The following modifi cations can be carried out on the Onyx 1640i by an authorized service center. Authorized service centers may be found online at: www.mackie.com/scripts/service_centers/search.asp Please contact our technical support department if you are having trouble fi nding an authorized service center in your area. -
Page 47: Track Sheet
Track Sheet A LT E R N AT E F I R E W I R E A S S I G N M E N T S LINE LINE LINE LINE FW 3 FW 4 FW 1 FW 2 75Hz 75Hz 18dB/OCT... - Page 48 POST POWER SOLO DESTINATION PHONES AUX 1-6 LEVEL EXTERNAL TALKBACK SUB ASSIGN MAIN MIX MAIN MIX MAIN MIX MAIN MIX ASSIGN TO FW 15-16 SUB1 SUB2 SUB3 SUB4 SUBS 1-4 TO FW 5-8 MAIN SUB1 SUB2 SUB3 SUB4 Onyx 1640i...
-
Page 49: Limited Warranty
Product Warranty will be valid unless set forth in a written instrument signed by the party to be bound thereby. • Visit www.mackie.com and click Support to fi nd: FAQs, manuals, addendums, and other useful information. - Page 50 16220 Wood-Red Road NE • Woodinville, WA 98072 • USA United States and Canada: 800.898.3211 Europe, Asia, Central and South America: 425.487.4333 Middle East and Africa: 31.20.654.4000 Fax: 425.487.4337 • www.mackie.com E-mail: sales@mackie.com...