Fetco CBS-2131XTS User Manual
Hide thumbs
Also See for CBS-2131XTS:
- User manual (34 pages) ,
- Specifications (8 pages) ,
- User manual (55 pages)
Table of Contents
Advertisement
www.fetco.com
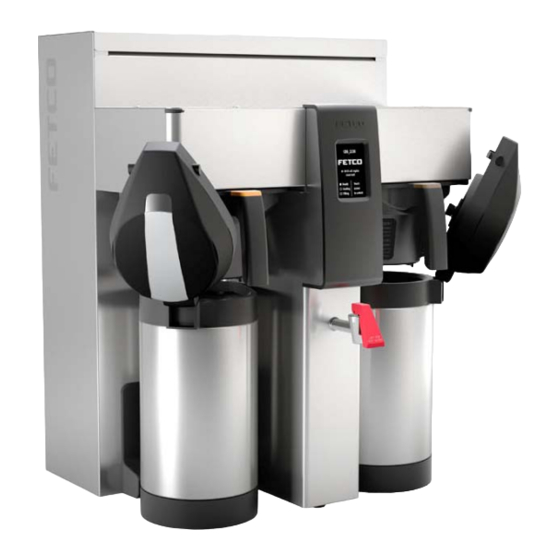
CBS-2131 & CBS2132
1 gallon airpot brewers
FETCO®, LUXUS®, EXTRACTOR®, INTERMITTENT BREW, Driven To Innovate, XTS are trademarks or trade names of Food Equipment Technologies
Company.
U.S. Patent 7,866,255 7,631,593 6,889,598 6,772,676 6,576,282 6,571,685 6,565,906 6,705,208 6,148,717 6,713,109 & Other Patents Are Pending
© 2013 Food Equipment Technologies Company
®
Models:
NOTICE TO INSTALLER: Please leave this book with the
User's Guide
CBS-2131
CBS-2132
One gallon and three liter
single and dual airpot brewers
machine.
P123 - Universal Version
XTS
XTS
CBS-2131 & CBS2132
3 liter airpot brewers
September 2013
Advertisement
Table of Contents

Related Manuals for Fetco CBS-2131XTS


Summary of Contents for Fetco CBS-2131XTS
- Page 1 NOTICE TO INSTALLER: Please leave this book with the machine. FETCO®, LUXUS®, EXTRACTOR®, INTERMITTENT BREW, Driven To Innovate, XTS are trademarks or trade names of Food Equipment Technologies Company. U.S. Patent 7,866,255 7,631,593 6,889,598 6,772,676 6,576,282 6,571,685 6,565,906 6,705,208 6,148,717 6,713,109 & Other Patents Are Pending ©...
-
Page 2: Table Of Contents
Index: Contact Information............2 Description & Features ..........2 Technical Data ............... 2 Requirements..............2 Weights Capacities and Measurements ......3 Specifications-North America......... 3 Specifications-CE............4 Accessing equipment and control screens ....8 Layout of the XTS brewer ..........8 Accessing batch and programming menu screens.. -
Page 4: Contact Information
Heavier gauge stainless steel cabinet Batch sizing Optional gourmet stainless steel brewbasket Recipe copy Designs, materials, specifications, physical dimensions, firmware and software protocol for equipment or replacement parts are subject to review and change by FETCO without notice Technical Data Requirements... -
Page 5: Weights Capacities And Measurements
Brewer Height Width Depth Brewer & Weight Weight Tank Weight Dimensions Filled Capacity Dispenser CBS-2131XTS 25 ¾” 11 ¾” 20 ⅜” 29 lb 55 lb 66.2lb 3.3 gal 41 lb 16” x 23” x 29” Single-3 liter 655mm 303mm 516mm 13.2kg... -
Page 6: Specifications-Ce
Terminal Block 4.2 – 6.1 21.3—25.5 14.0 gal/53 lit Designs, materials, specifications, physical dimensions, firmware and software protocol for equipment or replacement parts are subject to review and change by FETCO without notice Specifications-CE 3-liter airpot version, Standard Polymeric Brew Basket Electrical Configurations CBS_2131XTS—Single 3 liter airpot version [STANDARD: Polymeric Brew Basket]... - Page 7 2 X 3.0 kW 200-240 Terminal Block 4.2 – 6.1 21.3—25.5 14.0 gal/53 lit Designs, materials, specifications, physical dimensions, firmware and software protocol for equipment or replacement parts are subject to review and change by FETCO without notice Dimensions & Utility Connections—Rough-in drawings...
- Page 8 Rough-in CBS-2131XTS—Single station 3 liter airpot version Drawing#1201.00011.00 Rough-in CBS-2132XTS—Dual station 3 liter airpot version Drawing#1201.00012.00...
- Page 9 Rough-in CBS-2131XTS—Single station 1-gallon airpot version Drawing#1201.00013.00 Rough-in CBS-2132XTS—Dual station 1-gallon airpot version Drawing#1201.00014.00 Designs, materials, specifications, physical dimensions, firmware and software protocol for equipment or replacement parts are subject to review and change by FETCO without notice...
-
Page 10: Accessing Equipment And Control Screens
Main power switch Slide out back panel for service access Designs, materials, specifications, physical dimensions, firmware and software protocol for equipment or replacement parts are subject to review and change by FETCO without notice Accessing batch and programming menu screens Batch selection and brew operation menu screens FETCO HOME SCREEN: Tap to enter batch selection screen. - Page 11 To brew a single 3 liter coffee batch, using default recipe NOTES FETCO CBS-2130 series equipment is factory calibrated and preloaded with recipes and is ready to brew. Place 13”X5” paper filter in brew basket -FETCO Product # F002 or any 13”X5”...
- Page 12 Brewing-shown by touchscreen Brewer screens displayed for brewing NOTES CBS-2131 CBS-2132 “READY SCREEN” Note: there are three “BREW AT Tap screen to display TEMPERATURE DEFINITONS”. The “Brew menus at temperature default routine is shown below. Brew basket sensor Unit displays four enabled.
-
Page 13: Programming- Operator Access Programming
Programming- operator access programming -The FETCO CBS-2130 brewers have four brew batch menus per side. The menus are preprogrammed with basic settings that will operate the equipment as purchased. There are two batches each marked “Regular” and two marked “Decaf”... - Page 14 Menu Features: Batch Parameters PROGRAM Programming Items Factory set Default Programming Range Notes • Batch Summary Batch 1 LEFT* Display Summary Choose from list: (Regular 1-16) • Batch Name Regular 1(-16) Regular1 -OR- Write: any name 3.05 liter 3.05 liter •...
- Page 15 Programming Factory set Programming Range GENERAL Notes Items Default (display) 200 °F Correction for high Tank Temp. 200°F |______________[]___| altitude below “OFF” allows AUTO AUTO SEE NOTE BELOW! Brew at Temp. brewing at any |____________[]___| temperature. ON AUTO °F • Temperature Units of Meas.
- Page 16 Programming Factory set Programming Range OTHER Notes Items Default (display) Error Codes • Display Errors (Codes) Chart is below Reset !!Errors must be • Reset Errors (Reset) |_______________[]____| corrected and cleared!! Setup upload Brewer Copy ------------------------------------------------------------------------ • From SD to B. Brewer ---- |________________[]____...
-
Page 17: Hot Water Convenience Tap
Programming Factory set Programming Range OUTPUTS Notes Items Default (display) TEST Runs valve to verify Left Valve • Left Valve Test (Press to test) Press To Test flow. Have container under brewbasket! 1540 ml p m Calibrate Factory or service use •... -
Page 18: Error Codes
INSERT BREW Error codes must be BASKET cleared by entering PROGRAMMING and using the menus! Designs, materials, specifications, physical dimensions, firmware and software protocol for equipment or replacement parts are subject to review and change by FETCO without notice... -
Page 19: Airpot Use Instructions And Cleaning
D063 (1 gallon) Airpot ® DESCRIPTION : Dispenser Diagram The FETCO D041 (3 liter) and D063 (1 gallon) airpots are lever type, air pressure evacuated beverage dispenser featuring double-wall, vacuum insulated construction. The hermetically sealed vacuum double-wall construction provides excellent heat or cold retention, while the stainless steel outer and inner liners provide robust durability. - Page 20 Buttons to release the lid. airpot dispenser locator airpot : (if featured). Swing the lid completely 3 liters (FETCO D041) Align the center of the backwards -or- airpot Drip-Through with 1gallon (FETCO D063) the outlet of the brewbasket.
- Page 21 Dispenser Cleaning & Maintenance D041 (3 liter) and D063 (1 gallon) Airpot ® To Clean : Squeeze the Lid Release Carefully remove the Remove the Drip-Through Buttons to release the lid. bellows Cap. Detach the Down-Tube Press the Lid Detach Button Handling the parts gently, and the Spout-Tube.
-
Page 22: Operator Training
Operator Training Review the operating procedures with whoever will be using the brewer. Pay particular attention to the following areas: 1. Always pre-heat the dispensers before the first use of each day by filling them half way with hot water, and letting them stand for at least 5 minutes. -
Page 23: Installation
Verify voltages, polarity, circuits, and circuit breaker access before attaching equipment. The electrical diagram is located in the Users Guide and online at www.fetco.com. The installation must comply with applicable federal, state, and local codes having jurisdiction at your location. Check with your local inspectors to determine what codes will apply. -
Page 24: Installation Directions
Installation Directions Brewer Setup Review the dimensions for the unit and verify that it will fit properly in the space intended for it. Verify that the counter or table will support the total weight of the brewer and dispensers when filled (specifics-page 3). -
Page 25: Terminal Block Diagram
SCREENS SHOWN TO THE RIGHT WILL APPEAR 4. The water tank will begin filling. FETCO Home Screen #1 will read “FILLING”. 5. When the water level rises and is sensed by the probe at the top of the tank the heaters will activate 6. - Page 26 NEW August, 2013 Please see our website-www.fetco.com for the most up to date listings and additional parts and service information Designs, materials, specifications, physical dimensions, firmware and software protocol for equipment or replacement parts are subject to change without notice.
-
Page 27: Parts Diagrams, Bill Of Materials Lists
Parts diagrams, bill of materials lists Drawing 1101.00152.00 CBS-2131XTS ASSEMBLY, 3 Liter... - Page 28 Drawing 1101.00152.00 CBS-2131XTS ASSEMBLY, 3 Liter Ref# Part number Description 1111.00036.00 WELDMENT BODY, COMPLETE, CBS-2131 1024.00049.00 EDGE PROTECTOR, 7.00"LG, CBS-2130 1086.00004.00 BUSHING, SNAP, 1" MOUNTING HOLE 1024.00063.00 O-RING, 3 15/16" x 3/32" CS, DASH # 154, BUNA-N, 1102.00203.00 ASSEMBLY, SPRAY HOUSING, DSVP11 DESIGN 1083.00010.00...
- Page 29 Drawing 1104.00053.00 TANK ASSY, CBS-2131XTS Ref# Part number Description 1114.00080.00 WELDMENT TANK CBS-2131, GROMMET DESIGN 1024.00053.00 LEVEL AND TEMP PROBE GROMMET 1024.00062.00 GROMMET, SHORT, SILICONE, LEVEL AND TEMP PROBE 1024.00050.00 GROMMET, SILICONE, 11.4mm ID 1107.00019.00 HEATER ASSEMBLY, IMMERSION 2300W/120VAC 1107.00021.00 HEATER ASSEMBLY, IMMERSION 1500W/120VAC 1107.00022.00...
- Page 30 Drawing 1104.00052.00 TANK ASSY, CBS-2132XTS Ref# Part number Description 1114.00081.00 WELDMENT TANK CBS-2132, GROMMET DESIGN 1024.00053.00 LEVEL AND TEMP PROBE GROMMET 1024.00062.00 GROMMET, SHORT, SILICONE, LEVEL AND TEMP PROBE 1024.00050.00 GROMMET, SILICONE, 11.4mm ID 1107.00018.00 HEATER ASSEMBLY, IMMERSION 3000W/240VAC 1003.00005.00 BRACKET, ONE SHOT THERMOSTAT 1053.00004.00 THERMOSTAT, SINGLE SHOT, 25A...
- Page 31 Drawing 1101.00153.00 CBS-2132XTS ASSEMBLY, 3 Liter...
- Page 32 Drawing 1101.00153.00 CBS-2132XTS ASSEMBLY, 3 Liter Ref# Part number Description 1111.00037.00 WELDMENT BODY, COMPLETE, CBS-2132 1024.00049.00 EDGE PROTECTOR, 7.00"LG, CBS-2130 1086.00004.00 BUSHING, SNAP, 1" MOUNTING HOLE 1024.00063.00 O-RING, 3 15/16" x 3/32" CS, DASH # 154, BUNA-N 1102.00203.00 ASSEMBLY, SPRAY HOUSING, DSVP11 DESIGN 1083.00010.00 WASHER, #10 SCREW W/NEOPRENE-BONDED SEAL 1084.00006.00...
- Page 33 Drawing 1101.00151.00 ASSEMBLY, CBS-2131XTS, 1 GAL.
- Page 34 Drawing 1101.00151.00 ASSEMBLY, CBS-2131XTS, 1 GAL. Ref# Part number Description 1111.00036.00 WELDMENT BODY, COMPLETE, CBS-2131 1024.00049.00 EDGE PROTECTOR, 7.00"LG, CBS-2130 1086.00004.00 BUSHING, SNAP, 1" MOUNTING HOLE 1024.00063.00 O-RING, 3 15/16" x 3/32" CS, DASH # 154, BUNA-N, 1102.00203.00 ASSEMBLY, SPRAY HOUSING, DSVP11 DESIGN 1083.00010.00...
- Page 35 Drawing 1101.00150.00 CBS-2132XTS ASSEMBLY, 1 gallon...
- Page 36 Drawing 1101.00150.00 CBS-2132XTS ASSEMBLY, 1 gallon Ref# Part number Description 1111.00037.00 WELDMENT BODY, COMPLETE, CBS-2132 1024.00049.00 EDGE PROTECTOR, 7.00"LG, CBS-2130 1086.00004.00 BUSHING, SNAP, 1" MOUNTING HOLE 1024.00063.00 O-RING, 3 15/16" x 3/32" CS, DASH # 154, BUNA-N 1102.00203.00 ASSEMBLY, SPRAY HOUSING, DSVP11 DESIGN 1083.00010.00 WASHER, #10 SCREW W/NEOPRENE-BONDED SEAL 1084.00006.00...
-
Page 37: Spray Housing Assembly Parts
1102.00203.00 Spray Housing Assembly Parts CBS-2130 XTS PART NO DESCRIPTION 1102.00020.00 SPRAY HOUSING ASSY CSD DESIGN 1024.00002.00 ORING, AS568A-019, BUNA-N 1102.00019.00 ASSEMBLY, CASCADE SPRAY DOME 1023.00189.00 ADAPTER, SPRAY HSG, DSV11 VALVE 1082.00068.00 SCREW, M3.9x13, CHEESE PH., T/FORM, Z/P 1057.00038.00 DIAPHRAGM, VALVE DSV-11 1057.00050.00 SPACER PLATE DSV11, -1 OPTION 1057.00040.00... -
Page 38: Wiring Diagrams-North America
Wiring Diagrams-North America Drawing 1401.00050.00 CBS-2132XTS Wiring - North America... -
Page 39: Wiring Diagrams-Ce
Drawing 1401.00051.00 CBS-2131XTS Wiring- North America Wiring Diagrams-CE... - Page 40 Drawing 1401.00052.00 CBS-2131XTS Wiring-CE...
- Page 41 Drawing 1401.00054.00 CBS-2132XTS Wiring-CE...