Table of Contents
Advertisement
Available languages
Available languages
Advertisement
Chapters
Table of Contents

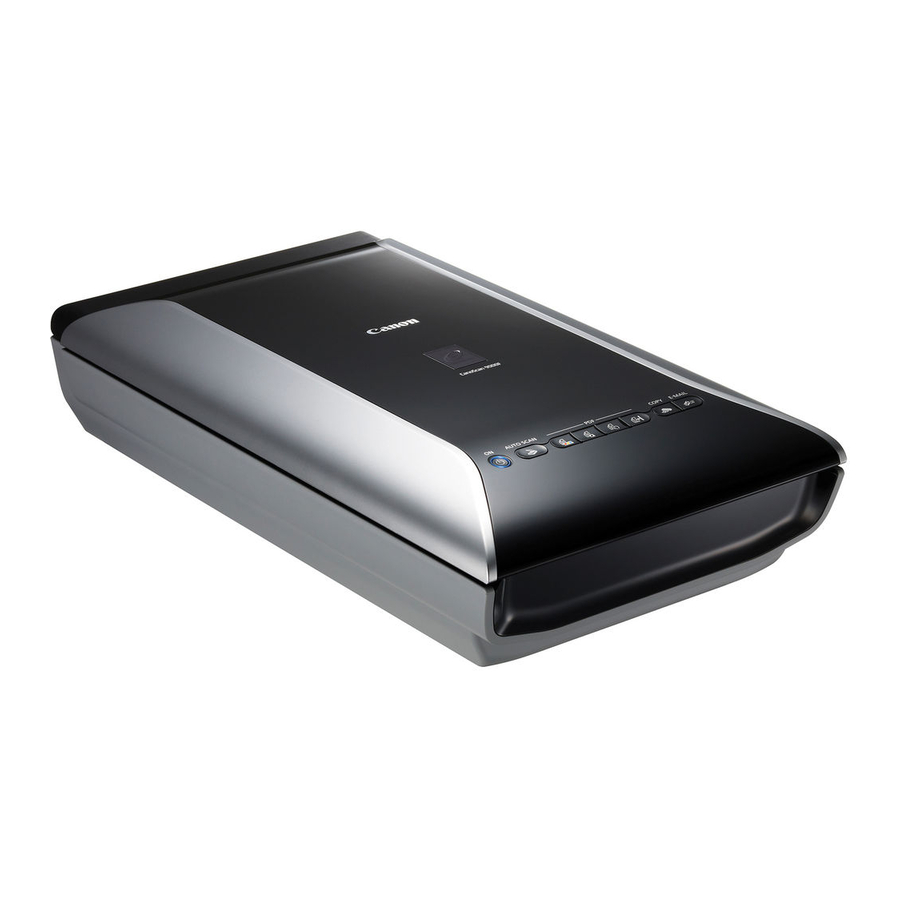
Related Manuals for Canon CanoScan 9000F


Summary of Contents for Canon CanoScan 9000F
- Page 1 Quick Start Guide Guide de démarrage rapide...
-
Page 2: Table Of Contents
Quick Start Guide Quick Start Guide Please read this guide before operating this scanner. After you finish reading this guide, store it in a safe place for future reference. Table of Contents Safety Precautions ......... 2 Using the Scanner Buttons ......11 Package Contents .......... -
Page 3: Safety Precautions
Safety Precautions Safety Precautions Please read and take note of the following precautions before using the scanner and accessories. WARNING Indicates a warning concerning operations that may lead to death or injury to persons if not performed correctly. In order to use the scanner safely, always pay attention to these warnings. CAUTION Indicates a caution concerning operations that may lead to injury to persons or damage to property if not performed correctly. -
Page 4: General Handling Precautions
• When transporting the scanner, always unplug the cables. Damaged cables could cause fire or electrical shock. If anything enters the scanner, immediately unplug the power cord. Then contact your retailer or Canon Customer Support Help Desk. CAUTION • Do not release the document cover until it completely opens/closes. If the document cover falls, it may lead to pinch your hands or damage the scanner and result in injury. -
Page 5: Package Contents
Package Contents Package Contents Scanner and Accessories Scanner USB Cable Power Cord Film Guides Film Guide (for 35 mm film strip/slide) (for 120 format film) Documentation • Quick Start Guide (this document) • Additional Documents Setup CD-ROM • Software Programs - ScanGear (scanner driver) - MP Navigator EX (utility software) - Solution Menu (menu panel software) -
Page 6: Installing The Software
USB cable is unplugged. • Quit all running applications before installation. • For Windows: Uninstall software bundled with the Canon scanner before upgrading from Windows Vista to Windows 7, then, install the bundled software again. • For Macintosh: After upgrading from Mac OS X v.10.5 or lower to Mac OS X v.10.6, install software bundled with the Canon scanner. - Page 7 Installing the Software Click Easy Install on the main menu. Click Install to start installation. Carefully read the License Agreement, and then click Yes to proceed. For Macintosh, skip step 6 and go to step 7. For Windows, carefully read the Please Allow All Install Wizard Processes screen, and then click Next.
- Page 8 Installing the Software For Windows, when the Extended Survey Program screen appears, confirm it. If you can agree, click Agree. When the installation is complete, follow the on-screen instructions. For Windows: Click Restart. After restarting the computer, Solution Menu will appear. For Macintosh: Click Exit.
-
Page 9: Preparing The Scanner
Preparing the Scanner Preparing the Scanner Unlocking the Scanner Peel the shipping tapes off the scanner. Open the document cover and slide the scanner lock switch toward the unlock mark Unlock Mark • The document cover is locked temporarily at an angle of about 50 degrees. Close the document cover. -
Page 10: Connecting The Scanner
Preparing the Scanner Connecting the Scanner Connect the scanner to your computer with the supplied USB cable. Connect the supplied power cord to the scanner. Plug the power cord into the electrical outlet. Press ( ) to turn the power on. Turning the Power Off To turn the scanner off, be sure to press the ON button. -
Page 11: Try Scanning
1 cm away from the edges of the platen glass, and then close the document cover. Start MP Navigator EX. For Windows: Double-click the Canon Solution Menu icon, then click Scan/import photos or documents. For Macintosh: Click the Solution Menu icon in the Dock, then click Scan/import photos or documents. -
Page 12: Using The Scanner Buttons
Using the Scanner Buttons Using the Scanner Buttons Scanner buttons allow you to copy, scan, e-mail, and save scanned images in PDF format with a press of a button. Simply place your document on the scanner, and then press the scanner button for the required function. -
Page 13: Scanning With Mp Navigator Ex
Click Scan/import photos or documents in the Solution Menu. You can also start it by following procedure. For Windows: Select Start – (All) Programs – Canon Utilities – MP Navigator EX 3.1, and click MP Navigator EX 3.1. For Macintosh: Open Applications – Canon Utilities folders, then double-click the MP Navigator EX 3.1 icon. -
Page 14: Scanning Film
Scanning Film Scanning Film This scanner can scan 35 mm film (film strip or slide) and 120 format film. Follow the procedure below when scanning film. Remove the protective sheet from the document cover. Press and hold the lever at the top of the protec- protective sheet tive sheet while you pull the sheet outward... - Page 15 Scanning Film 35 mm Slides Align the Film Guide’s tab with the FILM symbol on the platen glass of the scanner. Calibration Slot Place a slide or slides face down (correctly viewed from below) in the Film Guide as shown in the figure on the right.
- Page 16 Scanning Film Using a Film Retainer Sheet Curled film strips can stick to the platen glass and Film Holder cause a pattern of rings called Newton Rings to appear on the scanned image. If this occurs, scan using the supplied Film Retainer Sheet as shown in the diagram.
- Page 17 Scanning Film Click Scan. Do not move the scanner while it is operating. When the preview is displayed, place a check mark beside the number(s) of the frame(s) you want to scan, and then click Scan to start scanning. Do not move the scanner while it is operating.
-
Page 18: Specifications
The fastest speed in Hi-Speed USB mode on Windows PC. Transfer time is not included. Scanning speed varies according to the document types, scan settings, or specifications of the computer. USB connection to PC. • Specifications are subject to change without notice. Model Name: K10346 (CanoScan 9000F) - Page 19 The socket-outlet shall be installed near the equipment and shall be easily accessible. ® As an ENERGY STAR Partner, Canon Inc. has determined that this product meets the ENERGY STAR guidelines for energy efficiency. Warning When you use this product, you should pay attention to the following legal issues: •...
- Page 20 Guide de démarrage rapide Guide de démarrage rapide Lisez ce guide avant d'utiliser ce scanner. Quand vous avez terminé la lecture de ce guide, rangez-le en lieu sûr afin de pouvoir le consulter ultérieurement. Table des matières Précautions de sécurité........2 Utilisation des boutons du scanner....
-
Page 21: Précautions De Sécurité
Précautions de sécurité Précautions de sécurité Veuillez lire et noter les précautions suivantes avant d'utiliser le scanner et ses accessoires. AVERTISSEMENT Avertissements concernant des opérations qui peuvent entraîner la mort ou causer des blessures si elles ne sont pas effectuées correctement. Afin d'utiliser le scanner en toute sécurité, suivez toujours ces avertissements. - Page 22 • Si vous entendez des bruits inhabituels, si vous apercevez de la fumée, si vous sentez une chaleur excessive ou une odeur étrange, débranchez immédiatement le cordon d'alimentation et contactez votre revendeur ou le centre de service clientèle Canon. L'utilisation du scanner dans ces conditions pourrait créer des risques d'incendie ou d'électrocution.
-
Page 23: Contenu De L'emballage
Contenu de l'emballage Contenu de l'emballage Scanner et accessoires Scanner Câble USB Cordon Guides de film Guide de film d'alimentation (pour pellicule/ (pour film au format 120) diapositive 35 mm) Documentation • Guide de démarrage rapide (ce document) • Documents supplémentaires CD-ROM d'installation •... -
Page 24: Installation Des Logiciels
• Quittez toutes les applications en cours avant de procéder à l'installation. • Sous Windows : désinstallez les logiciels fournis avec le scanner Canon avant d'effectuer une mise à niveau de Windows Vista vers Windows 7, puis installez à nouveau les logiciels fournis. - Page 25 Installation des logiciels Cliquez sur Installation rapide dans le menu principal. Cliquez sur Installer pour lancer l'installation. Lisez attentivement le contrat de licence, puis cliquez sur Oui pour continuer. Sous Macintosh, ignorez l'étape 6 et passez à l'étape 7. Sous Windows, lisez attentivement l'écran Autorisez tous les processus de l'assistant d'installation, puis cliquez sur Suivant.
- Page 26 Installation des logiciels Sous Windows, confirmez l'écran Extended Survey Program lorsqu'il apparaît. Si vous acceptez, cliquez sur J'accepte. Lorsque l'installation est terminée, suivez les instructions qui s'affichent à l'écran. Sous Windows : cliquez sur Redémarrer. Après le redémarrage de l'ordinateur, le Solution Menu apparaît. Sous Macintosh : cliquez sur Quitter.
-
Page 27: Préparation Du Scanner
Préparation du scanner Préparation du scanner Déverrouillage du scanner Retirez les bandes de protection du scanner. Ouvrez le couvercle du scanner et faites glisser le bouton de verrouillage du scanner vers le repère de déverrouillage ( Repère de déverrouillage • Le couvercle du scanner est verrouillé provisoirement avec un angle de verrouillage de 50 degrés. Fermez le couvercle du scanner. - Page 28 Préparation du scanner Raccordement du scanner Raccordez le scanner à l'ordinateur au moyen du câble USB fourni. Branchez le cordon d'alimentation fourni sur le scanner. Branchez le cordon d'alimentation sur la prise électrique. Appuyez sur ( ) pour mettre l'appareil sous tension. Mise hors tension Pour mettre le scanner hors tension, appuyez sur le bouton MARCHE.
-
Page 29: Essai De Numérisation
1 cm des bords de celle-ci, puis fermez le couvercle du scanner. Démarrez MP Navigator EX. Sous Windows : double-cliquez sur l'icône Canon Solution Menu, puis cliquez sur Numériser/Importer des photos ou des documents. Sous Macintosh : cliquez sur l'icône Solution Menu sur le Dock, puis sur Numériser/Importer... -
Page 30: Utilisation Des Boutons Du Scanner
Utilisation des boutons du scanner Utilisation des boutons du scanner Les boutons du scanner permettent, d'une simple pression, de copier, de numériser, d'envoyer par courrier électronique et d'enregistrer des images numérisées au format PDF. Il vous suffit de placer le document sur le scanner, puis d'appuyer sur le bouton correspondant à la fonction souhaitée. Pour plus d'informations, reportez-vous au «... -
Page 31: Numérisation Avec Mp Navigator Ex
Vous pouvez également démarrer le logiciel en procédant comme suit : Sous Windows : sélectionnez Démarrer – Programmes (Tous les programmes) – Canon Utilities – MP Navigator EX 3.1, puis cliquez sur MP Navigator EX 3.1. Sous Macintosh : ouvrez les dossiers Application(s) - Canon Utilities, puis double-cliquez sur l'icône MP Navigator EX 3.1. -
Page 32: Numérisation D'un Film
Numérisation d'un film Numérisation d'un film Ce scanner permet de numériser un film 35 mm (pellicule ou diapositive) et un film au format 120. Lors de la numérisation d'un film, procédez comme suit. Retirez la feuille de protection du couvercle du scanner. - Page 33 Numérisation d'un film Diapositives 35 mm Alignez la languette du guide de film avec le symbole FILM sur la vitre d'exposition du scanner. Fente d'étalonnage Placez une ou plusieurs diapositives face vers le bas (afin qu'elles soient correctement visibles du bas) dans le guide de film, comme illustré dans la figure ci-contre.
- Page 34 Numérisation d'un film Utilisation d'une feuille de maintien du film Support de film Des pellicules recourbées peuvent adhérer à la vitre d'exposition et provoquer l'apparition sur l'image numérisée d'un motif en forme de cercles appelés anneaux de Newton. Si cela se produit, utilisez la feuille de maintien du film comme indiqué...
- Page 35 Numérisation d'un film Cliquez sur Numériser. Ne déplacez pas le scanner pendant son fonctionnement. Dans l'aperçu, activez la case à cocher en regard du ou des numéros de la vue ou des vues que vous souhaitez numériser, puis cliquez sur Numériser pour lancer la numérisation. Ne déplacez pas le scanner pendant son fonctionnement.
-
Page 36: Fiche Technique
La vitesse de numérisation varie selon les types de documents, les paramètres de numérisation ou les caractéristiques techniques de l'ordinateur. Connexion USB à l’ordinateur. • Fiche technique susceptible d'être modifiée sans préavis. Modèle : K10346 (CanoScan 9000F) - Page 37 (EEE : Norvège, Islande et Liechtenstein) La prise doit être installée à proximité de l'appareil et être facilement accessible. ® En tant que partenaire ENERGY STAR Partner, Canon Inc. affirme que ce modèle répond aux exigences du Programme ENERGY STAR en termes d'économie d'énergie. Avertissement Lorsque vous utilisez ce produit, vous devez être attentif aux aspects légaux suivants :...
- Page 38 Do not make any changes or modifications to the equipment unless otherwise specified in the manual. If such changes or modifications should be made, you could be required to stop operation of the equipment. Canon U.S.A., Inc. One Canon Plaza...
- Page 39 CANON CANADA INC. 6390 Dixie Road, Mississauga, Ontario, L5T 1P7 Canada QT5-2916-V01 XXXXXXXX ©CANON INC. 2010 PRINTED IN THAILAND IMPRIME EN THAILANDE...