Table of Contents
Advertisement
Advertisement
Table of Contents

Related Manuals for Lowrance iWAY 600C


Summary of Contents for Lowrance iWAY 600C
-
Page 1: Operation Instructions
Pub. 988-0160-191 Turn-by-Turn Mapping GPS and MP3 Player Operation Instructions... - Page 2 Copyright © 2007 Lowrance Electronics, Inc. No part of this manual may be copied, reproduced, republished, trans- mitted or distributed for any purpose, without prior written consent of Lowrance. Any unauthorized commercial distribution of this manual is strictly prohibited. Lowrance is a registered trademark and iWAY™...
-
Page 3: Table Of Contents
Preface: Introducing GPS... 1 How Lowrance GPS and the GPS System Work... 2 Section 1: Installation & Accessories... 3 Power Cable ... 3 External Connections... 3 USB-to-PC Cable Connect ... 5 Other Accessories ... 5 Mounting Brackets... 6 Section 2: Map Mode Operation ... 7 Touch Screen ... - Page 4 Units of Measure ... 40 Reset Options... 41 Device Information... 41 Navigation Mode ... 41 Transfer Data ... 42 GPS Simulator... 43 Picture Viewer ... 44 Gauge Page ... 45 Satellite Status / GPS Status button ... 46 Time Settings... 48 Section 5: Searching, Finding and Navigating...
- Page 5 Notes...
- Page 6 A CAREFUL NAVIGATOR NEVER RELIES ON ONLY ONE METHOD TO OBTAIN POSITION INFORMATION. CAUTION When showing turn-by-turn navigation data, a GPS unit will show the shortest, most direct route to the destination. There are times when it may give directions, such as a U-turn, that may be prohib- ited in some locations.
-
Page 7: Preface: Introducing Gps
And, how this manual can get you out on the road, fast! Welcome to the exciting world of turn-by-turn GPS navigation. Before you grab the iWAY 600c™ GPS unit and begin installing it, please give us a moment or two to explain how the manual can help you get the best performance from your mapping GPS receiver and MP3 music player. -
Page 8: How Lowrance Gps And The Gps System Work
Hawaii, Alaska, the 48 contiguous United States and most of Canada. The iWAY 600c is the world's first portable navigation device with sat- ellite imagery in full color. It's also the first automotive GPS to contain color satellite photos. This unit contains photos for more than 150 of the largest metropolitan areas in the United States and Canada. -
Page 9: Section 1: Installation & Accessories
Section 1: Installation & Accessories Information in this section includes how to connect the unit to your car's power, the unit's external connections and the various accessories included with the unit. This section also will explain some of the op- tional accessories available for the unit. - Page 10 Power socket power cord. External connections on the back of the iWAY™ 600c. NOTE: Certain vehicles are equipped with special windshields containing metal in the glass. These models may prevent any GPS unit from receiving satellite signals and establishing a "lock." If the GPS will not navigate inside, test it outside the car.
-
Page 11: Usb-To-Pc Cable Connect
Caution: If you do not connect the external antenna to the unit correctly it could prevent the unit from receiving satellite signals with the external antenna. Also, do not mount in line with a radar an- tenna. Radar radiates high energy signals that can interfere with GPS signal reception. -
Page 12: Mounting Brackets
rect cleaning is not covered by the warranty. We strongly rec- ommend you only use a microfiber towel to clean the unit's screen. Mounting Brackets Mounting brackets are available for GPS units through LEI Extras. Permanent and temporary mounts suitable for boat, aircraft and mo- torcycle handlebars are available. -
Page 13: Section 2: Map Mode Operation
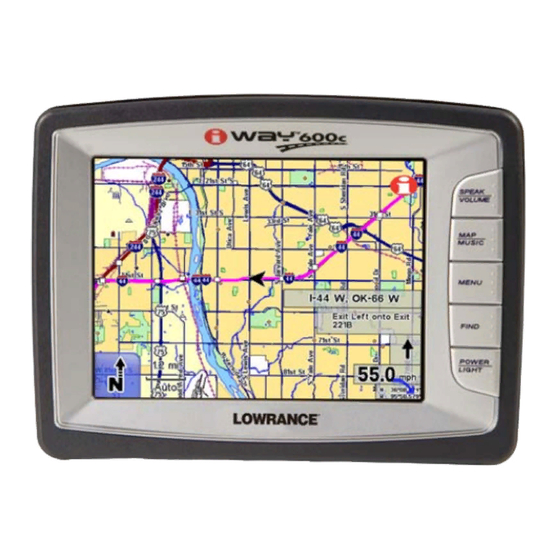
Map Mode Operation This section addresses Map Mode operation, including the different menus and features associated with the unit. Map Mode includes all navigation features from finding the nearest restaurant to planning a road trip across the country. 1. SPEAK/VOLUME – Push this button once and the unit will repeat the current navigation instruction. -
Page 14: Touch Screen
5. POWER/LIGHT – The Power button turns the unit on and off. It also controls the backlight. Press to turn the unit on. To acti- POWER vate the backlight press again. The unit has three preset back- POWER light levels. Repeatedly pressing will cycle through the back- POWER light settings. -
Page 15: Map Mode And On-Screen Commands
When you press menu to select the spoken language used by the unit while giving turn- by-turn voice instructions. When you make your selection the unit will speak a short test message. Press text language or press press in the Language – Voice menu to continue to the map screen. -
Page 16: Map Display Toolbar
While the map display provides information about your surroundings, you also can use it to explore locations other than your current position. All of the tools you will need to operate the Map Mode display are available on-screen. When the unit is navigating the map display tool- bar buttons at the left of the map screen are hidden. -
Page 17: Auto Zoom
Zoom In and Zoom Out increases or decreases the map view. Control the zoom to get the most detail possible while still showing all of the necessary area. You can use this feature in combination with the Move Map function to focus on an area other than your current location. Auto Zoom The Auto Zoom feature is designed to show the most map detail possi- ble while navigating. -
Page 18: Location Information Button
North Up always shows the map with North at the top of the screen. Track Up rotates the map so that the direction you are traveling is al- ways at the top of the screen. 3D view displays the map from a position above and slightly behind the black arrow icon. -
Page 19: Map Mode Practice Run
Highlighted location A business location (right) highlighted with the cursor. The cursor can highlight other symbols on the map and provide information on those Map Mode Practice Run The following is a 10-step "Practice Run" that will walk you through the most basic Map Mode operation. -
Page 20: Creating And Saving Contacts
10. To return to your previous location use the same steps outlined above. Creating and Saving Contacts Use the Location Information button to view information on almost any symbol on the map screen. It also is a good way to create a saved con- tact in the Address Book. - Page 21 If you want to place a symbol at a particular location on the map screen select a symbol from the Symbol Window screen. When you exit the Symbol Window screen after highlighting a symbol, the symbol will appear at the cursor's location on the map screen. The symbol will remain on the map screen until you delete it by select- in the Contact Information screen.
- Page 22 To change information about a saved contact in the Address Book, highlight the entry you wish to change in the Edit Contact screen; such as Address or Phone Number. A keyboard (following figures) will appear allowing you to enter the new information. The Edit Contact screen "letters"...
- Page 23 The Latitude entry is highlighted in the Edit Contact screen, at left. When Latitude is highlighted and selected it will bring up the Edit Contact screen keyboard for the Latitude entry, shown at right. You can use the keyboard to manually enter the latitude. The Longitude entry works the same way.
- Page 24 Notes...
-
Page 25: Section 3: Music Mode Operation
Music Mode Operation The unit can display satellite images for select metropolitan areas. Getting Music on the iWAY Use the USB-to-PC cable to connect the unit to a computer. Once con- nected, the unit can be treated like a removable disk. That means you can add new folders, rename folders or files, and copy and delete files the same way you would on a computer. -
Page 26: Visualization Effects Screen
You can copy pre-made play list files from a computer to the unit and play the songs in the play lists by selecting them from the song browser screen. When you select a folder to play, the unit automatically creates a play list from all the music stored in the folder. -
Page 27: Find Music
Find Music To find a particular song or play list by its filename press the USIC symbol. This will bring up the Audio Search screen. Touch anywhere inside the Name Filter box to open a virtual keyboard. Enter all or part of a song's filename and press Repeat When Repeat is turned on, at the end of a play list −... -
Page 28: Audio Search/Browse Music Files
Play/Pause starts a song or play list. If no play list or song has been selected, the unit will automatically generate a play list from all the music on the hard drive. If a song is playing, pressing this button will pause the song. -
Page 29: Music Mode Practice Run
The Browse Music Files screen, at left. The Browse Music Files virtual keyboard is shown at right. Music Mode Practice Run The following is a 10-step "Practice Run" that will walk you through the most basic Music Mode operations. Follow these steps to start lis- tening to music files. - Page 30 8. To play the audio through your car’s radio, press the UTPUT button in the bottom left corner of the Music Mode screen. The volume slider will be replaced by two up and down arrow buttons. Find an empty frequency on your car's radio and use the up and down arrow buttons to tune the unit to the same frequency as the radio.
-
Page 31: Section 4: Main Menu
The unit's Menu feature contains four menu screens. The menus can be used to customize the operation of the unit and come with default set- tings so you can use the unit right out of the box. That way you may never need to make changes. -
Page 32: Trip Calculator
Trip Calculator The Trip Calculator keeps track of detailed information concerning your route. You can use it to find the distance of your daily commute or to calculate your average speed on a cross-country road trip. Pressing the Reset Trip button will reset all on-screen values to zero. Overlay Data Setup Overlay Data boxes provide information about the route you are following. -
Page 33: Route Via Destinations
Overlay Data Setup command in Menu 1, far left. If you select "(Add here …)" in the Overlay Data Shown screen (center figure) the Data Viewer screen will appear. The Data Viewer screen is shown far right. The Data Viewer screen left and center figure. The Data Information screen for the Odometer setting is shown at right. - Page 34 Use the Routes list menu (left) to store and manage different routes. The Edit Route screen, at right, shows the details of a stored route. Each route contains different "legs." Each leg is a destination in the route. The Edit Route screen contains all of the routing controls for a generated route from the Routes list.
- Page 35 Once you have added all the locations in your route go back to the Route Via Destinations menu and you should see the route you created in the Routes list. To navigate the route, highlight it and select from the START bottom of the screen.
- Page 36 The Find By menu with its three options: Name Entry, Near Current The three menus for the three Find By options. To learn more about the specifics of "Searching, Finding and Navigat- ing" refer to Section 5. Once you have found your desired destination select it and add it to your route.
-
Page 37: Cancel Navigation
If you want to remove a "leg" from a route in the Edit Route screen, highlight the entry and press the moved from that particular route. If you prefer, the unit can generate a route for you among several locations even if you don't know which order you want to go in. -
Page 38: Routing Options
Routing Options Routing Options are used to control exactly how the unit generates a route from your current position to a selected destination. When generating a route, the unit can analyze certain types of roads or turns and adjust their value to prefer or avoid them. Preferred road types will occur more often in your routes. -
Page 39: Turn Preview
Prefer/Avoid Toll Roads By default, toll roads have a fairly high value in routes generated by the unit because they are usually quality roads with high speed limits allowing you to get where you are going faster. If you would like to save on the cost of traveling toll roads consider setting the unit to generally Avoid toll roads by pressing and dragging the slider to the... -
Page 40: Categories Drawn
As shown in the previous figure, the Turn Preview screen includes a close-up map of the turn itself and a magenta line showing your path. Additional data boxes show the text instruction, the distance from your current location to the turn, the direction of the turn and the total dis- tance from the turn to the end of the route. -
Page 41: My Trails
The Map Categories Drawn Menu is divided into two columns, "Cate- gory" and "Subcategory." You can turn any category or subcategory on or off. If you turn off a category none of its subcategories will appear. Press and highlight any item to turn it on or off. When it is highlighted press it again to check it (turn it on) or uncheck it (turn it off). -
Page 42: Safety Mode
The Language – Text menu is shown at left and the Language – Voice Once you have selected the text language in the Language – Text menu, press in the bottom right corner of the screen. This will bring up the Language – Voice menu. In this menu you can choose what language the unit uses when giving spoken turn-by-turn instruc- tions. -
Page 43: Sound And Voice Setup
The red X on the Safety Mode button (left) indicates the feature is turned off. The disable Safety Mode Warning dialog box is shown at WARNING: When a GPS unit is used in a vehicle the vehicle operator is solely responsible for operating the vehicle in a safe manner. -
Page 44: Interface Options
When this feature is on the unit will emit a sound every Key Sounds: time you enter a command. If you turn off Voice Instructions, voice instructions Voice Instructions: can still be accessed by pressing the When you do, the unit will state the current navigation instruction. This feature will cause the unit to give slightly more de- Verbose Mode: tailed spoken navigation instructions. -
Page 45: Keyboard
Interface Selection and the unit will display the new skin automatically. Screenshots throughout this manual were taken using the "Default" skin mode. The "Nightmode" skin is designed to make the unit easier to read when travel- ing at night. Keyboard Brightness The Brightness Slider controls the brightness of the screen. -
Page 46: Units Of Measure
When you do, a new target will appear somewhere on-screen. Press each of the targets in turn. After the third time the screen should be calibrated. The calibration screen will disappear, returning you to the Interface Options screen. Units of Measure Use this feature to adjust the units of measure, including speed and distance (statute miles or meters), your heading (true or magnetic), the current time (12 hour or 24 hour... -
Page 47: Reset Options
Reset Options To reset all settings to the factory defaults, select . A dialog box will appear asking if you want to "Reset PTIONS all the options?" To reset all options select reset the options another dialog box will appear asking, "Do you want to clear your address book?"... -
Page 48: Transfer Data
Transfer Data In addition to storing media files, such as music and pictures, you can store and transfer GPS data files to the unit. This is a way to save contacts, trails and routes that you have created. You will use the USB-to-PC cable to transfer GPS data files between the unit and your home computer. -
Page 49: Gps Simulator
File name text box The Transfer My Data screens for both the Save and Load commands are shown far left and far right. When you select Save Data in the far left Transfer My Data screen, a keyboard will appear (center) allowing When you transfer GPS data files to the unit, the file will be added to all the "normal"... -
Page 50: Picture Viewer
Play/Pause Reverse The GPS Simulator control buttons. Use the button to move backwards along a route. Stop or re- EVERSE sume motion along the route using the simulation by pressing to your starting location press Mode until you turn it off. To turn off Simulator Mode select from Menu 3. -
Page 51: Gauge Page
The toolbar, on the left side of the screen in both figures, can be hid- den using the arrow icon located in the bottom right corner of the The picture toolbar controls are: Close Slideshow returns to the Main Menu. Zoom In enlarges the image, zooming in on the center of the display. -
Page 52: Satellite Status / Gps Status Button
Satellite Status / GPS Status button The GPS Status button will open the Satellites screen. The Satellites screen provides information on the satellite signals the unit is monitoring to determine your position. You can access the Satellites screen from any of the four Menu screens by press- ing the GPS Status button. - Page 53 Each satellite is shown on the circular chart relative to your position. The GPS receiver is tracking satellites that are in light blue type. The receiver hasn't locked onto a satellite if the number is in dark blue.
-
Page 54: Time Settings
Time Settings This feature is represented by a clock at the bottom of Menu 4. Pressing this button will open the Time Settings feature. You can use this feature to adjust the month, day, year and Local Time display. To adjust the time display use the up and down arrows located to the left and right of the Local Time display. -
Page 55: Section 5: Searching, Finding And Navigating
Searching, Finding and Navigating The unit's most important function is generating routes to help you get from where you are to where you want to go. There are several ways to do this. The easiest is the Location Information screen. Use the map cursor to select any location on the map and press the Location Information button located in the top right corner of the map screen. -
Page 56: Using The Virtual Keyboard
No matter which Find category you choose, you will be able to search for places nearest your current position or cursor – if the cursor is ac- tive on-screen – or to search for specific locations by name. While the Address feature allows you to enter a street address and navigate di- rectly to it, the Address Book feature allows you to save and then search through a list of address entries saved in the unit. -
Page 57: Find Address
In the following two figures the letter "A" was entered. When the letter "L" was entered next, the unit came up with a list that included Ala- bama, Alaska and Alberta. Highlight and select your choice from the generated list. In the Find Address screen at left the letter "A"... - Page 58 The unit will ask you to enter a City or ZIP code, far left. Press "Choose" and a keyboard (center) will appear. Once you have entered the City or ZIP code another screen (right) will appear asking you to enter an address. When you have entered an address, the unit will sometimes provide a list with more than one address that closely resembles the one you are searching for.
-
Page 59: Fuel, Lodging, Restaurants And Other Pois
Fuel, Lodging, Restaurants and other POIs Most of the options in the Find menus work essentially the same. We will use the command as an example but you can follow essentially the same steps to locate and navigate to any POI stored in the unit. To find a nearby gas station: 1. -
Page 60: Using The Name Filter
The Nearest To Current Position screen's Find By menu allows you to search for a location by Name Entry, Near Current Location or Near Cursor. The Find By menu allows you to search for a location by Name Entry, Near Current Location or Near Cursor. Searching for a specific name allows you to find the closest Texaco or Shell gas station depending on your preference. -
Page 61: Navigating To A Selected Poi
You can also use the Sub-Category field to narrow your search. Press the arrow button next to Entire Category and a drop down box will ap- pear allowing you to choose a specific restaurant type. The Sub- Category feature works the same in almost all the Find menus. Use the Sub-Category feature to help narrow your search. -
Page 62: Address Book
The Find Recent screen is shown at left. When one of the recent desti- nation entries is highlighted and selected the Recent Destination In- formation (right) screen appears. Address Book Address Book allows you to navigate to contacts you have saved. To save a contact, use the Location Information or POI Information screen and select DD TO... -
Page 63: Choosing New Destinations While Navigating
Use the keyboard to enter the name of the first street. Enter the name of the street without direction or street type modifiers such as "N." for "North" or "Ave." for Avenue. When finished entering the street name, press . Another Find Streets screen will appear asking you to enter the name of the second street. -
Page 64: Considering Temporary Or Local Conditions
Detour here will make the unit immediately navigate to the new selected location. Once you arrive, the unit will resume navigating to your original destination. New final destination will add the new location to the end of the current route. So, if you are navigating to a nearby restaurant and choose to set a gas station as your New Final Destination, the unit will direct you to the restaurant first and send you to the gas station after you have finished eating. -
Page 65: Section 6: Point-To-Point Navigation
Point-to-Point Navigation The iWAY 600 's primary job is providing turn-by-turn road naviga- tion, but it can also display plot trails and perform traditional straight- line or point-to-point navigation in off road situations. This section will explain how to operate the unit in point-to-point navi- gation mode and how to use the two additional map sets described be- low. -
Page 66: Switch Between Navigation Modes
The iWAY's Point-to-Point mode uses straight-line navigation, the origi- nal method used by the Global Positioning System. This function is handy when you want to find a map feature, waypoint or point of interest on a lake, in coastal waters or in off-road areas where turn-by-turn won't work. -
Page 67: Straight-Line Navigation Commands
Therefore, the prudent navigator will not only take ad- vantage of all available navigation tools when traveling to a waypoint, but will also visually check to make sure a clear, safe path to the waypoint is always available. Straight-line Navigation Commands There are two basic commands used for straight-line navigation: Go To Cursor and Go To Waypoint. -
Page 68: Create Waypoint On Map
to create and save the waypoint. The Edit Contact (Way- DDRESSBOOK point) screen appears. You can accept the default name and symbol, edit them, or just select to close the screen. Waypoint Information screen, left. Edit screen for this waypoint, right. (If you do want to change the waypoint name, symbol or any of the other information boxes, simply touch anywhere inside the relevant box and the iWAY's virtual keyboard will appear. -
Page 69: Navigate To A Waypoint
Navigate To a Waypoint Find and Go To Waypoint Unless you happen see the waypoint nearby on the map, the fastest way to navigate to a waypoint is to look it up in the Address Book by using the Find button. Press the key, then choose point one of three ways:... -
Page 70: Following Navigation Indicators
Navigating with the Go To Cursor command. At left, the boater has selected a waypoint (fish symbol) with the cursor and started navigat- ing. The figure at right shows the straight-line navigation course after the cursor and toolbar have been cleared from the screen. The Go To Cursor command is extremely powerful because it's not lim- ited to waypoints —... - Page 71 Navigating to a fishing spot using course line and Overlay Data boxes, seen in lower right corner. From top to bottom, they are: bearing, course, track, off course and steering arrow/distance. The Steering Arrow overlay is a graphical arrow showing which way to steer to the destination.
-
Page 72: Navigating With Trails
Course: The direction you should be traveling to reach your destina- tion when you are on the original course line. Off Course (Pos Error): The distance (to the left or to the right) from the course line. Steer so your Track, Bearing and Course match, and you will be headed straight for your destination along your original course. - Page 73 all the bus routes he drives in one file for work. Another file could con- tain personal GPS data for fishing or vacation travel. Hunter on ATV Recording a trail in a roadless area. This hunter can retrace his path from parking area to hunting stand even in the dark.
- Page 74 Visible Trail (check symbol) At left, Trails Menu with Trail 1 ready to record. The Active symbol shows that any travel will be recorded in this, the active trail. At right, selecting New Trail button automatically stops recording and saves Trail 1 by creating Trail 2 and making Trail 2 active.
- Page 75 Fig. 1 Navigating a route made from a trail. Fig. 1 shows boat on first leg of the route. In Fig. 2 boat nears point two and unit automatically switches navigation to point three. Boat is still tracking 321°, but bear- ing overlay now shows point three is 269°...
-
Page 76: Nauticpath™ Usa Marine Electronic Charts
Step 4 Step 3 3. Point 1 is now half-way down the list. It should be at the bottom, just above the text "(Add to list)". 4. Use the U and D buttons to move the points until they are all in reverse order, with the original end point at the top of the list. -
Page 77: Reading Nauticpath Map Information
Reading NauticPath Map Information Use the cursor on the map screen to highlight a map feature or symbol and a pop-up information box appears identifying the item. Certain symbols offer additional information. For example, use the cursor to select a chart symbol, then press the button in the top right corner of the map screen. -
Page 78: Enhanced Lake Maps
The cursor has been used to highlight a shipwreck symbol, and a popup box appeared describing the selected item. The Information button was then selected to view waypoint information on the wreck. The cursor has selected the Port Aransas Municipal Harbor marina symbol. - Page 79 These figures show the lake detail included in the enhanced lake maps. More detail appears as you zoom in. This is a man-made lake; these examples clearly show the submerged river and stream channels that formed the lake. In addition to underwater contour features, these lake maps show en- hanced shoreline features, small islands and various bottom structures.
-
Page 80: Elevation Contour Lines
Elevation Contour Lines Topographic information is displayed as major and minor contour lines with numbers showing the elevation above sea level. At left, different colors mark parks and public hunting areas. At right, topo contours and the border of a game refuge are shown. Cursor has selected a contour line, launching a pop-up box showing the elevation. - Page 81 Notes...
- Page 82 Notes...
-
Page 83: Fcc Compliance
This device complies with Part 15 rules. Operation is subject to the fol- lowing two conditions: 1. This device may not cause harmful interference, and 2. This device must accept any interference received, including inter- ference that may cause undesired operation. This equipment has been tested and found to comply with the limits of a Class B digital device, pursuant to Part 15 of the FCC Rules. - Page 84 Canadian Compliance Statement This Class B Digital apparatus meets all the requirements of the Ca- nadian Interference-Causing Equipment Regulations. Cet appareil numerique de la classe B respecte les exigences du Regle- ment sur le material broilleur du Canada. This device complies with Class B Limits of Industry Canada. Opera- tion is subject to the following two conditions: 1.
-
Page 85: End User License Agreement
TERMS AND CONDITIONS Personal Use Only. You agree to use this Data together with the iWAY™ 600c GPS receiver for the solely personal, non-commercial purposes for which you were licensed, and not for service bureau, time-sharing or other similar purposes; for purposes of clarity, such “personal, non-commercial purposes”... - Page 86 including but not limited to, content, quality, accuracy, complete- ness, effectiveness, reliability, fitness for a particular purpose, use- fulness, use or results to be obtained from this Data, or that the Data or server will be uninterrupted or error-free. Disclaimer of Warranty: LOWRANCE AND ITS LICENSORS (INCLUDING THEIR LICENSORS AND SUPPLIERS) DISCLAIM ANY WARRANTIES, EXPRESS OR IMPLIED, OF QUALITY, PERFORMANCE, MERCHANTABILITY, FITNESS FOR A PAR-...
- Page 87 agreements previously existing between us with respect to such subject matter. Governing Law. The above terms and conditions shall be gov- erned by the laws of the Illinois, without giving effect to (i) its con- flict of laws provisions, or (ii) the United Nations Convention for Contracts for the International Sale of Goods, which is explicitly excluded.
- Page 88 Notes...
- Page 89 LOWRANCE ELECTRONICS FULL ONE-YEAR WARRANTY "We," "our," or "us" refers to LOWRANCE ELECTRONICS, INC., the manufacturer of this product. "You" or "your" refers to the first person who purchases this product as a consumer item for personal, family or household use. We warrant this product against defects or malfunctions in materials and workmanship, and against failure to conform to this product's written specifications, all for one (1) year from the date of original purchase by you.
-
Page 90: How To Obtain Service
How to Obtain Service… …in the USA: We back your investment in quality products with quick, expert service and genuine Lowrance parts. If you're in the United States and you have technical, return or repair questions, please contact the Factory Customer Service Department. -
Page 91: Accessory Ordering Information
Accessory Ordering Information for all countries To order Lowrance GPS accessories, please contact: 1) Your local sporting goods, marine, aviation, automobile or consumer electronics store. Most quality dealers that handle outdoor electronic equipment or other consumer electronics should be able to assist you with these items. -
Page 92: Visit Our Web Site
Visit our web site: Lowrance Pub. 988-0160-191 © Copyright 2007 All Rights Reserved Printed in USA 020807 Lowrance Electronics, Inc.