
Related Manuals for Lowrance iFinder Explorer


Summary of Contents for Lowrance iFinder Explorer
-
Page 1: Operation Instructions
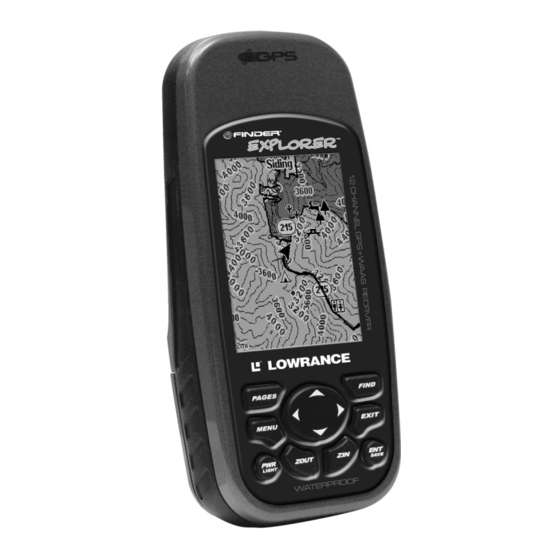
Pub. 988-0148-831 www.lowrance.com iFINDER Explorer Handheld Mapping GPS Receiver Operation Instructions... -
Page 2: Visit Our Web Site
Ltd. Exit Authority and eXitSource are trademarks of Zenrin Co. Ltd. Lowrance Electronics may find it necessary to change or end our policies, regulations and special offers at any time. We reserve the right to do so without notice. All features and specifications subject to change without notice. -
Page 3: Table Of Contents
Table of Contents Section 1: Read Me First! ............1 Capabilities and Specifications: ........... 2 Introduction to GPS, WAAS and EGNOS ........6 How to use this manual: typographical conventions ....8 Arrow Keys ................8 Keyboard ................... 8 Menu Commands ..............8 Instructions = Menu Sequences .......... - Page 4 Visual Back Trailing ............... 36 Navigate a Back Trail............. 37 Clearing or Erasing a Trail ............ 38 Power Saving ................38 Transfer Custom Maps and GPS Data Files ......39 Switch to Advanced Mode............41 Section 4: Advanced Mode Operation......... 43 Keypad..................
- Page 5 Delete a Route ................. 57 Save GPS Data Files to an MMC ..........57 Searching..................58 Trails ................... 60 Create and Save a Trail............60 Clear a Trail ................60 Delete a Trail ................60 Edit a Trail Name ..............60 Edit a Trail Color ..............
- Page 6 Auto Satellite Search..............72 Check MMC Files and Storage Space ........73 Com Port Configuration ............. 73 Configure NMEA ................ 74 Use WAAS/EGNOS..............75 Coordinate System..............75 Map Fix..................77 Customize Page Displays ............78 External Passive Antenna ............79 GPS Simulator ................
- Page 7 Delete Trail ................102 New Trail................103 Trail Visible/Invisible and Other Trail Options ....103 Units of Measure............... 103 Section 6: Searching ............. 105 Selected Item................106 Destination................106 Recent Finds ................107 Current Route ................107 Find Addresses................108 Find Home Waypoint..............
- Page 8 WARNING! A CAREFUL NAVIGATOR NEVER RELIES ON ONLY ONE METHOD TO OBTAIN POSITION INFORMATION. CAUTION When showing navigation data to a position (waypoint), a GPS unit will show the shortest, most direct path to the waypoint. It provides navigation data to the waypoint regardless of obstructions.
-
Page 9: Section 1: Read Me First
Here's how: The manual is organized into seven sections. This first section is an introduction to Lowrance GPS. It tells you the basics you need to know before you can make the unit look around and tell you where you are. -
Page 10: Capabilities And Specifications
(and our power users), but if you don't care how many waypoints the iFINDER can store or how long the batteries last, skip ahead to important information on how the iFINDER works, on page 4. Capabilities and Specifications: iFINDER Explorer General Display:......3" (7.62 cm) diagonal high contrast Film Su- perTwist. - Page 11 MMC slots: ...... One, inside battery compartment. Accepts non-proprietary MMC or SD memory cards. Background map:..Built-in custom, detailed Lowrance map. Contains: low-detail maps of the whole world (containing cities, major lakes, major rivers, political boundaries);...
- Page 12 The amount of GPS data you can record and save for re- call later is only limited by the number of MMC cards you have. How the iFINDER Explorer Works You'll navigate faster and easier if you understand how the iFINDER scans the sky to tell you where you are on the earth —...
- Page 13 GPS data files, erase 'em and record new ones, over and over and over again. Like any computer file, these GPS Data Files (file format *.usr) can be shared between iFINDERs, other Lowrance GPS and so- nar/GPS combo units and even personal computers.
-
Page 14: Introduction To Gps, Waas And Egnos
You make your own Custom Map Files with our MapCreate software, but you don't have to. We also sell ready-to-use FreedomMaps. These custom maps are pre-loaded on MMCs. (No computer work required!). The iFINDER automatically reads Custom Map Files directly from the MMC or SD Card. - Page 15 A minimum of three satellites are required to determine a 2D fix. The system requires signal reception from three satellites in order to determine a position. This is called a 2D fix. It takes four satellites to determine both position and elevation (your height above sea level — also called altitude).
-
Page 16: How To Use This Manual: Typographical Conventions
There, however, are some fringe areas of the U.S., including parts of Alaska, that do not yet receive robust WAAS coverage. Continued WAAS development is planned to extend WAAS coverage in the years to come. WAAS boosts the accuracy of land GPS navigation, but the system is designed for aircraft. -
Page 17: Instructions = Menu Sequences
some kind with the menu item. Text that you may need to enter or file names you need to select are shown in italic type, such as trail name. Instructions = Menu Sequences Most functions you perform with the iFINDER are described as a se- quence of keystrokes and selecting menu commands. - Page 18 Notes...
-
Page 19: Section 2: Installation & Accessories
Rechargeable NiMH batteries, however, should give you suitable battery life. Lithium batteries are lighter than alkaline, and with some brands of lithium batteries, the iFINDER Explorer will float. We've tested the 2 iFINDER Explorer using Energizer lithium batteries, and it re- mained afloat. -
Page 20: Battery Installation
Battery Installation Turn the unit over so that the back is facing you. With your thumb or nail, pull back on the small clip to release the battery cover latch as shown in the following images. Once the latch is released, pull the bat- tery cover out of the grooves in the bottom of the case. -
Page 21: Cigarette Lighter Power Adapter
The unit can exchange information with any device that transmits or receives NMEA 0183 data. To exchange NMEA data, Lowrance offers an optional data only cable and a power/data combo cable: The PC-DI7 is a NMEA/serial communications cable. It has a standard female DB-9 connector on one end to attach your unit to a computer's serial communications port. -
Page 22: Mmc Or Sd Memory Card Installation
NMEA data to the computer, you can get live position data for GPS- compatible mapping software. You can also run one of our free Lowrance GPS emulators on your lap- top and operate it with real-time position information. To use it, plug the power adapter into a cigarette lighter socket, plug the DB-9 connector into a serial port on the computer and attach the cable to the iFINDER. -
Page 23: Mapping Resources
5. Turn the plastic rotating card lock until it holds the card firmly in place with the grip parallel to the direction of the batteries. 6. Replace the batteries and battery cover. Mapping Resources The iFINDER Explorer works with FreedomMaps, NauticPath USA, ... -
Page 24: External Antenna
software, but without the necessity of using a computer. FreedomMaps are available for the United States, Canada and Europe. Like custom maps built in MapCreate, the custom map on a FreedomMap card contains all of these features: rivers/lakes/tributaries; more than 60,000 critical navigation aids;... -
Page 25: R-A-M Bracket Mounting Systems
A suction-cup mount allows you to attach the antenna to a windshield. The iFINDER Explorer can use the passive FA-8 antenna or the active RAA-3 antenna. The active antenna offers a further performance boost by amplifying the satellite signals it receives. -
Page 26: Other Accessories
R-A-M even has suction cup bases for attachment to windscreens or fiberglass surfaces. See your Lowrance dealer or visit the LEI web site for the latest options. Acces- sory ordering information is on the inside back cover of this manual. -
Page 27: Section 3: Easy Mode Operation
BUT, if you just can't wait to get outside, grab the batteries and turn to the one-page Quick Reference on page 28. Keypad iFINDER Explorer keypad. 1. PWR/LIGHT – The PWR key turns the unit on and off and activates the backlight. -
Page 28: Power/Lights On And Off
6. EXIT – The Exit key lets you return to the previous screen, clear data or close a menu. 7. FIND – The Find key launches the iFINDER search menus and some navigation functions. 8. ZOUT – (Zoom Out) – This key lets you zoom out the screen to see a larger geographic are on the map. -
Page 29: Satellite Status Page
Sounds: enables or disables the sounds for key strokes and alarms and sets the alarm style. Power Saving: power saving mode helps extend battery life. Navigate Trail: sets up navigation back to the start of the current trail. Clear Trail: clears all the points stored in the plot trail. Sun/Moon: finds the rising and setting time of the sun and the moon. -
Page 30: Compass Page
Satellite Status Page. This screen shows a graphical view of the satellites that are in view. Each satellite is shown on the circular chart relative to your position. The point in the center of the chart is directly overhead. The small in- ner ring represents 45°... -
Page 31: Navigation Page
Track or compass heading indicator, showing facing direction Compass rose Navigation information data boxes Battery power indicator Compass Page. Navigation Page At the center of the Navigation Page is a compass rose. It shows direc- tion of travel and the direction to a recalled waypoint. When you're not navigating to a waypoint or destination, the navigation screen looks like the one in the following image. - Page 32 When navigating to a waypoint or following a route, the Navigation screen looks like the one shown in the next image. Your ground speed, track, distance, course and bearing to a waypoint, all can be shown digitally on this screen. The current cross-track error is shown in the XTK box.
-
Page 33: Map Page
Map Page The map screens show your course and track from a bird's-eye view. By default, this unit shows the map with north always at the top of the screen. (This can be changed using options in Advanced Mode. See the topic Map Orientation, in Sec. - Page 34 Map Pages with high-detail map of an urban area loaded on the MMC. Arterial streets appear at the 4-mile zoom range (left), with a few Point icons visible. Numerous dots representing Points of Interest become visible at the 3-mile range (center). At the 0.4-mile zoom (right), you can see an interstate highway with an exit, major and minor streets as well as Point of Interest icons.
- Page 35 Major Street Cursor line Interstate Restaurant Markers Pop-up School POI Position, distance and Zoom bearing data Range When the map is zoomed out far enough, most POIs appear as square dots (left). As you zoom in closer, the symbols become readable icons. In the 0.3-mile zoom example (right), the cursor has selected Cholita's Mexican Restaurant POI, which triggers a pop-up box with the POI name.
-
Page 36: Easy Mode Quick Reference
IFINDER Explorer Easy Mode Quick Reference Start outdoors, with a clear view of the open sky. As you practice, try navigating to a location a few blocks away. Navigation in too small a space, like a backyard, will constantly trigger arrival alarms. -
Page 37: Find Your Current Position
Find Your Current Position When you turn on the iFINDER, it automatically searches for satellites and under clear sky conditions, calculates its position in approximately one minute or less. NOTE: Clear sky means open sky, unobstructed by terrain, dense foliage or structures. -
Page 38: Selecting Any Map Item With The Cursor
Now that you have seen how the iFINDER can find where you are, let's search for something else. Searching is one of the most powerful fea- tures in the Lowrance GPS product line. In this example, we'll look for the nearest fast-food restaurant. For more information on different types of searches, refer to Sec. - Page 39 Find Map Places Menu (left); Category Selection menu (center) with list of the nearest restaurants (right). 3. A list of restaurants will appear with the closest at the top of the list and the one furthest from you at the bottom of the list. The location nearest you will be highlighted.
-
Page 40: Set Home Waypoint
6. The iFINDER's map appears, with the cursor crosshairs highlighting the restaurant's POI symbol. A pop-up name box identifies the POI. A data box at the bottom of the screen displays the location's latitude, longitude, distance and bearing. Map screen showing Finding Waypoint, the result of a restaurant search. -
Page 41: Go Home
Pop-up box Save Home Waypoint menu (left). Home waypoint with X symbol and name (right). When selected by the cursor, the pop-up box appears. The example shows the home waypoint set at the cursor location. If the cursor was not active, the point would be placed at the current position. Caution: Saving a new Home waypoint will overwrite and erase the pre- vious Home waypoint. -
Page 42: Navigate To Cursor Position On Map
Overboard and the Map Page displays a Man Overboard waypoint, rep- resented by a human figure. The steering arrow will guide you to that position. The man overboard position is stored in the waypoint table for future reference. It can be edited the same as any other waypoint in Advanced Mode. -
Page 43: Navigate To A Point Of Interest
3. Press and the iFINDER will begin navigating to the cur- MENU sor location. The Map Page will display a course line from your current position to the cursor position. The Navigation Page displays a compass rose showing navigation information to your destination. See the following examples. -
Page 44: Creating And Saving A Trail
Creating and Saving a Trail A trail or plot trail, is a history of the path you have taken. On the screen, trails are represented by a solid line extending from the back of the current position arrow. With the default auto setting, the iFINDER creates a trail by placing a dot (trail point) on the screen every time you change directions. -
Page 45: Navigate A Back Trail
Navigate a Back Trail 1. Press |↓ to MENU AVIGATE RAIL 2. Begin moving and let your iFINDER guide you. NOTE: If you are already located at or near the beginning of your back trail, the arrival alarm will go off as soon as you hit Enter. Just press to clear the alarm and proceed. -
Page 46: Clearing Or Erasing A Trail
Track or compass heading indicator Present position Bearing arrow Trail Compass waypoint rose symbol Trail line Cross track error range (off course indicator) Navigate trail, navigation page (compass rose) views: Driver is east- bound heading straight toward trail point 5 (left). The bearing arrow shows the trail point is due east (straight ahead.) Driver (right) has reached trail point 5 and must turn south to follow the trail. -
Page 47: Transfer Custom Maps And Gps Data Files
To do this, use the Power Saving command. Just remember the higher your Power Saving setting, the less reliable your position information on the map display. To access the Power saving feature in Easy Mode press |↓ to MENU . Press → or ← to move the slider bar. OWER AVING To return to the main page display, press... - Page 48 The Transfer My Data submenu asks if you want to save data to the MMC or load data from the MMC into the iFINDER's memory. 2. If no MMC is present, a message will appear letting you know there is no card in the iFINDER. You must insert a card to activate the Load or Save commands.
-
Page 49: Switch To Advanced Mode
These figures (left to right) show the menu sequence for loading a GPS Data File from an MMC into the iFINDER's memory. Switch to Advanced Mode To leave Easy Mode and switch to Advanced Mode: 1. Press |↓ to MENU DVANCED 2. - Page 50 Notes...
-
Page 51: Section 4: Advanced Mode Operation
Section 4: Advanced Mode Operation Keypad iFINDER Explorer keypad. 1. PWR/LIGHT (Power & Light) – The PWR key turns the unit on and off and activates the backlight. 2. PAGES – Pressing this key switches the unit between the four dif- ferent page screens in Advanced Mode. -
Page 52: Power/Lights On And Off
Power/lights on and off To turn on the unit, press . To turn on the backlight, press again. Pressing once again will turn off the backlight. (Press EXIT to clear any message or alarm displays.) Turn off the unit by pressing and holding the key for 3 seconds. -
Page 53: Satellite Status Page
GPS Setup: gives access to GPS receiver options, like GPS Simulator, Track Smoothing and GPS Auto Search. System Setup: give access to general configuration options like, Units of Measure, Set Local Time, Reset Options, Popup Help and Transfer My Data. Utilities: allows users to modify settings for Sun/Moon calculator, Trip Calculator, Timers and Alarm Clock. -
Page 54: Status Menu
Satellite Status Page (left) with Satellite Status Menu (right). Status Menu The Satellite Status Menu allows you to set GPS options such as Track Smoothing, GPS Auto Search and Use Indoors. Digital Data Page This page provides detailed information on the position of the iFINDER's cursor. -
Page 55: Navigation Page
Navigation Page This screen has a compass rose that not only shows your direction of travel, but also the direction to a recalled waypoint. The navigation screen looks like the one below when you’re navigating to a waypoint. Your position is shown by an arrow in the center of the screen and your trail history —... -
Page 56: Compass Menu
Compass Page (left) with Compass Page menu (right). Compass Menu From the Compass page menu, you can cancel navigation, set alarms, scout, customize the digital data boxes and execute compass orientation and calibration. Map Page The map screens your course and track from a bird’s-eye view. By de- fault, this unit shows the map with north always at the top of the screen. -
Page 57: Map Menu
Map Page (left) with Map Menu (right). Map Menu The map menu offers a variety of options, which include, finding dis- tances, scouting, changing the orientation of the map and viewing and modifying map data. Moving Around the Map: Zoom & Cursor Arrow Keys The map is presented from a bird's-eye view. -
Page 58: Find Distance From Point To Point
The distance to Dallas from the starting point is 211.1 miles. Find Distance from Point to Point You can also measure distance between two other points on the map. 1. While on the Map page press |↓ to MENU ISTANCE 2. -
Page 59: Icons
Icons Icons are graphic symbols used to mark some location, personal point of interest or event. They can be placed on the map screen, saved and re- called later for navigation purposes. These are sometimes referred to as event marker icons. The iFINDER has 42 different symbols to choose from when creating an icon. -
Page 60: Load Gps Data Files From An Mmc
Delete icons menu. Load GPS Data Files from an MMC GPS Data files, containing waypoints, routes, trails and event marker icons, must be copied from an MMC to the iFINDER's internal memory before the iFINDER can read them. Here's how: 1. -
Page 61: Navigate
Press ↑ ↓ to change the first character, then press → to the next char- acter and repeat until the name is correct. Then press |↓ to The unit will display a completion message when the data transfer is finished. To return to the main page display, press repeatedly. -
Page 62: Navigate To Point Of Interest (Poi)
Navigate to Point of Interest (POI) For POIs in view on the map, you can easily use the Navigate to Cursor command above. Use the cursor to select the POI. The other method involves searching for POIs with the Find command. (see Sec. 6, Searching, for detailed instructions on POI searches.) After selecting a POI and pressing , the Point of Interest informa-... -
Page 63: Routes
2. Press ↓ to saved trail list, then use ↓ or ↑ to select a trail to navigate. 3. With the trail name highlighted, press |↓ to AVIGATE 4. Wait while the iFINDER creates a route from the trail. When the progress message disappears, the unit displays a trail infor- mation screen, with highlighted in the top command box. -
Page 64: Pc-Created Routes
PC-created Routes MapCreate is the easiest method for preparing a route, because your PC's larger screen, keyboard and mouse are easier to manipulate than the pocket-sized iFINDER. To load a MapCreate route into the iFINDER, follow instructions in MapCreate's manual for creating a route and saving it as part of a GPS Data File (file format *.usr). -
Page 65: Delete A Route
Route creation sequence, continued: Fig. 4. Point (3) set at on-ramp turn. Fig. 5. Waypoint (4) set at highway exit to frontage road leading to river. Waypoint (5) ends the route at a tree stand in the hunting area. Fig. 6. Press EXIT to save the route and you return to this screen. 5. -
Page 66: Searching
4. To accept the default name Data for the GPS Data File, press ↓ to . If you wish to rename the file, press to activate the se- lection box. Press ↑ or ↓ to change the first character, then press → to the next character and repeat until the name is correct. - Page 67 sired location. To enter another letter, press →, then use ↑ ↓ to se- lect the desired letter. If the location you are looking for is in the list, it will move toward the top. To exit the Name Filter window, , then push ↓...
-
Page 68: Trails
Trails A trail or plot trail, is a string of position points plotted by the iFINDER. It's a travel history, a record of the path you have taken. Trails are useful for repeating a journey along the same track. They are particularly handy when you are trying to retrace your trip and go back the way you came. -
Page 69: Edit A Trail Pattern
Select and press . Choose the color you want and press OLOR Press repeatedly to return to the main page display. EXIT Trail Style highlighted on the Edit Trail menu (left); Scrolling through color options (center); Customizing the trail pattern (right). Edit a Trail Pattern To edit a trail name, press |↓... -
Page 70: Utilities
1. Insert the MMC card into your unit. Press |↓ to MENU MENU YSTEM |↓ to ETUP RANSFER To transfer data from the iFINDER to the MMC, press To transfer data from the MMC to the iFINDER, press → to 2. -
Page 71: Trip Calculator
Trip Calculator The Trip Calculator is a handy tool for keeping track of detailed route information. You can use it to find the distance of a daily commute or to calculate average speed on a cross-country road trip. Trip Active Use the Trip Active checkbox to turn on and off trip calculation. -
Page 72: Interpreting Weather Information
Interpreting Weather Information The iFINDER Explorer's Weather Prediction utility is found in two data boxes on the Digital Data page. (This page is only available in Ad- vanced Mode.) The Pressure History box at the top has a bar chart. - Page 73 Pressure History box shows hourly barometer readings. Weather Symbol box shows icon indicat- ing current weather trend. Digital Data page with barometric Pressure History box at the top and Weather Symbol box at lower left. When the iFINDER is first turned on and determines its position and the local time, it takes a barometric pressure reading.
- Page 74 plays one of five weather symbols in the Weather Symbol box. This symbol reflects the current trend shown in the Pressure History bar chart. By monitoring the trend (steady, rising or falling), the iFINDER can predict how the weather will likely behave. Weather Symbol box, showing Rain symbol.
-
Page 75: Sleep Mode
Sleep Mode When the iFINDER has more information to work with, it can provide better weather predictions. In order to help with this, we have designed the iFINDER with a Sleep Mode that allows it to conserve battery life, while occasionally waking up to take a pressure reading. This allows the unit to maintain a pressure history when you are not using it. -
Page 76: Create Waypoint At Current Position
Create Waypoint at Current Position 1. While you are traveling, press . The waypoint is saved and automatically given a name with a sequential number, like waypoint 002. The waypoint symbol and number appear on the map. Create a Man Overboard Waypoint This unit has a man overboard feature that shows navigation data to the location where the feature was activated. -
Page 77: Select A Waypoint
5. Choose the location you want to set as the reference point and press . Its position will appear as the reference position on the map. 6. Press ↑ to . Press ↑ or ↓ to change the first character, ISTANCE then press →... -
Page 78: Waypoint Altitude
. Use ↑ ↓ to change the first 1. Latitude: select and press ATITUDE character, then press → to the next character and repeat until the lati- tude is correct. Press EXIT 2. Longitude: press ↓ to . Use ↑ ↓ to change the first ONGITUDE character, then press →... -
Page 79: Section 5: System & Gps Setup Options
Section 5: System & GPS Setup Options Alarms This unit has several GPS alarms. The factory default setting has all alarms turned on, but you can turn alarms off and on and change their distance settings. You can set an arrival alarm to flash a warning message and sound a tone when you cross a preset distance from a waypoint. -
Page 80: Auto Satellite Search
alarm. To change the settings, use the ↑ or ↓ keys to highlight Arrival, . Press ↑ or ↓ to change the first Off Course or Anchor and press character, then press → to the next character and repeat until the dis- tance is correct, then press 4. -
Page 81: Check Mmc Files And Storage Space
Satellite Status page (left); Satellite Menu (right). You can force the unit to enter auto search mode. Here's how: 1. In Advanced Mode, press until you are on the Satellites page. PAGES then ← to 2. Press |↓ to MENU GPS A EARCH Check MMC Files and Storage Space... -
Page 82: Configure Nmea
Menus for changing Com Port settings. To set Com Port Configuration: 1. Press |↓ to MENU MENU YSTEM ETUP 2. Press ↓ to 3. Use the ↓ ↑ keys to select the desired Baud Rate and press Configure NMEA You can configure the unit to use specific NMEA sentences. 2. -
Page 83: Use Waas/Egnos
Use WAAS/EGNOS The iFINDER Explorer has a new feature that allows users to turn WAAS and EGNOS reception on and off. The default value is on. EG- NOS (European Geostationary Navigation Overlay Service) is the European equivalent of WAAS. - Page 84 (Standard + 10); Map Fix; Loran TD; British, Irish, Finnish, German, New Zealand, Swedish, Swiss, Taiwan, Greek and Military grids. UTM's are marked on USGS topographic charts. This system divides the Earth into 60 zones, each 6 degrees wide in longitude. British, Irish, Finnish, German, New Zealand, Swedish, Swiss, Taiwan, and Greek grid systems are the national coordinate system used only in their respective countries.
-
Page 85: Map Fix
To access the Loran Chain Number, Secondary Station 1 or Secondary . Use the ↑ ↓ Station 2 menus, highlight the category and press keys to choose the desired setting and press . Press to close the EXIT menu. Map Fix Map Fix is used with charts or maps. -
Page 86: Customize Page Displays
Press ↓ to , which will launch the Select Point window ELECT RIGIN with three options: My Waypoints, Map Places and Highway Exits. If you saved the reference point as a waypoint, choose AYPOINTS pressing , which will bring up the Waypoint list with the way- point nearest your location at the top. -
Page 87: External Passive Antenna
When you are satisfied with the changes, press EXIT External Passive Antenna The iFINDER Explorer can be used with an optional external antenna. While we recommend the more powerful external active antenna, the unit can also operate with an external passive antenna. To do this, mod- ify the settings so the unit will look for an external passive antenna rather than an external active antenna. -
Page 88: Gps Simulator
GPS Simulator The GPS simulator lets you use the unit to simulate outdoor naviga- tion. The starting location may be set in latitude/longitude, from a stored waypoint, map place or POI location. You can move across the map by using the arrow keys ( ) or by setting the track TEER W RROWS... -
Page 89: Map Auto Zoom
Enter an approximate (shown in compass degrees) that will point RACK you toward the start of the trail/route. 2. Set to zero. Select command and press PEED TEER WITH RROWS which turns on the simulator and returns you to the Map Page. 3. - Page 90 Scout Plot menus 3. The Scout menu appears. To make the scout active, highlight CTIVE and press , then scroll down to and press . The Edit COUT Scout points menu will appear. Select and press DD FROM An active scouting session (center), denoted by the checkbox next to Active.
-
Page 91: Map Data
Map Data The Map Data menu lets you turn off the map — which turns the map screen into a GPS plotter — turn on or off pop-up map info boxes, draw map boundaries or boxes around areas of detail and fill land areas with gray. -
Page 92: Map Datum Selection
are based on the current zoom range. At a 100-mile zoom, the screen will show two rings with your current position in the center. The large ring touching the left and right sides of the screen is 100 miles in di- ameter (same as the zoom range). -
Page 93: Map Detail Category Selection
GPS Setup Menu (left) with Map Datum Menu (right). Map Detail Category Selection This menu determines which of the mapping features are shown on the screen. This includes waypoints, trails, icons, cities, highways, etc. You can turn on or turn off any of these items, customizing the map to your needs. -
Page 94: Map Orientation
Map Orientation By default, this receiver shows the map with north always at the top of the screen (North Up). This is the way most maps and charts are printed on paper. You, however, can change the map orientation to Track Up, Course Up or Heading Up, if you switch to Advanced Mode. -
Page 95: Nauticpath Usa Marine Charts
To change map orientation: . Press ↑ or ↓ From the Map Page, press |↓ to MENU RIENTATION to select an orientation option, then press to return to the EXIT EXIT main page display. Map Menu (left) with Map Orientation menu (right). NauticPath... -
Page 96: Port Information
3. To scroll through the Chart Note screen, use ↑ or ↓ arrow keys to read the information. To return to the main page display, press EXIT repeatedly. Entrance to Aransas Pass on a NauticPath chart with 8-nautical mile zoom (left). Remaining images (left to right): same position at 4- nautical mile, 1-nautical mile and 0.3- nautical mile zoom ranges. -
Page 97: Tidal Current Information
3. To scroll through the service information window, use ↑ or ↓ to see the types of services available. To return to the main page display, press repeatedly. EXIT Port Services information screens. Tidal Current Information NauticPath charts contain Tidal Current information, represented at large zoom ranges by a box icon with the letter "C."... - Page 98 Tidal Current Station icon in animated mode Cursor lines NauticPath chart showing Tidal Current Station icon selected by cur- sor (left). Icon animates automatically at .08-mile zoom range (right). Current Time Line Velocity Slack Water Line Scale Tide Tables Current Information screen. The Tidal Current Information screen displays daily tidal current data for this station on this date at the present time.
-
Page 99: Tide Information
Tide Information NauticPath charts contain Tidal Information, repre- sented at large zoom ranges by a box icon with the letter "T." These icons will appear when you are zoomed in to a 6-mile range. The icon stands for a Tidal Station location. An example is displayed at right. When you zoom in to a sufficiently small zoom range (0.8 nautical mile), the icon becomes an animated gauge showing a rising or falling tidal height for the selected station at the present time. -
Page 100: Navionics Charts
Current Time Line Height MLLW Scale Line Tide Table Tide Information screen. The Tide Information screen displays daily tidal data for this station on this date at the present time. The graph at the top of the screen is an approximate view of the tidal range pattern for the day, from midnight (MN) to noon (NN) to midnight (MN). -
Page 101: Pop-Up Help
. Use ↑ ↓ to select the Map Name, then press HOICE EXIT EXIT Map Choice highlighted (left). Lowrance selected from Map Choice menu (right). WARNING: You should never format the MMC containing your Navionics chart. Formatting the MMC will permanently erase the chart from the card. -
Page 102: Reset Options
Pop-up Help message for the Screen command. Reset Options In Advanced Mode 1. Press |↓ to |↓ to |← MENU MENU YSTEM ETUP ESET PTIONS In Easy Mode Hold down the key while you press to turn the unit on. PAGES NOTE: Reset Options does not erase any waypoints, routes, icons or plot trails. - Page 103 Screen Command (left) and Contrast bar (right). To adjust the display's brightness: 1. From the screen menu, press ↓ to . Press ← or → to adjust RIGHTNESS the brightness. Screen menu with brightness selected. Display mode menu. To adjust the screen's display mode: 1.
-
Page 104: Set Language
Continuous selected on Light Delay menu. It's ideal for night travel in a vehicle, since the cigarette lighter can be used as the power source. Set Language This unit's menus are available in 10 languages: English, French, Ger- man, Spanish, Italian, Danish, Swedish, Russian, Dutch and Finnish. To select a different language: 1. -
Page 105: Software Version Information
Software Version Information From time to time, Lowrance updates the operating system software in some of its products. These software upgrades usually are offered to customers as free downloads from our web site, www.lowrance.com. -
Page 106: Sounds And Alarm Sound Styles
Software Info command in Easy Mode (left). Advanced mode (center). The Software Info screen (right). The command works the same in both Easy and Advanced Mode, but Software Information is accessed differently in each mode. Easy Mode 1. Press |↓ to MENU OFTWARE 2. -
Page 107: Power Saving
To change LineOut Volume: from the Sounds menu, use the ← → keys to increase or decrease the volume. To set Key Sounds: from the Sounds menu, highlight RESS OUNDS and press to turn them on (check) or turn them off (uncheck). To set Alarm Sounds: from the Sounds menu, highlight LARM OUNDS... -
Page 108: Track Smoothing
Power save set to the minimum power (left) and maximum power (right). For even greater power efficiency you can stop receiving GPS signals entirely by activating the Use Indoors command. Track Smoothing This is a factory setting that should always be turned on. When stopped or traveling at slow speeds, Track Smoothing prevents trails from wan- dering. -
Page 109: General Trail Options
Main Menu (left); Trails Menu (center); Trail Options menu (right). General Trail Options To access the Trails Menu: 1. Press |↓ to MENU MENU RAILS Delete All Trails Once you are in the Trails menu, you can remove all trails from mem- ory by pressing →... -
Page 110: Flash Trails Option
Flash Trails Option From the Trail Options menu, press ↓ to . With the option LASH RAILS highlighted, press to check it (turn on) and uncheck it (turn off.) Update Trail Criteria There are three criteria by which trails may be updated: automatic, time or distance. -
Page 111: New Trail
New Trail If you want to manually start a new trail from the Trails Menu, high- light the top command box, then use the ← → keys to scroll to RAIL and press . The edit trail menu appears with the new trail name listed in the name box at the top. - Page 112 Units of Measure highlighted (left). Units of Measure Menu (right). To set Speed/Distance: from the Units of Measure menu select then use ↑ ↓ to change the unit and press , press PEED ISTANCE To set Time and Date: from the Units of Measure menu, select and press .
-
Page 113: Section 6: Searching
Section 6: Searching NOTE: The background map loaded in your unit lets you search for U.S. Interstate Highway exits and exit services, as well as land features, including cities and lakes. For a full set of searchable land features, including landmarks, streets, addresses and Points of Interest, you must load your own high-detail custom map produced with our MapCreate 6 software. -
Page 114: Selected Item
Cursor crosshairs centered on a POI (left). The Find menu with Se- lected Item highlighted (center). POI information (right). Selected Item The Selected Item function will appear on the Find menu when an item is selected with the cursor crosshairs. It allows you to quickly access information on the selected location. -
Page 115: Recent Finds
To access Destination: 1. When navigating to a location, press , select FIND ESTINATION press 2. If your destination is listed in the POI database, the POI information window will appear. If you are navigating to a location not listed in the database, an information window will appear displaying the distance to the target as well as your current bearing. -
Page 116: Find Addresses
Current Route highlighted on the Find menu (left). The Route menu (right) launches when Current Route is selected from the Find menu. Find Addresses 1. Press |↓ to FIND DDRESS 2. Press to search in the Address field. Find Address Menu. 3. - Page 117 If the example below had been a search for 324 E. 9th St, you would enter 9 and press . The iFINDER will generate a list of all possi- ble 9th streets and let you choose the one you want. Find street by name menu (left);...
-
Page 118: Find Home Waypoint
is not in the database, a message will appear letting you know the ad- dress could not be found, otherwise a list of addresses will appear. 7. Use the ↓ ↑ keys to select the correct address from the list and press . -
Page 119: Find Map Places Or Points Of Interest (Poi)
2. To select a highway name press , which calls up the Find By Name menu. There are two highway search options: A. You can spell out the highway name in the top selection box. Press ↑ or ↓ to change the first letter, then press →... - Page 120 2. Press ↓ ↑ to select a Map Place or POI category, then press . (To narrow your search, press ← or → to select a subcategory before press- .) That will launch the Find By menu, which has two options: search for Nearest or search by Name.
-
Page 121: Find Streets Or Intersections
POI in the top selection box. Press ↑ ↓ to change the first letter, then press → to move the cursor to the next letter and repeat until the name is correct, then press . B. Jump down to the lower selection list , then use ↓... - Page 122 Find menu with Find Streets highlighted. 2. You must first fill in a street name in the First Street dialog box. Press to display the Find By Name menu. There are two options: A. You can spell out the street in the top selection box. Press ↑ or ↓ to change the first letter, then press →...
- Page 123 Find first street (left); Streets found list (right). If you want to navigate to the found street at the cursor location, just press MENU Find an Intersection You must enter one street in the First Street dialog box, then enter the next street in the Second Street dialog box.
-
Page 124: Find Waypoints (Advanced Mode Only)
Find intersection selected (left); Working message (center); Intersection list (right). 6. To search for the intersection of the two streets, press ↓ to . When the Intersections list appears, press ↑ ↓ to se- NTERSECTION lect the intersection you are searching for and press . - Page 125 List of nearest waypoints (left). Waypoint information screen with Go To highlighted (right). 4. To see information on the closest waypoint, press and the Way- point Information screen appears. If you wanted, you could select another waypoint from the list with the ↑ ↓ keys. A.
- Page 126 A. To navigate to the waypoint, press . The command is already highlighted. The unit will show navigation information to the waypoint. B. To find the waypoint, press → to . The Map Page IND ON appears with the cursor crosshairs centered on the waypoint. To close these menus and return to the main page display, press EXIT peatedly.
-
Page 127: Section 7: Supplemental Material
Section 7: Supplemental Material Datums Used by This Unit WGS 1984 Zaire, Zambia and Australian Geodetic Default Zimbabwe 1984 - Australia & Tasmania Adindan Arc 1950 - Botswana Mean for Ethiopia, Ayabelle Lighthouse - Sudan Arc 1950 - Burundi Djibouti Adindan Arc 1950 - Lesotho Bellevue (IGN) -... - Page 128 European 1950 L.C. 5 Astro 1961 Chua Astro England, Channel Cayman Brac Island Paraguay Islands, Ireland, Scotland, Shetland Leigon Corrego Alegre Islands Ghana Brazil European 1950 Liberia 1964 Dabola Finland, Norway Liberia Guinea European 1950 Luzon Djakarta (Batavia) Greece Philippines (Exclud- Indonesia (Sumatra) ing Mindanao) European 1950...
- Page 129 Naparima BWI North American 1927 Old Hawaiian Trinidad & Tobago Canada (Alberta, Mean for Hawaii, British Columbia) Kauai, Maui, Oahu North American 1927 Mean for Antigua, North American 1927 Old Hawaiian Barbados, Barbuda, Canada (Manitoba, Hawaii Caicos Islands, Ontario) Cuba, Dominican Old Hawaiian Republic, Grand North American 1927...
- Page 130 Point 58 Tokyo South American 1969 Mean for Japan, Ko- Sweden Chile rea, Okinawa Santo (DOS) South American 1969 Tokyo 1965 Espirito Santo Colombia Japan Island South American 1969 Tokyo Sao Braz Ecuador Korea Azores (Sao Miguel, Santa Maria Islands) South American 1969 Tokyo Ecuador (Baltra, Ga-...
-
Page 131: Fcc Compliance
FCC Compliance This device complies with Part 15 of the U.S. Federal Communi- cations Commission (FCC) Rules. Operation is subject to the fol- lowing two conditions: (1) this device may not cause harmful in- terference, and (2) this device must accept any interference re- ceived, including interference that may cause undesired opera- tion. - Page 132 Notes...
- Page 133 Notes...
- Page 134 Notes...
- Page 135 THIS IS A LEGAL AGREEMENT BETWEEN THE END-USER WHO FIRST PURCHASES THIS PRODUCT AS A CONSUMER ITEM FOR PERSONAL, FAMILY, OR HOUSEHOLD USE ("YOU") AND LOWRANCE ELECTRONICS, INC., THE MANUFACTURER OF THIS PRODUCT ("WE", "OUR", OR "US"). USING THE PRODUCT ACCOMPANIED BY THIS LICENSE AGREEMENT CONSTITUTES ACCEPTANCE OF THESE TERMS AND CONDITIONS.
-
Page 136: Databases Limited Warranty
DATABASES LIMITED WARRANTY "We", "our", or "us" refers to Lowrance Electronics, Inc., the manufacturer of this product. "You" or "your" refers to the first person who purchases the prod- uct as a consumer item for personal, family, or household use. The Databases Limited Warranty applies to the one or more databases that your product may contain. - Page 137 LOWRANCE ELECTRONICS FULL ONE-YEAR WARRANTY "We," "our," or "us" refers to LOWRANCE ELECTRONICS, INC., the manufacturer of this product. "You" or "your" refers to the first person who purchases this product as a consumer item for personal, family or household use.
-
Page 138: How To Obtain Service
…in the USA: We back your investment in quality products with quick, expert service and genuine Lowrance parts. If you're in the United States and you have technical, return or repair questions, please contact the Factory Customer Service Department. Before any product can be returned, you must call customer service to determine if a return is necessary. - Page 139 Accessory Ordering Information for all countries To order Lowrance GPS accessories such as computer cables or MMC cards, please contact: 1) Your local marine dealer or consumer electronics store. Most quality dealers that handle marine electronic equipment or other consumer electronics should be able to assist you with these items.
- Page 140 Visit our web site: Lowrance Pub. 988-0148-831 © Copyright 2006 All Rights Reserved Printed in USA 012006 Lowrance Electronics, Inc.