
Related Manuals for Siemens TOP WM5200


Summary of Contents for Siemens TOP WM5200
- Page 1 Operating and Installation Instructions Operating and Installation Instructions TOP WM5200 TOP WM5200 Silver Silver 5000 5000 TOP WM5200 TOP WM5200...
- Page 2 If you need an English user manual, please contact our local CS center/station specified in the "Washing Machine CS network" in your washing machine package or call our customer service free hotline (8008289828) for free supply. Thanks. Web address: http://www.siemens - ha.com.cn Customer Service email: Careline.China@BSHG.com Manufacturer: BSW Household Appliances Co.,Ltd.
-
Page 3: Table Of Contents
Table of Contents Disposal Information ..........2 Operating Environmental Protection/Conservation Issues ..3 Instructions Safety Precautions and Warnings ......Your New Washing Machine ........6 First Wash Cycle ............10 Preparing,Sorting and Loading the Laundry ..Laundry Detergents and Additives .......16 Selecting Programmes .........19 Washing ..............23 When the Programme has Ended ......25 Special Applications ..........26... -
Page 4: Disposal Information
Disposal Information Dispose of packing materials in a responsible manner. Keep packing materials out of the reach of children. The new machine's Packing materials are not toys. packaging Reprocessing and re-using materials saves raw mat- erials and reduces waste. All packing materials used are environment friendly and re-usable. -
Page 5: Environmental Protection/Conservation Issues
Environmental Protection Conservation Issues The most economical and environmentally friendly way to use the machine is always to wash the maximum amount of laundry: Cottons/coloureds 5,20kg Easy Care 2,60kg Delicates/Silk and Wool 2,00kg How to save energy: The variable capacity automatic system reduces the amount of water and energy consumed accordingly if the amount of laundry loaded into the machine is small. -
Page 6: Safety Precautions And Warnings
Safety Precautions and Warnings This machine complies with all relevant safety regulations. Please read the enclosed documents carefully Before using for the before using the washing machine for the first first time: time. They contain important information on the installation, use and safety of the machine. The manufacturer does not accept liability if th- ese instructions are not followed. - Page 7 Operate the machine with cold tap water only. When washing: Your washing machine is designed for domestic use only, i.e. for washing machine-washable textiles in a detergent solution. Never use flammable; explosible and/or poisonous solvents, such as gasoline; alcohol etc. As the washing lotion.
-
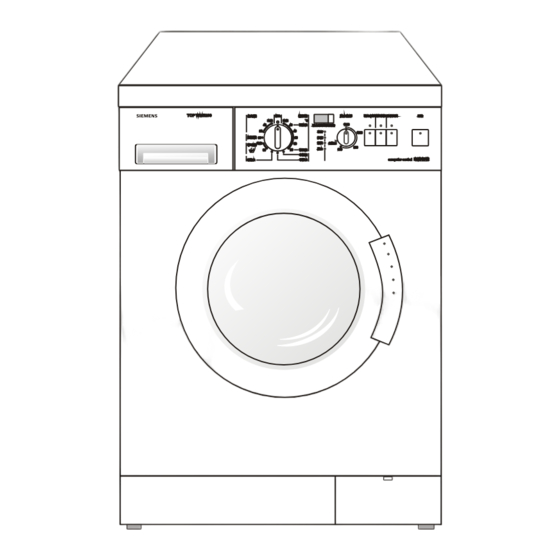
Page 8: Your New Washing Machine
Your New Washing Machine TOP WM5200 TOP WM5200 Filling laundry detergent and/or additive dispensers. Chamber I: Detergent for pre-wash,starch, or pre-soaking agent. Chamber II: Detergent for main washing period, water softener, blench and stain removing salt. Chamber Additives, e.g. fabric softener or former(Do not exceed "Max") - Page 9 Control Panel Drawing Silver 5000 Silver 5000 TOP WM5200 TOP WM5200 Cottons/Coloureds ÃÞ Ö¯ Îï 1. 1. 2. 2. Ê£Óàʱ¼ä Finish In 3. 3. ×¼±¸ Ready »¯ ÏË Ï´ Easy-Care Ô¤Ô¼¿ªÊ¼ Ï´µÓ Delay Start Wash ³¬ Èá Ï´ Ưϴ Delicates/Silk Rinse Ñò...
-
Page 10: Control Panel
Control Panel 1.Programme selector Ã Þ Ö ¯ Î ï Ã Þ Ö ¯ Î ï » ¯ Ï Ë Ï ´ Can be turn in both directions to select/switch off the washing programme. Stop/alter a programme when it is in process, you should turn the programme selector to "... -
Page 11: Spin Speed Selector
Ãâ ÅÅ Ë® in the "Easy care", "Delicates/Silk" and "Wool" washing programmes to ensure that the laundry is TOP WM5200 Silver 5000 washed carefully. "Rinse Hold" option: The laundry remains in the water after the final rinse to avoid creasing the fabric. -
Page 12: First Wash Cycle
First Wash Cycle The installation of the washing machine is finished.(see page 39-48) Carry out the first wash cycle without laundry to remove any water left over from the factory tests. Do not load any laundry. Turn the tape ON. Pull the detergent drawer out as far as it will go. -
Page 13: Preparing,Sorting And Loading The Laundry
Preparing, Sorting and Loading the Laundry Remove any loose items or metal objects, such as safety pins, paper clips, etc. from the laundry. Preparing the Brush sand, coins, etc. out of pocket and cuffs. laundry Close zips and button up cushion covers, duvet covers, etc. -
Page 14: Sorting The Laundry
Caution: Items of clothing can become discoloured. Sorting the laundry Never wash new multi-coloured items together with other items. According to colour and degree of dirt White items may become grey. Always wash white and coloured items separately. Degree of dirt Slight dirt No recognizable dirt or staining. - Page 15 Intensive dirt Dirt and/or staining recognizable. - Kitchen hand towels that have been used for up to one week. - Fabric napkins. - Children's outer clothing or football shirts and shorts with grass and soil stains. - Working clothes such as overalls or baker's and butcher's coats.
-
Page 16: Loading The Laundry
Only wash laundry that is labelled with the following care symbols: Sorting laundry according to their care label 90 C Cottons + lines specifications 60 C, 40 C, 30 C Cottons + lines 90 C 90 C 60 C 60 C 40 C 40 C 60 C, 40 C, 30 C Easy-Care... - Page 17 Open the loading door. Unfold the sorted items of clothing and place them loosely into the drum. Mix up large and small items. Items of varying size will distribute better during the spin cycle. Do not exceed the maximum load: Overloading will cause poor wash results and encourage creasing.
-
Page 18: Laundry Detergents And Additives
Laundry Detergents and Additives Risk of poisoning not use solvent-based cleaning agents in fully automatic washing machines. Explosion hazard. Keep detergents and additives out of the reach of children. You can use any standard powder or liquid detergent which is suitable for automatic washing machines. - Page 19 - degree of soiling - size of the load - amount of detergent to be added according to its manufacturer Dispensing the correct amount of detergent relieves the strain on the environment and ensures optimum washing results. Frequent use of insufficient detergent will eventually become noticeable as follows: - washing appears grey or not properly clean - grey-brown stains(grease marks) form on...
- Page 20 Filling laundry detergent and/or Chamber I: additive dispensers Detergent for prewash, starch or pre-soaking agent. Chamber II: Detergent for main wash, water softener, bleach and stain removal product. Chamber Additives, e.g. fabric softener of former. - Do not fill beyond the " MAX" mark, otherwise will be flushed into the machine together with the detergent at the start of the programme.
-
Page 21: Selecting Programmes
Selecting Programme Select the desired programme (refer also to Basic programme separate "Programme Table" ). 90 C Cottons/Coloureds Ã Þ Ö ¯ Î ï Ã Þ Ö ¯ Î ï » ¯ Ï Ë Ï ´ An energy-intensive programme for heat-resistant fabrics made from cotton or linen. -
Page 22: Special Programmes
"Rinse Hold" setting for the gentle treatment of delicate laundry. Spin speed selector For your clothes, there are different spin speeds in different washing programme of SIEMENS washing machines. In the "Cottons/Coloureds" programme, the fabrics will be spun at the maximum possible spin speed. - Page 23 Additional function on Rinse Hold spin speed selector For delicate laundry and net curtains. The laundry remains lying in the water after the final rinse. Before the laundry can be unloaded, the "Spin" or "Pumping" programme must be performed. Additional function Intensive For very dirty clothes, the washing duration will be prolonged 20 to 40 minutes after pressing...
-
Page 24: Washing
Washing (take TOP WM5200 pictures for example and "Rinse Hold" option is not selected) 1.Turn on the water tap. Start the programme 2.Turn the programme selector to the desired Í£ Ö¹ »¯ÏËÏ´ ÃÞÖ¯Îï programme (refer to separate "Programme table" Àä Ï´... - Page 25 5.Press the Start button. " " ¿ªÊ¼ ¿ªÊ¼ The Wash control light comes on and the programme " " starts. The digital screen displays remaining time of programme automatically such as " ", it means that the programme will be completed in one and half an hour.
-
Page 26: Changing A Programme
If you have accidentally selected the wrong programme: Changing a Turn the programme selector to "Off" . programme Turn the programme selector to the desired programme. The "Ready" control light comes on. Press the "Start"button. The "Wash"control light comes on and the new programme starts. -
Page 27: When The Programme Has Ended
When the Programme has ended The digital screen displays " " . Í£ Ö¹ »¯ÏËÏ´ ÃÞÖ¯Îï The buzzer sounds to remind the user when the Àä Ï´ Àä Ï´ Ç¿ ¿ì Ï´ Ê £ Ó à Ê ± ¼ ä / Ô ¤ Ô ¼ ¿ ª Ê ¼ programme has ended. -
Page 28: Special Applications
Special Applications Load laundry of the same color. Pre-soak Add the pre-soak agent to chamber II according to the manufacturers specifications. Turn the programme selector to"Cold, Cottons/ coloureds". The "Ready" control light comes on Press the "Start" button. The "Wash" control light comes on and the programme starts. - Page 29 As soon as water starts to enter the machine: Pull out the detergent dispenser slightly. Add the starching solution to chamber I. Close the detergent dispenser. If the "Rinse Hold" option is selected, the "Pumping" programme must be subsequently be selected.
-
Page 30: Cleaning And Care
Cleaning and Care Risk of electric shock! Always disconnect the appliance from the mains before cleaning. Never clean the washing machine with a jet of water. Risk of explosion! Never use solvents to clean the appliance. As required: Cleaning the Use hot soapy water or a mild, non-abrasive appliance housing cleaning agent. -
Page 31: Cleaning The Detergent Dispenser
In the event that residual detergents or additives have accumulated. Cleaning the detergent dispenser Pull out the detergent dispenser up to the end stop, press down the hollow on the insert and remove the detergent dispenser completely. Pull up the insert. Rinse the detergent dispenser under hot running water. -
Page 32: Cleaning The Drain Pump
This is necessary if the washing solution cannot be completely drained. The pump is blocked by Cleaning the drain either loose debris or fluff which accumulates if fluff-giving fabrics are washed at high temperature. pump Draining the washing Up to 20 litres. Have a suitable container ready. solution Risk of scalding Allow the hot washing solution to cool. -
Page 33: Cleaning Water Inlet Strainers
To avoid unused detergent from flowing into the drain during the next wash cycle: Pour 1 litre of water into chamber II. Select the "Pumping" programme. This is necessary if very little or no water flows into the washing machine. Cleaning water inlet strainers First release the water pressure in the supply... -
Page 34: Descaling The Washing Machine
Cleaning the strainer on the washing machine Disconnect the hose from the back of the washing machine. Pull out the strainer and rinse under running water. Insert the strainer and reconnect the hose. Turn on the water tap and check whether water is still discharged. - Page 35 If the machine is located in a room which is exposed to freezing temperatures, any residual Frost protection water in both the pump and the water inlet hose must be drained immediately every time the machine is used. Draining the pump: See "Cleaning the pump"...
-
Page 36: Troubleshooting Minor Faults
Troubleshooting Minor Faults Risk of electric shock Repairs must only be carried out by our Customer Service or an authorized technician. If repairs are needed, and assuming that you cannot eliminate the fault yourself with the aid the following table: Turn the programme selector to "Off". - Page 37 Fault Cause Action Control lights do not A fuse has triggered. Switch on/replace the fuse. come on. Call Customer Service if this fault is repeated. An interrupted programme will be Power failure. resumed when power returns. If you wish to unload the laundry, proceed as in "Cleaning the drain pump", Page 30.
- Page 38 Cause Action Fault Foam coming out of the To much detergent. Mix1 tablespoon of fabric softener detergent dispenser. with 1/2 litre of water and pour into chamber I of the detergent dispenser. Reduce the amount of detergent next time. Repeated spinning at short This is not a fault.
-
Page 39: Customer Service
Customer Service Before calling the Customer Service, please make sure that you cannot eliminate the fault yourself(refer to Page 36). This is because consultation provided by our technicians, even within the warranty period, will lead to costs being incurred by yourself. If you cannot correct a problem yourself, switch off the washing machine, remove the plug from the socket, shut off the water supply and call... -
Page 40: Programme Table
Programme Table (Silver 5000, TOP WM5200) Detergent and Additional Always follow the fabric softener functions manufacturers care label instructions Programme * * * * * * 70(110) Cold 70(110) 40 C quick 80(120) 40 C 80(120) 60 C 90(135) 90 C... -
Page 41: Installation,Connection And Transport
Installation, Connection and Transport Risk of injury Safety information The washing machine is heavy. Take care when lifting it. Caution: Frozen hoses can tear/burst. Do not install the washing machine outdoors or in an area prone to frost. Take care not to damage the washing machine. Do not hold onto protruding parts (e.g. - Page 42 On the back of the machine: - Water drain hose. - Power cord. The following tools are helpful: Useful tools - Wrench. - Spirit level. Dimensions a=600mm b=560mm c=850mm Approx. weight=76 kg To ensure the proper operation of the machine, Installation location please pay attention to the following when you install the machine.
- Page 43 Keep the environment dry and vented. Never put small appliance, such as microwave oven; and/or jar cooker, on the machine. Keep the machine away from the flaming equipment, such as candle; cooking stove; liquefied gas container etc. Never put the pressure containers on the machine. Never put the machine over the opening of an uncovered drainage.
-
Page 44: Removing The Transport Bolts
Caution: Removing the The transport bolts must always be removed before using the appliance for the first time and transport bolts must be retained for any subsequent transport (e.g. when moving). Use the spanner provided only if a ring spanner is unavailable. -
Page 45: Hose And Cable Lengths
Hose and cable lengths Left-hand connection 100cm 140cm Right-hand connection 150cm 110cm For the water connection a standard cold-water Water connection line with a minimum water pressure of 0,1 MPa is required(with tap full ON, at least 8 litres of Water supply water must flow out in one minute). - Page 46 The filters at the free end of the inlet hose and at the back of machine should only be removed for cleaning purposes. To avoid water damage the tap must be turned OFF after using the machine. The plastic nuts on the hose connections must only be tightened by hand.
- Page 47 Connect the water supply hose: To the back of the washing machine, and... To the water tap. After connection: Turn on the water tap completely and check that the connection points are water-tight. min. min. The connection of the water tap and water inlet hose are finished.
-
Page 48: Water Drainage
Water drainage Caution: Do not bend or pull the water drainage hose. Height difference between the placement area and drainage point: Maximum 100 cm. Drainage into a wash basin(The hose elbow is in the drum). Caution: The plug must not block the drain of the wash basin. Secure the water drainage hose so that it does not slide out. - Page 49 When heating, the maximum current of the washing machine is 10A, so please make sure Electrical that the power supply system(voltage; current connection and the cable) is applicable to the load of the applied appliance. The machine must only be connect to an alternating current supply via a correctly installed earthed socket.
- Page 50 Before transporting the washing machine: - Turn off the water tap, Transport - Drain any residual washing solution(refer to e.g. when moving Page 30), - Release the water pressure in the supply hose (refer to Page 31), - Disconnect the washing machine from the mains, - Dismantle the supply and drainage hose, - Install the transport bolts.
-
Page 51: Adjust The Volume Of Buzzer And Audible Feedback Of Start Button
Appendix You can change the volume of the buzzer Adjust the volume according to your requirement. of buzzer and Audible The operation procedure: feedback of "Start" 1. Switch on the machine, turn the programme button selector to "Off". 2. Turn the programme selector to " cold ÃÞÖ¯Îï... -
Page 52: Audible Feedback Of Function Button
Appendix You can open or close the audible feedback of Audible feedback function buttons according to your requirement. of function buttons Open procedure: Ç¿ Á ¦ È ¥ Î Û Ç¿ Á ¦ È ¥ Î Û ¶î Í â Æ ¯ Ï ´ ¶î... - Page 53 Contents of this brochure could be changed without written notice. Part No.: 5120002749 Version: Valid date: 2002.03...