Table of Contents
Advertisement
Quick Links
Copyright
Copyright of this publication belongs to AOpen Inc. AOpen reserves the
right to change the content of this publication without obligation to notify
any party of such changes or revisions. No part of this publication may be
reproduced, transcribed, transmitted, translated into any language, stored in
a retrieval system in any form or by any means electronically, mechanically,
optically without the prior written permission of this company.
Disclaimer
AOpen makes no warranties or representations, either expressed or implied,
with respect to the content herein and specifically disclaims any warranties,
merchantability of fitness for any particular purpose.
AOpen and AOpen logos used herein are registered trademarks of AOpen
Inc.All other brand names and trademarks are owned by their respective
owners.
Copyright © 2006 by AOpen Inc.
All rights reserved.
AOpen Inc.
Advertisement
Table of Contents

Related Manuals for AOpen B2945


Summary of Contents for AOpen B2945
- Page 1 Copyright Copyright of this publication belongs to AOpen Inc. AOpen reserves the right to change the content of this publication without obligation to notify any party of such changes or revisions. No part of this publication may be reproduced, transcribed, transmitted, translated into any language, stored in a retrieval system in any form or by any means electronically, mechanically, optically without the prior written permission of this company.
-
Page 2: Safety Precautions
Safety Precautions Read and follow the content of the Safety Precautions carefully so that you will not cause damages to yourself or the system. 1. Pay attention to the warnings and notes in this manual to avoid causing unexpected damages. 2. - Page 3 When your PC system runs into problems, do not try to fix it unless you possess adequate technical know-how concerning hardware installation and system maintenance. It would advisable to seek assistance from qualified maintenance personnel so as to avoid improper disassembling. 10.
-
Page 4: Disposal Instruction
For more information about the collection and recycling of Waste Electrical and Electronic Equipment (WEEE), you are invited to visit our homepage at www.aopen.com under “Green Products”. Safety Instruction Safety Caution Concerning Battery Use the battery according to the manufacturer’s recommendation. -
Page 5: Table Of Contents
Content Safety Precautions..................2 Disposal Instruction................... 4 Safety Instruction..................4 1. Hardware Installation................. 6 Unpacking Your System............... 6 System Overview................. 8 1.2.1 Summary of Motherboard Features..........8 1.2.2 Summary of Audio Features............8 1.2.3 Summary of General Input/Output Ports........8 Front View.................. -
Page 6: Hardware Installation
(depending on the model selected) 03. Power cable 04. User’s Manual 05. A pack of screws 06. 80-pin flat IDE cable 07. AOpen bonus pack CD 08. Riser Card 09. SATA Cable Option (depending on the model selected): *. Combo disc drive *. -
Page 8: System Overview
1.2 System Overview 1.2.1 Summary of Motherboard Features ● The system is designed to support Intel pro cessors under 115 W, 3xx/5xx/6xx/820/920/930 sequence. ● The system is built with two memory slots supporting DDR2 667/533 memory modules. The total system memory can be expanded to 2GB. -
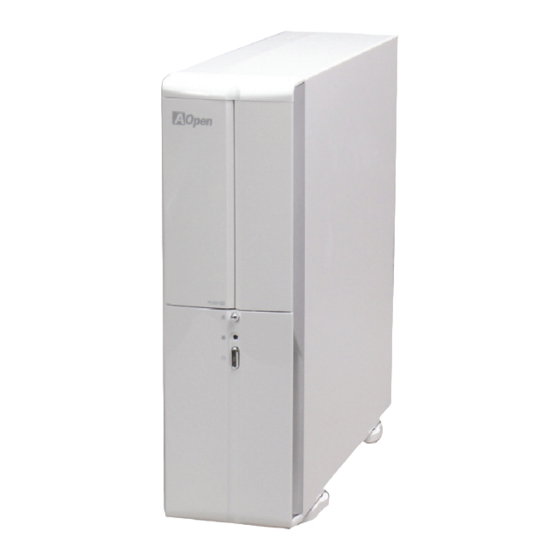
Page 9: Front View
1.3 Front View Earphone / Mic-In 2 x USB 2.0 4-pin or 6-pin 1394 Slim Card Reader or FDD ODD Eject Button HDD LED Power Button w/ Power LED 1.4 Rear View - 1 x PCIe(x16) - 1 x PCIe(x1) Low Profile 8cm Fan w/ Noise Killer (Standard one comes with only one low profile card slot) -
Page 10: Get Ready For Installation
1.5 Get Ready for Installation Before building your PC, clear a good-size workspace. Open the components pack. Follow these steps: Step 1 Carefully select the workspace. Avoid places with heavy dusts, wet or high temperature. Stay away from other electric equipment. Especially, the electric source and connecting parts should have a distance from other electrical appliances to avoid electromagnetic or wireless frequency interference. - Page 11 Step 4 Turning on power: After completing the preceding steps, reaffirm your PC is connected correctly with peripheral lines for printer, monitor, speaker, etc. Then you may press the power switch on the front panel of the PC to activate the machine. Your computer should start operating. Step 5 Shut down PC properly: When you want to turn off the computer, click the “Start”...
-
Page 12: Disassemble The System
1.6 Disassemble the System A user can disassemble the system according to the following steps. 1.6.1 Remove Top Cover A user can disassemble the upper case by removing the three screws on the three sides of the rear panel. Remove the screws fastening the top cover to the back panel of the system unit. - Page 13 Remove the link bar. The link bar is used to add extra stability to the structure and the riser card. Remove the two screws fastening the optical drive cage to the chassis. Optical drive cage...
- Page 14 Slide out the drive cage horizontally. Tilt the front end of the drive cage slightly to release the optical cage from the chassis.
-
Page 15: Remove Hard Drive
If you turn the optical drive cage upside down, you will see two tenons, which should be inserted into the mortises on top of the hard disk drive cage when you replace the optical drive cage on top of the HDD drive cage. Mortise Tenon 1.6.2 Remove Hard Drive... -
Page 16: Install Hdd Drive
1.6.3 Install HDD Drive Slide the hard drive into the drive cage and make sure you can drive screws through the slots of the drive cage. After the hard drive is fixed with screws on its sides, replace the drive cage into the chassis and fix it to the chassis with a screw. -
Page 17: Remove And Install Power Supply
1.6.5 Remove and Install Power Supply The power supply is fastened to the rear panel with five screws. After the five screws are removed, you can lift it to disassemble it from the chassis. When you restore it back to the chassis, you have to tilt the power supply (the side with the fan) slightly toward the rear panel. - Page 18 Release the steel wire lever of the CPU socket. Open the metal cap covering the CPU socket. Install the CPU. Note: You have to keep the CPU socket clean. Keep dust off from the CPU socket. Before installing the CPU, you have to handle the CPU with care. Do not touch the CPU pins with your fingers.
-
Page 19: Bios Installation
2. BIOS Installation 2.1 Turn On the Power Introduction In the system unit, there is an integrated circuit(IC), in which the basic input/output system (BIOS) is stored. It is the built-in software that determines what a computer can do without accessing programs from a disk. - Page 20 manual may look slightly different from the BIOS messages, which comes with your system. After you turn on the power, you will see the following screen. If you want to enter BIOS setup menu, press <Del> when POST screen is shown on your video monitor.
- Page 21 Now, you can move the cursor by using direction keys on the keyboard. Move the cursor to the option item "Load Setup defaults" and press Enter Then, the following dialogue screen will pop up to confirm the default BIOS values. Please press "Y" to confirm and then press Enter...
- Page 22 Finally, move the cursor to "Save & Exit Setup" and press Enter to save the parameters and exit BIOS setup. At the same time, type "Y" in the dialogue box and press Enter to exit. Now everything is perfectly finished!
-
Page 23: Power Master
BIOS setting page. Once you get into BIOS setting page, please select the Frequency/voltage control to set up the Power Master. You will have three modes to select what you want via BIOS setting. When you get the new motherboard from AOpen, the default is Automatic mode. - Page 24 Automatic Mode Once you enable this mode, Power Master will detect your processor true loading automatically. When the processor loading is heavy, Power Master will raise your processor’s clock frequency to meet your requirement. On the contrary, when the processor is in low loading, Power Master will drop the clock frequency to reduce the noise from processor fan.
- Page 25 Silent Mode Once you enable this mode, Power Master will detect your processor true loading automatically. In order to provide you the quietest working environment, you can choose this mode. In this mode, the processor clock frequency will be lower and the noise from processor fan might be very silent.
-
Page 26: Jumper Setting
2.3 Jumper Setting The jumper blocks are located near the white riser card slot. HDTV PCIE Card Riser Card When JP1, JP2, JP3, JP4, and JP5 are connected with a shorting cap, the HD TV function is enabled. When the JP1, JP2, JP3, JP4, and JP5 are not connected with a shorting cap, the PCI Express interface is enabled. - Page 27 Notes...
- Page 28 Notes...