VTech Kidizoom User Manual
Hide thumbs
Also See for Kidizoom:
- User manual (53 pages) ,
- Parents' manual (33 pages) ,
- Instruction manual (31 pages)
Table of Contents
Advertisement
Advertisement
Table of Contents

Related Manuals for VTech Kidizoom


Summary of Contents for VTech Kidizoom
- Page 1 User’s Manual © 2015 VTech Printed in China 91-003007-005...
- Page 2 , music cla and even rece ! With Preschool Learning™, learning is fun om day one! At VTech®, we know that a child has the ability to do great things. at’s why all our electronic learning products are uniquely designed to develop a child’s mind and allow them to learn to the best their...
- Page 3 INTRODUCTION Capture videos and photos of all your adventures with the Kidizoom ® Action Cam by VTech . Built with you in mind, the Action Cam can go ® anywhere you do with two included mounts so you can attach it to a bike, skateboard and more.
- Page 4 Kidizoom Action Cam Waterproof Case Camera Holder ® Bike Mount Mounting Attachment Adhesive Flat Mount Double-Sided micro-USB Cable Wrist Strap Adhesive Tape Strips WARNING: All packing materials, such as tape, plastic sheets, packaging locks and tags are not part of this toy, and should be discarded for your child’s safety.
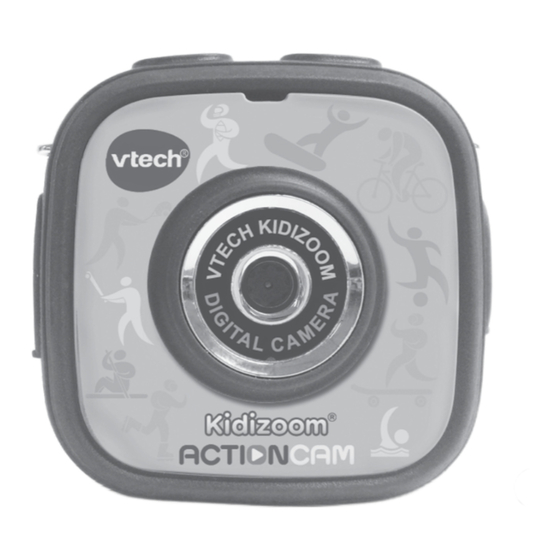
- Page 5 PRODUCT LAYOUT AND BUTTONS Left button Right button OK button...
- Page 6 Master Power Switch When the switch is set to 0 , the unit is disconnected from the battery and the battery will not charge. Move the switch to 1 to connect the unit to the battery and allow it to be recharged. Note: It is not necessary to move the switch to the off position when the camera is in daily use.
- Page 7 PRODUCT SPECIFICATION Display 1.41” color LCD Photo Resolution 640 X 480 (0.3 MP) Video Resolution 640 X 480 (available when using memory card only, and does not support video effects) 320 X 240 (default resolution) 160 X 120 Video Length 30 minutes Limit per file As limited by the maximum size per file (2 GB),...
-
Page 8: Getting Started
The video length limit per file is 30 minutes, or a file size no larger than 2 GB. GETTING STARTED When you use Kidizoom Action Cam ® for the first time, you will need to switch the master power switch to on. - Page 9 When the battery level is too low, the camera will not turn on until it is charged. POWER SAVING To preserve battery life, the Kidizoom Action Cam will automatically ® turn off after a short period when no buttons are pressed. When recording videos or using the time-lapse photos function, the camera will not automatically turn off until the process has stopped or completed.
- Page 10 The preview screen can also be set to automatically turn off after a while in Settings to help save power. Please refer to the Settings section in this manual. BATTERY MAINTENANCE Give the battery a regular charge to keep it operating at optimum performance, even when the camera isn’t in use.
- Page 11 MEMORY CARD INSTALLATION Kidizoom Action Cam supports the below memory cards for memory ® expansion. microSD microSDHC The microSD and microSDHC logos are trademarks of SD-3C, LCC • Make sure the camera is turned off. • Locate the memory card slot at the side of the camera (near the OK button •...
- Page 12 Note: VTech recommends setting the screen to auto-off when the camera is mounted for sports, such as on a bike or skateboard. Please refer to the Settings section of this manual to enable the camera screen...
- Page 13 A USB port is usually marked with this symbol • You will see a removable drive called VTech 1707, please use this to transfer files to and from the camera. There is another removable drive called VT SYSTEM, which is for the storage of system data...
- Page 14 • Locate and open the DOWNLOAD folder in the removable drive VTech 1707, drag and drop the photo files into the PHOTO subfolder, or VIDEO subfolder for video files. Note: Do not transfer photo or video files created by other cameras to Kidizoom Action Cam, as these file formats may not be compatible.
- Page 15 Note: VTech recommends setting the screen to auto-off when the camera is mounted for sports, such as on a bike or skateboard. Please refer to the Settings section of this manual to enable the camera screen auto-off function.
- Page 16 • Press the left or right buttons to cycle through different video cartoon themes or effects. Self-timer • Turn the self-timer function on in the settings menu to allow a countdown period before the video starts recording. The self-timer will automatically turn off when the camera is switched off. •...
- Page 17 • Please check that there is enough free memory for this activity, otherwise the pictures taken may not be saved. Games There are 3 built-in games in Kidizoom Action Cam. Select the game ® icon in the home menu to enter the game menu. Press the left...
- Page 18 Note: For safety, VTech highly recommends setting the screen to auto off when the camera is mounted for sports, such as on a bike or skateboard.
- Page 19 • If a memory card is being used, data stored in the internal memory cannot be seen unless the memory card is removed. • When the internal memory of Kidizoom Action Cam is getting ® full, or when the file indexes are used up, you should back up all of the files from the camera’s internal memory to your computer.
- Page 20 (iii) Indoor Light Frequency Here you can set the A.C. power frequency according to the region you’re in when traveling. If it is not set correctly, you may see some flickering on the camera / video’s preview screen and the captured files when you are in an indoor environment.
- Page 21 A very small percentage of the public, due to an existing condition, may experience epileptic seizures or momentary loss of consciousness when viewing certain types of flashing colors or patterns. While Kidizoom Action Cam does not contribute to any additional ®...
- Page 22 Action Cam only supports the below ® formats: Photos in Standard Baseline JPEG and Videos in AVI (Motion JPEG) created by Kidizoom Action Cam. ® TECHNICAL SUPPORT If you have a problem that cannot be solved by using this manual, we encourage you to visit us online or contact our Consumer Services Department with any problems and/or suggestions that you might have.
-
Page 23: Frequently Asked Questions
For earlier operating systems that do not support mass storage, a system upgrade or mass storage device driver may be available. Again, please check with your PC manufacturer. Question 2: What is the ISO value (light sensitivity) of the Kidizoom Action Cam? ® Answer: The Kidizoom Action Cam uses an auto-ISO value. - Page 24 Kidizoom Action Cam. ® Moreover, if you wish to download images to be viewed on Kidizoom ® Action Cam, you can do so by moving the JPEG image files into the folder DOWNLOAD/PHOTO.
- Page 25 Microsoft , Windows and Windows Vista are either registered ® ® ® trademarks or trademarks of Microsoft Corporation in the United States and/or other countries. Macintosh, Mac and Mac OS are trademarks of Apple Inc., registered in the United States and other countries. All other trademarks are the property of their respective owners.
- Page 26 4. The front transparent plate of the camera can then be pulled out. 5. Remove the paper plate under the transparent plate and you will find 4 screws. Use a screwdriver again to remove them. 6. The whole camera can then be disassembled. 7.
- Page 27 KIDIZOOM ACTION CAM ® ACCESSORIES Waterproof Case Camera button Video button Strap hook Strap hook Mic hole Buckle handle Case body Buckle Left button Right button OK button O-ring Case cover...
- Page 28 Insert the camera into the waterproof case 1. Be sure you have inspected the O-ring (refer to the later section for details about inspecting the O-ring) and checked for water leaks before inserting the camera. 2. If you have attached a wrist strap to the camera, detach it before inserting the camera to this unit.
- Page 29 Notes on use • This waterproof case is operable up to a water depth of 6’ (2 meters) for 30 minutes with the camera inserted. • The waterproof performance is in accordance with the current toy safety standards • Do not subject this unit to a jet of pressurized water. •...
- Page 30 Perform the above maintenance each time you use this unit. In the unlikely event that a malfunction of this unit causes damage due to water leakage, VTech does not guarantee against damage to the equipment contained in it (camera, battery pack, etc.) and the recorded...
- Page 31 Bike Mount / Adhesive Mount / Camera Holder Camera Holder Bike mount Adhesive mount (mounting attachment + adhesive flat mount) Screw Screw knob Detachable buckle...
- Page 32 QUICK SETUP GUIDE Make Kidizoom Action Cam ready to be mounted ® Insert your Kidizoom Action Cam into the camera holder / waterproof ® case if you would like to attach it to the bike mount or adhesive mount. To insert Kidizoom Action Cam into the holder, align the camera lens ®...
- Page 33 2. Push the handle as illustrated below. If you cannot see the whole screw head, continue to turn the handle counterclockwise until you can see the whole screw head exposed. 3. Pull out the handle as illustrated. 4. Attach the head tube clamp onto the head tube of the bike. Note: It is recommended to mount the camera on the head tube of the bike instead of the handle bar as illustrated.
- Page 34 6. Mount the holder / waterproof case on the bike mount. Align the tripod screw hole on the camera holder / waterproof case to the screw of the bike mount. Screw the knob on the bike mount clockwise to affix the camera to the mount.
- Page 35 3. Remove the protective cover of the adhesive surface and stick it on a clean, flat and smooth surface. Note: If the surface is not very flat or a bit curved, such as that of a helmet, add the extra two double-sided adhesive tape strips (included) onto the adhesive flat mount to improve the contact area between the surface and the adhesive flat mount.
- Page 36 Note: Once the adhesive surface is stuck and affixed to a device, do not tear it off. Otherwise, the adhesive performance may be reduced and it may not work well for subsequent use. The mount can be detached from the adhesive part. Push the detachable buckle as shown in the illustration to separate the two parts.
- Page 37 WRIST STRAP ATTACHMENT INSTRUCTIONS Step 1: Locate the thread loop on the end of the strap. Insert it into the groove behind the bar and then push it through. Step 2: Feed the end of the strap up through the loop and pull it all the way through.
- Page 38 Electronics North America, L.L.C. and its suppliers ® assume no responsibility for any loss or claims by third parties that may arise through the use of this product. VTech Electronics North America, ® L.L.C. and its suppliers assume no responsibility for any damage or loss caused by deletion of data as a result of malfunction, dead battery, or repairs.
- Page 39 • Increase the separation between the equipment and receiver. • Connect the equipment into an outlet on a circuit different from that to which the receiver is connected. • Consult the dealer or an experienced radio/TV technician for help. THIS DEVICE COMPLIES WITH PART 15 OF THE FCC RULES.