Table of Contents
Advertisement
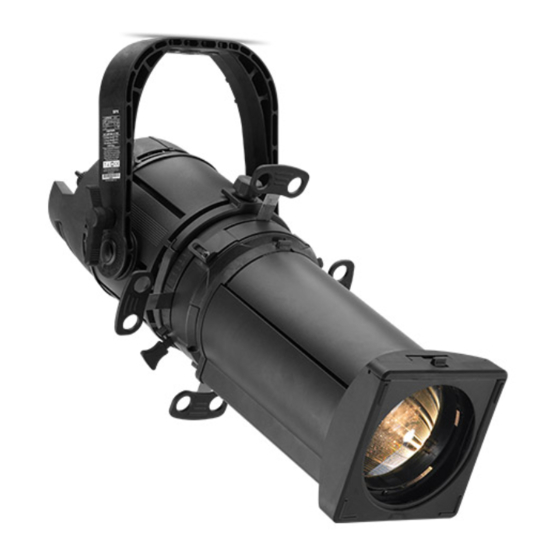
OPERATION MANUAL
SPX
This manual covers the following models:
SPX 15 - 35 Zoomspot
SPX 25 - 50 Zoomspot
SPX 14 Fixed Beam
SPX 19 Fixed Beam
SPX 26 Fixed Beam
SPX 36 Fixed Beam
SPX 50 Fixed Beam
THANK YOU FOR PURCHASING A PHILIPS SELECON SPX LUMINAIRE. WE HAVE DESIGNED THIS
LUMINAIRE TO PROVIDE YOU WITH A SUPERIOR FITTING IN PERFORMANCE, DESIGN AND
ENGINEERING. WE ARE CONFIDENT THAT IT WILL PERFORM TO YOUR EXPECTATIONS FOR MANY
YEARS TO COME.
Installation is entirely at your risk. Read this manual from cover to cover before attempting installation. Do not
attempt installation unless you are suitably qualified. If you do not understand a point in this manual, don't
guess. Don't take short cuts. If in doubt, stop! Contact Philips Selecon or one of its authorised distributors for
advice. Don't be afraid to ask for help.
IMPORTANT NOTE: The SPX sets new standards in product safety.
As it is double insulated it has a simpler testing procedure than
conventional luminaires. Refer to the testing section inside.
Before discarding the packaging ensure you have the suspension bolt
Caution!
set, colour frame &/or the lamp.
Version 2.0: 2013
© 2013 Philips Selecon All Rights Reserved
Advertisement
Table of Contents

Related Manuals for Philips Selecon SPX series


Summary of Contents for Philips Selecon SPX series
- Page 1 If you do not understand a point in this manual, don’t guess. Don’t take short cuts. If in doubt, stop! Contact Philips Selecon or one of its authorised distributors for advice. Don’t be afraid to ask for help.
- Page 2 Information in this manual shall not be deemed a warranty, representation or guarantee concerning a luminaire’s suitability or fitness for a specific purpose. Subject to the right to use its luminaires, Philips Selecon does not convey any right, title or interest in its intellectual property, including, without limitation, its patents, copyrights and know-how.
-
Page 3: Table Of Contents
Electrical Test Procedure............................10 Cleaning the Reflector ............................11 Cleaning the Lens ...............................12 Safety ..................................12 Limited Warranty ..............................13 Accessories and Order Codes ..........................14 Contacting Philips Selecon ..........................14 Version 2.0: 2013 © 2013 Philips Selecon All Rights Reserved... -
Page 4: Safety Warnings
Always take great care when making adjustments to the lamp, as its filament is fragile. N.B. The mains power supply automatically disconnected by a microswitch as the lamp module mount Version 2.0: 2013 © 2013 Philips Selecon All Rights Reserved... -
Page 5: Centering The Lamp
To set a ‘FLAT’ beam, turn the centre gear anti-clockwise towards the flat symbol until the distribution appears even across the beam. Version 2.0: 2013 © 2013 Philips Selecon All Rights Reserved... -
Page 6: Lamps
Great care should be taken when adjusting the lamp and focusing the luminaire to avoid shocks. Important Note: The quoted performance figures are achieved with Philips lamps. Other manufacturers lamps can be used, but no assumptions should be made as to relative performance. -
Page 7: Operating Your Luminaire
The shutter lock is used to fix the shutters in position after they have been focused. To lock, slide the lever to the closed position. To unlock, slide the lever to the unlocked position. Version 2.0: 2013 © 2013 Philips Selecon All Rights Reserved... -
Page 8: Rotatable Shutters
Glass pattern holder (code SPXGHB) An adjustable iris (code 20IRIS) A motorised gobo rotator (e.g. Rosco/Apollo) The rear slot will house a Philips Selecon steel pattern holder (order code: SPXGHB). Refer to website for a list of compatible third party accessories. To fit an accessory in the front slot Slide the accessory slot cover forward to reveal the aperture. Slide the accessory into the front slot. -
Page 9: Changing The Lens Tube
15° - 35° at 35° Good Good 25° - 50° at 25° Excellent Excellent 25° - 50° at 50° Excellent Excellent Tested with dark blue high performance gel using an 800W lamp, 240V. Version 2.0: 2013 © 2013 Philips Selecon All Rights Reserved... -
Page 10: Safe Practice
The individual conductor insulation should not be exposed and wire conductor should never be visible. Check under insulation tape for damage. Damaged or defective cable should be replaced with the correct Philips Version 2.0: 2013... -
Page 11: Cleaning The Reflector
SPX Operation Manual Selecon wiring loom by a suitably qualified person. Contact your Philips Selecon distributor for more information. Insulation Resistance Testing for class 2 appliance of the SPX is to be performed by a suitably qualified or competent person (as defined by the standard or local laws) using an ohmmeter (i.e. Megger) or portable appliance tester (PAT Machine) by applying a nominal voltage to the live conductors (active and neutral pins on plug) of the SPX, and placing a 0 volt reference probe on the external metal parts of the SPX;... -
Page 12: Cleaning The Lens
N.B. Luminaire Cable - Your Philips Selecon luminaire is fitted with special heat resistant flexible cable, replace with genuine Philips Selecon spare part cable kit only - refer to your Philips Selecon distributor. (Replacement cables are supplied complete with necessary terminal connectors.) -
Page 13: Limited Warranty
However, the owner shall bear the cost of freight and insurance on the luminaire, both ways. If Philips Selecon does not wish to service, repair or replace the defective luminaire, it shall refund the purchase price. -
Page 14: Accessories And Order Codes
Phone: +31 543 542516 Tel: (852) 2796 9786 Fax: (852) 2798 6545 Please contact us, or check our web site to find the Philips Selecon distributor nearest to you. www.seleconlight.com/distributors Version 2.0: 2013 © 2013 Philips Selecon All Rights Reserved...