Table of Contents
Advertisement
Advertisement
Table of Contents

Related Manuals for CITROËN Jumpy Miltispace


Summary of Contents for CITROËN Jumpy Miltispace
- Page 1 OWNER'S HANDBOOK...
- Page 2 On-line owner's handbook You can fi nd your handbook on the CITROËN website, Referring to the owner's handbook on-line also gives you under "MyCITROËN". access to the latest information available, easily identifi ed by the bookmark, associated with this symbol: This personal and customisable space allows you to establish direct and special contact with CITROËN.
- Page 3 We draw your attention to the following... The "Familiarisation" section at the start of this document is intended as a quick way of getting to know your vehicle. Reading the detailed sections is essential to make the most of your CITROËN has a presence on every continent, vehicle, in complete safety.
-
Page 4: Table Of Contents
Contents 1. FAMILIARISATION 2. READY TO GO 3. EASE OF USE 4. SAFETY 4-19 20-45 and COMFORT 46-93 94-118 Parking brake Presentation Remote control Controls for Hazard warning lamps Exterior lighting Parking sensors Sitting comfortably Alarm wipers Horn Seeing clearly Doors Cruise control Anti-lock braking system... - Page 5 Contents 5. ACCESSORIES 7. QUICK HELP 9. TECHNOLOGY on 10. VISUAL SEARCH 163-169 119-121 133-154 BOARD Towing a trailer Battery Emergency or assistance Exterior Other accessories Puncture repair kit eMyWay Instruments and controls Changing a wheel Audio system 9.63 Interior Technical data - Removable snow screen Maintenance...
-
Page 6: Presentation
PRESENTATION This handbook has been designed to familiarise you with your Within the chapters, symbols draw your attention to specific new vehicle from the moment you get behind the wheel and to information: describe the operating features. directs you to the chapter and section which contains detailed Reading the handbook is made easy with the content consisting information concerning a function, of 10 identified chapters, which can be located by means of a... -
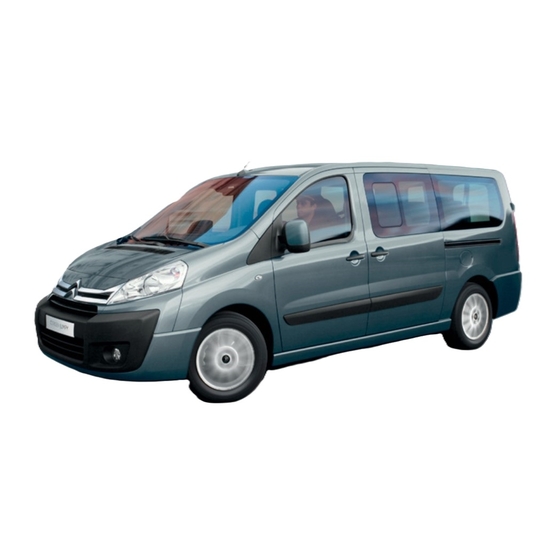
Page 8: Exterior
Exterior... - Page 9 Exterior Side-hinged rear doors Rear suspension Changing a wheel Key - Remote control Parking sensors Usable dimensions Sliding side door Repairing a wheel : section identification : page identification...
- Page 10 Exterior Partially open the bonnet, lift the safety Secure the stay in one of the two notches, Opening the bonnet catch and raise the bonnet. according to the height required, to hold the Lift the cover at the foot of the left-hand bonnet open.
- Page 11 Interior INSTRUMENTS AND CONTROLS 1. Lighting and direction indicator control stalk. 2. Instrument panel with screen. 3. Wipers, screenwash, trip computer control stalk. 4. Gear lever. 5. Ignition. 6. Audio system controls. 7. Driver's airbag, horn. 8. Steering wheel height and reach adjustment.
-
Page 12: Adjusting The Time
Interior CENTRE CONSOLE AND OVERHEAD STORAGE UNIT 1. Location of controls: - electric child lock, - central locking/unlocking. 2. Heating and/or air conditioning controls. 3. Location of the ticket/card storage or controls: - deactivation of the DSC, - deactivation of the interior protection alarm, alarm LED, - deactivation of the parking sensors. -
Page 13: Sitting Comfortably
Interior SITTING COMFORTABLY 1. Forwards-backwards adjustment. 2. Backrest angle. Driver's seat 3. Cushion height. 4. Lumbar. 5. Head restraint height. - Page 14 Interior Steering wheel Mirrors Electric windows Adjust the steering wheel for height and Manual adjustments. reach. Electric adjustments, electric folding / Seat belts unfolding. Height adjustment. Fastening.
-
Page 15: Seeing Clearly
Interior SEEING CLEARLY Changing bulbs Lighting control stalk Wiper control stalk In bad weather or in winter, check that the lamps are not covered with mud or snow. Lighting off. fast. normal. intermittent. Sidelamps. off. single wipe. Main beam headlamps (blue). AUTO , press the stalk down. -
Page 16: Driving Safely
Interior DRIVING SAFELY Emergency or assistance call This system allows an emergency or assistance call to be sent to the dedicated CITROËN centre. For more information on the use of this Audio system Cruise control / Speed limiter system, refer to section 9, "Technology on board". -
Page 17: Cab Fittings
Interior CAB FITTINGS REAR FITTINGS Overhead storage unit Rear seats Glove box Storage compartment Seating area fittings... -
Page 18: Child Safety
Interior CHILD SAFETY Seat and bench configurations Electric child lock Child surveillance mirror Rear windows Safety anti-pinch Child seats... -
Page 19: Ventilation
Interior VENTILATION Recommended settings For optimum use of the system, we recommend: If I require... Temperature Air flow distribution recirculation Heating Manual controls Cooling Demisting Defrosting Digital controls, with separate driver At the rear and passenger settings... -
Page 20: Eco-Driving
Eco-driving Eco-driving is a range of everyday practices that allow the motorist to optimise their fuel Remember to make use of equipment consumption and CO emissions. that can help keep the temperature in the passenger compartment down (sunroof Optimise the use of your Drive smoothly and window blinds...). - Page 21 Limit the causes of Observe the recommendations excess consumption on maintenance Spread loads throughout the vehicle; Check the tyre pressures regularly, when When refuelling, do not continue after the place the heaviest items in the bottom of cold, referring to the label in the door third cut-off of the nozzle to avoid any the boot, as close as possible to the rear aperture, driver's side.
-
Page 22: Remote Control
Access Central locking Folding / unfolding the key Press this button to lock your Press this button to release the vehicle, cab and rear doors. key from its housing. The direction indicators flash To fold the key, press the once and the door mirrors fold. chromed button then fold the key into the housing. -
Page 23: Key
Access Switch on the ignition. Press the locking padlock for at least five seconds within the next ten seconds. Switch off the ignition. Wait at least one minute before using the remote control. The remote control is now working again. ELECTRONIC IMMOBILISER All of the keys contain an electronic... -
Page 24: Alarm
Access Good practice Disarming Do not make any modifications to the Unlock the vehicle with the remote electronic immobiliser system. control or switch on the ignition, the red LED goes off. Operating the remote control, even when it is in your pocket, may result in involuntary Locking the vehicle with exterior unlocking of the doors. -
Page 25: Doors
Access Triggering Malfunction The siren sounds, the direction indicators When the ignition is switched on, if the flash for approximately 30 seconds and the red LED remains on for ten seconds, this red LED flashes rapidly. indicates a fault with the siren connection. To switch it off, insert the key and switch Have the system checked by a CITROËN on the ignition. - Page 26 Access Anti-intrusion protection The system automatically locks SLIDING SIDE DOOR The doors can still be opened from the all of the doors when you reach inside. If fitted on your vehicle, do not open the left- approximately 6 mph (10 km/h). hand side door while filling with fuel as you The indicator lamp in the control: risk damaging the fuel filler flap.
- Page 27 Access From the outside With the ignition on, press Operation in the event of a battery failure this button, the LED is on Pull the handle towards you then towards accompanied by a message in the Front and side passenger doors the rear.
- Page 28 Access HINGED REAR DOORS TAILGATE From the outside From the outside The two hinged doors open to 90°. If fitted on your vehicle, locking/unlocking is When parked with the rear via the remote control. To open, pull the handle towards you then doors open to 90°, the doors pull the lever to open the left-hand door.
-
Page 29: Instrument Panel
Instruments and controls INSTRUMENTS AND CONTROLS Warning lamp and controls in the overhead storage unit INSTRUMENT PANEL Passenger airbag deactivated warning 1. Distance recorder in miles / kilometres. lamp. 2. Screen. Driver / passenger heated seat controls 3. Fuel level, coolant temperature. (version with 2 front seats). -
Page 30: Adjusting The Time
Instruments and controls Instrument panel without screen ADJUSTING THE TIME Centre console without screen Centre console with screen turn to the right to increase the hours The display - time sequence To adjust the time of the clock (hold the button to the right for rapid is linked according to model on the instrument panel, use scrolling),... -
Page 31: Warning Lamps
Instruments and controls WARNING LAMPS Each time the engine is started: a series of warning lamps comes on applying a check auto-test. They go off again almost immediately. When the engine is running: the warning lamp becomes a warning if it remains on continuously or flashes. This initial warning may be accompanied by an audible signal and a message in the screen. - Page 32 Instruments and controls Warning lamp indicates Solution-action on with needle abnormal increase in Park, switch off the ignition then allow to cool. Visually in the red zone. temperature. check the level. Coolant temperature and level Chapter 6, "Levels" section. Contact a CITROËN dealer flashing.
- Page 33 Instruments and controls Warning lamp indicates Solution-action Have the system checked by a CITROËN dealer Front / lateral / flashing or failure of an airbag. or a qualified workshop without delay. Chapter 4, curtain airbag remains on. "Airbags" section. Front intentional deactivation of this passenger airbag in the presence of a...
- Page 34 Instruments and controls Warning lamp indicates Solution-action The vehicle retains conventional steering without Power steering system malfunction. assistance. Have the system checked by a CITROËN dealer or a qualified workshop. on and accompanied Check that the cab doors, the rear and side doors and Opening by a message in the door not closed correctly.
- Page 35 Instruments and controls Warning lamp indicates Solution-action Have the pads replaced by a CITROËN dealer or a Brake pads brake pad wear. qualified workshop. manual selection or automatic Turn the lighting stalk to the second position. Dipped beam lighting. headlamps / Daytime running lighting of the dipped beam headlamps Depending on the country in which the vehicle is sold.
- Page 36 Instruments and controls Screen indicates Solution-action Manual selection. Chapter 3, "Steering mounted Cruise control cruise control selected. controls" section. Manual selection. Chapter 3, "Steering mounted Speed limiter speed limiter selected. controls" section. To reduce fuel consumption, engage the gear a recommendation that is recommended with a manual gearbox.
-
Page 37: Fuel Gauge
Instruments and controls What you should do if the warning lamp comes on: stop immediately, switch off the ignition. The fan may continue to operate for a certain time, up to approximately 10 minutes, wait for the engine to cool down in order to check the coolant level and top it up if necessary. -
Page 38: Tyre Under-Inflation Detection
Instruments and controls EMISSIONS CONTROLS The tyre under-inflation detection system is an aid to driving which does EOBD (European On Board not replace the need for the driver to be Diagnosis) is a diagnostics system vigilant or to drive responsibly. which complies with, among others, the standards concerning This system does not avoid the need... - Page 39 Instruments and controls Under-inflation alert The loss of pressure detected does not Operating fault always lead to visible deformation of The fl ashing and then fi xed The alert is given by the fixed the tyre. Do not rely on just a visual check. illumination of this warning lamp, illumination of the under-infl...
-
Page 40: Service Indicator
Instruments and controls SERVICE INDICATOR More than 1 000 miles/km before the next A few seconds after the ignition is switched service is due on, the oil level is displayed, then the total This programmes service intervals according Example: 4 800 miles/km remain before distance recorder resumes normal operation to the use of the vehicle. -
Page 41: Lighting Dimmer
Instruments and controls Zero re-set Engine oil level indicator Dipstick A = maximum, never exceed Your CITROËN dealer or a qualified Depending on your vehicle's engine, when this level as a surplus of oil may workshop carries out this operation after the ignition is switched on, the engine oil damage the engine. -
Page 42: 5-Speed Manual Gearbox
Gearboxes and steering wheel 5-SPEED MANUAL GEARBOX 6-SPEED MANUAL GEARBOX Engaging reverse gear Raise the ring under the knob and move Engaging reverse gear Engaging 5 or 6 gear the gear lever to the left then forwards. With clutch pedal fully down, place the ... -
Page 43: Automatic Gearbox
Gearboxes and steering wheel AUTOMATIC GEARBOX Selecting positions Reverse: position of the lever for Drive: position of the lever for reverse gear. driving. Move the lever select a position. To reverse the vehicle. To move the vehicle forwards in Once the position is selected, the automatic mode. - Page 44 Gearboxes and steering wheel Moving off The gearbox always selects the most Reverse gear suitable gear taking account of the following: With the engine running, to move off from Select position R , with the the style of driving, position P . vehicle stationary and the the road profile, engine at idle.
- Page 45 Gearboxes and steering wheel Operating fault Manual mode Good practice Any operating fault is indicated by an Manual sequential gear changing. Never select position N when the vehicle is audible signal, accompanied by the moving. Select gear lever position M , message "Automatic gear fault"...
-
Page 46: Gear Shift Indicator
Gearboxes and steering wheel Operation Depending on the driving conditions and the equipment of your vehicle, the system may recommend skipping one or more gears. You can follow this indication without going through the intermediate gears. The gear engagement recommendations should not be considered to be compulsory. -
Page 47: Starting And Stopping
Starting and stopping Good practice when starting Minimise engine and gearbox wear To ensure the correct operation and long life of your engine and gearbox, when the ambient temperature is below -23°C, it is necessary to leave the engine idling for four minutes. -
Page 48: Lighting
Steering mounted controls Lighting off Automatic illumination of headlamps if your vehicle is fitted with a sunshine sensor. Sidelamps Dipped beam (green) Main beam (blue) STEERING MOUNTED CONTROLS LIGHTING CONTROL Dipped beam/main beam change Pull the stalk fully towards you. DIRECTION INDICATORS Front and rear lamps (flashing indicators) - Page 49 Steering mounted controls Front and rear foglamps Front foglamps (green) Daytime running lamps and rear foglamps (amber, Rotate ring B forwards to switch on and Depending on the country in which the vehicle 2nd rotation of the ring rearwards to switch off. The status is is sold, the vehicle may be equipped with forwards).
- Page 50 Steering mounted controls Automatic illumination of headlamps Activation Turn the ring to the AUTO position. The The sidelamps and dipped activation of this function is accompanied by beam headlamps switch a message in the screen. on automatically if the light is poor, or during operation Deactivation of the windscreen wipers.
- Page 51 Steering mounted controls Wash-wipe and headlamp wash Pull the stalk towards you, the wash-wipe is accompanied by a timed sweep of the wipers. The headlamp wash is linked with the wash- wipe, it is triggered if the dipped headlamps are on. To top up the levels, refer to the "Levels"...
-
Page 52: Wipers
Steering mounted controls Activation Press the control downwards. Activation of the function is accompanied by a message in the screen. The automatic rain sensitive windscreen wipers function must be reactivated by pressing the stalk downwards, if the ignition has been switched off for more than one minute. -
Page 53: Cruise Control
Steering mounted controls This cruise control shows the function selection status in the instrument panel and displays the programmed speed: Function selected, display of the "Cruise Control" symbol. Function deactivated, OFF . Function activated . CRUISE CONTROL "CRUISE" "This is the speed at which the driver wishes In order for it to be programmed or Vehicle speed above to drive". - Page 54 Steering mounted controls Selecting the function Temporarily exceeding the speed Reactivation Place the switch in the CRUISE position. It is possible to accelerate and drive Following deactivation of the cruise The cruise control is selected but is momentarily at a speed greater than the control, press this button.
-
Page 55: Fixed Speed Limiter
Steering mounted controls Using the accelerator: exceed the memorised speed until the speed required is reached, press the Set + or Set - button. To memorise a speed lower than the Operating fault previous one: press the Set - button. The programmed speed is cleared then replaced by three dashes. -
Page 56: Speed Limiter
Steering mounted controls This speed limiter shows the function selection status in the instrument panel and displays the programmed speed: Function selected, displaying of the "Speed Limiter" symbol. Function deactivated, last programmed speed - Function activated . SPEED LIMITER "LIMIT" "This is the selected speed which the driver However, pressing the pedal beyond this Vehicle speed above,... - Page 57 Steering mounted controls Selecting the function Place the switch in the LIMIT position. The limiter is selected but is not yet active. The screen indicates the last programmed speed. Programming a speed Activation/Deactivation (off) A speed can be programmed without activating Pressing this button once activates the the limiter but with the engine running.
- Page 58 Steering mounted controls Exceeding the programmed speed Switching the function off Operating fault Pressing the accelerator pedal in order to Place the switch in position 0 or switch The programmed speed is cleared then exceed the programmed speed will have off the ignition to switch the system off.
-
Page 59: Air Distribution
Ventilation Air flow The fan speed varies from 1 to the fastest 4. Position 0 switches it off. Remember to adjust this control in order to attain the desired comfort level. Air distribution Air distribution is directed by turning the control towards: the side vents and the central vents,... - Page 60 Ventilation Intake of exterior air Recommended settings The LED in the button is off. This is the preferred operating position. For optimum operation of the manual system, the settings below are recommended: Recirculation of interior air The LED in the button is on. Recirculation temporarily prevents If I require...
-
Page 61: Digital
Ventilation DIGITAL AIR CONDITIONING WITH SEPARATE SETTINGS Good practice If your vehicle is fitted with this control On entering the vehicle, the inside panel, it is located on the centre console. temperature may be much colder (or For maximum cooling or heating of the warmer) than is comfortable. -
Page 62: Automatic Operation
Ventilation Automatic operation Driver or passenger side comfort value Do not cover the sunshine sensor, located on the windscreen behind the The value indicated on the display corresponds AUTO comfort programme mirror, it is used for regulation of the air to a level of comfort and not a temperature in This is the normal air conditioning system conditioning. - Page 63 Ventilation Manual operation Air flow Intake of exterior air / Recirculation of interior air Press the small fan button to You can, according to your requirements, Press this button to recirculate reduce the flow or the large fan make a different selection from that offered the interior air.
-
Page 64: Air Conditioning
Ventilation CORRECT USE OF THE VENTILATION AND AIR CONDITIONING Vents Air conditioning Use the AUTO mode as much as possible as it permits optimised control "Leave them open" In all seasons, the air conditioning should of all of the functions: air flow, passenger only be used with the windows closed. -
Page 65: Demisting And Defrosting
Ventilation DEMISTING AND DEFROSTING Manual mode Turn the control to this air Press the air conditioning button. distribution setting. Turn the control to this Returning to exterior air intake temperature setting. open permits renewal of the air in the passenger compartment (LED off). - Page 66 Ventilation Demisting the rear screen and/or Automatic air conditioning: visibility programme mirrors Pressing this button, with the engine The comfort programme (AUTO) may not running, activates the rapid demisting - be sufficient to quickly demist or defrost the defrosting of the rear screen and/or electric windows (humidity, several passengers, ice).
-
Page 67: Rear Ventilation
Ventilation REAR VENTILATION Activation / Deactivation Temperature adjustment This button, located on the Control positioned: If your vehicle is fitted with an additional air overhead storage unit, enables conditioning unit, located in the rear of the on the blue, produces cool air, you to activate or deactivate vehicle. -
Page 68: Additional Heating
Ventilation ADDITIONAL HEATING Rear ventilation Coolant circuit heater Vehicles fitted with an HDi engine may be fitted with a heater. When the engine is at This is an additional and separate system idle or the vehicle is stationary, it is normal which heats the Diesel engine cooling to notice a high-pitched whistling noise and system to make starting easier. - Page 69 Ventilation Good practice Have the heater checked at least once a year at the beginning of winter. To avoid any risk of poisoning or Maintenance and repairs should only be asphyxiation, the heater must not be used, carried out by a CITROËN dealer or a even for short periods, in an enclosed space qualified workshop.
-
Page 71: Seats
Seats 2 - Seat back angle adjustment Pull the lever upwards and set the required angle. 3 - Driver's seat height adjustment Depending on the version and configuration FRONT SEATS of your vehicle, you have either: Depending on the version and configuration a passive adjustment: pull the handle of your vehicle, different front seats are upwards then take your weight off the... - Page 72 Seats The adjustment is correct when the upper edge of the head restraint is level with the top of the head. To remove it, set it in the high position, press the tabs and pull upwards and forwards at the same time. an active adjustment: operate the handle To re-install, engage the head restraint rods Adjustable armrest...
-
Page 73: 2-Seat Front Bench
Seats 2-SEAT FRONT BENCH If your vehicle is fitted with this bench seat, it is fixed and has a 3rd seat belt. Head restraint Press the tab to adjust the height of the head restraint. To remove the head restraint, press the tabs and raise the head restraint. - Page 74 Seats Writing table If fitted to your vehicle, the back of the centre seat of the bench (Row 1) folds to form a writing table with two cup holder recesses. Pull the handle located at the top of the seat back cushion.
-
Page 75: Rear Seats
Seats REAR SEATS The type of rear seats depends on the version and configuration of your vehicle. The individual seat is always located on the right-hand side and the bench on the left- hand side (in the direction of travel). - Page 76 Seats Individual passenger seat Type 2: an individual seat the back of which Two-seat bench can be folded to the table position then This seat and the 2-seat bench are Three models are offered: raised, facilitating access to the rear space. interdependent.
- Page 77 Seats Specifications depending on the Seat fitted with this control: the seat back Type 2: two seats with folding seat backs type of seat and seat cushion which can be raised. can be folded and coupled with the raising control. Seat fitted with this control: the seat back can be tilted.
- Page 78 Seats This armrest may be fitted. The seat backs of the centre seats are designed with cup holder and storage recesses. The seat backs of the outer seats are fitted with a storage net.
- Page 79 Seats Handling Folding the seat back to the table Seat and bench of type 1: position Raise the seat. Enter, exit the vehicle: raise the seat (centre seat example) Always start with the individual seat located Place the head restraints in the low on the right-hand side and place the head position.
- Page 80 Seats Installing the seat Lock the front feet using this handle. For the type 2 seat and the type 2 / 3 bench: fold up the seat back. Always install the bench first. Tilt the seat towards the rear until the rear feet lock.
- Page 81 Seats Precautions Following the various handling operations: do not remove a head restraint without storing it and fix it to a support, check that the seat belts are always accessible to the passenger and easy to fasten, a passenger must not take his seat without adjusting his seat's head restraint correctly and adjusting and fastening his seat belt.
-
Page 82: Seat And Bench Configuration
Seats SEAT AND BENCH CONFIGURATIONS 5 seats 6 seats Examples of various layouts combining comfort and practicality The various operations must be carried out while stationary. Do not fit seats in the 3rd row without first fitting the corresponding seatbelts. 7 seats 8 seats 9 seats... -
Page 83: Cab Fittings
Practical information PRACTICAL INFORMATION Glove box Storage compartment This is fitted with a lock, you can lock it CAB FITTINGS using the key. It contains three sockets for the connection Depending on the vehicle's equipment, the of portable electronic equipment (video various fittings below enhance your cab. - Page 84 Practical information Storage tray and bottle holder (1.5 L) Ticket storage Ashtray Any liquid carried in an open receptacle According to the configuration of the vehicle. 12 volt socket (cup or other) may be spilt, with the risk The maximum power of the socket, which is of damage to switches and controls at the of the cigarette lighter type, is 120 W.
- Page 85 Practical information Overhead storage unit This is located above the sun visors and has two compartments, with or without a cover, for storing a jumper, a file, ... Be aware that storing a hard object in direct contact with the compartment may result in noise.
-
Page 86: Courtesy Lamps
Practical information Front courtesy lamp Rear courtesy lamp Individual reading lamp SEATING AREA COURTESY Front: comes on when one of the If fitted on the vehicle, these are LAMPS switched on and off by means of a front or rear doors is opened. manual switch, with the ignition on. -
Page 87: Toll Cards/Car Park Tickets
Practical information Areas for toll cards / car park tickets The athermic windscreen has two non- reflective zones located either side of the base of the interior mirror. They are intended for affixing toll cards and/ or car park tickets. Mat fitting / removal When removing the front mat, push the seats as far back as possible and remove... - Page 88 Practical information Nets on the back of the outer seats Fittings / storage compartments Load retaining net fixing Raise the flap to gain access to the load Storage tray and bottle holder (0.5 L) retaining net fixings. Coat hooks...
- Page 89 Practical information To remove: pull the load space cover towards you to disengage it from its fixings, reinsert the load space cover in its roller, compress it and remove it from its support. Stowing rings Load space cover Use the stowing rings on the rear floor to fix To install: the net, your loads or luggage.
-
Page 90: Rear Suspension
Rear suspension the increasing or lightening of the load on Deactivation of automatic height correction the vehicle's platform is detected by two The control which permits deactivation of height sensors. When all of the doors are automatic regulation is located on the right- closed, the sensors trigger the automatic hand side, at the rear of the vehicle. - Page 91 Rear suspension Carry out these operations with the vehicle Malfunctions still stationary and: If the load sill is not adjusted when the with the front and side doors closed, control is pressed, "3 beeps" indicate a malfunction for the following reasons: with the parking brake applied, foot on the brake pedal with the key in do not leave your foot on the brake...
- Page 92 Rear suspension Deactivation of manual height correction Good practice Long term parking Avoid parking for a long duration on ground With the vehicle stationary: When stationary and with the ignition key which could present a potential obstacle as press and hold, removed, excessive use of the system your vehicle could lower.
-
Page 93: Mirrors
Mirrors and windows MIRRORS AND WINDOWS Electric folding The folding / unfolding on locking / unlocking can be deactivated. If your vehicle is fitted with this function, MIRRORS the mirrors can be folded electrically from Contact a CITROËN dealer or a qualified the inside, with the vehicle parked and the workshop. - Page 94 Mirrors and windows Manual rear view mirror SURVEILLANCE MIRROR REAR WINDOWS The rear view mirror has two positions: This mirror, placed on top of the central 2nd row side windows day (normal), mirror, enables the driver or front passenger If fitted on your vehicle, the 2nd row side to observe all the rear seats.
-
Page 95: Electric Windows
Mirrors and windows Reinitialisation Following reconnection of the battery, the safety anti-pinch function must be reinitialised. Lower the window fully, then raise it, it will rise in steps of a few centimetres each time the control is pressed. Repeat the operation until the window is fully closed. -
Page 96: Parking Brake
Driving safely DRIVING SAFELY PARKING BRAKE HAZARD WARNING LAMPS There is no advantage in engaging a gear after parking the vehicle, particularly if the vehicle is loaded. Press this button, the direction indicators Applying Pull on the parking brake lever, only with flash. -
Page 97: Parking Sensors
Parking sensors Activation / Deactivation You can activate or deactivate the system by pressing this button. The activation or deactivation of the system is stored when the vehicle stops. Malfunction In the event of a malfunction, when reverse gear is engaged the LED in the button comes on, accompanied by an audible Engage reverse gear signal and a message in the screen. -
Page 98: Horn
Driving safely Good practice If this warning lamp comes on, together with the brake and STOP The anti-lock braking system comes into warning lamps, accompanied by operation automatically when there is a risk an audible signal and a message of wheel lock. It does not reduce the braking in the screen, it indicates a malfunction of distance. - Page 99 Driving safely If there is a variation between the trajectory Operating fault followed by the vehicle and that required by When a malfunction of the the driver, the DSC system automatically systems occurs, the warning acts on the engine and the brake of one lamp and the LED come on, or more wheels, in order to put the vehicle accompanied by an audible signal...
-
Page 100: Grip Control
Driving safely Correct use Your vehicle is designed principally to drive on tarmac roads but it allows you to drive on other less passable terrain occasionally. However, particularly when your vehicle is heavily laden, it does not permit off-road activities such as: crossing and driving on ground which could damage the underbody or tear off components (fuel pipe, fuel cooler, ...),... - Page 101 Driving safely This DSC mode is calibrated for This snow mode allows the This sand mode allows a little a low level of skidding, based vehicle to adapts its strategy wheelspin on the two driving on different conditions of grip to the conditions of grip wheels at the same time to allow encountered on the road.
-
Page 102: Seat Belts
Seat belts Good practice The driver must ensure that passengers use the seat belts correctly and that they are all strapped in securely before moving off. Wherever you are seated in the vehicle, always fasten your seat belt, even for short journeys. - Page 103 Seat belts FRONT SEAT BELTS The force limiter reduces the pressure of the Recommendations for children: seat belt against the body of the occupants. use a suitable child seat if the With front Airbags The pretensioning seat belts are active when passenger is less than 12 years old or The front seats are fitted with pretensioners the ignition is switched on.
-
Page 105: Airbags
Airbags Airbags only operate when the ignition is switched on. This equipment only operates once. If a second impact occurs (during the same or a subsequent accident), the airbag will not operate. The deployment of an airbag or airbags is accompanied by a slight discharge of smoke and a noise, due to the activation of the pyrotechnic cartridge incorporated in the... -
Page 106: Lateral Airbags
Airbags Good practice Lateral airbags Curtain airbags Only put recommended covers on the seats. Do not fix or attach anything to the roof. This Sit in a normal upright position. These will not hinder inflation of the lateral could cause injury to the head when the Wear a correctly adjusted seat belt. - Page 107 Airbags Operating fault If this warning lamp comes on in the instrument panel, accompanied by an audible signal and a message in the screen, contact a CITROËN dealer or a qualified workshop to have the system checked. The airbags may no longer be deployed in the event of a serious impact.
- Page 108 Airbags To ensure the safety of your child, it is essential to deactivate the passengers airbag when you install a rear-facing child seat on the front passenger seat. Otherwise, the child would risk being killed or seriously injured if the airbag were to inflate. Reactivation In the "OFF"...
-
Page 109: Child Seats
Child safety GENERAL POINTS ON CHILD SEATS Although one of CITROËN's main criteria when designing your vehicle, the safety of your children also depends on you. For maximum safety, please follow these precautions: all children under the age of 12 or less than one metre fifty tall must travel in approved child seats suited to their weight, on seats fitted with a seat belt or... -
Page 110: Deactivating The Passenger's Front Airbag
Child safety Installation of a child seat at the rear "Rearward facing" When a "rearward facing" child seat is installed on a rear passenger seat , move the vehicle's front seat forwards and straighten the backrest so that the "rearward facing"... - Page 111 Child safety НИКОГА НЕ инсталирайте детско столче на седалка с АКТИВИРАНА предна ВЪЗДУШНА ВЪЗГЛАВНИЦА. Това можеда причини СМЪРТ или СЕРИОЗНО НАРАНЯВАНЕ на детето. NIKDY neumisťujte dětské zádržné zařízení orientované směrem dozadu na sedadlo chráněné AKTIVOVANÝM čelním AIRBAGEM. Hrozí nebezpečí SMRTI DÍTĚTE nebo VÁŽNÉHO ZRANĚNÍ. Brug aldrig en bagudvendt barnestol på...
- Page 112 Child safety Qatt m’ghandek thalli tifel/tifla marbut f’siggu dahru lejn l-Airbag attiva, ghaliex tista’ tikkawza korriment serju jew anke mewt lit-tifel/tifla Plaats NOOIT een kinderzitje met de rug in de rijrichting op een zitplaats waarvan de AIRBAG is INGESCHAKELD. Bij het afgaan van de airbag kan het KIND ERNSTIG OF DODELIJK GEWOND raken.
-
Page 113: "Isofix" Mountings
Child safety The mountings comprise three rings for each Some also have an upper strap which is seat: attached to the rear ring B . two front rings A , located between the To secure the child seat to the Top Tether: vehicle seat backrest and cushion, remove and stow the head restraint indicated by an "ISOFIX"... - Page 114 Child safety LOCATIONS FOR ISOFIX CHILD SEATS In line with European legislation, this table indicates the options for the installation of ISOFIX child seats on the vehicle seats fitted with ISOFIX mountings. In the case of the universal and semi-universal ISOFIX child seats, the child seat's ISOFIX size category, determined by a letter from A to G , is indicated on the child seat next to the ISOFIX logo.
- Page 115 Child safety (a) To install a child seat on a rear seat, IUF: seat suitable for the installation of an Remove and stow the head restraint move the seats in front forward, I SOFIX U niversal child seat "forward before installing a child seat with then straighten the backrest to allow facing"...
- Page 116 Child safety INSTALLING CHILD SEATS ATTACHED USING THE SEAT BELT In line with European legislation, this table indicates the options for installing child seats secured using a seat belt and universally approved (a) for the weight of the child and the seat in the vehicle. Weight of the child and indicative age Under 13 kg From 9 to 18 kg...
- Page 117 Child safety (a) Universal child seat: child seat that can (e) To install a child seat on a rear seat, Remove and stow the head restraint be installed in any vehicle using the seat move the seats in front forward, then before installing a child seat with belt.
- Page 118 Child safety ADVICE ON CHILD SEATS For the optimum installation of a "forward Installing a booster seat facing" child seat, ensure that the back of The chest part of the seat belt must be The incorrect installation of a child seat in a the child seat is as close as possible to the positioned on the child's shoulder without vehicle compromises the child's protection in...
-
Page 119: Towing A Trailer
Towing a trailer TOWING A TRAILER, CARAVAN, BOAT, ETC... For more information about weights, Distribution of loads Cooling refer to the administrative documents Distribute the load in the trailer so that the Towing a trailer on a slope increases the (registration document, ...) or to the heaviest objects are as close as possible coolant temperature. - Page 120 Towing a trailer You should therefore use a high gear to Tyres Towbar lower the engine speed and reduce your Check the tyre pressures of the towing We recommend the use of genuine speed. vehicle (see the "Identification markings" CITROËN towbars and their harnesses, In all cases, pay attention to the coolant section of chapter 8) and of the trailer, which have been tested and approved from...
-
Page 121: Other Accessories
Equipment OTHER ACCESSORIES Audio equipment, hands-free kit, speakers, CD changer, Trims (except for 163 hp engine), front mud navigation, ... flaps, rear mud flaps, spoilers, sill, ... For any work on your vehicle, use Regardless of the audio and telematic equipment a qualified workshop that has the offered on the market, the technical constraints linked technical information, competence and... -
Page 122: Opening The Bonnet
Opening the bonnet OPENING THE BONNET From inside: From outside: partially open the bonnet, lift To close the safety catch and raise the bonnet. lift the cover located at the foot of the Lower the bonnet and release it at the end of its front left seat. -
Page 123: Diesel Engines
Under the bonnet 7.1 - Engine oil filler cap. If your vehicle is fitted with this oil filler tube, proceed as follows: UNDER THE BONNET A - Remove the oil filler cap. B - Remove the filler tube from its location. DIESEL ENGINES C - Place the filler tube in the filler opening 1 - Screen/headlamp wash reservoir. -
Page 124: Petrol Engine
Under the bonnet PETROL ENGINE 1. Screen/headlamp wash reservoir. 4. Brake and clutch fluid reservoir. 7. Engine oil filler cap. 2. Fusebox. 5. Air filter. 8. Power steering reservoir. 3. Coolant header tank. 6. Engine oil dipstick. 9. Removable towing eye. -
Page 125: Levels
Levels LEVELS These regular maintenance operations will keep your vehicle in good running order. Consult a CITROËN dealer or the servicing and warranty booklet enclosed in the handbook pack. If you have to remove / refit the engine style cover, handle it with care to avoid damaging the fixing clips. - Page 126 Levels Cooling system Power steering fluid level Diesel additive level (Diesel with particle emission filter) Only use the fluid recommended by the The vehicle must be parked on level ground The minimum level of this additive manufacturer. with the engine cold. Unscrew the cap integrated with the gauge and check the is indicated by lighting of the Otherwise, you risk seriously damaging your...
-
Page 127: Checks
Checks CHECKS Oil filter Particle emission filter (Diesel) Change the filter regularly, in accordance Battery This filter actively contributes with the servicing schedule. to the preservation of air quality At the start of winter, have your battery by trapping unburnt polluting checked by a CITROËN dealer or a qualified Carbon filter and passenger particles. - Page 128 Checks During this regeneration, you may notice Manual gearbox that the idling speed is higher than normal Have the level checked in accordance with and that the cooling fan is running. As the manufacturer's servicing schedule. operation of the exhaust emissions controls may cause the exhaust gas temperature to Good practice reach very high levels, it is recommended...
-
Page 129: Fuel
Fuel Filling with fuel It is normal to hear the noise of an inrush of air when the cap is opened as there is a The fuel tank must be fi lled with the engine off . vacuum caused by the sealing of the fuel system. -
Page 130: Fuel Cut-Off
Fuel FUEL CUT-OFF Quality of the fuel used for Diesel Quality of the fuel used for petrol engines engines In a serious collision, a mechanism automatically prevents fuel from reaching the engine. DIESEL The flashing of this warning lamp is accompanied by a message in the screen. - Page 131 Fuel DIESEL PRIMING BUTTON place the two slots in the lugs behind the unclip the protective cover for access to engine to allow the protective cover to the priming push button, If you should run out of fuel, it is necessary be refitted, place the cover to the right of the to prime the system using the priming...
-
Page 132: Battery
Battery BATTERY To charge the battery using a battery charger This is housed in a compartment located Disconnect the battery, underneath the fl oor, in front of the front right seat. Follow the instructions for use given by the battery charger manufacturer, Reconnect starting with the negative (-) terminal, Check that the terminals and connectors... - Page 133 Battery ECONOMY MODE After the engine has stopped, with the key in the ignition position, certain functions (windscreen wiper, electric windows, courtesy lamps, audio equipment, etc.) can only be used for a cumulative duration of thirty minutes, to prevent discharging of the battery. Once the thirty minutes are over, the active functions are put on standby and the battery warning lamp flashes accompanied by a...
-
Page 134: Puncture Repair Kit
Repairing a wheel Using the kit remove the compressor, unclip and store the bottle in a sealed bag to avoid switch off the ignition, staining your vehicle with traces of fluid, affix the speed limitation sticker to the drive immediately, for approximately vehicle's steering wheel to remind you two miles (three kilometres), at reduced that a wheel is in temporary use,... - Page 135 Repairing a wheel adjust the pressure using the Warning, the sealant cartridge contains compressor (to inflate: switch A in ethylene-glycol, this product is harmful position " 1 "; to deflate: switch A in if swallowed and causes irritation to position " 0 " and press button B ), in the eyes.
-
Page 136: Changing A Wheel
Changing a wheel 1. PARKING THE VEHICLE You must ensure that the occupants get out of the vehicle and wait in a safe location. If possible, park the vehicle on level, stable and non-slippery ground. Apply the parking brake, switch off the ignition and engage first or reverse gear. - Page 137 Changing a wheel Detach the carrier from the hook and 3. SPARE WHEEL Open the cover, located on the sill, to place the spare wheel near the wheel to access the carrier bolt. Gain access to the spare wheel from the be changed.
- Page 138 Changing a wheel 4. OPERATING PROCEDURE Remove the trim pulling it using the Place the jack in contact with the Do not extend the jack until you have towing eye. locating point provided, the one which is started unscrewing the bolts on the closest to the wheel to be changed.
- Page 139 Changing a wheel 5. FITTING THE SPARE WHEEL Position the wheel on the hub and start Lower the vehicle completely by folding Secure the carrier on the hook then tightening the wheel bolts by hand. the jack, then remove the jack. raise the carrier using the bolt and the wheel brace.
-
Page 140: Removable Snow Screen
Snow screen 6. REFITTING THE REPAIRED WHEEL The wheel is refitted as described in step 5, not forgetting to refit the wheel trim. Refer to the "Identification markings" section of chapter 8 to locate the tyre label. The spare wheel is not designed to be used over long distances. -
Page 141: Snow Chains
Snow chains SNOW CHAINS In wintry conditions, snow chains improve Use only the chains designed to be fitted to Advice on installation traction as well as the behaviour of the the type of wheel fitted to your vehicle: If you have to fit the chains during vehicle when braking. -
Page 142: Changing A Bulb
Changing a bulb Type A All glass bulb: pull gently as it is fitted by pressure. Type B Bayonet bulb: press on the bulb then turn it anticlockwise. Type C Halogen bulb: release the retaining spring from its housing. Halogen bulbs must be changed after the headlamp has been off for several CHANGING A BULB minutes (risk of serious burns). - Page 143 Changing a bulb FRONT LAMPS - Ensure that the cover is refitted 3. Direction indicators correctly all the way round to ensure Type B , PY21W - 21W (amber) Open the bonnet. To access the bulbs, reach sealing. - Turn the bulb holder a quarter turn behind the headlamp unit.
- Page 144 Changing a bulb High pressure jet washing When using this type of jet washer on stubborn dirt, do not persist on the headlamps, the lamps and their surrounds to avoid damaging their coating and seals. DIRECTION INDICATOR SIDE Front / Rear REPEATER COURTESY LAMPS Type A , WY5W - 5W (amber)
- Page 145 Changing a bulb REAR LAMPS Identify the faulty bulb then open the Move aside the 8 tabs then extract the rear doors to 180°. Refer to the "Access" bulb holder. For more information on bulbs, refer to the section of chapter 2. "Types of bulb".
-
Page 146: Number Plate Lamps
Changing a bulb NUMBER PLATE LAMPS THIRD BRAKE LAMP Type B , P21W - 21W Type A , W5W - 5W Type A , W5W - 5W Lamp located on the inside (tailgate) Lamp located on the outside (hinged Unscrew the two screws using a Torx doors) With tailgate 20 screwdriver. -
Page 147: A Fuse
Changing a fuse CHANGING A FUSE The three fuseboxes are placed: in the dashboard on the right-hand side (behind the storage compartment, retractable), in the passenger compartment (battery compartment), under the bonnet. The descriptions communicated are only the fuses which can be changed by the user. For any other operations, go to a CITROËN dealer or a qualified workshop. - Page 148 Changing a fuse Fuses A (amps) Allocation Rear wiper Free Airbag control unit Steering wheel angle sensor, Diagnostic socket, DSC sensor, Manual ventilation, Clutch switch, Headlamp beam height, Particle emission filter pump Electric mirrors, Passenger electric window motor Front electric windows supply Courtesy lamps and glove box lamp Multifunction screen, Anti-theft alarm siren, Audio equipment, Compact disc changer, Audio/telephone, Trailer fusebox...
- Page 149 Changing a fuse Fuses A (amps) Allocation Heated seats Row 3 12V socket 40/50 Trailer fusebox (accessory) Free Hinged door locks Hinged door locks Hinged door rear wiper Rear ventilation Folding mirrors PASSENGER COMPARTMENT FUSES Unclip the battery compartment cover. Remove the red battery terminal (+).
- Page 150 Changing a fuse Fuses A (amps) Allocation Engine control unit, Fuel supply and air supply systems, Fan assembly Horn Front and rear screenwash pump Headlamp wash pump Fuel supply system Power steering, Secondary brake pedal switch Braking system (ABS/DSC) Starter motor control Main brake pedal switch Fuel supply and air supply systems, Emissions control systems...
-
Page 151: A Wiper Blade
Changing a wiper blade CHANGING A WIPER BLADE Placing the windscreen wiper blades Changing a front wiper blade Changing the rear wiper blade in the special position Lift the wiper arm. Lift the wiper arm, then unclip the blade and remove it. Unclip the blade and remove it. -
Page 152: Towing The Vehicle
Having your vehicle towed TOWING THE VEHICLE Without lifting (4 wheels on the ground) From the rear Vehicles fitted with a manual gearbox (Diesel version) You should always use a towing bar. Unclip the cover using a coin or the flat part of the towing eye, In the case of vehicles fitted with a manual gearbox, the gear lever must be in the... - Page 153 Having your vehicle towed General recommendations Observe the legislation in force in your country. Ensure that the weight of the towing vehicle is higher than that of the towed vehicle. The driver must remain at the wheel of the towed vehicle and must have a valid driving licence.
-
Page 155: Dimensions
Dimensions... - Page 156 Dimensions DIMENSIONS (MM) The vehicle is available in 2 lengths (L1, L2) and 1 height (H1), refer to the tables: Overall length 4 805 5 135 Overall height pneumatic / metal suspension 1 895/1 942 Wheelbase 3 000 3 122 Front overhang Rear overhang 1 038...
- Page 157 Dimensions REAR DOORS (mm) Usable height 1 272 Usable width 1 237...
- Page 158 Dimensions SLIDING SIDE DOOR (mm) Height 1 203 Width...
-
Page 159: Weights
Weights WEIGHTS AND TOWED LOADS (KG) For more information, refer to your registration certificate. In each country, it is imperative that the towed loads permitted by local legislation are complied with. To find out your vehicle's towing capabilities and its gross train weight, contact a CITROËN dealer. Load transfer If the towing vehicle has not reached the GVW, it is possible to transfer this weight to the trailer. -
Page 161: Identification Markings
Identification markings IDENTIFICATION MARKINGS A. Manufacturer's label. B. Model serial number. C. Tyres and paint colour code. 1 - VF Type serial number. Use the flat end piece of the towing eye to The label C , on the front door gives: open the flap. - Page 162 Precautions PRECAUTIONS...
- Page 163 This handbook describes all of the equipment Automobiles CITROËN declares, by application available in the whole range. of the provisions of the European regulation (Directive 2000/53) relating to End of Life Vehicles, Your vehicle will be fi tted with some of this that it achieves the objectives set by this regulation equipment described in this document, depending and that recycled materials are used in the...
- Page 164 14JPY.0040 Anglais 2014 – DOCUMENTATION DE BORD 4Dconcept Diadeis Seenk Entagos CRÉATIVE TECHNOLOGIE...