Table of Contents
Advertisement
•
PROGRESSIVE SCAN PLAY
(FOR TVS WITH APPROPRIATE INPUT JACKS)
•
PLAYS DVD VIDEOS
•
PLAYS ALL AUDIO CDS
•
PLAYS MP3 RECORDED DISCS
•
PLAYS CD-R & CD-RW DISCS
•
PLAYS JPEG PHOTO DISCS
IB-DVD1002(AT)-WM-E-032706.pmd
PLEASE READ CAREFULLY BEFORE USE
1
MODEL DVD-1002
IB-DVD1002 (AT)-WM-E-032706
7/5/2006, 10:24 AM
Advertisement
Table of Contents

Related Manuals for Durabrand DVD-1002

Summary of Contents for Durabrand DVD-1002
- Page 1 (FOR TVS WITH APPROPRIATE INPUT JACKS) • PLAYS DVD VIDEOS • PLAYS ALL AUDIO CDS • PLAYS MP3 RECORDED DISCS • PLAYS CD-R & CD-RW DISCS • PLAYS JPEG PHOTO DISCS PLEASE READ CAREFULLY BEFORE USE IB-DVD1002(AT)-WM-E-032706.pmd MODEL DVD-1002 IB-DVD1002 (AT)-WM-E-032706 7/5/2006, 10:24 AM...
-
Page 2: Safety Instructions
SAFETY INSTRUCTIONS TO PREVENT FIRE OR SHOCK HAZARD, DO NOT USE THE PLUG WITH AN EXTENSION CORD, RECEPTACLE OR OTHER OUTLET UNLESS THE BLADES CAN BE FULLY INSERTED TO PREVENT BLADE EXPOSURE. TO REDUCE THE RISK OF FIRE OR ELECTRIC SHOCK, DO NOT EXPOSE THIS APPLIANCE TO RAIN OR MOISTURE. -
Page 3: Included Accessories
CLASS 1 LASER PRODUCT as stated on the bottom of the set. IB-DVD1002(AT)-WM-E-032706.pmd FCC NOTE INCLUDED ACCESSORIES The following items are included with your DVD player: - Remote Control - AAA Batteries (2) - Audio/Video Cables - User’s Guide - Product Registration Card... -
Page 4: Table Of Contents
TABLE OF CONTENTS • Getting Started: Safety Instructions ----------------------------------------------------------------------------------------1 Connections ------------------------------------------------------------------------------------------------4 Location of Controls --------------------------------------------------------------------------------------6 Remote Control Operation -----------------------------------------------------------------------------8 Notes on Discs ---------------------------------------------------------------------------------------------9 Precautions -------------------------------------------------------------------------------------------------10 • Initial Setting: System Setup (TV System, Sleep Control, TV Type & Default) Setting the TV System -----------------------------------------------------------------------------11 Setting the Sleep Control ------------------------------------------------------------------------11 Selecting the TV Type -----------------------------------------------------------------------------12 Default - Resetting the Functions to Factory Defaults -------------------------------------12... -
Page 5: Connections
YOUR DVD PLAYER Cr/Pr Cb/Pb S-VIDEO VIDEO OUT COAXIAL Connect the DVD player to your TV with the supplied video (yellow) and audio (red & white) cables as above. In this connection, please set the video output mode to S-VIDEO (see page 14). - Page 6 (Home Theater System) YOUR DVD PLAYER R - AUDIO - L For best sound, connect the DVD player to your home theater system with a coaxial cable (not included); For picture, connect the DVD player to your TV with the supplied video cable.
-
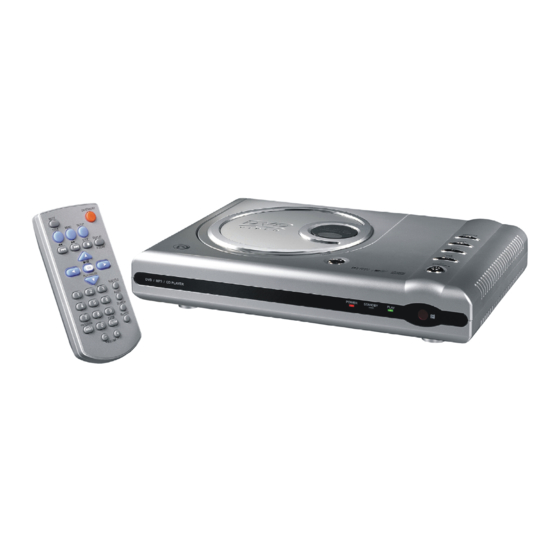
Page 7: Location Of Controls
LOCATION OF CONTROLS OPEN button - Press to open the door. DISC DOOR - Open and put the DVD disc inside with label side up. ON/STANDBY button - Press to switch the set on or switch to standby (off). PLAY/PAUSE button - Press to start playing a disc or to pause play. STOP button - Stops playing the DISC, press this twice for full stop. -
Page 8: Remote Control
11. ON/STANDBY button - Press to turn the set ON or STANDBY. 12. SETUP button - In STOP mode, press to display the DVD player’s setup menu. 13. DISPLAY/P-SCAN button - Press this button to view the elapsed time, title or chapter information and the track numbers during play;... -
Page 9: Remote Control Operation
60 player (not your TV set). Remember to point the REMOTE CONTROL in the direction of the DVD player, not the TV set. Tips on Remote Control Operation • The operating distance may vary according to the brightness of the room. -
Page 10: Notes On Discs
” may appear on the TV screen when pressing some buttons. A “ means that the operation is not permitted by the DVD player of the disc in that mode or at that time, sometimes the set needs to be in stop mode or other mode for that button to work. -
Page 11: Precautions
PRECAUTIONS Safety • As the laser beam used in the DVD player may be harmful to the eyes, do not attempt to disassemble the cabinet. Refer servicing to qualified personnel only (it is perfectly safe if you don’t unscrew and open the cabinet). -
Page 12: Initial Setting
Setting the SLEEP CONTROL This allows you to fall asleep to a movie or music disc and the DVD player will stop itself at a set time. In STOP mode, press the SETUP button on the remote control, “... -
Page 13: Selecting The Tv Type
& left of the center as in a movie theater. 16 X 9 Widescreen (16:9) - Choose this setting if your DVD Player is connected to a WIDESCREEN TV. If you choose this setting and you don’t have a widescreen TV, the images on the screen may... -
Page 14: Language Setup (Osd, Audio, Subtitle & Menu)
Setting the Digital Audio Out (Only for use in COAXIAL connection mode) Your DVD player can be connected to a home cinema system with coaxial digital audio jack to realize high quality sound effects, digital audio output allows you to select RAW or PCM digital signal. -
Page 15: Setting The Downmix Audio Out
INITIAL SETTING Setting the Downmix Audio Out Downmix audio output setup allows you to select LT/RT or STEREO audio output mode. In STOP mode, press the SETUP button on the remote control, “ ” (System Setup) is selected. button to highlight “ Press button and use “DOWNMIX”. -
Page 16: Basic Play
Make sure you have completed all the connections (see pages 4-5), you may need to change your TV’s video input mode to see the DVD player’s menu and movies. The video input channel varies with different brands and models, many TV remote controls have a TV/VIDEO button which can be used to change to different video inputs and back to TV for normal broadcast viewing. -
Page 17: Using The Search & Skip Functions
2. Press REPEAT button again at the end of the segment (point B), “REPEAT A-B” will appear on the display. 3. The DVD player will automatically play the selected segments A to B over and over till you press REPEAT button again. -
Page 18: Programmed Play
3. REPEAT PLAY For CD REP: [REP 1] REP: [REP ALL] A-B CANCEL For MP3 REP: [REP 1] REP: [REP DIR] REPEAT A-B A-B CANCEL 4. PROGRAMMED PLAY You can make a program of up to 16 tracks in the order you want them to be played during the STOP mode. -
Page 19: Search For Preferred Play
5. SEARCH FOR PREFERRED PLAY To select a scene with the title, the chapter, the track number and the time during play. Press the SEARCH button during play, the screen will show as on the right: Move the LEFT & RIGHT DIRECTION buttons ( &... -
Page 20: Slow-Motion Play
Note 1: If you press the AUDIO button for several times, but the desired language is not selected, it means the language is not available on the disc. Note 2: This DVD player does not support DTS decoding. For DTS disc, please select other output mode, such as AC-3; otherwise there will be no sound output. -
Page 21: Displaying Disc Information
11.DISPLAYING DISC INFORMATION If you want to know the information of the disc during play, press the DISPLAY button on the remote control, the information will appear on the TV screen. (see below) For DVD DVD TT 1/2 CH 6/12 o)): 1/3ENG 5.1CH 2/3ENG... -
Page 22: Mp3 Disc Operation
12. MP3 DISC OPERATION This allows you to play your MP3 recorded disc on this set. Load your recorded MP3 disc into the player, a menu will show on the screen. Select the desired file by pressing the Press OK button to open the file and start playing. Select the desired track by pressing the Press OK button to start playback. -
Page 23: Trouble Shooting
(some TV sets have 3 or 4 different inputs). You may have to press the VIDEO button on your TV. 4. Make sure both the TV and DVD player are on. 1. Press AUDIO button several times. The disc may have been set to DTS output or a blank audio channel on multiple language, please select AC-3 output or reset to the main language. - Page 24 Press the ON/STANDBY button on the remote to set the player to the standby mode and then press the ON/STANDBY button again to turn the player to ON. Reset the DVD player by disconnecting the power plug and then re-connecting it (the player may not be operating properly due to lightning, static electricity, damaged or wrong discs, or some other external factors).
-
Page 25: Glossary
TV set. Video Input This is a jack which accepts the picture portion of a signal. In order to use this DVD player, your TV set must have an S-Video (better) or Video input (standard) jack. ABOUT DVD REGION... -
Page 26: Specifications
SPECIFICATIONS General Description Power source: AC 100 – 240V, 50/60Hz Power consumption: 15 Watts [normal household current] (approx. 5W when the set is in the standby mode). Signal system: NTSC/PAL TV system 1 Vp-p Video output level: 2 Vrms (1 kHz, 0dB) Audio output level: Dimensions (Approx.): Width: 251 mm... -
Page 27: Limited Warranty
During the initial 1 year period after original purchase, we will service the set that is returned to LENOXX ELECTRONICS CORP., prepaid, at no charge. After the initial 1 year period expires, we will exchange, at no charge, any part that is defective, but will charge for the cost of labor, return postage paid by Lenoxx.