MicroBoards Technology GX-2 Installation Quick Reference Manual
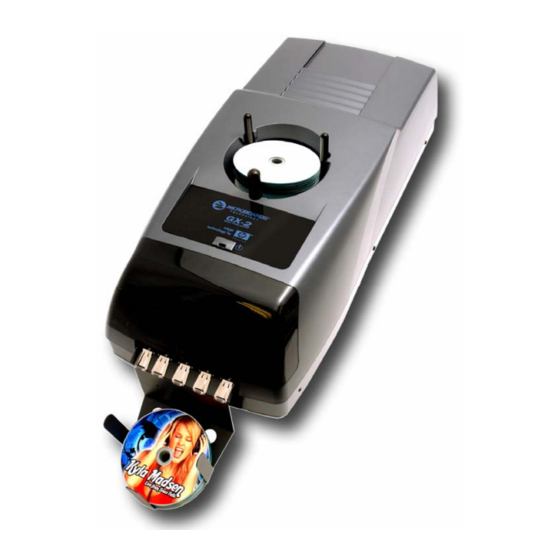
Disc publisher
Hide thumbs
Also See for GX-2:
- User manual (23 pages) ,
- Installation quick reference manual (2 pages) ,
- User manual (23 pages)
Advertisement
Quick Links
Download this manual
See also:
User Manual
For a more in-depth look at the installation process, please refer
to the Installation section of the User's Manual.
Be sure your computer meets the Minimum System
Requirements as stated in the User's Manual and that
you have read these instructions and the Manual prior
to contacting Microboards Technical Support with
installation or configuration questions!
Do NOT connect your GX-2 Disc Publisher to
your computer until you are told to do so!!
GX-2 Disc Publisher Installation:
You should not attempt to install the GX-2 Disc Publisher unless you are logged on
to your PC with administrative rights.
The hardware and much of the software installation will occur without intervention.
1. Unpack the GX-2 Disc Publisher and place it in the selected workspace. This
space should have enough vertical space to allow for easy loading of media into
the input hopper and have enough room to the back of the G3 Disc Publisher to
allow the unloading of rejected discs.
2. Insert the GX-2 Disc Publisher Installation disk into the CD/DVD ROM drive on
your computer. The installer should open automatically.
If the installer does not automatically open, click the Start button and select
Run from the Start menu. Click the Browse button and go to the CD/DVD drive,
highlight MBInstall.exe, click the Open button, then click OK.
Rev 10.03.26
GX-2 Disc Publisher Installation
Quick Reference Guide
Prerequisite Windows components may need to be installed before the Disc
Publisher can be installed. If any prerequisites are not present, they will be
installed at this point. You will not be able to install your Disc Publisher without
installing the prerequisite components. You may need to reboot the PC after
any prerequisites are installed. The Disc Publisher installer will launch
automatically after rebooting.
Select
Microboards GX-2 Disc Publisher
from the list, then click the Install
Microboards GX-2 Disc Publisher button that appears.
3. You will first be guided through the hardware setup. Please follow all directions
on each window before clicking the Next button.
4. After the physical hardware setup is complete, you will be instructed to connect
the GX-2 Disc Publisher to the computer. Once this occurs, Windows will find
your new hardware and run through the driver installation process.
5. Click the Finish button when complete. If the hardware is still being installed at
this point, you will be asked to wait until that process is complete.
6. Click the Finish button to begin the Disc Publishing software installation process.
7. Rebooting your PC is required before attempting to run your G3 Disc
Publisher! Click the Finish button to do so.
The Microboards Printer Toolbox Installation
The Microboards Toolbox is installed silently during the G3 installation. This
application is used for general maintenance functions.
After the installation completes, the Toolbox will start up. You will see an icon
appear in the tool tray in the lower right corner of your Windows desktop. To
access the Toolbox, double-click the icon circled below.
The Toolbox will also automatically start up after
rebooting the PC.
For more information on configuration options, please see the GX-2
Disc Publisher Configuration Quick Reference Guide on the other
side of this page, or refer to the appropriate sections of the User's
Manual.
Windows Configurations for Non-Administrative Users
To allow users who are logged on to your PC without administrative privileges to use
PrintWrite, a few final steps must be taken. You will need to be logged in as an
administrator to perform these steps.
If you only have users with administrative rights on your PC, or do not intend to
allow non-administrative users to run PrintWrite, you will not need to perform the
following steps.
Please visit our Technical Support website at www.microboards.com/support
for Windows 7, Vista, and XP
Sharing the PrintWrite Working Directories
If PrintWrite is to be run by users logged in as Standard or other Non-Administrative
user types, the main PrintWrite application directory will need to be shared to allow
those users access to the necessary files and directories. The main application
directory will be the same as the directory specified during the PrintWrite installation.
The default installation directory is
you changed the location, you must share the directory you selected.
You will need to specify that you are allowing users to modify the contents of the
PrintWrite directory.
You will also need to share the
C:\MBSDK Data
location of this directory cannot be changed during the installation. This directory
will not appear until the first time PrintWrite is launched.
Windows Firewall
You may need to add two applications, PrintWrite.exe and ServerManager.exe to
the Windows Firewall Exceptions list, depending on your PC's Windows Firewall
settings. If Windows Firewall is on and you do not add them to the exceptions list,
any non-administrative users will be blocked from running PrintWrite.
Installation Troubleshooting Guide:
Hardware not installing on
1. Turn on power to GX-2 Disc Publisher (back panel)
PC
2. Reseat USB connection
3. Installation CD in drive?
Printer not responding
1. Ink cartridge installed correctly?
2. Turn on power to Printer (front panel). Firmly press
Drive not appearing in
1. PC needs to be rebooted
Windows Explorer
2. Mapped drive conflict: Disconnect GX-2 Disc
In order to guarantee quality results from the GX-2 Disc Publisher,
ONLY MICROBOARDS GX-300HC
COLOR INK CARTRIDGE CAN BE USED!
As is true with all printers, the quality of ink cartridge and the quality of the ink
within the cartridge will affect your output. To ensure quality results, the GX-2
Disc Publisher will not operate with any other color ink cartridge in place.
The use of refilled ink cartridges will void your warranty!
C:\Program
Files\Microboards\PrintWrite; if
directory in the same way. The
the power button and wait several seconds for the
printer power LED to come on.
Publisher and reboot PC. Disconnect Network
drives and remap to letters near end of alphabet.
Reconnect GX-2 Disc Publisher.
Advertisement

Related Manuals for MicroBoards Technology GX-2


Summary of Contents for MicroBoards Technology GX-2
- Page 1 5. Click the Finish button when complete. If the hardware is still being installed at the Windows Firewall Exceptions list, depending on your PC’s Windows Firewall You should not attempt to install the GX-2 Disc Publisher unless you are logged on this point, you will be asked to wait until that process is complete.
- Page 2 Drive: Select the drive letter from the drop-down list. Verify the correct drive Windows XP, Classic Start Menu layout: You will need to go to the Settings selection by clicking the Test button; the drive tray in the GX-2 Disc Publisher selection, then to the Printers and Faxes from the Start button.