
Related Manuals for Vivotek VS8100


Summary of Contents for Vivotek VS8100
- Page 1 VS8100 Video Server User’s Manual H.264 • Compact Size • Easy Installation Rev. 1.0...
-
Page 2: Table Of Contents
Ready to Use ....................13 Accessing the Video Server ..................14 Using Web Browsers ..................14 Using RTSP Players ..................16 Using 3GPP-compatible Mobile Devices ............17 Using VIVOTEK Recording Software ...............18 Main Page ........................19 Client settings ......................22 Configuration ......................25 System ......................26 System >... -
Page 3: Revision History
VIVOTEK Revision History 1. Rev. 1.0: Initial release. Package Contents ■ VS8100 ■ Quick Installation Guide User's Manual - 3... -
Page 4: Overview
VIVOTEK Overview VIVOTEK VS8100 is a small-sized H.264 1-CH video server that helps you migrate from analog to digital surveillance system with ease. Its power sharing with CCTV and tiny design make it ideal for front-end installation and surveillance applications such as home, offices, retail stores, banks, and city surveillance, where their power supply and IP network connections are already settled. -
Page 5: Physical Description
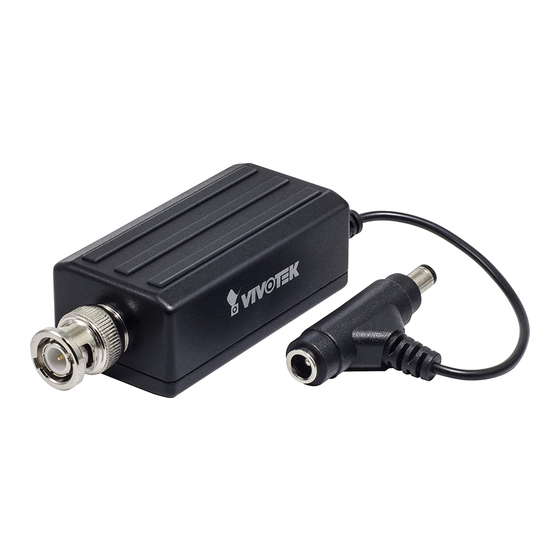
VIVOTEK Physical Description 1 BNC input (male) 2 DC 12V output (to camera) 3 DC 12V input (to power source) 4 Reset button 5 Audio input phonejack 6 RS485 7 RJ-45 Ethernet connector NOTE: The video server consumes approximately 12V 0.15A = 1.8W power. - Page 6 7. Connect an Ethernet cable to the RJ45 Ethernet port, and connect another end to an Ethernet switch. 8. See the table below for LED definitions. 9. Visit www.vivotek.com to download the IW2 utility program. Use the IW2 utility to locate and access your video server. 6 - User's Manual...
-
Page 7: Status Led
VIVOTEK Status LED Item LED status Description Steady Orange Powered on, and system booting Orange LED off Power is off. Steady Orange & Green blinking every 1 sec. (Green LED on for 1 sec., and off for another 1 Network is working (heartbeat) sec.) - Page 8 VIVOTEK Hardware Reset The reset button is used to reset the system or restore the factory default settings. Sometimes resetting the system can return the video server to normal operation. If the system problems remain after reset, restore the factory settings and install again.
-
Page 9: Network Deployment
VIVOTEK Network Deployment Setting up the Video Server over the Internet There are several ways to set up the video server over the Internet. The first way is to set up video server behind a router. The second way is to utilize a static The third way is to use PPPoE. - Page 10 For more information with network configuration options (such as that of streaming ports), please refer to Configuration > Network Settings. VIVOTEK also provides the automatic port forwarding feature as an NAT traversal function with the precondition that your router must support the UPnP port forwarding feature.
- Page 11 VIVOTEK Internet connection with static IP Choose this connection type if you are required to use a static IP for the Video server. Please refer to LAN on page 45 for details. Internet connection via PPPoE (Point-to-Point over Ethernet) Choose this connection type if you are connected to the Internet via a DSL Line. Please refer to PPPoE on page 41 for details.
-
Page 12: Software Installation
VIVOTEK Software Installation Download Installation Wizard 2 (IW2) from VIVOTEK’s website. The utility helps you set up your video server on the LAN. 1. Install IW2. When done, double click the IW2 shortcut on your desktop to launch the program. -
Page 13: Ready To Use
2. You should be able to see live video from your camera. You may also install the 32-channel recording software from VIVOTEK's website in a deployment consisting of multiple cameras. For its installation details, please refer to its related documents. -
Page 14: Accessing The Video Server
3. The live video will be displayed in your web browser. 4. If it is the first time installing the VIVOTEK video server, an information bar will pop up as shown below. Follow the instructions to install the required plug-ins on your computer. - Page 15 VIVOTEK ® 2. Look for Download signed ActiveX controls; select Enable or Prompt. Click OK. ® 3. Refresh your web browser, then install the Active X control. Follow the instructions to complete installation. User's Manual - 15...
-
Page 16: Using Rtsp Players
VIVOTEK Using RTSP Players To view the live view streaming media using RTSP players, you can use one of the following players that support RTSP streaming. Quick Time Player VLC Player VLC media player 1. Launch the RTSP player. mpegable Player 2. -
Page 17: Using 3Gpp-Compatible Mobile Devices
VIVOTEK Using 3GPP-compatible Mobile Devices To view the streaming media through 3GPP-compatible mobile devices, make sure the video server can be accessed over the Internet. For more information on how to set up the video server over the Internet, please refer to Setup the video server over the Internet on page 9. -
Page 18: Using Vivotek Recording Software
Please install the recording software; then launch the program to add the video server to the Channel list. For detailed information about how to use the recording software, please refer to the user’s manual of the software or download it from http://www.vivotek.com. 18 - User's Manual... -
Page 19: Main Page
26. Camera Control Area Video Stream: VS8100 supports 1 channel for video live viewing. The channel allows you to view only one stream. For more information about video settings, please refer to page 40 for detailed information. PTZ Control Area: The up/down/left/right/zoom/focus/pan buttons allow you to adjust the video in the viewing window to the spot you wish to watch. - Page 20 VIVOTEK Manual Trigger Area Click to enable/disable an event trigger manually. Please configure an event setting on Application page before enable this function. A total of 4 event settings can be configured. For more information about event settings, please refer to page 81.
- Page 21 VIVOTEK Title and Time: The video title and time can be stamped on the streaming video. For further configuration, please refer to Video settings on page 40. Video and Audio Control Buttons: Depending on the video server model and video server configuration, some buttons may not be available.
-
Page 22: Client Settings
VIVOTEK Client settings This chapter explains how to select the stream transmission mode and saving options on the local computer. When completed with the settings on this page, click Save on the page bottom to enable the settings. H.264 media options Select to stream video or audio data or both. - Page 23 VIVOTEK MP4 saving options Users can record live video as they are watching it by clicking Start MP4 Recording on the main page. Here, you can specify the storage destination and file name. Folder: Specify a storage destination for the recorded video files.
- Page 24 VIVOTEK Joystick settings Calibrate: Make sure a joystick is already attached to your COM port or USB port on your client computer. Click on the Calibrate button and the Windows Game Controller function will be started. If properly connected, your operating system should have already detected the joystick. Follow the onscreen instructions to calibrate your joystick.
-
Page 25: Configuration
Click Configuration on the main page to enter the camera setting pages. Note that only Administrators can access the configuration page. VIVOTEK offers an easy-to-use user interface that helps you set up your video server with minimal effort. In order to simplify the user interface, the detailed information will be hidden unless you click on the function item. -
Page 26: System
VIVOTEK System This section explains how to configure the basic settings for the video server, such as the host name and system time. It is composed of the following three columns: System, System Time and DI and DO. When finished with the settings on this page, click Save at the bottom of the page to enable the settings. -
Page 27: System > Homepage Layout
Theme Options (the second tab on this page). The settings will be displayed automatically in this Preview field. The following shows the homepage using the default settings: ■ Hide Powered by VIVOTEK: If you check this item, it will be removed from the homepage. Logo graph Here you can change the logo that is placed at the top of your homepage. - Page 28 VIVOTEK Theme Options Here you can change the color of your homepage layout. There are three types of preset patterns for you to choose from. The new layout will simultaneously appear in the Preview filed. Click Save to enable the settings.
- Page 29 VIVOTEK ■ Follow the steps below to set up the customed homepage: 1. Click Custom on the left column. 2. Click the field where you want to change the color on the right column. Color Selector Custom Pattern 3. The palette window will pop up as shown below.
-
Page 30: System > Logs
VIVOTEK System > Logs This section explains how to configure the Network Camera to send the system log to a remote server as backup. Log server settings Follow the steps below to set up the remote log: 1. Select Enable remote log. - Page 31 You can install the included ST7501 recording software, which provides an Event Management function group for delivering event messages via emails, GSM short messages, onscreen event panel, or to trigger an alarm, etc. For more information, refer to the ST7501 User Manual. VIVOTEK Network Cameras Internet 3G Cell phone...
-
Page 32: System > Parameters
VIVOTEK Access log Access log displays the access time and IP address of all viewers (including operators and administrators) in a chronological order. The access log is stored in the Network Camera’s buffer area and will be overwritten when reaching a certain limit. -
Page 33: System > Maintenance
Note: Do not power off the Network Camera during the upgrade! Follow the steps below to upgrade the firmware: 1. Download the latest firmware file from the VIVOTEK website. The file is in .pkg file format. 2. Click Browse… and locate the firmware file. - Page 34 VIVOTEK General settings > Restore This feature allows you to restore the Network Camera to factory default settings. Network: Select this option to retain the Network Type settings (please refer to Network Type on page 45). Daylight Saving Time: Select this option to retain the Daylight Saving Time settings (please refer to Import/Export files below on this page).
- Page 35 VIVOTEK ® 3. Open the file with Microsoft Notepad and locate your time zone; set the start and end time of DST. When completed, save the file. In the example below, DST begins each year at 2:00 a.m. on the second Sunday in March and ends at 2:00 a.m.
- Page 36 VIVOTEK The following message is displayed when attempting to upload an incorrect file format. Export language file: Click to export language strings. VIVOTEK provides nine languages: English, Deutsch, Español, Français, Italiano, 日本語, Português, 簡体中文, and 繁體中文 . Update custom language file: Click Browse… and specify your own custom language file to upload.
-
Page 37: Media > Image
VIVOTEK Media > Image This section explains how to configure the image settings of the Network Camera. It is composed of the following four columns: General settings, Image settings, Exposure, and Privacy mask. General settings Video title Show_timestamp_and video_title_in_video_and_snapshots: Enter a name that will be displayed on the title bar of the live video as the picture shown below. - Page 38 VIVOTEK Image settings On this page, you can tune the White balance and Image adjustment. Image Adjustment ■ Brightness: Adjust the image brightness level, which ranges from 0% to 100%. ■ Contrast: Adjust the image contrast level, which ranges from 0% to 100%.
- Page 39 VIVOTEK Privacy mask Click Privacy Mask to open the settings page. On this page, you can block out sensitive zones to address privacy concerns. 2013/09/09 17:08:56 ■ To set the privacy mask windows, follow the steps below: 1. Click New to add a new window.
-
Page 40: Media > Video
VIVOTEK Media > Video Stream settings This Network Camera supports multiple streams with frame sizes ranging QCIF (176x144) to D1 (704x480 NTSC pixels). Click the stream item to display the detailed information. The maximum frame size will follow your settings in the above Viewing Window sections. - Page 41 VIVOTEK This Network Camera provides real-time H.264 and MJPEG compression standards (Dual Codec) for real-time viewing. If the H.264 mode is selected, the video is streamed via RTSP protocol. There are several parameters through which you can adjust the video performance: ■...
- Page 42 VIVOTEK Video quality ■ • Constant bit rate: A complex scene generally produces a larger file size, meaning that higher bandwidth will be needed for data transmission. The bandwidth utilization is configurable to match a selected level, resulting in mutable video quality performance.
- Page 43 VIVOTEK JPEG mode is selected, the Network Camera sends consecutive JPEG images to the client, producing a moving effect similar to a filmstrip. Every single JPEG image transmitted guarantees the same image quality, which in turn comes at the expense of variable bandwidth usage. Because the media contents are a combination of JPEG images, no audio data is transmitted to the client.
-
Page 44: Media > Audio
VIVOTEK Media > Audio Audio Settings Mute: Select this option to disable audio transmission from the Network Camera to all clients. Note that if muted, no audio data will be transmitted even if audio transmission is enabled on the Client Settings page. -
Page 45: Network > General Settings
Use fixed IP address: Select this option to manually assign a static IP address to the Network Camera. 1. You can make use of VIVOTEK Installation Wizard 2 on the software CD to easily set up the Network Camera on LAN. Please refer to Software Installation on page 12 for details. - Page 46 VIVOTEK Primary DNS: The primary domain name server that translates hostnames into IP addresses. Secondary DNS: Secondary domain name server that backups the Primary DNS. Primary WINS server: The primary WINS server that maintains the database of computer names and IP addresses.
- Page 47 VIVOTEK NOTE: NOTE ► If the default ports are already used by other devices connected to the same router, the Network Camera will select other ports for the Network Camera. ► If UPnP is not supported by your router, you will see the following message: Error: Router does not support UPnP port forwarding.
- Page 48 VIVOTEK 4. In the Networking Services dialog box, select Universal Plug and Play and click OK. 5. Click Next in the following window. 6. Click Finish. UPnP is enabled. ► How does UPnP work? UPnP networking technology provides automatic IP configuration and dynamic discovery of devices added to a network.
- Page 49 VIVOTEK Enable IPv6 Select the Enable IPv6 checkbox and click Save to enable IPv6 settings. Please note that this only works if your network environment and hardware equipment support IPv6. The ® browser should be Microsoft Internet Explorer 7 or 8, Mozilla Firefox 13.0 or above.
- Page 50 VIVOTEK Please follow the steps below to link to an IPv6 address: 1. Open your web browser. 2. Enter the link-global or link-local IPv6 address in the address bar of your web browser. 3. The format should be: http://[2001:0c08:2500:0002:0202:d1ff:fe04:65f4]/ IPv6 address 4.
- Page 51 1025 and 65535. FTP port: The FTP server allows the user to save recorded video clips. You can utilize VIVOTEK's Installation Wizard 2 to upgrade the firmware via FTP server. By default, the FTP port is set to 21. It also can be assigned to another port number between 1025 and 65535.
-
Page 52: Network > Streaming Protocols
VIVOTEK Network > Streaming protocols HTTP streaming To utilize HTTP authentication, make sure that your have set a password for the Network Camera first; please refer to Security > User account on page 62 for details. Authentication: Depending on your network security requirements, the Network Camera provides two types of security settings for an HTTP transaction: basic and digest. - Page 53 VIVOTEK URL command -- http://<ip address>:<http port>/<access name for stream 1~3> For example, when the Access name for stream 2 is set to video2.mjpg: 1. Launch Mozilla Firefox or Netscape. 2. Type the above URL command in the address bar. Press Enter.
- Page 54 VIVOTEK Authentication: Depending on your network security requirements, the Network Camera provides three types of security settings for streaming via RTSP protocol: disable, basic, and digest. basic authentication is selected, the password is sent in plain text format, but there can be potential risks of it being intercepted.
- Page 55 VIVOTEK Multicast settings for stream 1 ~ 3: Click the items to display the detailed configuration information. Select the Always multicast option to enable multicast for stream 1 ~ 3. Unicast video transmission delivers a stream through point-to-point transmission; multicast, on the other hand, sends a stream to the multicast group address and allows multiple clients to acquire the stream at the same time by requesting a copy from the multicast group address.
- Page 56 IP address, to have a fixed host and domain name. Express link Express Link is a free service provided by VIVOTEK server, which allows users to register a domain name for a network device. One URL can only be mapped to one MAC address. This service will examine if the host name is valid and automatically open a port on your router.
- Page 57 DDNS: Dynamic domain name service Enable DDNS: Select this option to enable the DDNS setting. Provider: Select a DDNS provider from the provider drop-down list. VIVOTEK offers Safe100.net, a free dynamic domain name service, to VIVOTEK customers. It is recommended that you register Safe100.net to access VIVOTEK’s Network Cameras from the Internet.
- Page 58 4. Select Enable DDNS and click Save to enable the setting. ■ CustomSafe100 VIVOTEK offers documents to establish a CustomSafe100 DDNS server for distributors and system integrators. You can use CustomSafe100 to register a dynamic domain name if your distributor or system integrators offer such services.
- Page 59 VIVOTEK Network > QoS (Quality of Service) Quality of Service refers to a resource reservation control mechanism, which guarantees a certain quality to different services on the network. Quality of service guarantees are important if the network capacity is insufficient, especially for real-time streaming multimedia applications. Quality can be defined as, for instance, a maintained level of bit rate, low latency, no packet dropping, etc.
- Page 60 VIVOTEK QoS/DSCP (the DiffServ model) DSCP-ECN defines QoS at Layer 3 (Network Layer). The Differentiated Services (DiffServ) model is based on packet marking and router queuing disciplines. The marking is done by adding a field to the IP header, called the DSCP (Differentiated Services Codepoint). This is a 6-bit field that provides 64 different class IDs.
-
Page 61: Network > Snmp (Simple Network Management Protocol)
VIVOTEK Network > SNMP (Simple Network Management Protocol) This section explains how to use the SNMP on the network camera. The Simple Network Management Protocol is an application layer protocol that facilitates the exchange of management information between network devices. It helps network administrators to remotely manage network devices and find, solve network problems with ease. -
Page 62: Security > User Accounts
VIVOTEK Security > User accounts This section explains how to enable password protection and create multiple accounts. Root Password The administrator account name is “root”, which is permanent and can not be deleted. If you want to add more accounts in the Manage User column, please apply the password for the “root” account first. -
Page 63: Security > Https (Hypertext Transfer Protocol Over Ssl)
VIVOTEK Security > HTTPS (Hypertext Transfer Protocol over SSL) This section explains how to enable authentication and encrypted communication over SSL (Secure Socket Layer). It helps protect streaming data transmission over the Internet on higher security level. Create and Install Certificate Method Before using HTTPS for communication with the Network Camera, a Certificate must be created first. - Page 64 VIVOTEK 5. Click Save to preserve your configuration, and your current session with the camera will change to the encrypted connection. 6. If your web session does not automatically change to an encrypted HTTPS session, click Home to re- turn to the main page. Change the URL address from “http://” to “https://“ in the address bar and press Enter on your keyboard.
- Page 65 VIVOTEK Create certificate request and install 1. Select the option from the Method pull-down menu. 2. Click Create certificate to proceed. 3. The following information will show up in a pop-up window after clicking Create. Then click Save to generate the certificate request.
- Page 66 VIVOTEK 5. Look for a trusted certificate authority, such as Symantec’s VeriSign Authentication Services, that issues digital certificates. Sign in and purchase the SSL certification service. Copy the certificate request from your request prompt and paste it in the CA’s signing request window. Proceed with the rest of the process as CA’s instructions on their webpage.
- Page 67 VIVOTEK 7. Open a new edit, paste the certificate contents, and press ENTER at the end of the contents to add an empty line. 8. Convert file format from DOS to UNIX. Open File menu > Conversions > DOS to Unix.
- Page 68 VIVOTEK 9. Save the edit using the “.crt” extension, using a file name like “CAcert.crt.” 10. Return to the original firmware session, use the Browse button to locate the crt certificate file, and click Upload to enable the certification. 68 - User's Manual...
- Page 69 VIVOTEK Note that a 11. When the certifice file is successfully loaded, its status will be stated as Active. certificate must have been created and installed before you can click on the “Save" button for the configuration to take effect.
-
Page 70: Security > Access List
VIVOTEK Security > Access List This section explains how to control access permission by verifying the client PCs’ IP addresses. General Settings Maximum number of concurrent streaming connection(s) limited to: Simultaneous live viewing for 1~10 clients (including stream 1 to stream 3). The default value is 10. If you modify the value and click Save, all current connections will be disconnected and automatically attempt to re-link (IE Explorer or Quick Time Player). - Page 71 VIVOTEK ■ Refresh: Click this button to refresh all current connections. ■ Add to deny list: You can select entries from the Connection Status list and add them to the Deny List to deny access. Please note that those checked connections will only be disconnected temporarily and will automatically try to re-link again (IE Explore or Quick Time Player).
- Page 72 VIVOTEK There are three types of rules: Single: This rule allows the user to add an IP address to the Allowed/Denied list. For example: 192.168.2.1 Network: This rule allows the user to assign a network address and corresponding subnet mask to the Allow/Deny List.
- Page 73 Authentication server (usually a RADIUS server): Checks the client certificate and decides whether to accept the end user’s access request. ■ VIVOTEK Network Cameras support two types of EAP methods to perform authentication: EAP-PEAP and EAP-TLS. Please follow the steps below to enable 802.1x settings: 1.
- Page 74 VIVOTEK 3. When all settings are complete, move the Network Camera to the protected LAN by connecting it to an 802.1x enabled switch. The devices will then start the authentication automatically. NOTE: ► The authentication process for 802.1x: 1. The Certificate Authority (CA) provides the required signed certificates to the Network Camera (the supplicant) and the RADIUS Server (the authentication server).
-
Page 75: Ptz > Ptz Settings
Then you can configure the PTZ driver and RS485 port with the following settings. VIVOTEK provides several PTZ drivers: DynaDome/SmartDOME, Lilin PIH-7x00, Pelco D, Pelco P, and Samsung Scc643 protocol. If none of the above PTZ drivers is supported by your PTZ scanner, please select Custom camera (scanner). -
Page 76: Preset Positions
VIVOTEK Preset positions If you select DynaDome/SmartDOME, Lilin PIH-7x00, or Pelco D, Pelco P protocol, Samsung scc643 protocol protocol as the PTZ driver and click the Save button, the Preset Position button will be enabled. Click Preset Position to open the settings page. You can also select preset positions for the camera to patrol. - Page 77 VIVOTEK ■ The Camera Control Panel and Preset positions will be displayed on the home page: ■ Click Go to: Select one from the drop-down list, and the Network Camera will move to the selected preset position. Camera ID settings The Camera ID is necessary to control multiple cameras.
- Page 78 VIVOTEK Patrol settings You can select some preset positions for the Network Camera to patrol. Please follow the steps below to set up a patrol schedule: 1. Select Channel in the drop-down list. 2. Select the preset locations on the list, and click 3.
- Page 79 VIVOTEK Custom Command If Custom Camera (scanner) is selected as the PTZ driver, the Preset Position and PTZ Control Panel on the main page will be disabled. You will need to configure command buttons to control the PTZ scanner. Click Custom Command to open the Custom Command page to set the commands in the Control Settings session.
- Page 80 VIVOTEK ►The command buttons will be displayed on the main page: 80 - User's Manual...
-
Page 81: Event > Event Settings
VIVOTEK Event > Event settings Advanced Mode This section explains how to configure the Network Camera to responds to particular situations (event). A typical application is that when a motion is detected, the Network Camera sends buffered images to an FTP server or e-mail address as notifications. Click on Help, there is an illustration shown in the pop-up window explaining that an event can be triggered by many sources, such as motion detection or external digital input devices. - Page 82 VIVOTEK ■ Event name: Enter a name for the event setting. ■ Enable this event: Select this option to enable the event setting. ■ Priority: Select the relative importance of this event (High, Normal, or Low). Events with a higher priority setting will be executed first.
- Page 83 VIVOTEK ■ Camera tampering detection This option allows the Network Camera to trigger when the camera detects that is is being tampered with. To enable this function, you need to configure the Tampering Detection option first. Please refer to page 97 for detailed information.
- Page 84 VIVOTEK Add server It is necessary to configure the server and media settings so that the Network Camera will know what action to take (such as which server to send the media files to) when a trigger is activated. Click server to open the server setting window.
- Page 85 VIVOTEK To verify if the email settings are correctly configured, click Test. The result will be shown in a pop-up window. If successful, you will also receive an email indicating the result. Click Save server to enable the settings. Note that after you configure the first event server, the new event server will automatically display on the Server list.
- Page 86 VIVOTEK ■ Passive mode Most firewalls do not accept new connections initiated from external requests. If the FTP server supports passive mode, select this option to enable passive mode FTP and allow data transmission to pass through the firewall. The firmware default has the Passive mode checkbox selected.
- Page 87 VIVOTEK Network storage: Select to send the media files to a networked storage when a trigger is activated. Please refer to NAS server on page 100 for details. Note that only one NAS server can be configured. Click Save server to enable the settings.
- Page 88 VIVOTEK Click 20130120 to open the directory: The format is: HH (24r) Click to open the file list for that hour 2013/01/20 2013/01/20 Click to go back to the previous Click to delete level of the directory selected items Click to delete all...
- Page 89 VIVOTEK Add media Add media Click to open the media setting window. You can specify the type of media that will be sent when a trigger is activated. A total of 5 media settings can be configured. There are three choices of media types available: Snapshot, Video Clip, and System log.
- Page 90 VIVOTEK ■ Add date and time suffix to the file name Select this option to add a date/time suffix to the file name. For example: Snapshot_20101213_100341 File name prefix Date and time suffix The format is: YYYYMMDD_HHMMSS Click Save media to enable the settings.
- Page 91 VIVOTEK ■ Maximum file size Specify the maximum file size allowed. Some users may need to stitch the video clips together when searching and packing up forensic evidence. ■ File name prefix Enter the text that will be appended to the front of the file name.
- Page 92 VIVOTEK In the Event settings column, the Servers and Medias you configured will be listed; please make sure the Event -> Status is indicated as ON, in order to enable the event triggering action. When completed, click the Save event button to enable the settings and click Close to exit Event Settings page.
- Page 93 Please note that there is a limited number of customized scripts you can upload; if the current amount of customized scripts has reached the limit, an alert message will prompt. If you need more information, please contact VIVOTEK technical support. 20130213...
-
Page 94: Applications > Motion Detection
VIVOTEK Applications > Motion detection This section explains how to configure the Network Camera to enable motion detection. A total of three motion detection windows can be configured. 2010/12/10 17:08:56 2013/2/3 14:39:12 Motion Detection Setting 1: For normal situations hallway... - Page 95 VIVOTEK A green bar indicates that even though motions have been detected, the event has not been triggered because the image variations still fall under the preset threshold. Percentage = 30% If you want to configure other motion detection settings for day/night/schedule mode (e.g., for a different lighting condition), please click on Profile to open the Motion Detection Profile Settings page as shown below.
- Page 96 VIVOTEK NOTE NOTE: ► How does motion detection work? There are two motion detection parameters: Sensitivity and Percentage. In the illustration above, frame A and frame B are two sequential images. Pixel differences between the two frames are detected and highlighted in gray (frame C) and will be compared with the sensitivity setting. Sensitivity is a value that expresses the sensitivity to moving objects.
-
Page 97: Applications > Tampering Detection
VIVOTEK Applications > Tampering detection This section explains how to set up camera tamper detection. With tamper detection, the camera is capable of detecting incidents such as redirection, blocking or defocusing, or even spray paint. Please follow the steps below to set up the camera tamper detection function: 1. -
Page 98: Recording > Recording Settings
VIVOTEK Recording > Recording settings Advanced Mode This section explains how to configure the recording settings for the Network Camera. Recording Settings Recording Settings Click Add to open the recording setting window. On this page, you can define the adaptive recording, recording source, recording schedule, and recording capacity. - Page 99 VIVOTEK If you enable adaptive recording on a camera, only when an event is triggered on Camera A will the server record the full frame rate streaming data; otherwise, it will only request the I frame data during normal monitoring, thus effectively saves bandwidths and storage space.
- Page 100 VIVOTEK 2. Destination You can select a networked storage (NAS) for the recorded video files. If you have not configured a NAS server, see details in the following. NAS server Click Add NAS server to open the server setting window and follow the steps below to set up: 1.
- Page 101 VIVOTEK If successful, you will receive a test.txt file on the network storage server. 3. Enter a server name. 4. Click Save to complete the settings and click Close to exit the page. ■ Capacity: You can choose either the entire free space available or limit the reserved space. The recording size limit must be larger than the reserved amount for cyclic recording.
- Page 102 VIVOTEK Event f you want to enable recording notification, please click to configure event triggering settings. Please refer to Event > Event settings on page 81 for more details. When completed, select Enable this recording. Click Save to enable the setting and click Close to exit this page.
-
Page 103: Appendix
VIVOTEK Appendix URL Commands for the Network Camera/Video Server 1. Overview For some customers who already have their own web site or web control application, the Network Camera/Video Server can be easily integrated through URL syntax. This section specifies the external HTTP-based application programming interface. -
Page 104: General Cgi Url Syntax And Parameters
VIVOTEK 3. General CGI URL Syntax and Parameters When the CGI request includes internal camera parameters, these parameters must be written exactly as they are named in the camera or video server. The CGIs are organized in functionally-related directories under the cgi-bin directory. The file extension .cgi is required. -
Page 105: Security Level
VIVOTEK 4. Security Level SECURITY SUB-DIRECTORY DESCRIPTION LEVEL anonymous Unprotected. 1 [view] anonymous, viewer, 1. Can view, listen, talk to camera. dido, camctrl 2. Can control DI/DO, PTZ of the camera. 4 [operator] anonymous, viewer, Operator access rights can modify most of the camera’s... - Page 106 VIVOTEK 5. Get Server Parameter Values Note: The access right depends on the URL directory. Method: GET/POST Syntax: http://<servername>/cgi-bin/anonymous/getparam.cgi?[<parameter>] [&<parameter>…] http://<servername>/cgi-bin/viewer/getparam.cgi?[<parameter>] [&<parameter>…] http://<servername>/cgi-bin/operator/getparam.cgi?[<parameter>] [&<parameter>…] http://<servername>/cgi-bin/admin/getparam.cgi?[<parameter>] [&<parameter>…] Where the <parameter> should be <group>[_<name>]. If you do not specify any parameters, all the parameters on the server will be returned.
- Page 107 VIVOTEK Response: HTTP/1.0 200 OK\r\n Content-Type: text/html\r\n Context-Length: 33\r\n \r\n network_ipaddress=192.168.0.123\r\n User's Manual - 107...
-
Page 108: Set Server Parameter Values
VIVOTEK 6. Set Server Parameter Values Note: The access right depends on the URL directory. Method: GET/POST Syntax: http://<servername>/cgi-bin/anonymous/setparam.cgi? <parameter>=<value> [&<parameter>=<value>…][&return=<return page>] http://<servername>/cgi-bin/viewer/setparam.cgi? <parameter>=<value> [&<parameter>=<value>…][&return=<return page>] http://<servername>/cgi-bin/operator/setparam.cgi? <parameter>=<value> [&<parameter>=<value>…][&return=<return page>] http://<servername>/cgi-bin/admin/setparam.cgi? <parameter>=<value> [&<parameter>=<value>…][&return=<return page>] PARAMETER VALUE DESCRIPTION <group>_<name> value to assigned Assign <value>... - Page 109 VIVOTEK Example: Set the IP address of server to 192.168.0.123: Request: http://myserver/cgi-bin/admin/setparam.cgi?network_ipaddress=192.168.0.123 Response: HTTP/1.0 200 OK\r\n Content-Type: text/html\r\n Context-Length: 33\r\n \r\n network_ipaddress=192.168.0.123\r\n User's Manual - 109...
-
Page 110: Available Parameters On The Server
VIVOTEK 7. Available parameters on the server This chapter defines all the parameters which can be configured or retrieved from VIVOTEK network camera or video server. The general format of description is listed in the table below Valid values: VALID VALUES DESCRIPTION string[<n>]... - Page 111 VIVOTEK 7.1 system Group: system NAME VALUE DEFAULT SECURITY DESCRIPTION (get/set) hostname string[64] Video Host name of server Server (Network Camera, Wireless Network Camera, Video Server, Wireless Video Server). ledoff <boolean> Turn on (0) or turn off (1) all led indicators.
- Page 112 VIVOTEK -281: GMT-07:00 Arizona -240: GMT-06:00 Central America, Central Time, Mexico City, Saskatchewan -200: GMT-05:00 Eastern Time, New York, Toronto -201: GMT-05:00 Bogota, Lima, Quito, Indiana -180: GMT-04:30 Caracas -160: GMT-04:00 Atlantic Time, Canada, La Paz, Santiago -140: GMT-03:30 Newfoundland...
- Page 113 VIVOTEK 160: GMT 04:00 Abu Dhabi, Muscat, Baku, Tbilisi, Yerevan 180: GMT 04:30 Kabul 200: GMT 05:00 Ekaterinburg, Islamabad, Karachi, Tashkent 220: GMT 05:30 Calcutta, Chennai, Mumbai, New Delhi 230: GMT 05:45 Kathmandu 240: GMT 06:00 Almaty, Novosibirsk, Astana, Dhaka,...
- Page 114 VIVOTEK daylight_timezones string ,-360,-320, List time zone index which -280,-240, support daylight saving time. -241,-200, -201,-160, -140,-120, -80,-40,0, 40,41,80, 81,82,83, 120,140, 380,400,48 updateinterval 0 to Disable automatic time 3600, adjustment, otherwise, it 86400, indicates the seconds between 604800, NTP automatic update 2592000 intervals.
- Page 115 Subgroup of system: info (The fields in this group are unchangeable.) NAME VALUE DEFAULT SECURITY DESCRIPTION (get/set) modelname string[40] VS8100 Internal model name of the server (eg. IP7139) extendedmodelname string[40] VS8100 ODM specific model name of server (eg. DCS-5610). If it is not an ODM model, this field will be equal to “modelname”...
- Page 116 VIVOTEK language_count <integer> Number of webpage languages available on the server. language_i<0~(count-1)> string[16] <product Available language lists. dependent> customlanguage_maxcount <integer> Maximum number of custom languages supported on the server. customlanguage_count <integer> Number of custom languages which have been uploaded to the server.
- Page 117 VIVOTEK admin above can control PTZ (capability.ptzenabled > 0 or capability.eptz > 0) user_i0_name string[64] root User name of root user_i<1~20>_name string[64] <blank> User name user_i0_pass password[64] <blank> Root password user_i<1~20>_pass password[64] <blank> User password user_i0_privilege admin admin Root privilege user_i<1~20>_...
- Page 118 VIVOTEK pppoe resetip <boolean> 1 => Get ipaddress, subnet, router, dns1, dns2 from DHCP server at next reboot. 0 => Use preset ipaddress, subnet, rounter, dns1, and dns2. ipaddress <ip <product IP address of server. address> dependent> subnet <ip <blank>...
- Page 119 VIVOTEK certificate_time <integer> Certificate installed time. Represented in EPOCH certificate_size <integer> Certificate file size (in bytes) privatekey_exist <boolean> Private key installed flag (for TLS) privatekey_time <integer> Private key installed time. Represented in EPOCH privatekey_size <integer> Private key file size (in bytes) 7.4.2 QOS...
- Page 120 VIVOTEK 7.4.3 IPV6 Subgroup of network: ipv6 (capability.protocol.ipv6 > 0) NAME VALUE DEFAULT SECURITY DESCRIPTION (get/set) enable <boolean> Enable IPv6. addonipaddress <ip address> <blank> IPv6 IP address. addonprefixlen 0~128 IPv6 prefix length. addonrouter <ip address> <blank> IPv6 router address. addondns <ip address>...
- Page 121 VIVOTEK =1 and capability.nmediastream > s2_accessname string[32] video3.mjpg Http server push access name for stream 3 (capability.protocol.spush_mjpeg =1 and capability.nmediastream > anonymousviewing <boolean> Enable anoymous streaming viewing. 7.4.6 HTTPS port Subgroup of network: https_port (capability.protocol.https > 0) NAME VALUE DEFAULT...
- Page 122 VIVOTEK 7.4.7.1 RTSP multicast Subgroup of network_rtsp_s<0~(n-1)>: multicast, n is stream count (capability.protocol.rtp.multicast > 0) NAME VALUE DEFAULT SECURITY DESCRIPTION (get/set) alwaysmulticast <boolean> Enable always multicast. ipaddress <ip address> For n=0, Multicast IP address. 239.128.1.99 For n=1, 239.128.1.100, and so on.
- Page 123 VIVOTEK 7.5 IP Filter Group: ipfilter NAME VALUE DEFAULT SECURITY DESCRIPTION (get/set) enable <boolean> Enable access list filtering. admin_enable <boolean> Enable administrator IP address. admin_ip String[44] <blank> Administrator IP address. maxconnection 0~10 Maximum number of concurrent streaming connection(s). type 0, 1 Ipfilter policy : 0 =>...
- Page 124 VIVOTEK Bit 0 => Support camera control function; 0(not support), 1(support) Bit 1 => Built-in or external camera; 0 (external), 1(built-in) Bit 2 => Support pan operation; 0(not support), 1(support) Bit 3 => Support tilt operation; 0(not support), 1(support) Bit 4 => Support zoom operation;...
- Page 125 VIVOTEK operation; 0(not support), 1(support) Bit 5 => Support focus operation; 0(not support), 1(support) text string[60] <blank> Enclose caption. imprinttimestamp <boolean> Overlay time stamp on video. s<0~(m-1)>_codectype mjpeg, h264 h264 Video codec type. svc is only supported with stream 0.
- Page 126 VIVOTEK s<0~(m-1)>_h264_quant 1~5,99,100 Quality of video when choosing vbr in “ratecontrolmode”. Set the pre-defined quality level: 1: Median 2: Standard 3: Good 4: Detailed 5: Excellent 100: Use the quality level in "qpercent" 99: Use the quality level in "qvalue"...
- Page 127 VIVOTEK ypolicy imagequality the target bit rate is not sufficient to satisfy current encoded conditions. “framerate” indicates frame rate first. “imagequality” indicates image quality first. s<0~(m-1)>_mjpeg_rateco cbr, vbr cbr, constant bitrate ntrolmode vbr, fix quality s<0~(m-1)>_mjpeg_quant 1~5,99,100 Quality of JPEG video.
- Page 128 VIVOTEK s<0~(m-1)>_mjpeg_bitrate 1000~800000 6000000 Set bit rate in bps when choosing cbr in “ratecontrolmode”. s<0~(m-1)>_forcei Force I frame. 7.7 image setting per channel Group: image_c<0~(n-1)> for n channel products NAME VALUE DEFAULT SECURITY DESCRIPTION (get/set) brightness -5 ~ 5,100 Adjust brightness of image according to mode settings.
- Page 129 VIVOTEK blend perform de-interlace on it. This mode leads to better image quality, but consumes more resource. Blend: Use blend method to perform de-interlace. 7.8 Audio input per channel Group: audioin_c<0~(n-1)> for n channel products (capability.audioin>0) NAME VALUE DEFAULT SECURITY...
-
Page 130: Motion Detection Settings
VIVOTEK 7.9 Time Shift settings Group: timeshift, c for n channel products, m is stream number (capability.timeshift > 0) NAME VALUE DEFAUL SECURIT DESCRIPTION (get/set) enable <boolean> Enable time shift streaming. c<0~(n-1)>_s<0~( <boolean> Enable time shift streaming for m-1)>_allow specific stream. - Page 131 VIVOTEK profile is applied to. i<0~(m-1)>_begintime hh:mm 18:00 Begin time of schedule mode. i<0~(m-1)>_endtime hh:mm 06:00 End time of schedule mode. i<0~(m-1)>_win_i<0~2>_enable <boolean> Enable motion window. i<0~(m-1)>_win_i<0~2>_name string[40] <blank> Name of motion window. i<0~(m-1)>_win_i<0~2>_left 0 ~ 320 Left coordinate of window position.
-
Page 132: Express Link
VIVOTEK 7.12 DDNS Group: ddns (capability.ddns > 0) NAME VALUE DEFAULT SECURITY DESCRIPTION (get/set) enable <boolean> Enable or disable the dynamic DNS. provider Safe100, DyndnsDy Safe100 => safe100.net DyndnsDynamic, namic DyndnsDynamic => dyndns.org DyndnsCustom, (dynamic) DynInterfree, DyndnsCustom => dyndns.org CustomSafe100 (custom) DynInterfree =>dyn-interfree.it... -
Page 133: System Log
VIVOTEK active. “badnetwork” : Express Link is not supported under this network environment. string[64] <blank> The URL to connect to this camera by express link. 7.14 UPnP presentation Group: upnppresentation NAME VALUE DEFAULT SECURITY DESCRIPTION (get/set) enable <boolean> Enable or disable the UPnP presentation service. - Page 134 VIVOTEK 3: LOG_ERR 4: LOG_WARNING 5: LOG_NOTICE 6: LOG_INFO 7: LOG_DEBUG 7.17 camera PTZ control Group: camctrl (capability.camctrl.httptunnel > 0) NAME VALUE DEFAULT SECURITY DESCRIPTION (get/set) enableptztunnel <boolean> Enable HTTP tunnel for camera control. Group: camctrl_c<0~(n-1)> for n channel product (capability.ptzenabled)
- Page 135 VIVOTEK separated by “,” patroldwelling string[160] <blank> (For external device) The dwelling time of each patrol point, separated by “,” 7.18 UART control Group: uart (capability.nuart > 0) NAME VALUE DEFAULT SECURITY DESCRIPTION (get/set) ptzdrivers_i<0~19, string[40] <blank> Name of the PTZ driver.
- Page 136 VIVOTEK ptzdriver 0~19, The PTZ driver is used by this 127 (custom), (no driver) COM port. 128 (no driver) 7.19 SNMP Group: snmp (capability.snmp > 0) NAME VALUE DEFAULT SECURITY DESCRIPTION (get/set) SNMP v2 enabled. 0 for disable, 1 for enable SNMP v3 enabled.
- Page 137 Hyperlink of the logo vivotek.co logo_powerbyvvtk_hidden <boolean> 0 => display the power by vivotek logo 1 => hide the power by vivotek logo theme_option 1~3: One of the default themes. 4: Custom definition. theme_color_font string[7] #ffffff Font color...
-
Page 138: Privacy Mask
VIVOTEK 7.21 Privacy mask Group: privacymask_c<0~(n-1)> for n channel product NAME VALUE DEFAULT SECURITY DESCRIPTION (get/set) enable <boolean> Enable privacy mask. win_i<0~4>_enable <boolean> Enable privacy mask window. win_i<0~4>_name string[40] <blank> Name of the privacy mask window. win_i<0~4>_left 0 ~ 320 Left coordinate of window position. - Page 139 VIVOTEK naudioin Number of audio inputs. <positive integer> naudioout Number of audio outputs. <positive integer> nvideoin <positive integer> Number of video inputs. nvideoinprofile <positive integer> Number of video input profiles. nmediastream <positive integer> Number of media stream per channels. naudiosetting <positive integer>...
- Page 140 VIVOTEK Bit 7 => External or built-in PT; 0(built-in), 1(external) Bit 8 => Invalidate bit 1 ~ 7; 0(bit 1 ~ 7 are valid), 1(bit 1 ~ 7 are invalid) Bit 9 => Reserved bit; always Examples: PT8133: 0b1111 SD8362: 0b111111...
- Page 141 VIVOTEK protocol_rtp_multicast <boolean> Indicate whether to support scalable multicast. scalable protocol_rtp_multicast <boolean> Indicate whether to support backchannel multicast. backchannel protocol_rtp_tcp <boolean> Indicate whether to support RTP over TCP. protocol_rtp_http <boolean> Indicate whether to support RTP over HTTP. protocol_spush_mjpeg <boolean> Indicate whether to support server push MJPEG.
- Page 142 VIVOTEK rate separated by commas> videoin_mjpeg_maxfr <a list of available 30,30,30,30 0/7 Available maximum frame list. amerate maximum frame rate separated by commas> videoin_h264_maxfra <a list of available 30,30,30,30 0/7 Available maximum frame list. merate maximum frame rate separated by commas>...
- Page 143 VIVOTEK uart_httptunnel <boolean> Indicate whether to support HTTP tunnel for UART transfer. camctrl_httptunnel <boolean> The attribute indicates whether sending camera control commands through HTTP tunnel is supported. 0: Not supported 1: Supported camctrl_privilege <boolean> Indicate whether to support “Manage Privilege” of PTZ control in the Security page.
- Page 144 VIVOTEK product can be upgraded to VVXX. (TCVV<->TCXX is excepted) evctrlchannel <boolean> Indicate whether to support HTTP tunnel for event/control transfer. joystick <boolean> Indicate whether to support joystick control. storage_dbenabled <boolean> Media files are indexed in database. nanystream 0, <positive number of any media stream integer>...
- Page 145 VIVOTEK 7.23 Customized event script Group: event_customtaskfile_i<0~2> PARAMETER VALUE Default SECURITY DESCRIPTION (get/set) name string[40] NULL Custom script identification of this entry. date string[20] NULL Date of custom script. time string[20] NULL Time of custom script. 7.24 Event setting Group: event_i<0~2>...
- Page 146 VIVOTEK 0 ~ 7 Indicate the source id of vi trigger. This field is required when trigger condition is “vi”. One bit represents one digital input. The LSB indicates VI 0. visignal 0 ~ 1 Indicate the source of video input signal loss.
- Page 147 VIVOTEK begintime hh:mm 00:00 Begin time of the weekly schedule. endtime hh:mm 24:00 End time of the weekly schedule. (00:00 ~ 24:00 sets schedule as always on) action_server_i<0~4>_en 0, 1 Enable or disable this server action. able action_server_i<0~4>_m NULL, 0~4 NULL Index of the attached media.
- Page 148 VIVOTEK 7.25 Server setting for event action Group: server_i<0~4> PARAMETER VALUE DEFAULT SECURITY DESCRIPTION (get/set) name string[40] NULL Identification of this entry type email, email Indicate the server type: ftp, “email” = email server http, “ftp” = FTP server “http” = HTTP server “ns”...
- Page 149 VIVOTEK 7.26 Media setting for event action Group: media_i<0~4> (media_freespace is used internally.) PARAMETER VALUE DEFAULT SECURITY DESCRIPTION (get/set) name string[40] NULL Identification of this entry type snapshot, snapshot Media type to send to the server or systemlog, store on the server.
- Page 150 VIVOTEK 7.27 Recording Group: recording_i<0~1> PARAMETER VALUE DEFAULT SECURITY DESCRIPTION (get/set) name string[40] NULL Identification of this entry. enable 0, 1 Enable or disable this recording. priority 0, 1, 2 Indicate the priority of this recording: “0” indicates low priority.
- Page 151 VIVOTEK weekday 0~127 Indicate which weekday is scheduled. One bit represents one weekday. bit0 (LSB) = Saturday bit1 = Friday bit2 = Thursday bit3 = Wednesday bit4 = Tuesday bit5 = Monday bit6 = Sunday For example, to detect events on...
- Page 152 VIVOTEK adaptive_preevent Indicate when is the adaptive recording started before the event trigger point (seconds) adaptive_postevent 0~10 Indicate when is the adaptive recording stopped after the event trigger point (seconds) Unit: Mega bytes. maxsize 100~2048 When this condition is reached, recording file is truncated.
- Page 153 VIVOTEK localityname string[128] Asia The locality name in the certificate information. organizationname string[64] VIVOTEK Organization name in the Inc. certificate information. unit string[32] VIVOTEK Organizational unit name in the Inc. certificate information. commonname string[64] www.vivotek Common name in the certificate .com...
-
Page 154: Drive The Digital Output
VIVOTEK 8. Useful Functions 8.1 Drive the Digital Output (capability.ndo > 0) Note: This request requires Viewer privileges. Method: GET/POST Syntax: http://<servername>/cgi-bin/dido/setdo.cgi?do1=<state>[&do2=<state>] [&do3=<state>][&do4=<state>] Where state is 0 or 1; “0” means inactive or normal state, while “1” means active or triggered state. - Page 155 VIVOTEK Example: Query the status of digital input 1 . Request: http://myserver/cgi-bin/dido/getdi.cgi?di1 Response: HTTP/1.0 200 OK\r\n Content-Type: text/plain\r\n Content-Length: 7\r\n \r\n di1=1\r\n 8.3 Query Status of the Digital Output (capability.ndo > 0) Note: This request requires Viewer privileges Method: GET/POST Syntax: http://<servername>/cgi-bin/dido/getdo.cgi?[do0][&do1][&do2][&do3]...
-
Page 156: Capture Single Snapshot
VIVOTEK \r\n do1=1\r\n 8.4 Capture Single Snapshot Note: This request requires Normal User privileges. Method: GET/POST Syntax: http://<servername>/cgi-bin/viewer/video.jpg?[channel=<value>][&resolution=<value>] [&quality=<value>][&streamid=<value>] If the user requests a size larger than all stream settings on the server, this request will fail. PARAMETER VALUE DEFAULT... -
Page 157: Account Management
VIVOTEK 8.5 Account Management Note: This request requires Administrator privileges. Method: GET/POST Syntax: http://<servername>/cgi-bin/admin/editaccount.cgi? method=<value>&username=<name>[&userpass=<value>][&privilege=<value>] [&privilege=<value>][…][&return=<return page>] PARAMETER VALUE DESCRIPTION method Add an account to the server. When using this method, the “username” field is necessary. It will use the default value of other fields if not specified. -
Page 158: System Logs
VIVOTEK 8.6 System Logs Note: This request require Administrator privileges. Method: GET/POST Syntax: http://<servername>/cgi-bin/admin/syslog.cgi Server will return the most up-to-date system log. Return: HTTP/1.0 200 OK\r\n Content-Type: text/plain\r\n Content-Length: <syslog length>\r\n \r\n <system log information>\r\n 8.7 Upgrade Firmware Note: This request requires Administrator privileges. - Page 159 VIVOTEK 8.8 Camera Control (capability.ptzenabled) Note: This request requires Viewer privileges. Method: GET/POST Syntax: http://<servername>/cgi-bin/camctrl/camctrl.cgi?[channel=<value>][&camid=<value>] [&move=<value>] – Move home, up, down, left, right [&focus=<value>] – Focus operation [&iris=<value>] – Iris operation [&auto=<value>] – Auto pan, patrol [&zoom=<value>] – Zoom in, out [&zooming=<value>&zs=<value>]...
- Page 160 VIVOTEK speedzoom -5 ~ 5 Set the zoom speed. speedfocus -5 ~ 5 Set the focus speed. speedapp -5 ~ 5 Set the auto pan/patrol speed. auto Auto pan. patrol Auto patrol. stop Stop camera. zoom wide Zoom larger view with current speed.
- Page 161 VIVOTEK [&x=<value>&y=<value>&videosize=<value>&resolution=<value>&stretch=<value>] – Click on image (Move the center of image to the coordination (x,y) based on resolution or videosize.) [ [&speedpan=<value>][&speedtilt=<value>][&speedzoom=<value>][&speedapp=<value>] ] – Set speeds [&return=<return page>] Example: http://myserver/cgi-bin/camctrl/eCamCtrl.cgi?channel=0&stream=0&move=right http://myserver/cgi-bin/camctrl/eCamCtrl.cgi?channel=0&stream=1&vx=2&vy=2&vz=2 http://myserver/cgi-bin/camctrl/eCamCtrl.cgi?channel=0&stream=1&x=100&y=100& videosize=640x480&resolution=640x480&stretch=0 PARAMETER VALUE DESCRIPTION channel <0~(n-1)> Channel of video source.
- Page 162 VIVOTEK videosize <window size> The size of plug-in (ActiveX) window in web page resolution <window size> The resolution of streaming. stretch <boolean> 0 indicates that it uses resolution (streaming size) as the range of the coordinate system. 1 indicates that it uses videosize (plug-in size) as the range of the coordinate system.
- Page 163 VIVOTEK 8.11 ePTZ Recall (capability.eptz > 0) Note: This request requires camctrl privileges. Method: GET/POST Syntax: http://<servername>/cgi-bin/camctrl/eRecall.cgi?channel=<value>&stream=<value>& recall=<value>[&return=<return page>] PARAMETER VALUE DESCRIPTION channel <0~(n-1)> Channel of the video source. stream <0~(m-1)> Stream. recall Text string less than One of the present positions to recall.
- Page 164 VIVOTEK relative path according to the current path. If you omit this parameter, it will redirect to an empty page. 8.13 ePTZ Preset Locations (capability.eptz > 0) Note: This request requires Operator privileges. Method: GET/POST Syntax: http://<servername>/cgi-bin/operator/ePreset.cgi?channel=<value>&stream=<value> [&addpos=<value>][&delpos=<value>][&return=<return page>] PARAMETER...
- Page 165 VIVOTEK 8.14 IP Filtering Note: This request requires Administrator access privileges. Method: GET/POST Syntax: http://<servername>/cgi-bin/admin/ipfilter.cgi? method=<value>&[start=<ipaddress>&end=<ipaddress>][&index=<value>] [&return=<return page>] PARAMETER VALUE DESCRIPTION method addallow Add allowed IP address range to the server. Start and end parameters must be specified. If the index parameter is specified, it will try to add starting from the index position.
- Page 166 VIVOTEK 8.14.1 IP Filtering for ONVIF Syntax: http://<servername>/cgi-bin/admin/ipfilter.cgi?type[=<value>] http://<servername>/cgi-bin/admin/ipfilter.cgi?method=add<v4/v6>&ip=<ipaddress>[&index=<val ue>][&return=<return page>] http://<servername>/cgi-bin/admin/ipfilter.cgi?method=del<v4/v6>&index=<value>[&return=<retu rn page>] PARAMETER VALUE DESCRIPTION type NULL Get IP filter type allow, deny Set IP filter type method addv4 Add IPv4 address into access list. addv6 Add IPv6 address into access list.
- Page 167 VIVOTEK ------------------------------------------------------------------------- POST /cgi-bin/operator/uartchannel.cgi x-sessioncookie: string[22] content-type: application/x-vvtk-tunnelled pragma : no-cache cache-control : no-cache content-length: 32767 expires: Sun, 9 Jam 1972 00:00:00 GMT User must use GET and POST to establish two channels for downstream and upstream. The x-sessioncookie in GET and POST should be the same to be recognized as a pair for one session. The contents of upstream should be base64 encoded to be able to pass through a proxy server.
- Page 168 VIVOTEK cache-control : no-cache content-length: 32767 expires: Sun, 9 Jam 1972 00:00:00 GMT User must use GET and POST to establish two channels for downstream and upstream. The x-sessioncookie in GET and POST should be the same to be recognized as a pair for one session. The contents of upstream should be base64 encoded to be able to pass through the proxy server.
- Page 169 VIVOTEK 8.19 Senddata (capability.nuart > 0) Note: This request requires Viewer privileges. Method: GET/POST Syntax: http://<servername>/cgi-bin/viewer/senddata.cgi? [com=<value>][&data=<value>][&flush=<value>] [&wait=<value>] [&read=<value>] PARAMETER VALUE DESCRIPTION 1 ~ <max. com port The target COM/RS485 port number. number> data <hex decimal The <hex decimal data> is a series of digits from 0 ~ 9, A ~ data>[,<hex decimal...
- Page 170 VIVOTEK 8.20 Storage managements (capability.storage.dbenabled > 0) Note: This request requires administrator privileges. Method: GET and POST Syntax: http://<servername>/cgi-bin/admin/lsctrl.cgi?cmd=<cmd_type>[&<parameter>=<value>…] The commands usage and their input arguments are as follows. PARAMETER VALUE DESCRIPTION cmd_type <string> Required. Command to be executed, including search, insert, delete, update, and queryStatus.
- Page 171 VIVOTEK Indicate if the file is locked or not. 0: file is not locked. 1: file is locked. A locked file would not be removed from UI or cyclic storage. triggerTime <text> Optional. Indicate the event trigger time. (not the file created time) Format is “YYYY-MM-DD HH:MM:SS”...
- Page 172 VIVOTEK PARAMETER VALUE DESCRIPTION label <integer primary key> Required. Identify the designated record. Ex. label=1 isLocked <boolean> Required. Indicate if the file is locked or not. Ex. Update records whose key numbers are 1 and 5 to be locked status.
- Page 173 VIVOTEK Element name Type Description label <Integer Primary Key> A unique integer. triggerType <Text> Indicate the event trigger type. mediaType <Text> Indicate the file media type. destPath <Text> Indicate the file location in camera. resolution <Text> Indicate the media file resolution.
- Page 174 VIVOTEK </i0> <i1> <label>2</label> <triggerType>di</triggerType> <mediaType>snapshot</mediaType> <destPath>/mnt/auto/NCMF/123/123.jpg</destPath> <resolution>800x600</resolution> <isLocked>0</isLocked> <triggerTime>2009-01-24 12:01:00</triggerTime> <backup>0</backup> </i1> </stormgr> Ex. Local storage status in XML format. <?xml version="1.0" encoding="ISO-8859-1" ?> <stormgr version="0.0.0.1"> <disk> <i0> <name>SDcard</name> <status>ready</status> <totalSize>7824444</totalSize> <freeSize>7824388</freeSize> <usedSize>56</usedSize> </i0> </disk> </stormgr> Ex. Local storage status in javascript format.
- Page 175 VIVOTEK Ex. Query local storage status and call for javascript format return message. http://<servername>/cgi-bin/admin/lsctrl.cgi?cmd=queryStatus&retType=javascript There are two cgi commands for download and composing jpegs to avi format. For download single selected file, you can use “/cgi-bin/admin/downloadMedias.cgi”. Just assign the request file path to this cgi.
- Page 176 VIVOTEK 8.21 Virtual input (capability.nvi > 0) Note: Change virtual input (manual trigger) status. Method: GET/POST Syntax: http://<servername>/cgi-bin/admin/setvi.cgi?vi0=<value>[&vi1=<value>][&vi2=<value>] [&return=<return page>] PARAMETER VALUE DESCRIPTION vi<num> state[(duration)nstate] Ex: vi0=1 Setting virtual input 0 to trigger state Where "state" is 0, 1. “0”...
- Page 177 VIVOTEK Examples: 1. setvi.cgi?vi0=0(15000)1 2. setvi.cgi?vi0=1 Request 2 will not be accepted during the execution time(15 seconds). 8.22 Open Timeshift Stream (capability.timeshift > 0, timeshift_enable=1, timeshift_c<n>_s<m>_allow=1) Note: This request requires Viewer access privileges. Syntax: For HTTP push server (MJPEG): http://<servername>/<network_http_s<m>_accessname>?maxsft=<value>[&tsmode=<value>&refti me=<value>&forcechk&minsft=<value>]...
- Page 178 VIVOTEK forcechk Check if the requested stream enables timeshift, feature and if minsft is achievable. If false, return “415 Unsupported Media Type”. minsft <positive How many seconds of cached stream client can integer> accept at least. (Used by forcechk) Return Code...
- Page 179 VIVOTEK 8.24 Upload Files Note: This request requires Administrator privileges. Method: POST Syntax: For daylight saving time configuration file: http://<servername>/cgi-bin/admin/upload_dst.cgi Post data: filename =<file name>\r\n \r\n <multipart encoded form data> For language file: http://<servername>/cgi-bin/admin/upload_lan.cgi Post data: filename =<file name>\r\n \r\n <multipart encoded form data>...
- Page 180 VIVOTEK 8.25 Media on demand (capability.localstorage.modnum > 0) Media on demand allows users to select and receive/watch/listen to metadata/video/audio contents on demand. Note: This request requires Viewer access privileges. Syntax: rtsp://<servername>/mod.sdp?[&stime=<value>][&etime=<value>][&length =<value>][&loctime =<value>][&file=<value>][&tsmode=<value>] PARAMETER VALUE DEFAULT DESCRIPTION stime <YYYYMMDD_HHMMSS.MMM> N/A Start time.
-
Page 181: Site Survey
VIVOTEK 8.26 Start wireless connection Note: This request requires Administrator privileges. Syntax: http://<servername>/cgi-bin/admin/connect_ap.cgi This command is only used in pure wireless model (e.g., a model without Ethernet. Ex: IP8336W). This command triggers camera to start to connect to a Wi-Fi access point. Before use this command, please setup your wireless settings properly. - Page 182 VIVOTEK 8.28 Remote Camera Control (capability.remotecamctrl.master > 0) Note: This request requires Viewer access privileges. Method: GET/POST Syntax: http://<servername>/cgi-bin/camctrl/rCamCtrl.cgi?[channel=<value>] [&x=<value>&y=<value>&r=<value>&videosize=<value>&resolution=<value>&stretch=<value>] – Click on image [&camid=<value>] [&return=<return page>] Example: http://myserver/cgi-bin/camctrl/rcamctrl.cgi?channel=0&x=300&y=200&r=100&resolution=1920x 1920&videosize=1920x1920&strech=1&camid=0 PARAMETER VALUE DESCRIPTION channel <0~(n-1)> Channel of video source. <integer>...
- Page 183 VIVOTEK return <return page> Redirect to the page <return page> after the parameter is assigned. The <return page> can be a full URL path or relative path according to the current path. If you omit this parameter, it will redirect to an empty page.
- Page 184 VIVOTEK 8.29 Upload map file (capability.remotecamctrl.master > 0) Note: This request requires Admin privileges. Method: POST Syntax: http://<servername>/cgi-bin/admin/upload_map.cgi?camid=<value> – Upload map file Return code - Upload fail: upload_result=1 upload_msg=<value> - Upload success: upload_result=0 upload_msg=<value> [ip=<value>] , not exist in map file: default ip = ""...
-
Page 185: Technical Specifications
DC 12V Power Adapter Others Quick installation guide, Warranty card All speci cations are subject to change without notice. Copyright © 2013 VIVOTEK INC. All rights reserved. Distributed by: VIVOTEK INC. 6F, No.192, Lien-Cheng Rd., Chung-Ho, New Taipei City, 235, Taiwan, R.O.C. -
Page 186: Technology License Notice
VIVOTEK Technology License Notice AMR-NB Standard THIS PRODUCT IS LICENSED UNDER THE AMR-NB STANDARD PATENT LICENSE AGREEMENT. WITH RESPECT TO THE USE OF THIS PRODUCT, THE FOLLOWING LICENSORS’ PATENTS MAY APPLY: TELEFONAKIEBOLAGET ERICSSON AB: US PAT. 6192335; 6275798; 6029125; 6424938; 6058359. NOKIA CORPORATION: US PAT. -
Page 187: Electromagnetic Compatibility (Emc)
があいます。この場合には使用者が適切な対策を講ずるよう要求されるこたがあります。 Liability VIVOTEK Inc. cannot be held responsible for any technical or typographical errors and reserves the right to make changes to the product and manuals without prior notice. VIVOTEK Inc. makes no warranty of any kind with regard to the material contained within this document, including, but not limited to, the implied warranties of merchantability and fitness for any particular purpose.