Table of Contents
Advertisement
Quick Links
Operating Instructions
DECT Portable Station
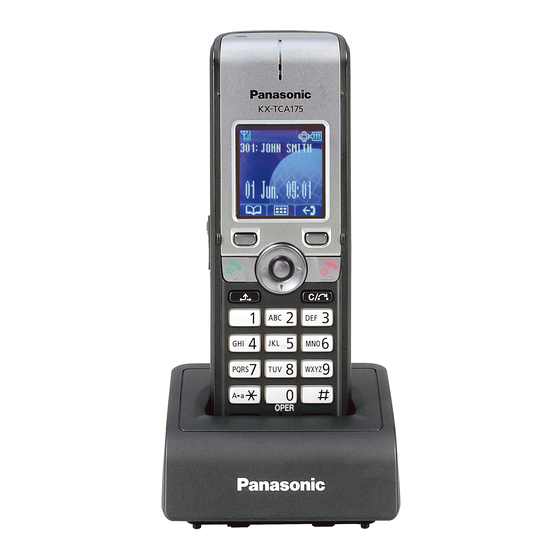
KX-TCA175
Model No.
Thank you for purchasing a Panasonic DECT Portable Station.
Please read this manual carefully before using this product and save this manual for
future use.
Please use only the battery provided and charge the battery for about 7 hours before
using the handset for the first time.
Note:
In this manual, the suffix of each model number is omitted unless necessary.
Advertisement
Table of Contents

Related Manuals for Panasonic KX-TCA175


Summary of Contents for Panasonic KX-TCA175
-
Page 1: Operating Instructions
DECT Portable Station KX-TCA175 Model No. Thank you for purchasing a Panasonic DECT Portable Station. Please read this manual carefully before using this product and save this manual for future use. Please use only the battery provided and charge the battery for about 7 hours before using the handset for the first time. -
Page 2: Table Of Contents
Table of Contents Table of Contents Before Initial Use ..................4 Accessories (included) ..................4 Installation ......................5 Battery Installation ..................5 Charger Connection ..................5 Charging the Battery ...................6 Charger Wall Mounting ................6 Attaching the Belt Clip .................7 Attaching the Phone Strap ................8 Setting the Password ..................8 Before Operating the Handset ..............9 Location of Controls ..................9 Key Lock ....................11... - Page 3 Table of Contents Storing an Item Using the PBX Extension Phonebook ......51 Editing Category Names ................52 Assigning Hot Keys ..................53 Selecting the Type of Hot Key Dialling ............54 Entering Characters ..................55 Character Mode Table ................56 Locking the Handset Phonebook ...............57 Locking the Handset Phonebook ..............57 Unlocking the Handset Phonebook ............57 Unlocking the Handset Phonebook Temporarily ........57...
-
Page 4: Before Initial Use
Before Initial Use Please read "Important Information" on page 78 before using. Read and understand all instructions. For System Requirements, see page 86. Before Initial Use Accessories (included) AC adaptor: 1 Charger: 1 [Part No.] For KX-TCA175CE users: PQLV219CE For KX-TCA175UK users: PQLV219E For KX-TCA175AL users: PQLV219AL Battery: 3 Belt Clip: 1... -
Page 5: Installation
• Fasten the AC adaptor cord to the cord holder. • Use only the included Panasonic AC adaptor. – For KX-TCA175CE users: Part No. PQLV219CE – For KX-TCA175UK users: Part No. PQLV219E – For KX-TCA175AL users: Part No. PQLV219AL WARNING •... -
Page 6: Charging The Battery
Before Initial Use Charging the Battery At the time of shipment, the battery is not charged. Please charge the battery for about 7 hours before using the handset for the first time. • When the battery has been completely charged, the charge indicator will change from red to green. -
Page 7: Attaching The Belt Clip
Before Initial Use Attaching the Belt Clip You can attach the handset to your belt by following the steps below. [To attach] Insert the clip into the designated notches in the handset. [To remove] Remove the belt clip. -
Page 8: Attaching The Phone Strap
Before Initial Use Attaching the Phone Strap Open the battery cover, run the strap through the strap hole, and then loop it around the hook. Setting the Password The handset password is not set by default. You must register a handset password (4 digits) before use. -
Page 9: Before Operating The Handset
Before Operating the Handset Location of Controls Before Operating the Handset The headset is an optional L Press POWER for accessory. more than 2 seconds. [Power On] Standby mode [Power Off] Blank display Open the cover. [Back View] Right Left Centre Down You can use the... - Page 10 Before Operating the Handset I Microphone J Display Refer to "Display" on page 17. K Left/Right Soft Key Used to select the function displayed directly above each key. Functions are displayed based on the current context. Also used as a Function Key, Flexible Key, or Hot Key when they are assigned. To edit the soft keys, see "Key Option"...
-
Page 11: Key Lock
Before Operating the Handset Key Lock You can lock all keys other than the Navigator Key while the handset is in standby mode. One of 4 key lock types can be selected. (See "Key Option" on page 65.) [Display Icon] Unlocked Locked Press Centre for more than 2 seconds to lock/... -
Page 12: Selecting The Display Language
Before Operating the Handset Selecting the Display Language You can select the language displayed on your handset. Press Centre. Select " Press Centre. Select "Display Setting Handset". Option". Press Centre. Select Press Centre. Select the desired "Language". language. Press Centre. *1 You can select "Auto"... -
Page 13: Editing The Standby Display Name
Before Operating the Handset Editing the Standby Display Name You can edit the name displayed when the handset is in standby mode. Select " Select "Display Setting Press Centre. Press Centre. Handset". Option". Press Centre. Select "Standby Press Centre. Select "Edit". Display". -
Page 14: Editing The Names Of The Flexible Keys
Before Operating the Handset Editing the Names of the Flexible Keys You can edit a name for each Flexible Key of the handset. Press Centre. Select " Press Centre. Select "Key Setting Handset". Option". Press Centre. Select "Flex Press Centre. Select the desired base. -
Page 15: Adjusting The Ringer Volume
Before Operating the Handset Adjusting the Ringer Volume Press Centre. Select " Press Centre. Select the desired Ringer setting.(Step Up/ Volume". Step Down/Level 1-6/Off) Press Centre. • To set the ringer pattern, see "Incoming Option" on page 64. Adjusting the Ringer Volume or Turning the Ringer off while Ringing While receiving a call [To adjust the ringer volume]... -
Page 16: Adjusting The Receiver/Speaker/Headset Volume
Before Operating the Handset Adjusting the Receiver/Speaker/Headset Volume During a conversation Press Up or Down to adjust the volume. (Receiver Volume—Level 1-5, Speaker Volume—Level 1-6, Headset Volume—Level 1-5) -
Page 17: Display
Before Operating the Handset Display Pictograph Within range of a Cell Station (CS) Battery Indicator Out of range Full Intercom Indicator Off-hook Status Message Waiting Needs to be charged. Phonebook Navigation Key Guidance Handset Status Information Auto Answer Do Not Disturb (See page 37.) Call Forwarding (See page 37.) Ringer Volume Off (See page 15.) Date and Time Display... -
Page 18: Soft Keys
Before Operating the Handset Soft Keys Icons and information shown on the display will vary depending on the context. To select an item shown on the display, press the corresponding soft key. Opens the Phonebook. Inserts a dialling pause. Pressing this key for more than 2 seconds locks the Phonebook. - Page 19 Before Operating the Handset Displayed when in Greek character Disconnects the current call and entry mode. allows you to make another call without hanging up. Pressing this key switches to Special character (Extended 1) entry mode. Displayed when in Special character Used to register the handset with the (Extended 1) entry mode.
-
Page 20: Operation Outline
Before Operating the Handset Operation Outline Handset functions are accessed through the display menu and selected with the Navigator Key and soft keys. The guidance display is shown in standby mode for easy operation. [Function Keys] [In standby mode] [Flexible Keys] [Main Menu] [Handset Phonebook] [Incoming Call Log]... -
Page 21: Function Menus
Before Operating the Handset • To enter characters, see page 55. To search for an item stored in the Phonebook, see page 29. Function Menus Press the Navigator Key to display the main and sub menus. Main Menu—While in Standby Mode Incoming Log: Enters the Incoming Call Log. -
Page 22: Function Keys
Before Operating the Handset Function Keys Handset functions can be activated through the display key list. Press the Navigator Key to display the function key list. 1: Redial Redials the last dialled number. 2: Fwd/DND Displays and/or sets Call Forwarding and Do Not Disturb. 3: Flash/Recall Disconnects the current call and allows you to make another call without hanging up. - Page 23 Before Operating the Handset Shortcut Combinations Redial H/S Phonebook Fwd/DND PBX Phonebook Flash/Recall EXT Phonebook Auto Answer PBX Program Conference Incoming Log Pause Outgoing Log • For operation, see page 25. • To edit the function key list, see "Key Option" on page 65.
-
Page 24: Flexible Keys
Before Operating the Handset Flexible Keys A Flexible Key can be used either to seize a line in order to make or receive an outside call, or used as a function key. Press the Navigator Key to display the Flexible Key list. Here you can access the 12 Flexible Keys. -
Page 25: Operation
Operation Making Calls Calling Operation To an extension Extension No. Extension No. To an outside party –Using the Line Access Numbers Outside Phone No. Outside Line Group No. –Using Flexible Keys idle Flexible Key No. [0-9, , #] Outside Phone No. (idle Flexible Key) Using the Outgoing Call Log Using the Incoming Call Log... - Page 26 Operation Calling *1 *2 Using the PBX System Phonebook (if required) Name Using the PBX Extension Phonebook (if required) Name One-touch Dialling To store (" ") PBX Program (Flexible Key) Desired No. To dial (One-touch Dialling key) Hot Key Dialling To dial Press the dialling key assigned as a Hot Key for more than 1 second.
- Page 27 Operation Hot Line To store Desired Phone No. To set/cancel Cancel To dial Operator Call System Speed Dialling To dial System Speed Dial No. (3 digits) Doorphone Call Doorphone No. (2 digits) Automatic Callback Busy To set To cancel While hearing a busy tone To answer from an idle extension To answer from an idle outside line While hearing a callback ring...
- Page 28 Operation • To enter characters, see page 55. • You can confirm that the number was dialled correctly before calling (Predialling) by entering the number, then pressing • To clear an entire number while predialling, press for more than 1 second. •...
-
Page 29: Searching For An Item Stored In The Phonebook
Operation Searching for an item stored in the Phonebook You can search for an item in the Phonebook by following the steps below. Handset Phonebook Scrolling through all items Press the left Press Up or Down repeatedly. soft key. Searching by name or first character(s) of name Enter name or the first character(s) of the desired name. - Page 30 Operation Searching by category Press the left Press #. Select the desired Press Centre. soft key. category number. Enter name. Press Centre. Press Select the Up or Down. desired item. (if required) *1 You can enter up to 5 characters. Corresponding names appear as the characters are entered. *2 This step can be omitted.
- Page 31 Operation PBX System Phonebook Scrolling through all items Press the left Press the left Press Up or Down repeatedly. soft key. soft key. Searching by name or first character(s) of name Enter name or the first character(s) of the desired name. Press the left Press the left soft key.
- Page 32 Operation PBX Extension Phonebook Scrolling through all items Press the left Press the left Press the left Press Up or Down soft key. soft key. soft key. repeatedly. Searching by name or first character(s) of name Enter name or the first character(s) of the desired name.
-
Page 33: Receiving Calls
Operation Receiving Calls Receiving An Intercom Call/An Outside Call/A Group Call An Intercom Call An Outside Call on a specific line rapidly flashing Flexible Key [0-9, , #] (rapidly flashing Flexible Key) Call Pickup Directed Extension No. Group Group No. (2 digits) •... -
Page 34: Caller Id
Operation Caller ID If an outside call that contains Caller ID information (a caller’s name and telephone number) is received, this information will be logged in the incoming call log and displayed on the handset in one of the two following ways: –... -
Page 35: During A Conversation
Operation During a Conversation Transferring a Call To an extension Extension No. To an outside party Outside Phone No. Outside Line Group No. Holding To hold (Regular Hold) To hold (Exclusive Call Hold) To retrieve a call –An Intercom Call –An Outside Call slowly flashing Flexible Key [0-9, , #]... - Page 36 Operation • To return to the call before the transfer destination answers, press • The method used to hold a call depends on the Call Hold mode (Regular Hold/Exclusive Call Hold). Ask your manager what the current mode is. • To hold several outside calls, you need to assign Flexible Keys (Single Line/Loop Line/ Trunk Group) as necessary beforehand.
-
Page 37: Useful Features
Operation Useful Features Call Forwarding Both Calls Outside Calls Intercom Calls Destination All Calls Extension No. Busy No answer Outside Line Outside Busy/No answer Access No. Phone No. Cancel Follow Me Your Extension No. Follow Me Cancel Do Not Disturb Both Calls Outside Calls Cancel... - Page 38 Operation Call Waiting To talk to the new party (While hearing the Call Waiting tone) –To terminate the current status –To hold and then talk to the new party rapidly flashing Flexible Key [0-9, , #] (rapidly flashing Flexible Key) Disregard this step if both parties are extensions.
- Page 39 Operation Absent Message To set Will Return Soon Gone Home At Ext %%%% + Extension No. Back at %%:%% + Hour:Minute Out until %%/%% + Month/Day In a Meeting Enter required no. To cancel Log-in/Log-out For Log-in Specified ICD Group Extension No.
- Page 40 Operation Message Waiting Caller –To leave a message waiting indication When the called extension is busy or does not answer –To cancel a message waiting indication Desired Extension No. Called extension –To call back –To clear message waiting indications left on your extension Your Extension No.
- Page 41 Operation To clear message waiting indications (one-touch operation) (One-touch dialling key) • For more information, refer to the user documentation for your PBX.
-
Page 42: Making Use Of The Voice Mail Service
Operation Making Use of the Voice Mail Service Listening to a Message From your own extension KX-TVM series Listen to Message Extension No. Deliver Message Mailbox Password Mailbox Management • If you have no password, you can skip Automated Attendant the last step. - Page 43 Operation Leaving a Message From your own extension Mailbox Password From someone else's extension VPS Extension No. Mailbox No. Mailbox Password . If you have no password, you can skip the last step. Enter the desired Leave a message mailbox no. To send the message immediately (KX-TVM series) (KX-TVP series)
-
Page 44: Using The Handset Phonebook
Using the Handset Phonebook Handset Phonebook You can store up to 200 items with names, phone numbers, and category numbers in the Using the Handset Phonebook handset for easy access. You can set unique ringer patterns and LED patterns for each category to identify incoming calls. -
Page 45: Storing An Item In The Handset Phonebook
Using the Handset Phonebook Storing an Item in the Handset Phonebook Storing a New Item Enter name. (max. 16 characters) Press Centre. Select " Press Centre. Phonebook". Enter phone number. (max. 32 digits) Press Centre. Press Press Centre. Up or Down. Select the desired Press Centre. -
Page 46: Editing A Stored Item
Using the Handset Phonebook Editing a Stored Item Enter name. Press the left Press Centre. Press soft key. Up or Down. Select the Press Centre. Press Centre. Select "Edit". desired item. (if required) Edit name. (max. 16 characters) Press Centre. Press Press Centre. -
Page 47: Storing An Item Using The Predialling
Using the Handset Phonebook Storing an Item Using the Predialling Enter phone number. Enter name. (max. 32 digits) (max. 16 characters) Press Centre. Edit phone number. (max. 32 digits) Press Centre. Press (if required) Press Centre. Up or Down. Select the desired Press Centre. -
Page 48: Storing An Item Using The Outgoing Call Log
Using the Handset Phonebook Storing an Item Using the Outgoing Call Log Press the Select the Press Centre. Select "Save right soft key. desired item. Phonebook". Enter a name, phone number, and select the category number (1-9) or "Off". Press Centre. Press Centre for "Save". -
Page 49: Storing An Item Using The Incoming Call Log
Using the Handset Phonebook Storing an Item Using the Incoming Call Log Press the Press the right soft key. right soft key. Select the Press Centre. desired item. Press Up or Down. Enter a name, phone number, and select the category number (1-9) or "Off". -
Page 50: Storing An Item Using The Pbx System Phonebook
Using the Handset Phonebook Storing an Item Using the PBX System Phonebook Enter name. Press the left Press the left soft key. soft key. Press Centre. Press Select the Press Centre. Up or Down. desired item. (if required) Enter a name, phone number, and select the category number (1-9) or "Off". -
Page 51: Storing An Item Using The Pbx Extension Phonebook
Using the Handset Phonebook Storing an Item Using the PBX Extension Phonebook Enter name. Press the left Press the left Press the left soft key. soft key. soft key. Press Centre. Press Select the Press Centre. Up or Down. desired item. (if required) Enter a name, phone number, and select the category number (1-9) or... -
Page 52: Editing Category Names
Using the Handset Phonebook Editing Category Names You can edit the names of the categories in the Handset Phonebook. Press Centre. Select " Press Centre. Select "Display Setting Handset". Option". Press Centre. Select "Category Press Centre. Select the desired category number Name". -
Page 53: Assigning Hot Keys
Using the Handset Phonebook Assigning Hot Keys You can assign a phone number stored in the Handset Phonebook to a key to be used as a Hot Key. Enter name. Press Centre. Press Press the left Up or Down. soft key. Select the Press Centre. -
Page 54: Selecting The Type Of Hot Key Dialling
Using the Handset Phonebook Selecting the Type of Hot Key Dialling You can select one of 2 types of Hot Key Dialling for each assigned Hot Key. Press the dialling key for more than 1 second. Select the Press Centre. Select "Automatic desired item. -
Page 55: Entering Characters
Using the Handset Phonebook Entering Characters You can enter characters and digits using the dialling keys. A, a B, b You can select one of 5 character modes by pressing the Right Soft C, c Key while entering a name. The function icon above the soft key displays the current character mode. -
Page 56: Character Mode Table
Using the Handset Phonebook Character Mode Table Keys (Alphabetic) (Numeric) (Extended 1) (Greek) (Extended 2) • Press before or after entering a character to change between uppercase and lowercase. • Pressing a key repeatedly will cycle through the characters associated with that key. For example, to enter the letter "C"... -
Page 57: Locking The Handset Phonebook
Using the Handset Phonebook Locking the Handset Phonebook You can lock/unlock the Phonebook while the handset is in standby mode. If no password has been set, you cannot lock the Phonebook. To set the password, see "Setting the Password" on page 8. Locking the Handset Phonebook Press the left soft key Locked. -
Page 58: Deleting Stored Items
Deleting Stored Items Deleting Stored Items in Handset Phonebook/Hot Key Dial/Outgoing Call Log/Incoming Call Log Deleting Stored Items Handset Phonebook Enter name. Press Centre. Press Press the left Up or Down. soft key. Select "Delete". Select the Press Centre. Press Centre. desired item. -
Page 59: Hot Key Dial
Deleting Stored Items Hot Key Dial Press the dialling key for more than 1 second. Select the Press Centre. Select "Delete". desired item. Press Centre. Select "Yes". Press Centre. *1 Select "Delete All" if you want to delete all items. •... -
Page 60: Outgoing Call Log
Deleting Stored Items Outgoing Call Log Press the Select the Press Centre. Select "Delete". right soft key. desired item. Press Centre. Select "Yes". Press Centre. Incoming Call Log Press the Press the Select the Press Centre. right soft key. right soft key. desired item. -
Page 61: Configuring Handset Settings
Configuring Handset Settings Changing the Initial Settings You can customise the handset by editing the settings found under "Setting Handset" Configuring Handset Settings in the menu list, as follows: Press Centre. Select " Press Centre. Select the desired Setting main item. Handset". -
Page 62: Handset Setting Menu Layout
Configuring Handset Settings Handset Setting Menu Layout [Main Item] [Sub Item] Incoming Option Ringer Volume Setting Handset Ringer Type Ring On Charger Memo Alarm Power Save Headset Ringer Talk Option Speaker Volume Receiver Volume Headset Volume Headset Mic Vol Talk On Charger Headset Button Answer Option Any Key Answer... - Page 63 Configuring Handset Settings Colour Scheme Tone Option Key Tone Range Alarm System Option Register H/S Cancel Base Select Base System Lock Change PIN Other Option Change Password Line Access CD Reset Handset...
- Page 64 Configuring Handset Settings Incoming Option Sub Item Description Setting Default Ringer Volume Adjusts the ringer volume. Step Up Step Down Level 3 Level 1-6 Ringer Type Ringer Pattern Bell 1-10 Selects the ringer pattern for Bell 1 – Intercom Melody 1-10 each type of call.
-
Page 65: Talk Option
Configuring Handset Settings Talk Option Sub Item Description Setting Default Speaker Adjusts the rear speaker Level 1-6 Level 3 Volume volume. Receiver Adjusts the receiver volume. Level 1-5 Level 3 Volume Headset Adjusts the headset speaker Level 1-5 Level 2 Volume volume. - Page 66 Configuring Handset Settings Sub Item Description Setting Default Function Key Edits the Function Key list. Redial 1: Redial 2: Fwd/DND Fwd/DND 3: Flash/ Flash/Recall Recall Auto Answer 4: Auto Conference Answer Pause Conference Auto Dial 6: Pause H/S Phonebook 7: H/S Phonebook PBX Phonebook 8: PBX...
- Page 67 Configuring Handset Settings Sub Item Description Setting Default Hot Key Time Selects the number of seconds before a call is automatically made when a 1 s-20 s Hot Key assigned to "Auto" is pressed and held. *1 Used to cancel the settings. *2 Displayed only when "Standby"...
-
Page 68: Display Option
Configuring Handset Settings Display Option Sub Item Description Setting Default Language Selects the display language. Auto Auto Backlight Turns on the backlight of the LCD and keypad. On & Receiving LCD Contrast Adjusts the LCD contrast. Level 1-5 Level 3 Standby Selects what is shown on the Handset Number... - Page 69 Configuring Handset Settings Sub Item Description Setting Default Date&Time Selects the format for the DD-MM 12H Form date shown on the display in DD-MM 24H standby mode. DD-MM 12H/ MM-DD 12H DD-MM MM-DD 24H DD-MM-YY MM-DD-YY Caller ID Selects which caller H/S Phonebook Disp information is displayed when...
-
Page 70: Tone Option
Configuring Handset Settings Tone Option Sub Item Description Setting Default Key Tone Turns the key tone on or off. Range Alarm Selects whether the range alarm tone rings or not. System Option Sub Item Description Setting Default Register H/S Registers a handset to a Base 1-4 Not stored base. -
Page 71: Other Option
Configuring Handset Settings Other Option Sub Item Description Setting Default Change Changes the handset Enter Old Password. *1*2 password (4 digits) used for Password ¯ unlocking the Handset Enter New Password. Phonebook, using the Reset registered ¯ Handset option, and unlocking the key lock. -
Page 72: Memo Alarm Setting
Configuring Handset Settings Memo Alarm Setting An alarm will sound at the set time. A memo can also be displayed. Memo Alarm is available only when the handset is within range of a CS. To set Press Centre. Select " Press Centre. - Page 73 Configuring Handset Settings [Select the alarm mode-Weekly] Enter time. Select the desired Press the Press Centre. day of the week. right soft key. Enter memo. Press Centre. Press Centre. Press Centre for "Save". [Select the alarm mode-Off] Press Centre. Press Centre for "Save".
- Page 74 Configuring Handset Settings To delete the alarm mode setting Press Centre. Select " Press Centre. Select the alarm Memo number. (1-3) Alarm". Press the Select "Yes". Press Centre. right soft key. To stop the alarm • Press any key other than soft keys.
-
Page 75: Troubleshooting And Error Messages
Troubleshooting and Error Messages Troubleshooting Problem Possible Cause Solution Troubleshooting and Error Messages The handset does The battery is drained. Charge the battery fully. not work. (See "Charging the Battery" on page 6.) The power is off. • Turn it on. (See "Location of Controls"... - Page 76 Troubleshooting and Error Messages Problem Possible Cause Solution The headset does A headset tone cannot be heard • Make sure the headset tone not work. when receiving an incoming setting is set to "On". (See call when the headset is "Incoming Option"...
-
Page 77: Error Messages
Troubleshooting and Error Messages Error Messages Error Message Possible Cause Solution Register Unit The handset has been Consult your dealer. cancelled or the handset has not been registered. No Service The handset is out of range. Move closer to the CS. The CS is turned off. -
Page 78: Important Information
Important Information Battery Information After your Panasonic battery is fully charged (at 25 °C): Important Information Operation Operating Time While in use (Talk) Up to about 15 h While not in use (Standby) Up to about 200 h • Operating time may be shorter than listed above depending on usage conditions and ambient temperature. - Page 79 3. Open the cover and replace the batteries. • Insert a finger into the side gap to remove the batteries easily (B). 4. Close the cover and charge the handset. • Please use a Panasonic battery with the service part number HHR-4EPT only.
-
Page 80: Important Safety Instructions
Important Information Important Safety Instructions When using your telephone equipment, basic safety precautions, including those below, should always be followed to reduce the risk of fire, electric shock and injury to persons. • Do not use the product near water, for example, near a bathtub, wash bowl, kitchen sink, or laundry tub, in a wet basement, or near a swimming pool. - Page 81 Important Information • The use of excessive sound volume through earphones, headphones, or headsets may cause hearing loss. • Switch off the device when in the proximity of areas with potentially explosive atmospheres such as fuel/chemical storage facilities or blasting operations. •...
- Page 82 Important Information Important Notice Concerning the Correct Use and Charging of Ni-MH Batteries Batteries, due to their construction, undergo some wear and tear. The lifetime of a battery also depends on correct maintenance. Charging and discharging are the most important factors.
-
Page 83: For Best Performance
Important Information For Best Performance Operating Range • The range of operation depends on the topography of your office, weather, or usage conditions, because signals are transmitted between the CS and the handset by radio waves. • Normally, you get greater range outdoors than indoors. If there are obstacles such as walls, noise may interfere with your telephone calls. - Page 84 Important Information Notice for product repair, disposal, transfer, or return • Keep a copy of all important data (such as your Phonebook) before sending the machine for repair. • This product can store your private/confidential information. To protect your privacy/ confidentiality, we recommend that you erase the information such as Phonebook or call log from the memory before you dispose, transfer or return the product.
- Page 85 Important Information RF Specification Item Description Radio Access Method MultiCarrier TDMA-TDD Frequency Band 1880 MHz to 1900 MHz Number of Carriers Carrier Spacing 1728 kHz Bit Rate 1152 kbps Carrier Multiplex TDMA, 24 (Tx12, Rx12) slots per frame Frame Length 10 ms Modulation Scheme GFSK...
-
Page 86: System Requirements
Important Information System Requirements This model supports the following CS models, PBX models, and PBX software versions: Model No. Main Processing (MPR) Software Version KX-TDA0141CE KX-TDA30 PSMPR Software File Version 5.0000 or later KX-TDA100 PMPR Software File Version 5.0000 or later KX-TDA200 KX-TDA600 PLMPR Software File Version 5.0000 or later... -
Page 87: Additional Information
Telecom’s network services. PTC200 4.12 (2) (b) Handset Instability When attached to some longer lines this Panasonic KX-TCA175 DECT Cordless Handset may display instability immediately after dialling if the handset is placed facedown on a hard surface. This is a temporary condition that will revert to a normal level after a short duration. - Page 88 Important Information Information for Users on Collection and Disposal of Old Equipment and used Batteries These symbols on the products, packaging, and/or accompanying documents mean that used electrical and electronic products and batteries should not be mixed with general household waste. For proper treatment, recovery and recycling of old products and used batteries, please take them to applicable collection points, in accordance with your national legislation and the Directives 2002/96/EC and 2006/66/...
- Page 89 Panasonic Communications Company (U.K.) Ltd. declares that this equipment is in compliance with the essential requirements and other relevant provisions of Radio & Telecommunications Terminal Equipment (R&TTE) Directive 1999/5/EC. Declarations of Conformity for the relevant Panasonic products described in this manual are available for download by visiting: http://www.doc.panasonic.de...
- Page 90 1-62, 4-chome, Minoshima, Hakata-ku, Fukuoka 812-8531, Japan Copyright: This material is copyrighted by Panasonic Communications Co., Ltd., and may be reproduced for internal use only. All other reproduction, in whole or in part, is prohibited without the written consent of Panasonic Communications Co., Ltd.