Table of Contents
Advertisement
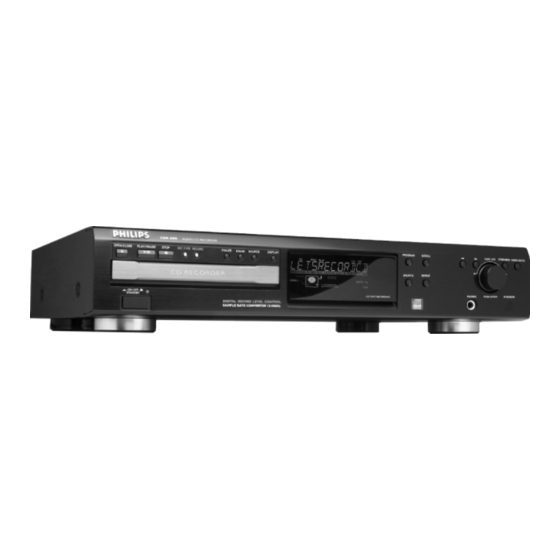
Compact Disc Recorder
SERVICING
For servicing CDR600 and CDR602 the set can be divided into two parts:
1. Except for the CD-R/W module all workshops can repair the set on component level.
The Switched Mode Power Supply unit is available as a sparepart, but can also be repaired on
component level.
2.The CD-R/W module can only be repaired on component level with the help of
COMPAIR, Release 1.6 and higher.
With this tool diagnosing of the set can be done in an interactive way. In the tool also the
adjustment procedure has been implemented. This is absolutely necessary in case the CDR Main
Board and/or CD drive (CDR Loader) is disconnected from the matched production combination.
Only designated workshops can perform these repairs!
Please send the complete set to the designated workshop.
Available circuit descriptions:
TABLE OF CONTENTS
Technical Specification.............................................................2
Warnings and Servicing Hints ..................................................3
Brief Operating Instructions ......................................................6
Wiring Diagram........................................................................25
Exploded View.........................................................................26
Dismantling Instructions ..........................................................27
Overall Block diagram .............................................................28
DISPLAY BOARD ...................................................................29
HEADPHONE/IR BOARD .......................................................31
©
Copyright 2001 Philips Consumer Electronics B.V. Eindhoven, The Netherlands
All rights reserved. No part of this publication may be reproduced, stored in a retrieval
system or transmitted, in any form or by any means, electronic, mechanical, photocopying,
or otherwise without the prior permission of Philips.
Published by MS 0115 Service Audio
The Basics of Compact Disc Recordable/Rewritable
3rd generation Compact Disc Recording
page
Printed in The Netherlands
Subject to modification
4822 725 25242
3104 125 40100
I/O BOARD .............................................................................32
POWER BOARD ...................................................................32b
Diagnostic Software................................................................33
Faultfinding trees ....................................................................37
Faultfinding guide ...................................................................41
List of Abbreviations ...............................................................51
Partslist ...................................................................................56
CDR600
/00/17
CDR602
/00S
page
CLASS 1
LASER PRODUCT
©
3103 785 25090
Advertisement
Table of Contents

Related Manuals for Philips CDR600/00/17


Summary of Contents for Philips CDR600/00/17
-
Page 1: Table Of Contents
LASER PRODUCT © Copyright 2001 Philips Consumer Electronics B.V. Eindhoven, The Netherlands All rights reserved. No part of this publication may be reproduced, stored in a retrieval system or transmitted, in any form or by any means, electronic, mechanical, photocopying, or otherwise without the prior permission of Philips. -
Page 2: Technical Specification
GB 2 CDR600 Technical Specifications CDR600 1. Technical Specifications CDR600 General S/N-ratio A-weighted : > 98dB (typical 102dB) S/N-ratio unweighted : > 93dB (typical 95dB) Mains voltage : all range version 84- Dynamic range : > 92dB at 1kHz 250V (/00), (typical 96dB) : USA version 117V/ >... -
Page 3: Warnings And Servicing Hints
Warnings and Servicing Hints CDR600 GB 3 2. Warnings and Servicing Hints WARNING WAARSCHUWING All ICs and many other semi-conductors are Alle IC's en vele andere halfgeleiders zijn susceptible to electrostatic discharges (ESD). gevoelig voor elektrostatische ontladingen Careless handling during repair can reduce (ESD). - Page 4 GB 4 CDR600 Warnings and Servicing Hints SERVICING HINTS In the set, chip components have been applied. For disassembly and assembly check the figure below.
- Page 5 Warnings and Servicing Hints CDR600 GB 5...
-
Page 6: Record
GB 6 CDR600 Directions for Use 3. Directions For Use Operating buttons 10 11 12 13 14 15 16 17 18 19 20 21 22 23 24 OPEN/CLOS E PLAY/PAU SE STOP RECORDING FINALIZE ERASE SOURCE DISPLAY PROGRA M TYPE SCROLL RECORD TRACK... -
Page 7: Record
Directions for Use CDR600 GB 7 Display DISPLAY indications lights during recording lights during recording TOTAL TRACK TIME STEP TIME TRACK ) ANALOG analog input selected 2 3 4 9 10 11 12 13 14 15 16 17 18 19 20 + SYNC MANUAL RECORD PROG... -
Page 8: Record
GB 8 CDR600 Directions for Use Display DISC FULL UNFINALIZE/PRESS ENTER recording no longer possible when trying to record on a finalized CDRW DIGITAL 1 PROF SOURCE digital coaxial input 1 selected when a professional source is connected OPTICAL digital optical input selected Play ANALOG PROGRAM... -
Page 9: Menu Messages
Directions for Use CDR600 GB 9 Display AUTO TRACK MENU messages - when selecting auto track increment ON or OFF See Menu mode Auto Track increment on TIME TRACK TOTAL TRACK TIME STEP Auto Track increment off EASY JOG STORE/MENU CANCEL/DEL SET BALANCE SYNC MANUAL PROG... -
Page 10: Record
CD recorder. If you still have difficulties with the so you can listen to playback of this set via the connections, please contact the Philips Consumer Service amplifier/receiver desk in your area. -
Page 11: Record
Directions for Use CDR600 GB 11 Installation Analog connections Digital connections These connections are required for playback and recording via Direct digital coaxial connection an amplifier/receiver, equipped with an analog in- and outputs. This connection is required for direct recording from a digital coaxial source (e.g a CD player, DVD, DAT). -
Page 12: Record
GB 12 CDR600 Directions for Use Installation Power supply/Mains Digital coaxial connections via a digital receiver If you have a receiver with digital coaxial in- and outputs, these connections allow you to make digital recordings from various sources, connected to the receiver. DIGITAL RECEIVER Check whether the mains voltage as shown on the type... -
Page 13: Record
SCROLL activates scrolling of text over the display selects CD recorder selects CD player, can be used to control a separate Philips CD player starts CD(RW) play previous track (Play and Program mode) next track (Play and Program mode) -
Page 14: Record
GB 14 CDR600 Directions for Use Recording Inserting discs - searches backward - cursor control in Menu/Prog. review mode - searches forward - cursor control in Menu/Prog. review mode OPE N/C LOS E PLA Y/P AU SE STO P interrupts CD(RW) play/recording REC ORD TYP E FIN ALI ZE... -
Page 15: Write Cd Text On A Cdr(W)
Directions for Use CDR600 GB 15 Recording Important: Use only discs with CDR AUDIO only or Introduction CDRW AUDIO only logo. Discs for use in a personal You will soon discover how easy it is to make your own computer’s CD-(re)writer cannot be used in an Audio CDs. -
Page 16: Of Scratches And Dust Particles
GB 16 CDR600 Directions for Use Recording Adjusting the recording level Recording an entire CD Some analog sources have such high output levels, that you This feature enables you to make fast and easy copy of an may need to adjust the recording level to ensure good entire CD to CD, make a compilation CD or archive an quality recordings without distortion. -
Page 17: Of Scratches And Dust Particles
Directions for Use CDR600 GB 17 Recording Recording a single track Recording To start recording, press Play on the external source from which you want to record.The CD recorder automatically starts recording. If, however, you start the source during a track, recording will start at the beginning of the next track or after 2.7 seconds of silence in analog recordings. -
Page 18: Of Scratches And Dust Particles
GB 18 CDR600 Directions for Use Recording Manual recording Preparing Place an unfinalized recordable disc, absolutely free of scratches and dust particles in the CD recorder tray. Press SOURCE repeatedly to select the type of connection you made to your source of recording. Examples: - CD-player is connected with its digital out connector directly to the digital in connector of your CD-recorder: connection is DIGITAL I. - Page 19 Directions for Use CDR600 GB 19 Recording Finalizing CDR & CDRW discs Unfinalizing CDRW discs During finalizing, the table of contents (TOC) is written to For CDRW discs only the disc. If you want to make more recordings (or erase tracks) on a Finalizing is a simple procedure that is necessary in order finalized disc, you must unfinalize it first.The index of the disc content will be removed.
-
Page 20: Erasing Cdrw Discs Content
GB 20 CDR600 Directions for Use Recording / Playing Erasing CDRW discs content Playing a CD For unfinalized CDRW discs only! You can erase: Press PLAY/PAUSE 2; to start CD play. - Tracks can only be erased from the end. 2 will light up and the track number and track time of - With the EASY JOG you can select more then one track the track in play will appear on the display. -
Page 21: Programming Tracks
Directions for Use CDR600 GB 21 Playing Search Programming tracks You can program up to 99 tracks to play in any desired sequence. Tracks can be programmed more than once, but each time counts as a track ( STEP Programming In Stop mode press PROGRAM to enter Program mode. -
Page 22: Menu Mode
GB 22 CDR600 Directions for Use Menu mode Remarks about Menu mode General operation of Menu In Menu mode you will have access to a number of features Menu active in Recording or Stop mode! which are not available via the regular keys (on the deck’s When using the remote control, select CDR first. - Page 23 Directions for Use CDR600 GB 23 English...
- Page 24 GB 24 CDR600 Directions for Use English...
-
Page 25: Mechanical Instructions
Mechanical Instructions CDR600 GB 25 4. Mechanical Instructions WIRING DIAGRAM Pin 1 indicated by All Wires are 1/1, except flex 8001. 0101 8006 3104 157 10992 8001 (at conn. 1400 8002 8003 (at conn. F934 0206 of CDR main board) of CDR main board) VDC2 VFTD... -
Page 26: Exploded View
Mechanical Instructions CDR600 GB 26 EXPLODED VIEW Torx 1005 M3x6 CDR770-LOADER MODULE 76+77+78+79+81+82+ 85+86+1001 Torx M3x6 Pl. Torx Pl. Torx 3x10 3x10 POWER SUPPLY UNIT Torx M3x6 Torx M3x15 I/O BOARD 76 77 78 79 SUSPENSION Torx M3x6 LOADER ASSY CDL4009/51 Torx M3x6... -
Page 27: Dismantling Instructions
Mechanical Instructions CDR600 GB 27 DISMANTLING INSTRUCTIONS See Exploded View for item numbers Cover 151 assembling ↑ ⇒ → 174, Remove 7 screws 168 ↓ 2 at each side and 3 at rear side. disassembling ⇒ Lift cover at rear side to remove. CDR module includes : I/O board 1004 Power supply unit 1003... -
Page 28: Electrical And Circuit Diagrams
Electrical and Circuit Diagrams CDR600 GB 28 5. Electrical and Circuit Diagrams BLOCK DIAGRAM BLOCK DIAGRAM CDR MAIN BOARD ON/OFF CDL 4009 1301 LOADER ASSY 2 WIRES 7703 7330 1500 CDM3800 0205 0206 VDC2 1330 FLASH VFTD HALL 11 WIRES VDC1 POWER SUPPLY DRIVE, HALL FEEDBACK... - Page 29 Electrical and Circuit Diagrams CDR600 GB 29 DISPLAY BOARD - CIRCUIT DIAGRAM 0100 H10 1050 H6 1101 B9 1102 C11 1103 C11 1104 C11 1105 B10 1106 B11 1107 B11 1108 B12 1109 C9 1113 1110 H4 15-BT-60GNK 1111 C9 1112 C12 REC TIME TRACK TOTAL REM TRACK TIME...
- Page 30 Electrical and Circuit Diagrams CDR600 GB 30 DISPLAY BOARD - FRONT VIEW DISPLAY BOARD - BACK VIEW CL 96532084_007.eps 300899...
- Page 31 Electrical and Circuit Diagrams CDR600 GB 31 HEADPHONE/IR BOARD - CIRCUIT DIAGRAM HEADPHONE & IR BOARD TOP VIEW 0200 C2 1200 A1 1201 B1 1290 B3 2200 B2 2201 C2 F202 6200 2202 B1 1200 EH-S TSOP1736 F201 2203 B1 3200 B3 F200 6200 A3...
- Page 32 Electrical and Circuit Diagrams CDR600 GB 32 I/O BOARD - CIRCUIT DIAGRAM 1000-1 F1 1000-10 C9 3025 F100 F101 +5VDS 1000-11 C9 +5VDS 1000-12 B9 1000-13 B1 3021 DRIVER 1000-14 C9 1000-2 E1 GP1F32T 1001-A 3024 1000-3 E1 5002 7010 YKC21-3421 1000-4 D9 BLM21...
- Page 33 Electrical and Circuit Diagrams CDR600 GB 32a I/O BOARD - TOP VIEW I/O BOARD - BOTTOM VIEW...
- Page 34 Electrical and Circuit Diagrams CDR600 GB 32b 0101 A2 5225 D9 0125 B5 5226 E9 0205 A12 5230 B10 0206 G7 5240 C9 POWER SUPPLY UNIT CDR3-ECO 0207 A11 5250 C11 3124 0260 2128 0208 A10 5255 C7 HEATSINK 0260 A7 6100 A4 470R 0205...
- Page 35 Electrical and Circuit Diagrams CDR600 GB 32c POWER SUPPLY UNIT CDR3-ECO - TOP VIEW POWER SUPPLY UNIT CDR3-ECO - BOTTOM VIEW...
- Page 36 Electrical and Circuit Diagrams CDR600 GB 32d Personal notes: Personal notes:...
-
Page 37: Diagnostic Software
Diagnostic Software CDR600 GB 33 6. Diagnostic Software Dealer mode The purpose of the dealer mode is to prevent people taking out the CD inside the player at exhibitions, showrooms etc.. This mode disables the open/close function of the player. The dealer mode can be switched on and off by pressing keys [OPEN/CLOSE] and [STOP] of the CDR player simultaneously while switching on the unit. - Page 38 GB 34 CDR600 Diagnostic Software Electrical service diagnostics ELECTRICAL SERVICE DIAGNOSTICS (software versions, test for defective components) If power ON, switch power OFF Load CD-DA disc (SBC444A) Press <PLAY> + <F FWD> simultaneously and switch ON unit PLAYER LOADER TESTS INFORMATION CDR LOADER TEST Display :...
- Page 39 Diagnostic Software CDR600 GB 35 CDR main board test Loader tests As soon as the CDR main board tests are finished, all failure These tests determine if the CDR loader and the CD loader in messages (if any) will be displayed sequentially by pressing the case of a CDR775 work correctly.
- Page 40 GB 36 CDR600 Diagnostic Software Figure 6-3 6.4.1 Description DC-erase service mode No external tools are required to perform this test. The cover needs to be removed because the user has to check the DC ERASE SERVICE MODE (erasement of complete CD-RW) movements of the tray, focus and sledge visually.
-
Page 41: Faultfinding Trees
Faultfinding Trees CDR600 GB 37 7. Faultfinding Trees NO DISC LOADED SWITCH ON POWER STBY LED? PRESS <DISPLAY> CHECK: • MAINS, MAINS CABLE • POWER SUPPLY (SEE FAULT FINDING GUIDE PSU) ⇒ WIRING ⇒ ON/OFF SWITCH ⇒ FUSES ⇒ VOLTAGES •... - Page 42 GB 38 CDR600 Faultfinding Trees CD-DA DISC LOADED CHECK: • WIRING • POWER SUPPLY VOLTAGES DISC • ELECTRICAL SERVICE DIAGNOSTICS: DETECTION & READING? REPLACE CDR MODULE IF "DERRn" OR "BERRn" ERROR OCCURS CHECK: • DISC: DIRT, SCRATCHES, DAMAGED... DISPLAY: • ELECTRICAL SERVICE DIAGNOSTICS: “CD”...
- Page 43 Faultfinding Trees CDR600 GB 39 CD-R DISC LOADED CHECK: • DISC WIRING DETECTION & • POWER SUPPLY VOLTAGES READING? • ELECTRICAL SERVICE DIAGNOSTICS: REPLACE CDR MODULE IF "DERRn" OR "BERRn" ERROR OCCURS CHECK: DISPLAY: DISPLAY: • DISC: DIRT, SCRATCHES, DAMAGED... “CD R”...
- Page 44 GB 40 CDR600 Faultfinding Trees CD-RW DISC LOADED CHECK: • DISC WIRING DETECTION & • POWER SUPPLY VOLTAGES READING? • ELECTRICAL SERVICE DIAGNOSTICS: REPLACE CDR MODULE IF "DERRn" OR "BERRn" ERROR OCCURS CHECK: DISPLAY: DISPLAY: • DISC: DIRT, SCRATCHES, DAMAGED... “CD RW”...
-
Page 45: Faultfinding Guide
Faultfinding Guide CDR600 GB 41 8. Faultfinding Guide Display Board Display controller TMP87C874F TMP87C874F (IC7104) is a high speed and high performance 8-bit single chip microprocessor, containing 8-bit A/D 8.1.1 Description of display board conversion inputs and a VFT (Vacuum Fluorescent Tube) driver. - Page 46 GB 42 CDR600 Faultfinding Guide Figure 8-1 8.1.2 Test instructions Grid lines Level and timing of all grid lines, G1-->G15, can be checked either at the FTD itself or at the display controller. Grid lines Supply voltages G13, G14 and G15 each have an extra current amplifier in line The display board receives several voltages via connector : T7203 for G13, T7204 for G14 and T7100 for G15.
- Page 47 Faultfinding Guide CDR600 GB 43 key has been pressed. Without a key pressed, pins 28 to 33 of The pulses created this way arrive at pin 16 and 17 of the the display controller maintain a high level (+5V). display controller. The first pulse to arrive tells the controller the direction of the rotation.
- Page 48 GB 44 CDR600 Faultfinding Guide 8.1.3 Display board troubleshooting guide SWITCH POWER ON, EXIT STAND BY MODE CHECK : • SUPPLY VOLTAGES ⇒ -38V ±5% at conn. 1119-2 ⇒ 3V8 ± 10% between conn. 1119-1 and 1119-3 DISPLAY? ⇒ +5V ± 5 % at conn. 1119-10 (1121-4 for CDR570/930) •...
- Page 49 Faultfinding Guide CDR600 GB 45 Circuit description of the current mode power supply Blockdiagram Rectifier 6210 Lightning 5131 Protection MAINS FILTER 2643 6230 +12V Start Overvoltage Circuit Protection Comp 6240 2.5V CLOCK Error 6250 Amplifier 7125 comparator VFTD Verror Output latch 6220 Isense...
- Page 50 GB 46 CDR600 Faultfinding Guide Description of UC3842 The input voltage Vcc(pin 7) is monitored by a Vref comparator with hysteresis, enabling the circuit at 16V and disabling the circuit below 10V. The error amplifier 2.5V BIAS compares a voltage Vfb(pin 2) related to the output voltage of the power supply, with an internal 2.5V Rt/ct OUTPUT...
- Page 51 Faultfinding Guide CDR600 GB 47 Regulation Figure 4 shows the most relevant signals during the regulation phase of the power supply. The oscillator voltage ramps up and down between V1 and V2. The voltage at the current sense terminal is compared every cycle with the output of the error amplifier Vcomp.
- Page 52 GB 48 CDR600 Faultfinding Guide Oscillograms PM3394B CH1 2 CH3 2 V~ ALT MTB5.00us- 0.90dv ch1- ch1 : Drain voltage at testpoint T632 ch2 : Drain current ch3 : Gate voltage at testpoint T669 PM3394B CH3 50mV~ ALT MTB5.00us- 0.90dv ch1- ch1 : Drain voltage(T632) ch2 : Oscillator voltage at pin 4 of IC7612 PM3394B...
- Page 53 Faultfinding Guide CDR600 GB 49 Circuit description Regulation circuit Input circuit The regulation circuit comprises opto-coupler 7200 which The input circuit consists of a lightning protection circuit and isolates the error signal from the control IC on the primary side an EMI filter.
- Page 54 GB 50 CDR600 Faultfinding Guide TROUBLE SHOOTING POWER SUPPLY Check DC voltages power supply OK +5V +12V -8V VFTD(-38V) VDC1-VDC2(3V8) Disconnect the power supply from the MAIN Board Connect a dummy load resistor 6,8 ohm 10W (min 5W) on the 5V and power supply OK Check DC voltages check - main board...
-
Page 55: List Of Abbreviations
List of Abbreviations CDR600 GB 51 9. List of Abbreviations SIGNAL NAME SIGNAL FLOW FUNCTION AND DESCRIPTION +12V main supply voltage from PSU +12V supply voltage from PSU +12VA supply voltage +12V supply voltage for Audio part main supply voltage from PSU +5V supply voltage from PSU +5VA supply voltage... - Page 56 GB 52 CDR600 List of Abbreviations COS+ CONN1220 -> IC7225B Hall feedback signal from sledge motor CSFLASH IC7701 -> IC7703 Chip Select for FLASH or boot device CSRAM IC7270 -> R3235A -> R3703, IC7802 Chip Select SRAM, active low D(16:31) IC7701 <->...
- Page 57 List of Abbreviations CDR600 GB 53 FSON IC7008 -> R3051 Forward Sense photo diode sampling ON R3040 -> IC7270 Forward Sense signal while Reading for read control loop FSRS IC7008 -> IC7126D Forward Sense photo diode Read Sampling R3050 -> IC7270 Forward Sense signal while Writing for write control loop FSWS IC7008 ->...
- Page 58 GB 54 CDR600 List of Abbreviations LWRT R3048 -> IC7008 Laser WRiTe control input MA(16:17) IC7270 <-> IC7208 bank switch higher address lines MA(8:15) IC7270 <-> IC7802 <-> IC7208 address bus high byte MACE2 Mini All Cd Engine (minus decoder + OPC + PCS + extra RAM) MAD(0:7) IC7270 <->...
- Page 59 List of Abbreviations CDR600 GB 55 SRSTN IC7270 -> R3243B, IC7300 Slave ReSeT out (CDR60 reset), active low STANDBY IC7270 -> R3807 -> R3887 -> IC7701 STANDBY pin, high level activates essential powers necessary for full function; overrules HI_POWER setting IC7701 ->...
-
Page 60: Partslist
BUTTON POWER CDR600 MECHANICAL PARTS 3103 308 11290 BUTTON POWER CDR602 ––––––––––––––––––––––––––––––––––––––––––––––––––––– 4822 256 10506 FTD HOLDER CDR600 3139 240 00040 WORDMARK „PHILIPS“ SILVER CDR602 MISCELLANEOUS 4822 459 10887 WORDMARK „PHILIPS“ CDR600 ––––––––––––––––––––––––––––––––––––––––––––––––––––– 3103 304 71360 KNOB EASY-JOG CDR600 1050... - Page 61 Partslist CDR600 GB 57 RESISTORS 10.2.2. I/O BOARD ––––––––––––––––––––––––––––––––––––––––––––––––––––– 9004 © 4822 051 10008 CHIP JUMPER 1206 MISCELLANEOUS 9005 © 4822 051 10008 CHIP JUMPER 1206 ––––––––––––––––––––––––––––––––––––––––––––––––––––– 9006 © 4822 051 10008 CHIP JUMPER 1206 1000 2422 025 16289 FFC-CONNECTOR, 14P, SIDE ENTRY 9007 ©...
- Page 62 GB 58 CDR600 Partslist 10.2.3. POWER SUPPLY BOARD RESISTORS ––––––––––––––––––––––––––––––––––––––––––––––––––––– 3126 4822 116 80176 1Ω 0,5W COMPLETE MODULES 3127 4822 116 80176 1Ω 0,5W ––––––––––––––––––––––––––––––––––––––––––––––––––––– 3128 4822 116 80676 1,5Ω 0,5W 1003 3122 427 22000 PSU-CDR3-ECO EURO 20PS202 3129 © 4822 117 10833 10kΩ...
- Page 63 Partslist CDR600 GB 59 TRANSISTORS ––––––––––––––––––––––––––––––––––––––––––––––––––––– 7125 4822 130 11417 STP3NB60FP, FET 7141 © 4822 130 60373 BC856B 7150 © 4822 130 60511 BC847B 7251 4822 130 41344 BC337-40 7252 © 4822 130 60373 BC856B 7253 4822 130 41246 BC327-25 7254 ©...