Table of Contents
Advertisement
Advertisement
Table of Contents

Related Manuals for Korg SP 250


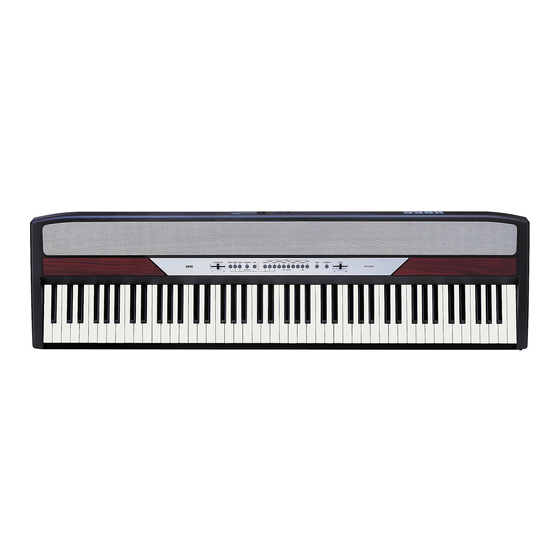
Summary of Contents for Korg SP 250
- Page 1 User’s Manual...
- Page 2 Be careful not to let metal objects get into the equipment. If something does slip into the equipment, unplug the AC adapter from the wall outlet. Then contact your nearest Korg dealer or the store where the equipment was purchased.
- Page 3 Korg is not responsible for any eventual dif- ferences found between the specifications and the contents of the instruction manual - the specifica-...
-
Page 4: Table Of Contents
Introduction ............. . 7 Main features . -
Page 5: Introduction
Main features Wide range of sounds. including a Stereo Concert Grand Piano. You can use the Layer function to simulta- neously play two sounds. The SP-250 provides built-in digital effects that can simulate the natural Effects. ambience of a concert hall (Reverb) and add richness to the sound (Chorus). Damper pedal simulation. - Page 6 Powerful integrated amplification. SP-250 includes a powerful, 11 Watt amplier, with two 10cm speakers in Bass Reflex box. Two sets of heaphones. You can connect two stereo headphones, to play with your teacher or another musician. Introduction...
-
Page 7: Panels
Front panel 1 1 1 1 2 2 2 2 4 4 4 4 5 5 5 5 6 6 6 6 7 7 7 7 8 8 8 8 9 9 9 9 1 1 1 1 SPEAKERS: Listen to the piano sound from these powerful speakers. To turn them off, insert a jack in one of the PHONES connectors. - Page 8 7 7 7 7 TOUCH button: Lets you select the keyboard sensitivity. 8 8 8 8 TRANSPOSE/FUNCTION button: Multifunction button to be used in order to modify the transpose and fine tuning functions, to program the MIDI parameters and to carry on other adjustments. Note: When the instrument is turned off, all parameters are reset.
-
Page 9: Rear Panel
Rear panel 2 2 2 2 4 4 4 4 1 1 1 1 Music stand holes: Insert the music stand into these two holes. Please note that, the first times you use the music stand, you will need to apply some force to insert or remove it. -
Page 10: Before You Begin
Connecting to an external amplification system Use the OUTPUT connectors, if you like to connect your SP-250 to a high-quality mixer, stereo hi-fi, or a couple of active monitors. When using a stereo hi-fi, connect the OUTPUTs to the AUX or TAPE inputs (never use the PHONO inputs). For mono amplification, connect only the L/MONO output. -
Page 11: Turning The Instrument On
Turning the instrument on Insert the DC plug of the supplied AC adapter into the DC inlet of the SP-250, then connect the AC plug to a wall socket. You can use the dedicated hook to fix the power cable to the piano’s back panel, as shown in the following illustration: After having connected the power cable, press the POWER switch. - Page 12 PIANO 2 F. Chopin: Nocturne Op.9, no.2 E.PIANO 1 C.A. Debussy: Clair de lune E.PIANO 2 Korg Original (M. Tem- pia): Lullaby for a Little Star You can select just one demo song to be played back. Bank 2 (11-20) Korg Original (M.
- Page 13 (from the Sonata in A- major K.331) ORGAN 2 F. Chopin: Valse no.6 in D -major Op.64, no.1 STRINGS Korg Original (M. Tem- /PAD pia): Old Feather Blues CHOIR Korg Original (M. Tem- pia): Noise of time Press the DEMO button to stop the playback and exit the demo mode.
-
Page 14: Basic Functions
Playing a single sound (Single mode) You can select a sound from the thirty sounds supplied with the instrument. Press one of the sound selection buttons in order to select a sound. The LED on the button you pressed will light. Use the BANK button to select one of the three available banks (1-10, 11-20, 21- 30). -
Page 15: Choosing The Reverb And The Chorus
Note: When selecting the Layer mode, the total number of voices that can play at the same time is reduced, depending on the total number of oscillators used by the selected sounds. Note: You can’t select two sounds included under the same button. Press one of the sound selection buttons in order to select the first sound. -
Page 16: The Damper Pedal
Hold down the REVERB or CHORUS button, and press either the PIANO 1/L, PIANO 2/M, or E.PIANO1/H sound selection button to select the reverb or chorus depth. Button Reverb depth PIANO 1/L Light reverb PIANO 2/M Normal reverb E.PIANO 1/H Deep reverb To check the currently selected reverb or chorus depth, hold down the REVERB or CHORUS button, and look at which of the above LEDs is turned on. - Page 17 Adjusting the metronome volume. METRONOME button pressed and repeatedly press the STRINGS/PAD button (or the B5 key) to lower the volume, or the CHOIR button (or the C6 key) to raise it. To reset the volume, simultaneously press the STRINGS/PAD and CHOIR buttons (or the B5 and C6 keys on the keyboard) while holding the METRONOME button.
- Page 18 Selecting the time signature. sure. Button PIANO 1 PIANO 2 E.PIANO 1 E.PIANO 2 While the metronome is working, keep the METRONOME button pressed and press the button that corresponds to the time signature you wish to use (see table above).
-
Page 19: Other Functions
Touch settings The keyboard sensitivity, or touch, can be programmed. Keep the TOUCH button pressed, and press the appropriate button to select one of the available touch settings. Button Touch sensitivity PIANO 1/L Light. Loud notes can be produced even by playing lightly. PIANO 2/M Normal. -
Page 20: Transpose
Transpose In some cases, a song may be written in a difficult key (e.g., many black keys), or you may wish to shift the pitch to match another instrument or vocalist. In such cases, you can transpose (shift the pitch) so that you can use an easier fingering, or use the same familiar fingering to play at a different pitch. -
Page 21: Selecting A Temperament
Hold the TRANSPOSE/FUNCTION button, and press the corresponding key to change the pitch. Each time the B5 or C6 key is pressed, the pitch will be raised or lowered by 0.5 Hz. To get back to standard pitch, hold the TRANSPOSE/FUNCTION button and press the B5 and C6 buttons at the same time. - Page 22 To check the currently selected temperament, hold down the TOUCH button, and look at which of the above LEDs is turned on. Note: When the power is turned on, the equal temperament will be automatically selected. About stretched tuning. In order to produce the most natural resonance, PIANO 1 and PIANO 2 sounds use a “stretched tuning”...
-
Page 23: Midi
What is MIDI? MIDI, is the abbreviation of Musical Instrument Digital Interface. It is an interna- tional standard that was created to connect and transfer data between electronic musical instruments, computers and other devices. What can you do with MIDI? -
Page 24: Standard Midi Settings
the SP-250 MIDI OUT connector to the MIDI IN connector of the computer. Con- nect the SP-250 MIDI IN connector to the MIDI OUT connector of the computer. Standard MIDI settings When turning the instrument on, the MIDI parameters of the SP-250 are pro- grammed as follows: Parameter Transmission channel... -
Page 25: Using The Sp-250 As A Multitimbral Tone Generator
Hold down the TRANSPOSE/FUNCTION button, and press the note in the range C2–D#3 corresponding to the desired MIDI channel. Channel Note: When the power is turned on, channel 1 will automatically be selected. Note: By default, channel 10 will automatically be assigned to the metronome sound (notes D#5-E5). -
Page 26: Local On/Off
Read the other devices user’s manual for details on sending Program Change mes- sages. Local On/Off Local is the parameter that allows you to establish whether the keyboard has to play the internal sounds and transmit MIDI data at the same time (Local On), or whether it just has to transmit MIDI data and not play the internal sound (Local Off). - Page 27 on the SP-250, as shown in the following table. Only Program Change (PC) num- bers in the range 0–29 have effect on the SP-250, while other numbers (30-127) are ignored. Button PIANO 1 PIANO 2 E.PIANO 1 E.PIANO 2 HARPSI/CLAV VIBES/GUITAR ORGAN1 ORGAN2...
-
Page 28: Control Change
Program Change enable/disable. must enable Program Change messages transmission and reception. Otherwise, you can disable Program Changes data. Hold down the TRANSPOSE/FUNCTION button, and press the PIANO 2 sound selection button. Each time you press the switch, the setting will alternate between Enabled and Disabled. - Page 29 MIDI Data Dump You can save the current sound settings (Single or Layer mode) on an external MIDI storage device, like a sequencer or a MIDI data filer. You can later reload these data into the SP-250, to restore a saved set of data. Warning: To avoid loosing data, carefully read the owner's manual of your MIDI data filer.
- Page 30 On the SP-250, hold down the TRANSPOSE/FUNCTION button and press the VIBES/GUITAR sound selection button. The LEDs of the TRANSPOSE/FUNC- TION and VIBES/GUITAR buttons will blink, and the SP-250 will wait to receive the data dump. Set the data filer to send the sound setting data that were previously saved from the SP-250.
-
Page 31: Assembling The Stand
Assembling the stand Cautions for assembly • When placing the piano on the stand, be careful not to pinch your hands. • Be sure that the correct parts are assembled in the correct orientation and position, and follow the steps in order. •... -
Page 32: Assembling Procedure
Assembling procedure Open the packing carton and take out the contents. Check that all of the following items are available. List of parts Piano stand (includes parts A’ and A” – please refer to the next page) Pedal “beam” (includes parts e – see page 36) Pedal Piano (main body) Power supply... - Page 33 Open the stand (A) by unfolding the legs (A’) and diagonal bars (A”), as shown in the following illustration. Use the two short screws (b) to fix the diagonal bars (A”). Be sure you insert a washer (d) between the diagonal bar and the hole in the stand. Assembling the stand...
- Page 34 Prepare the pedal beam (B), by removing the two caps (e) from both sides. Fit the pedal beam (B) and the legs (A’) together, with the curved part pointing toward the back of the stand (as shown in the illustration). Fix them by using the two long screws (a).
- Page 35 Lay the pedal (C) on the pedal bar (B). Lift the piano (D) with two or more people, and fix it to the stand (A), so that the carved, molded guides on the botton of the piano perfectly match the top of the stand.
- Page 36 Fix the piano (D) to the stand (A) from below, by using the two wing bolts (c). Be sure you insert a washer (d) between the stand’s bottom surface and each of the wing bolts. Assemble the power cord (F) to the separate power supply unit (E). Connect the pedal and power cables to the corresponding piano connectors.
-
Page 37: Check After Assembly
Place the piano in the location where it will be played. Please be sure to place it over a flat floor, to avoid any shaking. Note: Be careful not to pinch the power cable under the piano feet. Tighten and check all the screws. Check after assembly [•] Are any parts left over? If any parts are left over, check the diagrams to see where they should be used. -
Page 38: Appendix
find out what the problem is, and try resolving it by fol- lowing the suggestions below. If the instrument will still not function properly refer to your dealer or to an Authorized Korg Service Center. Problem... -
Page 39: Technical Specifications
Power consumption Dimensions (W x D x H) Weight Included accessories Sounds processed with INFINITY™. Korg reserves the right to change the specifications without notice. Appendix SP-250 88 notes, velocity sensitive, with Korg RH3, Real Weighted Ham- mer Action Light, Normal, Heavy... -
Page 41: Midi Implementation Chart
Recognized 1–16 ****************** 15–113 ****************** O 9n, V=1–127 O 9n, V=1–127 0–29 ****************** Mode 2:OMNI ON, MONO Mode 4:OMNI OFF, MONO KORG SP-250 Digital Piano June 01, 2005 Remarks 1-16 0–127 21–108 Volume Expression Damper Pedal Sostenuto Soft Pedal Reverb Depth... - Page 42 Care Card Garantie...
- Page 51 Address KORG Italy SpA Via Cagiata, 85 I-60027 Osimo (An) Italy Web Servers www.korgpa.com www.korg.co.jp www.korg.com www.korg.co.uk www.korgcanada.com www.korgfr.net www.korg.de www.korg.it www.letusa.es © KORG Italy 2005. All rights reserved...