Table of Contents
Advertisement
Quick Links
Advertisement
Table of Contents

Related Manuals for U-Line Wine Captain 2275ZWCS


Summary of Contents for U-Line Wine Captain 2275ZWCS
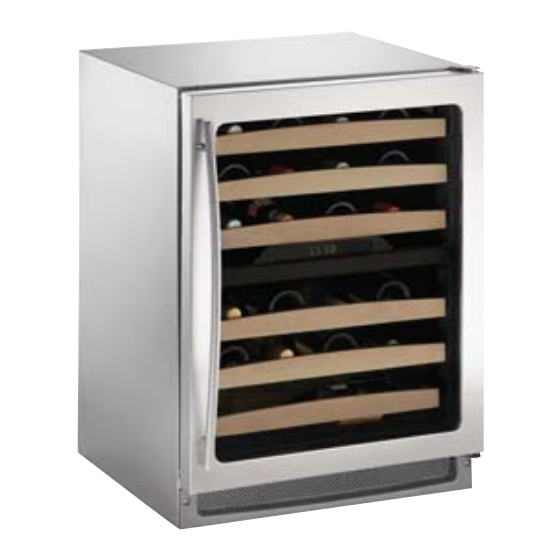
- Page 1 Installation Guide Dual Zone Models Wine Captain® Models: 2275ZWCS & 2275ZWCOL www.U-LineService.com Phone (414) 354-0300 • FAX (414) 354-7905 Service & Parts Tech Lines Phone (800) 779-2547 • FAX (414) 354-5696 OnlineService@U-Line.com ©2008 U-Line Corporation 03/2008...
-
Page 2: Table Of Contents
2275 Dual Zone WC Model Contents 1 Follow Safety Precautions 1-Follow Safety Precautions..... . 2 Safety Alert Definitions ..... . . 2 IMPORTANT General Precautions . -
Page 3: 2-Inspect And Plan
All units come with maple trim racks that can be finished Steel Polish and Cleaner, which can be purchased from or stained. Please carefully follow the directions that U-Line Corporation. (The part number is 173348.) apply to your unit and your intended design. Comparable products are acceptable. Frequent... -
Page 4: 3-Prepare The Site
25-3/8” including handle Your U-Line product has been designed for either free- standing or built-in installation. When built-in, your unit does not require additional air space for top, sides or rear. However, the front grille must NOT be obstructed and clearance is required for electrical connection in the rear. -
Page 5: 4-Other Site Requirements
The unit requires a grounded and polarized 115 VAC, 60 Hz, 15A circuit (normal household current). See Electrical Specifications. ENVIRONMENTAL REQUIREMENTS Many U-Line models are designed to operate in harsh outdoor/marine environments. Special considerations include the following: • The units are designed to operate between 50°F (10°C) and 110°F (40°C). -
Page 6: 6-Side-By-Side Installation Instructions
Instructions hinge (Figure 8). For a complete refreshment center, install your Dual-Zone unit beside a U-Line Refrigerator, Ice Maker or Combo Model (see Figure 11 for typical cut-out). Note: Each side-by-side installation will be different. • Cut-out width for a side-by-side installation is the total... -
Page 7: Rack Removal/Installation
8 Wood Trim Finishing to Adjust Door. CAUTION Interior components of your U-Line unit are equipped with a natural wood trim for appearance and durability. To prevent permanent damage to the inner liner of Although this wood trim has been coated with a clear... -
Page 8: 9-Overlay Frame (2275Zwcol Only)
2275 Dual Zone WC Model 2. Lightly scruff sand the wood trim with 280 or finer grit 9 Overlay Frame (2275ZWCOL Only) sandpaper. 3. Remove sanding dust with a clean, dry cloth. FRAME PREPARATION 4. The factory-applied seal is compatible with virtually all IMPORTANT finishes. -
Page 9: Preparing The New Overlay Panel
2275 Dual Zone WC Model PREPARE THE NEW OVERLAY PANEL ATTACHING THE OVERLAY PANEL 7. Remove the top hinge pivot pin with a Phillips IMPORTANT screwdriver and lift door off bottom hinge pin (Figure The overlay door panel must not weigh more than 15). -
Page 10: Assembling Door To Cabinet
2275 Dual Zone WC Model 10. After gasket has been removed, place it on a flat, clean Note: After attaching the wood to the door, double check the bottom pivot hole location. If the hole in the pivot surface. bracket is covered by any wood, chase thru the hole with 11. -
Page 11: 10-Adjusting The Door
2275 Dual Zone WC Model 3. See Figure 22. If the top far edge of the door needs to 10 Adjusting The Door move UP, move the hinge plate toward the outside of the door and retighten screws. If the top far edge of the CHECKING DOOR ALIGNMENT door needs to move DOWN, move the hinge plate toward the inside of the door and retighten the screws. -
Page 12: 11-Prepare Power Supply
2275 Dual Zone WC Model 11 Electrical Specifications 12 Level The Unit LEVELING INFORMATION CAUTION Note: It is recommended that the unit is level. Electrical installation must observe all state and 1. Use a level to check the levelness of the unit from local codes. -
Page 13: 13-Install The Unit
2275 Dual Zone WC Model 5. Place the Anti-Tip brackets on the floor against the line 13 Install The Unit drawn for the outer edge. Mark spots for the screw holes (Figure 29). ANTI-TIP BRACKET INSTALLATION 6. Use a 1/8” drill to make two starter holes and fasten the 1. -
Page 14: Side-By-Side Installation
INSTALLATION TROUBLESHOOTING WHO TO CALL Problem If the need for service arises, call the U-Line Customer The door remains open unless it is pushed closed. Care Center directly @ 800-779-2547. To ensure accurate assistance, please have your Model Number and Serial Solution Number and an explanation of the problem. - Page 15 2275 Dual Zone WC Model This page intentionally left blank. 03/2008 www.U-LineService.com...
- Page 16 For more than four decades, U-Line has distinguished itself as the leader in built-in undercounter ice making, refrigeration and wine storage appliances. U-Line Corporation, located in Milwaukee, WI, is a family operated manufacturer of built-in ® ® undercounter icemakers, Combo...