
Related Manuals for Vitamix Vitamix XL


Summary of Contents for Vitamix Vitamix XL
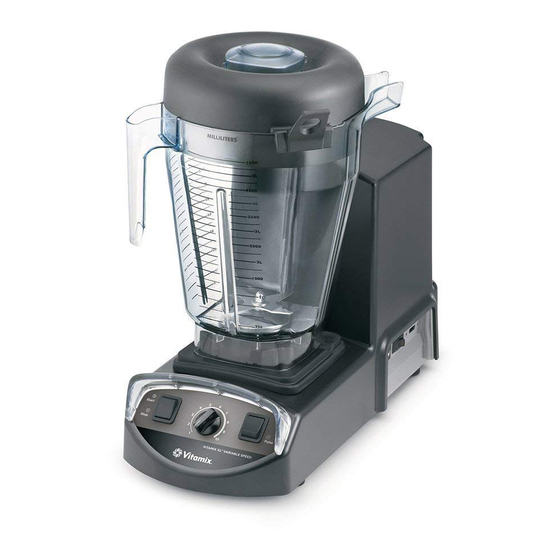
- Page 1 Vitamix XL ™ Large Capacity Blender ALL MODELS Use and Care Manual Read and save these instructions E N G L I S H E S PA Ñ O L F R A N Ç A I S...
-
Page 2: Table Of Contents
CO N T E N TS English ..........................Español ........................Français ........................Important Safeguards ..................General Instructions ..................Programmable Model All Models Maintenance Tips Blending Tips Control Panel ......................Programming ......................Programming Custom Chip Resetting Pre-Set Buttons Machine Assembly .................... Lid Assembly Safety Interlock Blade Assembly... -
Page 3: Important Safeguards
14. Container should not be more than 2⁄3 full when the accelerator tool is left in place while blending. Do not exceed 30 seconds of continuous blending while accelerator tool is in place. 15. CAUTION: Cooling problems resulting in thermal shut-off and eventual motor FIGURE A FIGURE B damage may result if machine is operated in sound chambers other than those approved by Vitamix®. 16. When making nut butters or oil based foods, do not process for more than one minute after mixture starts circulating. Over processing can cause IMPORTANT NOTES! dangerous overheating as well as damage the container. 17. Always operate the Vitamix machine with the lid in place and securely attached. The instructions appearing in this Use and Care Manual cannot cover every possible 18. WARNING: When processing hot liquids: condition and situation that may occur. Common sense and caution must be • The two-part latching lid must be securely in place. This allows steam to escape practiced when operating and maintaining any appliance. naturally and will prevent the lid from coming off when the machine is turned on. -
Page 4: General Instructions
SETTING 5: (2:00) Starts Low, ramps to High (100%) for 1 minute 55 seconds 9. To use the pulse switch: SETTING 6: (3:00) • Vitamix XL™ Programmable Model: Make sure the power is on. With the container Starts Low, ramps to High (100%) for 2 minute 55 seconds on the motor base, depress the pulse switch. Release the switch to stop the motor. • Vitamix XL™ Variable Speed Model: Make sure the power is on. Turn the dial to the desired variable speed. With the container on the motor base, depress the Vitamix XL™ Blender Instructions (All Models) pulse switch. Release the switch to stop the motor. Repeat multiple times until mixture is blended to desired consistency. 1. Place liquids and soft foods in the container first. Placing wet ingredients towards 10. Unplug the machine when not in use. the blades helps to start the vortex that allows the other ingredients to be pulled into the blades. Although not necessary for processing, cutting or breaking food into smaller pieces (1 to 3 in. / 3 to 8 cm) allows for more precise measuring of ingredients. Thawed or partially-thawed fruit is recommended. The highest speed is recommended for heavy-duty blending. -
Page 5: Maintenance Tips
• Never bang the container against a surface to loosen the ingredients. 1. If your ingredients freeze up, try reducing the amount of ice. Remove the container from the base and use a rubber spatula to remove thick Compared to other blenders, you do not need as much ice to mixtures from the bottom of your container. make an equally frozen drink in a Vitamix XL™ blender. • Never shake or rattle a container while in use. 2. Place liquids and soft foods in your container first. Hard items and ice should be placed last. • Never remove the container before the machine has come to a complete stop. -
Page 6: Control Panel
Vitamix XL Variable Speed Vitamix XL Programmable ™ ™ Variable Speed Dial Pulse Switch Start/Stop Switch Program Dial Pulse Switch Start/Stop Switch Vitamix XL™ Variable Speed Vitamix XL™ Programmable On/Off Power Switch: Located on the side of the On/Off Power Switch: Located on the side of the machine (Figure A), the On/Off switch controls the machine (Figure A), the On/Off switch controls the power to the machine. While plugged in, switch to on to power to the machine. While plugged in, switch to on to ready the machine for blending. Shut off the power switch ready the machine for blending. Shut off the power switch at night or whenever the machine will be left unattended. at night or whenever the machine will be left unattended. FIGURE A... -
Page 7: Programming
P R O G R A M M I N G M AC H I N E ASS E M B LY FIGURE A FIGURE B FIGURE C The Vitamix XL™ Programmable is pre-programmed with blending cycles that are optimized for a variety of applications. The programs can be customized by using a programming chip or programmer software kit available from Vitamix®. Call your distributor or Customer Service for more information. Although your machine comes from the factory pre-set with the Vitamix XL™ programs, follow these instructions when using a custom programming chip. Programming with a Custom Chip Lid Assembly 1. Turn the power to the machine on using the On/Off switch located on... -
Page 8: Safety Interlock
M AC H I N E ASS E M B LY Safety Interlock Blade Assembly The interlock is supplied only for those countries requiring this feature. Blade Agitator Assembly: The blade assembly With the machine plugged into the nearest outlet, the magnetic safety lock includes a precision-hardened stainless steel blade will disengage the power supply to the motor when the safety lid is lifted into with enclosed double sealed steel ball bearings for an upright position while placing the container on the centering pad (Figure A). maximum durability. The rugged blade assembly literally explodes molecules of food and ice in the Power is engaged whenever the safety lid is lowered onto the container lid container, helping every batch to homogenize (Figure B). The accelerator tool can be used through the safety lid and more effectively. The blades do not need to container lid while blending. be removed for normal cleaning. (Refer to the information below to remove or replace.) Drive Spline: Inserts into drive socket on the motor base to turn the blade. FIGURE A FIGURE B Note: Removing and replacing your container while the coupling is still rotating will strip the drive spline “teeth.” (This part is NOT removable.) -
Page 9: Accelerator Tool
M AC H I N E ASS E M B LY C A R I N G FO R YO U R M AC H I N E Accelerator Tool Splash Disk The accelerator tool prevents an air bubble from forming while blending and allows for the processing of very thick and/or difficult-to-process frozen mixtures. While the machine is running, use the accelerator tool to push ingredients into the blades. Using the Accelerator Tool: • If thick mixtures stop circulating, you may have trapped an air bubble. Insert the accelerator tool through the lid and stir to release it. -
Page 10: Caring For Your Machine
3. Thoroughly clean switches so that they work freely. They may become sticky from use. Unplug the machine and use a wet cloth, moistened with water* and a mild detergent, to clean around the edges of the switch paddles until they function freely. IMPORTANT NOTES! Work the switches back and forth a few times to loosen any dried residue under switch. Leaving switches sticky will damage or burn out the switches. Clean carefully, * B e sure to wring excess water out of cloth or sponge when using caution not to allow water or other liquids to infiltrate the switch. cleaning around the controls or any electrical part. 4. Dry with a soft cotton cloth. ** T o prolong container life, Vitamix® recommends using soaps with a low Ph balance, such as a liquid dishwashing detergent (Ivory Liquid®). *** R ecommended sanitizing solution: 1.5 tsp. / 7,4 ml institutional or Container and Lid household bleach in 2 qt. / 2,0 L water. Separate the lid and plug. Wash in warm soapy water. Rinse clean under running water and dry. Reassemble before use. (See page 13.) To Clean: Fill container 1⁄4 full with warm (110˚F / 43˚C) water and add a couple drops of liquid dishwashing detergent.** Return container to motor WARNINGS! base and firmly position the two-piece lid. Run machine for 30 seconds. -
Page 11: Troubleshooting
(Programmable model only) but there is no power it is snug. See page 15. Machine may stop working if it is • Machine did not work right overloaded on low speed. To cool out of the box the motor, reset by turning power • Setting selected starts • Machine will not run Double-check to make sure power cord off for up to 45 minutes. the wrong program is firmly in power outlet. Call Vitamix Customer Service. (Programmable model only) Check to make sure the On/Off Switch is in the on position. Check to make sure switches are clean and moving freely. The thermal protector may have shut the machine off. Turn power off for up to 45 minutes to reset. Note: Cooling If you cannot fix your machine with these suggestions, technical help is available may be quickened by placing the motor by calling Vitamix® technical support at 800-886-5235. If you purchased your base in a cool spot. (Unplug first.) Try equipment outside the U.S.A., contact your local Vitamix Distributor or telephone the circulating the air with a vacuum or fan aimed at the bottom of the motor base. -
Page 12: Warranty
WA R R A N T Y LIMITED WARRANTY of Vita-Mix and does not cover normal wear-and-tear, abuse, misuse, negligent use, alteration of the base or container (or the sound enclosure), or exposure to extreme conditions and is only valid if the Equipment is used in In order to maximize the life and keep your Vitamix® product in good working order, accordance with the accompanying instruction booklet (which may also be accessed it is important that you follow a few simple maintenance tips: at www.vitamix.com/foodservice). 1. Periodically inspect the drive socket for visible wear and tear, cracks, or • If applicable, improper installation or ventilation in the case of the in-counter model of brakes to the socket. If damage is found, replace the drive socket with the the Equipment, or placing the Equipment in a sound enclosure not manufactured by extra drive socket enclosed with your blender. To purchase additional Vita-Mix will void this warranty. replacement drive sockets contact Vitamix at 1-800-437-4654 (1-800-4DRINK4) • This warranty is void in the event that repairs to the Equipment are performed for a dealer near you. For customers outside the U.S.A., contact your authorized by someone other than Vita-Mix or an authorized Vita-Mix Service Center. Vitamix Distributor, or call the Vitamix International Division at +1.440.782.2450 or Vita-Mix will not be responsible for the cost of any unauthorized repairs. email international@vitamix.com for a distributor near you. • The sole obligation of Vita-Mix under this warranty is to repair or replace 2. Manually rotate the blade bearing assembly to make sure it turns without the warranted part or parts as determined exclusively by Vita-Mix. hesitation or doesn’t spin too freely. If the blade hesitates or spins too freely, In no event, whether based on contract, indemnity, warranty, tort (including... -
Page 13: Parts List
PA RTS L I ST #755 #15900 Vitamix XL™ #15900 Lid and plug for 1.5 gal. / 5,6 L container #15899 1.5 gal. / 5,6 L container, blade assembly and lid assembly #15896 1.5 gal. / 5,6 L container only #15899 #15897 Vitamix XL™ blade agitator assembly for 1.5 gal. / 5,6 L container #15896 #15901 Retainer nut for 1.5 gal. / 5,6 L container #15897 #15892 Accelerator tool lid and plug for 64 oz. / 2,0 L Advance® container #102035 #15894 64 oz. / 2,0 L Advance® container, #15901 blade assembly and accelerator tool lid assembly #15893 64 oz. / 2,0 L container only #15902 #15895 #15941 Vitamix XL™ blade agitator assembly for Advance® container #15942 Retainer nut for Advance® container (for Vitamix XL™ only) #15902 Drive socket #755 #15895 Vitamix XL™ centering pad...