Nvidia 3D VISION User Manual
3d glasses
Hide thumbs
Also See for 3D VISION:
- User manual (663 pages) ,
- Quick start manual (122 pages) ,
- User manual (49 pages)

Related Manuals for Nvidia 3D VISION


Summary of Contents for Nvidia 3D VISION
- Page 1 3D VISION ™ USER GUIDE (US) USER GUIDE (UK) BENUTZERHANDBUCH MANUEL D’UTILISATION GUIDA DELL’UTENTE GUíA DEL USUARIO РУКОВОДСТВО ПОЛЬЗОВАТЕЛЯ 用户指南 使用手冊 ユーザーガイド 사용설명서...
- Page 2 3D VISION ™ USER GUIDE USER GUIDE...
-
Page 4: Table Of Contents
Required action before You start the Installation Installation Connecting the Display Removing Current Display Drivers Installing the Drivers and software NVIDIA Control Panel accessing the nVIDIa Control Panel set Up stereoscopic 3D enable stereoscopic 3D adjusting the Depth stereoscopic 3D Display Type Change 3D laser sight... - Page 5 Advanced Information Preset Configurations setting Your own shortcut Keys Game Configuration Guidelines Viewing Practices Tips And Troubleshooting 3D Vision is not Working Image is not Clear eyestrain/Headache no laser sight allow your 120 Hz lCD to Warm Up Compliance and Certifications...
-
Page 6: Welcome
About this Guide This guide discusses the installation and operation of the nVIDIa 3D Vision hardware and software. There is a full section containing usage tips and troubleshooting guidelines. Please read through the safety precautions and recommended... -
Page 7: System Requirements
PC meets the hardware requirements necessary to enjoy the 3D Vision experience. for a full list of system Requirements including supported nVIDIa GPUs, 3D Vision-Ready lCDs, 3D Vision notebooks and other required components, please visit www.nvidia.com/get3D and select System Requirements. -
Page 8: Epilepsy
WelCome Epilepsy WARNING IF YOU OR ANY MEMBER OF YOUR FAMILY HAS A HISTORY OF EPILEPSY, CONSULT A DOCTOR BEFORE USING COMPUTER GAME PRODUCTS. a small percentage of the population may experience epileptic seizures when viewing certain types of TV images or video games that contain flashing patterns of light. - Page 9 3D VIsIon UseR GUIDe...
-
Page 10: Unpacking Equipment
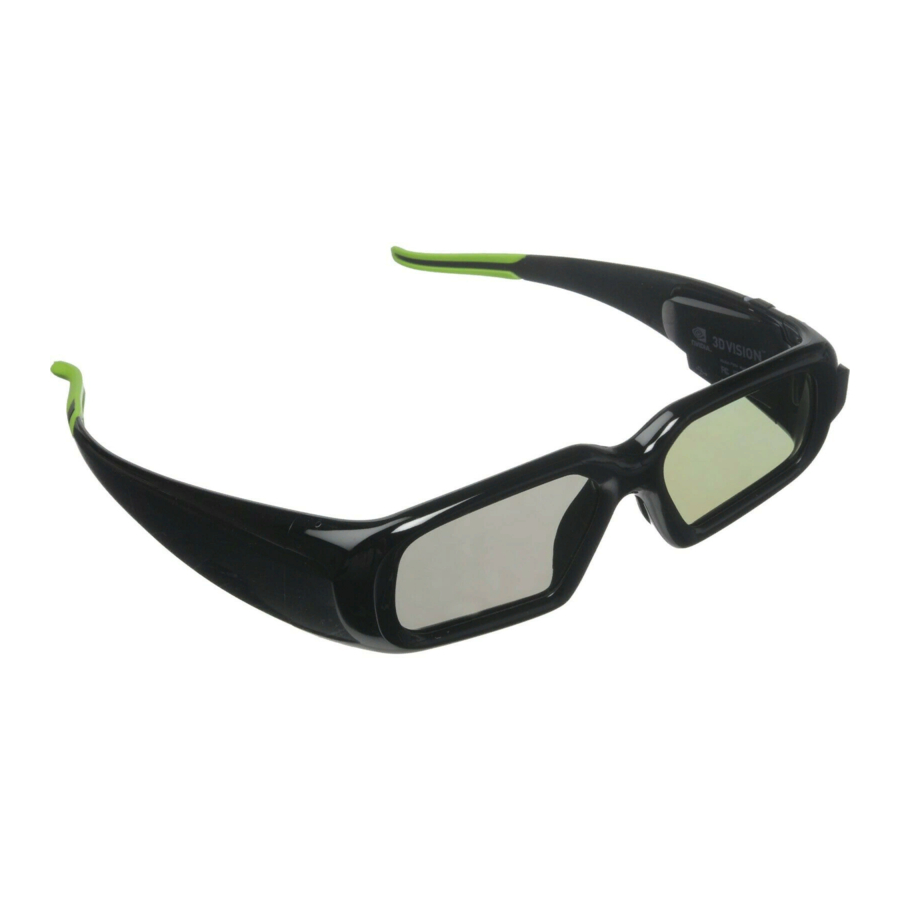
UnPaCKInG eqUIPmenT UNpaCkING EqUIpmENT Prior to unpacking your new nVIDIa 3D Vision box, it is a good idea to make sure you meet all the system requirements (page 2) for a smooth installation. be sure to inspect each piece of equipment shipped in the packing box. - Page 11 3D VIsIon UseR GUIDe Do not block this side of your glasses. It must be in-line-of-sight with the IR emitter ON button Indicator Light: To check the battery life, press the ON button. If the indicator light is: Green: Up to 60 hours of battery life.
- Page 12 (included with the 3D Vision glasses kit) 3D Vision products such as desktop monitors, projectors, and some 3D Vision notebooks use the Usb IR emitter to communicate to the 3D Vision glasses. Please view the diagrams below for information on how to use your Usb IR emitter.
- Page 13 3D VIsIon UseR GUIDe WARNING: Infrared Device Safety ClaSS 1 lED pRODUCT This product includes an Infrared light-emitting diodes for transmitting signals from the controller to the glasses. although this invisible beam is not considered harmful, and complies with EN60825-1 (IEC60825-1), we recommend the following precaution: when the Infrared device is transmitting: >...
-
Page 14: Ir Emitter
3D Vision products with built-In IR emitters do not require the Usb IR emitter and will communicate directly with the 3D Vision glasses. Please view the diagrams below for now to use 3D Vision you’re your product. 3D Vision notebooks... - Page 15 3D VIsIon UseR GUIDe 3D Vision lCD monitors and all-In-one PCs most 3D Vision lCD monitors and all-in-one PCs will not have keys for controlling 3D Vision when playing 3D content. You can control 3D using the following keyboard shortcuts: >...
-
Page 16: Wired Glasses
InsTall aTIon anD seTUP Wired Glasses 3D Vision Wired Glasses are designed to work with 3D Vision-Ready displays. The Wired Glasses do not use the Usb IR emitter that comes with 3D Vision Wireless Glasses kits and 3D Vision notebooks. - Page 17 Wired Glasses 3D Vision Wired Glasses can also be secured to be a PC using the notch in the Usb plug and notebook security devices. nVIDIa has tested Kensington notebook security devices to attach the glasses to a PC tower or table.
-
Page 18: Installation And Setup
Please launch the "set up 3D Vision" shortcut on your Windows desktop to set up 3D the first time. 120Hz If your lCD monitor includes nVIDIa 3D Vision glasses in the box or you want to ensure you have the latest drivers for your lCD monitor, visit www.nvidia.com/3DUpdate... -
Page 19: Installation
(skip this step if you are using a 3D Vision notebook) Connect your 3D Vision Ready display to your nVIDIa graphics card. The display you connect must be a 3D Vision Ready lCD or analogue CRT display. for lCDs use the dual-link DVI-to-DVI cable supplied with the display. - Page 20 TV’s menu to be PC or Computer to ensure the TV can process the video signal correctly. Note: The DVI-to-HDmI Cable is not included with your 3D Vision kit. Please obtain one from a computer or electronics store.
- Page 21 3D VIsIon UseR GUIDe 120 Hz lCD Connection Diagram for USb IR Emitter IR Emitter DO NOT MAKE THIS CONNECTION UNTIL TOLD TO DO SO BY THE INSTALL USB DVI WIZARD USB Cable Dual Link DVI cable (supplied with the display)
- Page 22 120 Hz lCD Connection Diagram for lCD monitors with built in IR Emitters Dual Link DVI cable (supplied with the display) Note: lCD monitors with built in IR emitters do not require additional Usb connectors from the PC to the monitor.
-
Page 23: Removing Current Display Drivers
STOP: If you purchased a PC with a built-in 3D Vision IR emitter (e.g. notebook) then 3D Vision drivers should already be installed on your PC. Do not uninstall the drivers. skip steps... -
Page 24: Installing The Drivers And Software
Click Remove Restart your computer If you are replacing a non nVIDIa graphics card, be sure to remove the graphics driver and power down your system to replace the card before continuing. Replace the card with a supported nVIDIa Geforce card. - Page 25 3D VIsIon UseR GUIDe Congratulations! setup and configuration are complete and 3D Vision is enabled and ready for you to begin the most immersive gaming experience for the PC. Note: 3D Vision has been enabled with the default depth amount of 15%.
-
Page 26: Nvidia Control Panel
3D Vision experience. To access the tool menus, go to the nVIDIa Control Panel. Accessing the NVIDIA Control Panel To open the NVIDIA Control Panel, right click on the desktop and select the nVIDIa Control Panel. You can also go to Windows Control Panel Hardware and Sound NVIDIA Control Panel. -
Page 27: Set Up Stereoscopic 3D
3D VIsIon UseR GUIDe Set Up Stereoscopic 3D This section of the nVIDIa Control Panel provides all the adjustments needed to enhance your gaming experience. each of the adjustments on this screen is discussed. Enable Stereoscopic 3D Note: stereoscopic 3D effects work only with full-screen DirectX applications. -
Page 28: Adjusting The Depth
The depth amount in a game is the depth that the farthest object is placed in a scene. When 3D Vision is first installed on your system, the Depth is set at the default of 15%. If you are new to 3D gaming, 15% is a good point to start with. -
Page 29: Stereoscopic 3D Display Type
Depth slider in the nVIDIa Control Panel. Stereoscopic 3D Display Type The Stereoscopic 3D display type is a drop-down list of all 3D Vision Ready displays that were found by the setup Wizard. This list is populated by the Wizard. If you had more than one 3D Vision-Ready display attached during setup, they will be reflected in the list. -
Page 30: Set Keyboard Shortcuts
The keyboard shortcuts are in-game hot keys that can be used to perform a variety of actions. To view or change the keyboard shortcut keys from the Set Up Stereoscopic 3D screen in the nVIDIa Control Panel, click on the Set Keyboard Shortcuts button. - Page 31 3D VIsIon UseR GUIDe This expands the Set Keyboard Shortcuts screen. To enable the use of advanced shortcut keys in-game, you must check the Enable advanced in-game settings check box. The standard shortcut keys (shown in the upper portion of the window) are always enabled.
- Page 32 Control Panel Ctrl+alt+ show/Hide in-game Displays the settings recommended Insert compatibility by nVIDIa for the current game in the lower corner of your display. Ctrl+f6 Increase moves objects towards you. maximum convergence convergence places all objects in front of the scene, in user space.
-
Page 33: Hide Stereoscopic 3D Effects When Game Starts
There are some games that do not launch very well when stereoscopic 3D effects are enabled at startup. To avoid this, check the box on the Set Up Stereoscopic 3D screen in the nVIDIa Control Panel. The stereoscopic 3D effects remain enabled, it is just hidden at startup. -
Page 34: Test Stereoscopic 3D
Test Stereoscopic 3D The Test Stereoscopic 3D button and drop-down list on the Set Up Stereoscopic 3D screen in the nVIDIa Control Panel provides the ability to test stereoscopic 3D viewing and the ability to run the setup Wizard and the medical Image Test. -
Page 35: View Compatibility With Games
3D user run the medical Image Test to verify their ability to view stereoscopic 3D-rendered images. If you can not see the image, do not use 3D Vision (see step 20 on page 22). View Compatibility With Games nVIDIa has tested and provided profiles for many of the top selling games to ensure they work properly with 3D Vision. - Page 36 Unchecked list all games tested of testing. by nVIDIa. list of games tested by nVIDIa If you have a game that is not on the list of those tested by nVIDIa, go to www.nvidia.com and consult the games that have been tested since the release of this version of software.
- Page 37 3D VIsIon UseR GUIDe...
-
Page 38: Advanced Information
You can view the list of these games on the View compatibility with games task located on the nVIDIa Control Panel. This menu also shows a list of comments pertaining to that game. These comments may include suggested settings or adjustments and comments on the construction of the game. -
Page 39: Setting Your Own Shortcut Keys
You can use the default setting or you can change the shortcut keys to suit your particular liking. To see the default keyboard shortcut key settings, go to the nVIDIa Control Panel and select the Set up stereoscopic 3D task in the left window pane. -
Page 40: Game Configuration Guidelines
aDVanCeD InfoRmaTIon Game Configuration Guidelines The following table lists some adjustment guidelines to use for specific issues when you are in a game. Table 2. Game Configuration Guidelines Issue Suggestion object are too close Decrease Convergence [Ctrl+F5] side borders are blurred, not Cycle frustum adjustments clear, not visible until borders are clear... - Page 41 The sharper the image on the screen, the better the quality. > Game Cursor/Cross-hair Sights: If you are using the nVIDIa 3D laser sights, be sure to turn off the sight that the game provides. The game sight is usually positioned at screen-depth, and inter- feres with useful viewing of the nVIDIa laser sight.
-
Page 42: Tips And Troubleshooting
> Check and make sure that stereoscopic 3D is enabled. Go to the nVIDIa Control Panel Set Up Stereoscopic 3D screen. > Re-evaluate your setup. ensure there is direct line-of-sight between the IR emitter and your wireless glasses at a range of at least 1.5 feet (45cm) or greater. -
Page 43: Image Is Not Clear
Run the setup Wizard to verify your hardware is operating properly. Go to the nVIDIa Control Panel (right click on the desktop). select Set Up 3D Vision. Then select Run Setup Wizard from Test Stereoscopic 3D drop down menu. >... - Page 44 Control Panel View Compatibility with Games screen. Verify that your game has been tested by nVIDIa and has been ranked as 3D Vision-Ready, Excellent, Good, or fair. Check out the Issues and recommended settings listed at the bottom of the screen. make any adjustments recommended by nVIDIa to make your gaming experience better.
-
Page 45: Eyestrain/Headache
If you do not see the laser sight in a game, the laser sight may not be enabled. Go to the nVIDIa Control Panel Set Up Stereoscopic 3D screen and click on the Change 3D laser Sight button to display the Change 3D Laser Sight screen. -
Page 46: Allow Your 120 Hz Lcd To Warm Up
24x7x365 online knowledgebase system, where you can submit questions to our tech support staff. questions may only be submitted in english. 3D Vision customers also have access to toll free technical support at 1-800-797-6530 from 8:00am-5:00Pm Pacific Time, m-f. The technical support... - Page 47 3D VIsIon UseR GUIDe...
-
Page 48: Compliance And Certifications
ComPlIanCe anD CeRTIfICaTIons COmplIaNCE aND CERTIfICaTIONS The nVIDIa 3D Vision systems are compliant with the relevant regulations and have received the required certifications: > australian Communications authority (C-Tick) > bureau of standards, metrology, and Inspection (bsmI) > Conformité européenne (Ce) >... - Page 49 3D VIsIon UseR GUIDe US Federal Communications Commission Compliance fCC – federal Communications Commission Title 47 of Code of federal Regulation (CfR) part 15 - Radio frequency devices; subpart b - Unintentional Radiator (fCC Part 15b:2008) CAUTION: Changes or modifications to this unit not expressly approved by the party responsible for compliance could void the user's authority to operate the equipment.
- Page 50 ComPlIanCe anD CeRTIfICaTIons Canada Compliance Industry Canada ICES-003:2004 - Digital apparatus: spectrum management and Telecommunications Policy; Interference-Causing equipment standard. This Class b digital apparatus complies with Canadian ICes-003. Cet appareil numérique de la classe b est conforme à la norme nmb- 003 du Canada.
- Page 51 3D VIsIon UseR GUIDe Korea Compliance MIC - ministry of Information and Communications KCC - Korea Communication Commission KC - Korea Certification > Kn 22 (CIsPR 22): Information technology equipment-Radio disturbance characteristics - limit and methods of measurement. >...
- Page 52 ComPlIanCe anD CeRTIfICaTIons European Union Compliance Ce: european Conformity (Conformité européenne) Product comply with both the emC Directive (2004/108/ eC) and the low Voltage Directive (2006/95/eC) issued by the Commission of the european Community. Compliance with these directives implies conformity to the following european norms (The equivalent international standards are in parenthesis) >...
- Page 53 3D VIsIon UseR GUIDe > GosT R 51317.3.3-99(IeC 61000-3-3): electromagnetic compatibility(emC)- Part 3-3: limits-limitation of voltage changes, voltage fluctuations and flicker in public low-voltage supply systems, for equipment with rated current ≤ 16a per phase and not subject to conditional connection).
-
Page 54: Important Safety Information
ImPoRTanT safeT Y InfoRmaTIon ImpORTaNT SafETY INfORmaTION Preface nVIDIa products are designed to operate safely when installed and used according to the product instructions and general safety practices. The guidelines included in this document explain the potential risks associated with computer operation and provide important safety practices designed to minimize these risks. -
Page 55: Safety Symbols
3D VIsIon UseR GUIDe > Radiation: noise, ionising, laser, ultrasonic waves. Retain and follow all product safety and operating instructions. always refer to the documentation supplied with your equipment. observe all warnings on the product and in the operating instructions. -
Page 56: General Precautions
> If the product sustains damage requiring service, disconnect the product from the computer or Usb charging adapter and refer servicing to an nVIDIa authorized service provider. > as with any electronic equipment, dispose of glasses and IR emitter properly. - Page 57 5C to 40C (41f to 104f). > Storage temperature: The recommended storage temperature range is -10C to 45C(14f to 113f). Do not leave 3D Vision system in your car, because temperatures in parked cars can exceed this range. Infrared device safety Class 1 LED Product...
- Page 58 Corporation. specifications mentioned in this publi- cation are subject to change without notice. This publication supersedes and replaces all information previously supplied.
- Page 59 www.nvidia.com...
- Page 60 3D VISION ™ USER GUIDE USER GUIDE...
- Page 62 Required action before You start the Installation Installation Connecting the Display Removing Current Display Drivers Installing the Drivers and software NVIDIA Control Panel accessing the nVIDIa Control Panel set Up stereoscopic 3D enable stereoscopic 3D adjusting the Depth stereoscopic 3D Display Type Change 3D laser sight...
- Page 63 Advanced Information Preset Configurations setting Your own shortcut Keys Game Configuration Guidelines Viewing Practices Tips And Troubleshooting 3D Vision is not Working Image is not Clear eyestrain/Headache no laser sight allow your 120 Hz lCD to Warm Up Compliance and Certifications...
-
Page 64: Welcome
About this Guide This guide discusses the installation and operation of the nVIDIa 3D Vision hardware and software. There is a full section containing usage tips and troubleshooting guidelines. Please read through the safety precautions and recommended viewing guidelines given on pages 2 and 3 under safety Requirements . -
Page 65: System Requirements
PC meets the hardware requirements necessary to enjoy the 3D Vision experience. for a full list of system Requirements including supported nVIDIa GPUs, 3D Vision-Ready lCDs, 3D Vision notebooks and other required components, please visit www.nvidia.co.uk/get3D and select System Requirements. -
Page 66: Epilepsy
WelCome Epilepsy WARNING IF YOU OR ANY MEMBER OF YOUR FAMILY HAS A HISTORY OF EPILEPSY, CONSULT A DOCTOR BEFORE USING COMPUTER GAME PRODUCTS. a small percentage of the population may experience epileptic seizures when viewing certain types of TV images or video games that contain flashing patterns of light. - Page 67 3D VIsIon UseR GUIDe...
-
Page 68: Unpacking Equipment
UnPaCKInG eqUIPmenT UNpaCkING EqUIpmENT Prior to unpacking your new nVIDIa 3D Vision box, it is a good idea to make sure you meet all the system requirements (page 2) for a smooth installation. be sure to inspect each piece of equipment shipped in the packing box. - Page 69 3D VIsIon UseR GUIDe Do not block this side of your glasses. It must be in-line-of-sight with the IR emitter ON button Indicator Light: To check the battery life, press the ON button. If the indicator light is: Green: Up to 60 hours of battery life.
-
Page 70: Ir Emitter
(included with the 3D Vision glasses kit) 3D Vision products such as desktop monitors, projectors, and some 3D Vision notebooks use the Usb IR emitter to communicate to the 3D Vision glasses. Please view the diagrams below for information on how to use your Usb IR emitter. - Page 71 3D VIsIon UseR GUIDe WARNING: Infrared Device Safety ClaSS 1 lED pRODUCT This product includes an Infrared light-emitting diodes for transmitting signals from the controller to the glasses. although this invisible beam is not considered harmful, and complies with EN60825-1 (IEC60825-1), we recommend the following precaution: when the Infrared device is transmitting: >...
-
Page 72: Built-In Ir Emitters
3D Vision products with built-In IR emitters do not require the Usb IR emitter and will communicate directly with the 3D Vision glasses. Please view the diagrams below for now to use 3D Vision you’re your product. 3D Vision notebooks... - Page 73 3D VIsIon UseR GUIDe 3D Vision lCD monitors and all-In-one PCs most 3D Vision lCD monitors and all-in-one PCs will not have keys for controlling 3D Vision when playing 3D content. You can control 3D using the following keyboard shortcuts: >...
-
Page 74: Wired Glasses
InsTall aTIon anD seTUP Wired Glasses 3D Vision Wired Glasses are designed to work with 3D Vision-Ready displays. The Wired Glasses do not use the Usb IR emitter that comes with 3D Vision Wireless Glasses kits and 3D Vision notebooks. - Page 75 Wired Glasses 3D Vision Wired Glasses can also be secured to be a PC using the notch in the Usb plug and notebook security devices. nVIDIa has tested Kensington notebook security devices to attach the glasses to a PC tower or table.
-
Page 76: Installation And Setup
Please launch the "set up 3D Vision" shortcut on your Windows desktop to set up 3D the first time. 120Hz If your lCD monitor includes nVIDIa 3D Vision glasses in the box or you want to ensure you have the latest drivers for your lCD monitor, visit www.nvidia.co.uk/3DUpdate... -
Page 77: Installation
(skip this step if you are using a 3D Vision notebook) Connect your 3D Vision Ready display to your nVIDIa graphics card. The display you connect must be a 3D Vision Ready lCD or analogue CRT display. for lCDs use the dual-link DVI-to-DVI cable supplied with the display. - Page 78 TV’s menu to be PC or Computer to ensure the TV can process the video signal correctly. Note: The DVI-to-HDmI Cable is not included with your 3D Vision kit. Please obtain one from a computer or electronics store.
- Page 79 3D VIsIon UseR GUIDe 120 Hz lCD Connection Diagram for USb IR Emitter IR Emitter DO NOT MAKE THIS CONNECTION UNTIL TOLD TO DO SO BY THE INSTALL USB DVI WIZARD USB Cable Dual Link DVI cable (supplied with the display)
- Page 80 120 Hz lCD Connection Diagram for lCD monitors with built in IR Emitters Dual Link DVI cable (supplied with the display) Note: lCD monitors with built in IR emitters do not require additional Usb connectors from the PC to the monitor.
-
Page 81: Removing Current Display Drivers
STOP: If you purchased a PC with a built-in 3D Vision IR emitter (e.g. notebook) then 3D Vision drivers should already be installed on your PC. Do not uninstall the drivers. skip steps... -
Page 82: Installing The Drivers And Software
Click Remove Restart your computer If you are replacing a non nVIDIa graphics card, be sure to remove the graphics driver and power down your system to replace the card before continuing. Replace the card with a supported nVIDIa Geforce card. - Page 83 3D VIsIon UseR GUIDe Congratulations! setup and configuration are complete and 3D Vision is enabled and ready for you to begin the most immersive gaming experience for the PC. Note: 3D Vision has been enabled with the default depth amount of 15%.
-
Page 84: Nvidia Control Panel
3D Vision experience. To access the tool menus, go to the nVIDIa Control Panel. Accessing the NVIDIA Control Panel To open the NVIDIA Control Panel, right click on the desktop and select the nVIDIa Control Panel. You can also go to Windows Control Panel Hardware and Sound NVIDIA Control Panel. -
Page 85: Set Up Stereoscopic 3D
3D VIsIon UseR GUIDe Set Up Stereoscopic 3D This section of the nVIDIa Control Panel provides all the adjustments needed to enhance your gaming experience. each of the adjustments on this screen is discussed. Enable Stereoscopic 3D Note: stereoscopic 3D effects work only with full-screen DirectX applications. -
Page 86: Adjusting The Depth
The depth amount in a game is the depth that the farthest object is placed in a scene. When 3D Vision is first installed on your system, the Depth is set at the default of 15%. If you are new to 3D gaming, 15% is a good point to start with. -
Page 87: Stereoscopic 3D Display Type
Depth slider in the nVIDIa Control Panel. Stereoscopic 3D Display Type The Stereoscopic 3D display type is a drop-down list of all 3D Vision Ready displays that were found by the setup Wizard. This list is populated by the Wizard. If you had more than one 3D Vision-Ready display attached during setup, they will be reflected in the list. -
Page 88: Set Keyboard Shortcuts
To view or change the keyboard shortcut keys from the Set Up Stereoscopic 3D screen in the nVIDIa Control Panel, click on the Set Keyboard Shortcuts button. shown with default values... - Page 89 3D VIsIon UseR GUIDe This expands the Set Keyboard Shortcuts screen. To enable the use of advanced shortcut keys in-game, you must check the Enable advanced in-game settings check box. The standard shortcut keys (shown in the upper portion of the window) are always enabled.
- Page 90 Control Panel Ctrl+alt+ show/Hide in-game Displays the settings recommended Insert compatibility by nVIDIa for the current game in the lower corner of your display. Ctrl+f6 Increase moves objects towards you. maximum convergence convergence places all objects in front of the scene, in user space.
-
Page 91: Hide Stereoscopic 3D Effects When Game Starts
There are some games that do not launch very well when stereoscopic 3D effects are enabled at startup. To avoid this, check the box on the Set Up Stereoscopic 3D screen in the nVIDIa Control Panel. The stereoscopic 3D effects remain enabled, it is just hidden at startup. -
Page 92: Test Stereoscopic 3D
Test Stereoscopic 3D The Test Stereoscopic 3D button and drop-down list on the Set Up Stereoscopic 3D screen in the nVIDIa Control Panel provides the ability to test stereoscopic 3D viewing and the ability to run the setup Wizard and the medical Image Test. -
Page 93: View Compatibility With Games
3D user run the medical Image Test to verify their ability to view stereoscopic 3D-rendered images. If you can not see the image, do not use 3D Vision (see step 20 on page 22). View Compatibility With Games nVIDIa has tested and provided profiles for many of the top selling games to ensure they work properly with 3D Vision. - Page 94 Unchecked list all games tested of testing. by nVIDIa. list of games tested by nVIDIa If you have a game that is not on the list of those tested by nVIDIa, go to www.nvidia.co.uk and consult the games that have been tested since the release of this version of software.
- Page 95 3D VIsIon UseR GUIDe...
-
Page 96: Advanced Information
You can view the list of these games on the View compatibility with games task located on the nVIDIa Control Panel. This menu also shows a list of comments pertaining to that game. These comments may include suggested settings or adjustments and comments on the construction of the game. -
Page 97: Setting Your Own Shortcut Keys
You can use the default setting or you can change the shortcut keys to suit your particular liking. To see the default keyboard shortcut key settings, go to the nVIDIa Control Panel and select the Set up stereoscopic 3D task in the left window pane. -
Page 98: Game Configuration Guidelines
aDVanCeD InfoRmaTIon Game Configuration Guidelines The following table lists some adjustment guidelines to use for specific issues when you are in a game. Table 2. Game Configuration Guidelines Issue Suggestion object are too close Decrease Convergence [Ctrl+F5] side borders are blurred, not Cycle frustum adjustments clear, not visible until borders are clear... - Page 99 The sharper the image on the screen, the better the quality. > Game Cursor/Cross-hair Sights: If you are using the nVIDIa 3D laser sights, be sure to turn off the sight that the game provides. The game sight is usually positioned at screen-depth, and inter- feres with useful viewing of the nVIDIa laser sight.
-
Page 100: Tips And Troubleshooting
> Check and make sure that stereoscopic 3D is enabled. Go to the nVIDIa Control Panel Set Up Stereoscopic 3D screen. > Re-evaluate your setup. ensure there is direct line-of-sight between the IR emitter and your wireless glasses at a range of at least 1.5 feet (45cm) or greater. -
Page 101: Image Is Not Clear
Run the setup Wizard to verify your hardware is operating properly. Go to the nVIDIa Control Panel (right click on the desktop). select Set Up 3D Vision. Then select Run Setup Wizard from Test Stereoscopic 3D drop down menu. >... - Page 102 Control Panel View Compatibility with Games screen. Verify that your game has been tested by nVIDIa and has been ranked as 3D Vision-Ready, Excellent, Good, or fair. Check out the Issues and recommended settings listed at the bottom of the screen. make any adjustments recommended by nVIDIa to make your gaming experience better.
-
Page 103: Eyestrain/Headache
If you do not see the laser sight in a game, the laser sight may not be enabled. Go to the nVIDIa Control Panel Set Up Stereoscopic 3D screen and click on the Change 3D laser Sight button to display the Change 3D Laser Sight screen. -
Page 104: Allow Your 120 Hz Lcd To Warm Up
24x7x365 online knowledgebase system, where you can submit questions to our tech support staff. questions may only be submitted in english. 3D Vision customers also have access to toll free technical support at 1-800-797-6530 from 8:00am-5:00Pm Pacific Time, m-f. The technical support... - Page 105 3D VIsIon UseR GUIDe...
-
Page 106: Compliance And Certifications
ComPlIanCe anD CeRTIfICaTIons COmplIaNCE aND CERTIfICaTIONS The nVIDIa 3D Vision systems are compliant with the relevant regulations and have received the required certifications: > australian Communications authority (C-Tick) > bureau of standards, metrology, and Inspection (bsmI) > Conformité européenne (Ce) >... - Page 107 3D VIsIon UseR GUIDe US Federal Communications Commission Compliance fCC – federal Communications Commission Title 47 of Code of federal Regulation (CfR) part 15 - Radio frequency devices; subpart b - Unintentional Radiator (fCC Part 15b:2008) CAUTION: Changes or modifications to this unit not expressly approved by the party responsible for compliance could void the user's authority to operate the equipment.
- Page 108 ComPlIanCe anD CeRTIfICaTIons Canada Compliance Industry Canada ICES-003:2004 : Digital apparatus: spectrum management and Telecommunications Policy; Interference-Causing equipment standard. This Class b digital apparatus complies with Canadian ICes-003. Cet appareil numérique de la classe b est conforme à la norme nmb-003 du Canada.
- Page 109 3D VIsIon UseR GUIDe Korea Compliance mIC - ministry of Information and Communications KCC - Korea Communication Commission KC - Korea Certification > Kn 22 (CIsPR 22): Information technology equipment-Radio disturbance characteristics - limit and methods of measurement >...
- Page 110 ComPlIanCe anD CeRTIfICaTIons European Union Compliance Ce: european Conformity (Conformité européenne) Product comply with both the emC Directive (2004/108/ eC) and the low Voltage Directive (2006/95/eC) issued by the Commission of the european Community. Compliance with these directives implies conformity to the following european norms (The equivalent international standards are in parenthesis): >...
- Page 111 3D VIsIon UseR GUIDe changes, voltage fluctuations and flicker in public low- voltage supply systems, for equipment with rated current ≤ 16a per phase and not subject to conditional connection) Underwriters Laboratories (UL/cUL, CB Scheme) Ul- Underwriters laboratories >...
-
Page 112: Important Safety Information
ImPoRTanT safeT Y InfoRmaTIon ImpORTaNT SafETy INfORmaTION Preface nVIDIa products are designed to operate safely when installed and used according to the product instructions and general safety practices. The guidelines included in this document explain the potential risks associated with computer operation and provide important safety practices designed to minimize these risks. - Page 113 3D VIsIon UseR GUIDe > Radiation: noise, ionizing, laser, ultrasonic waves Retain and follow all product safety and operating instructions. always refer to the documentation supplied with your equipment. observe all warnings on the product and in the operating instructions.
- Page 114 > If the product sustains damage requiring service, disconnect the product from the computer or Usb charging adapter and refer servicing to an nVIDIa authorized service provider. > as with any electronic equipment, dispose of glasses and IR emitter properly.
- Page 115 Operating temperature: Recommended range is 5°C to 40°C (41°f to 104°f). > Storage temperature: The recommended storage temperature range is -10°C to 45°C(14°fto 113°f). Do not leave 3D Vision system in your car, because temperatures in parked cars can exceed this range. Infrared device safety...
- Page 116 Corporation. specifications mentioned in this publi- cation are subject to change without notice. This publication supersedes and replaces all information previously supplied.
- Page 117 www.nvidia.co.uk...
- Page 118 3D VISION ™ USER GUIDE BENUTZERHANDBUCH...
- Page 120 Erforderliche Schritte vor Beginn der Installation Installation Anschließen des Bildschirms Entfernen vorhandener Bildschirmtreiber Installation der Treiber und der Software NVIDIA-Systemsteuerung Aufrufen der NVIDIA-Systemsteuerung Einrichten von stereoskopischem 3D Aktivieren von stereokopischem 3D Einstellen der Tiefe Stereoskopischer 3D-Anzeigetyp Ändern des 3D-Laservisiers Festlegen der Tastenkombinationen...
- Page 121 Informationen für fortgeschrittene Benutzer Voreingestellte Konfigurationen Festlegen eigener Tastenkombinationen Richtlinien zur Spielekonfiguration Beim Betrachten zu beachten Tipps und Fehlersuche 3D Vision funktioniert nicht Unscharfes Bild Augenbelastung und Kopfschmerzen Kein Laservisier 120-Hz-LCD-Bildschirme brauchen eine gewisse Aufwärmzeit Zertifizierungen und Standards Wichtige Sicherheitshinweise...
-
Page 122: Herzlich Willkommen
Wir gratulieren Ihnen zum Kauf von NVIDIA 3D Vision, ® einem überaus realistischen 3D-Stereo-Erlebnis für Ihren PC. Mit dem 3D Vision Kit aus kabelloser High-Tech-Brille und fortschrittlicher Software werden Hunderte von PC-Spielen und Digitalfotos zum unvergesslichen interaktiven Erlebnis. Einfach die modische Brille aufsetzen. -
Page 123: Systemanforderungen
BENUTZERHANDBUCH FÜR NVIDIA 3D VISION Systemanforderungen Bevor Sie beginnen, sollten Sie überprüfen, ob die folgenden Mindestsystemanforderungen erfüllt sind. Damit stellen Sie sicher, dass Ihr PC hardwaremäßig für das 3D-Vision-Erlebnis gerüstet ist. Eine umfassende Liste der Systemanforderungen inklusive unterstützter NVIDIA-Grafikprozessoren, 3D-Vision-fähiger LCD-Bildschirme,... -
Page 124: Epilepsie
HERZLICH WILLKOMMEN Epilepsie WARNUNG! WENN SIE SELBST ODER EINE ANDERE PERSON IN IHRER FAMILIE SCHON EINMAL UNTER EPILEPSIE GELITTEN HABEN, IST VOR DER AUSFÜHRUNG VON COMPUTERSPIELEN EIN ARZT ZU RATE ZU ZIEHEN. Bei einem kleinen Anteil der Bevölkerung kann das Betrachten bestimmter Arten von Fernsehbildern oder Videospielen, die plötzlich aufblitzende Lichtmuster enthalten, epileptische Anfälle auslösen. - Page 125 BENUTZERHANDBUCH FÜR NVIDIA 3D VISION...
-
Page 126: Auspacken Des Produkts
AUSPACKEN DES PRODUKTS AUSPACKEN DES PRODUKTS Bevor Sie Ihr neues NVIDIA 3D Vision aus der Verpackung nehmen, sollten Sie sich noch einmal vergewissern, dass Ihr System alle Anforderungen (Seite 2) für eine problemlose Installation erfüllt. Bitte überprüfen Sie alle im Lieferumfang enthaltenen Teile. Falls etwas fehlt oder beschädigt ist, wenden Sie sich an Ihren Händler. - Page 127 BENUTZERHANDBUCH FÜR NVIDIA 3D VISION Diese Seite der Brille nicht verdecken. Es muss eine ungehinderte Sichtverbindung zum Infrarotsender bestehen. Taste EIN Anzeige-LED: Drücken Sie die Taste EIN, um den Akkustand zu überprüfen. Bedeutung der LED-Farben: Grün: Die verbleibende Akkulaufzeit beträgt noch bis zu 60 Stunden.
-
Page 128: Usb-Infrarotsender
Hersteller Ihres Notebooks, ob Sie den USB-Infrarotsender benötigen. An der Rückseite des Senders befindet sich ein Drehregler, mit dem Sie während des Spiels die Tiefe erhöhen bzw. verringern können. Schalter für 3D Vision EIN/AUS Drehregler zur Einstellung der 3D-Tiefe während des Spiels VESA-konformer Bildschirmanschluss über Stereokabel (nur für DLP-HDTV-... - Page 129 BENUTZERHANDBUCH FÜR NVIDIA 3D VISION WARNUNG: Sicherheitshinweis für Infrarotgeräte LED-PRODUKT DER KL ASSE 1 Dieses Produkt verfügt über Infrarot-Leuchtdioden zur Signalübertragung von der Steuereinheit zur Brille. Auch wenn dieser unsichtbare Strahl als ungefährlich gilt und den Anforderungen von EN 60825-1 (IEC 60825-1) entspricht, empfehlen wir folgende Sicherheitsvorkehrungen, während...
-
Page 130: Integrierte Infrarotsender
Reichweite von ca. 3 m. Integrierter 3D-Vision-Infrarotsender Der Mindestabstand zwischen Sender und Brille beträgt 23 cm. Die Stelle, an der der Sender untergebracht ist, kann zwischen den Notebookmodellen variieren. (Dreieck nach oben) 3D-Stereo-Tiefe erhöhen (Einschalttaste) 3D Vision EIN/AUS (Dreieck nach unten) 3D-Stereo-Tiefe verringern... - Page 131 BENUTZERHANDBUCH FÜR NVIDIA 3D VISION 3D-Vision-LCD-Monitore und All-in-One-PCs Die meisten 3D-Vision-LCD-Monitore und All-in-One-PCs besitzen keine Spezialtasten zur Steuerung von 3D Vision während der Wiedergabe von 3D-Inhalten. Steuern Sie die 3D-Funktionen mit folgenden Tastenkombinationen: > 3D EIN/AUS: STRG-T > 3D-Stereo-Tiefe erhöhen: STRG-F4 >...
-
Page 132: Kabelgebundene Brille
Der Treiber für die 3D-Vision- Steuereinheit muss installiert sein, bevor Sie die kabelgebundene Brille anschließen. Hinweis: Sie können mithilfe der 3D-Vision-Tastenkombinationen 3d ein- und ausschalten sowie die 3D-Tiefe regeln. Weitere Informationen finden Sie auf www.nvidia.de/Get3D in dem online abrufbaren Benutzerhandbuch. - Page 133 Sicherung der kabelgebundenen Brille Die kabelgebundene 3D-Vision-Brille kann mithilfe einer Vertiefung am USB-Stecker bzw. entsprechenden Sicherheitsvorrichtungen sicher mit dem PC oder Notebook verbunden werden. NVIDIA hat Kensington-Sicherheitsvorrichtungen zur sicheren Verbindung der Brille mit einem PC-Tower oder Notebook getestet. Sicherheitsaussparung am...
-
Page 134: Installation Und Einrichtung
Wählen Sie zur ersten 3D-Einrichtung die Verknüpfung „3D Vision einrichten“ auf Ihrem Windows-Desktop. 120Hz War Ihrem LCD-Monitor eine 3D-Vision-Brille von NVIDIA beigelegt oder wollen Sie sichergehen, dass Sie im Besitz der neuesten Treiber für Ihren LCD-Monitor sind, laden Sie sich von www.nvidia. -
Page 135: Installation
BENUTZERHANDBUCH FÜR NVIDIA 3D VISION Installation Anschließen des Bildschirms (bei 3D-Vision-Notebooks diesen Schritt überspringen) Schließen sie Ihren 3D-Vision-fähigen Bildschirm an Ihre NVIDIA- Grafikkarte an. Der anzuschließende Bildschirm muss 3D-Vision- fähig sein, entweder ein LCD-Monitor oder ein analoger Röhrenmonitor. Verwenden Sie für LCD-Monitore ein Dual-Link-DVI- nach-DVI-Kabel aus dem Lieferumfang des Monitors. - Page 136 Anschlussdiagramm für DLP-HDTV HDMI-Anschluss Infrarotsender 3-poliges VESA-Stereokabel Senderanschluss für 3D-Brillen DVI-nach-HDMI-Kabel DIESE VERBINDUNG USB DVI ERST DANN HERSTELLEN, WENN DER INSTALLATIONSASSISTENT SIE DAZU AUFFORDERT USB-Kabel Hinweis: Überprüfen Sie im Benutzerhandbuch Ihres DLP- Geräts, ob ein spezieller HDMI-Port vorhanden ist, über den der HD-Fernseher an den PC angeschlossen werden kann.
- Page 137 BENUTZERHANDBUCH FÜR NVIDIA 3D VISION Anschlussdiagramm für 120-Hz-LCD-Bildschirme mit angeschlossenem USB-Infrarotsender Infrarotsender DIESE VERBINDUNG ERST DANN HERSTELLEN, WENN DER USB DVI INSTALLATIONSASSISTENT SIE DAZU AUFFORDERT USB-Kabel Dual-Link-DVI-Kabel (im Lieferumfang des Bildschirms enthalten)
- Page 138 Anschlussdiagramm für 120-Hz-LCD-Bildschirme mit integriertem Infrarotsender Dual-Link-DVI-Kabel (im Lieferumfang des Bildschirms enthalten) Hinweis: LCD-Monitore mit integriertem Infrarotsender benötigen keine zusätzliche Verbindung zwischen PC und Monitor.
-
Page 139: Entfernen Vorhandener Bildschirmtreiber
BENUTZERHANDBUCH FÜR NVIDIA 3D VISION Anschlussdiagramm für kabelgebundene Brillen Entfernen vorhandener Bildschirmtreiber Bevor Sie mit der Installation beginnen, müssen Sie den auf Ihrem PC vorhandenen Grafiktreiber entfernen. ACHTUNG: Besitzen Sie einen PC mit integriertem 3D-Vision- Infrarotsender (z. B. ein Notebook), sollten entsprechende 3D-Treiber bereits auf Ihrem PC installiert sein. -
Page 140: Installation Der Treiber Und Der Software
Sie dann die Karte aus, bevor Sie mit dem nächsten Schritt fortfahren. Ersetzen Sie die Karte durch eine unterstützte NVIDIA-GeForce-Karte. Installation der Treiber und der Software Die CD mit der Software und dem Handbuch für 3D Vision einlegen. Der Bildschirm Softwareinstallation wird angezeigt. GeForce-Grafiktreiber installieren wählen. - Page 141 Drehregler an der Rückseite des Infrarotsenders geändert. Eine vollständige Liste mit kompatiblen Spielen finden Sie auf www.nvidia.de/3dvision. Die NVIDIA-Systemsteuerung enthält zusätzliche Einstellungen für 3D Vision. Informationen zur Benutzung der Systemsteuerung finden Sie in diesem Handbuch auf Seite 21 unter NVIDIA 3D Vision-Systemsteuerung.
-
Page 142: Nvidia-Systemsteuerung
3D-Vision-Erlebnis individuell anpassen können. Rufen Sie die NVIDIA-Systemsteuerung auf, um auf die Tool-Menüs zuzugreifen. Aufrufen der NVIDIA-Systemsteuerung Rufen Sie die NVIDIA-Systemsteuerung auf, indem Sie mit der rechten Maustaste auf den Desktop klicken und „NVIDIA-Systemsteuerung“ wählen. Sie können stattdessen aber auch über Windows-Systemsteuerung Hardware und Audio NVIDIA-Systemsteuerung darauf zugreifen. -
Page 143: Einrichten Von Stereoskopischem 3D
3D-Stereo-Effekte ein- und auszuschalten: durch Drücken der Einschalttaste am USB-Infrarotsender, durch Drücken der 3D-Ein-/ Aus-Taste auf dem Notebook oder über die Tastenkombination Strg+T. Die Aktivierung des Kontrollkästchens hat keine Auswirkungen auf andere Anwendungen. Wenn 3D Vision jedoch nicht verwendet wird, kann dadurch die Spielleistung verringert werden. -
Page 144: Einstellen Der Tiefe
Der Tiefenwert in einem Spiel legt fest, in welcher Tiefe der in einer Szenerie am weitesten entfernte Gegenstand platziert sein soll. Wenn 3D Vision zum ersten Mal auf Ihrem System installiert wird, beträgt der vorgegebene Wert für die Tiefe 15 %. Haben Sie noch keine Erfahrung mit 3D-Spielen gemacht, so ist 15 % ein guter Startwert. -
Page 145: Stereoskopischer 3D-Anzeigetyp
Das Fadenkreuz in einem Ego-Shooter wird bei der 3D-Stereo- Wiedergabe normalerweise in Bildschirmtiefe positioniert, wodurch sich das Zielen schwierig gestaltet. NVIDIA hat in einigen Spielen eine Konfiguration erstellt, mit der sich das Laservisier im Spiel in der korrekten Tiefe positionieren lässt. Bei diesen Spielen ist keine Konfiguration durch den Benutzer erforderlich. -
Page 146: Festlegen Der Tastenkombinationen
Festlegen der Tastenkombinationen Tastenkombinationen sind Hotkeys, um eine Vielzahl von Handlungen im Spiel auszulösen. Um die Tastenkombinationen vom Bildschirm Stereoskopische 3D-Funktion einrichten der NVIDIA-Systemsteuerung aus anzeigen zu lassen oder zu ändern, klicken Sie auf die Schaltfläche Tastenkombinationen festlegen. Anzeige mit Standardwerten... - Page 147 BENUTZERHANDBUCH FÜR NVIDIA 3D VISION Um die erweiterten Spieleinstellungen einzublenden, klicken Sie auf Dadurch wird der Bildschirm Tastenkombinationen festlegen erweitert. Anzeige mit Standardwerten Um die Benutzung der erweiterten Tastenkombinationen im Spiel zu ermöglichen, aktivieren Sie das Kontrollkästchen Erweiterte Ingame-Einstellungen aktivieren. Die Standard- Tastenkombinationen (angezeigt in der oberen Hälfte des Fensters)
- Page 148 Tab. 1: Tastenkombinationen Tasten Beschreibung Handlung Strg+T Stereoskopische Schaltet 3D Vision ein bzw. aus. 3D-Effekte anzeigen oder ausblenden Strg+F4 Tiefe erhöhen Erhöht während des laufenden Spiels in Echtzeit den Tiefenwert. Der neue Wert wird in die NVIDIA-System- steuerung übernommen. Strg+F3 Tiefe verringern Verringert während des laufenden...
-
Page 149: Ausblenden Der 3D-Stereo-Effekte Beim Start Des Spiels
BENUTZERHANDBUCH FÜR NVIDIA 3D VISION Ausblenden der 3D-Stereo-Effekte beim Start des Spiels Bei manchen Spielen erfolgt der Startvorgang nicht reibungslos, wenn die 3D-Stereo-Effekte zum Start des Spiels aktiviert sind. Um dies zu verhindern, aktivieren Sie das folgende Kontrollkästchen auf dem Bildschirm Stereoskopische 3D-Funktion einrichten der NVIDIA-Systemsteuerung. -
Page 150: Testen Des Stereoskopischen 3D-Bildes
ERWEITERTE KONFIGURATIONEN Testen des stereoskopischen 3D-Bildes Im Bildschirm Stereoskopische 3D-Funktion einrichten der NVIDIA- Systemsteuerung befindet sich die Schaltfläche Stereoskopisches 3-Bild testen... mit zugehöriger Dropdown-Liste. Diese Liste enthält Optionen zum Testen der 3D-Stereo-Darstellung sowie zum Aufruf des Setup-Assistenten und des medizinischen Prüfbildes. -
Page 151: Anzeigen Der Kompatibilität Von Spielen
Mal mit stereoskopischem 3D vertraut machen, den Test mit dem medizinischen Prüfbild durchzuführen, um sich zu vergewissern, dass sie 3D-Stereo-Bilder erkennen können. Wenn Sie das Bild nicht erkennen, sollten Sie 3D Vision nicht verwenden. Anzeigen der Kompatibilität von Spielen NVIDIA hat viele aktuelle Topspiele getestet und stellt Profile dafür zur Verfügung, um sicherzustellen, dass diese Spiele korrekt mit 3D Vision... - Page 152 NVIDIA getesteten Spiele aufgelistet. Testergebnissen Liste der von NVIDIA getesteten Spiele Wenn Sie ein Spiel besitzen, das nicht in der Liste der von NVIDIA getesteten Spiele enthalten ist, gehen Sie auf www.nvidia.de. Dort sind die Spiele aufgeführt, die seit der Veröffentlichung dieser Softwareversion getestet wurden.
- Page 153 BENUTZERHANDBUCH FÜR NVIDIA 3D VISION...
-
Page 154: Informationen Für Fortgeschrittene Benutzer
Darstellung optimal anpassen. So wird, basierend auf den Anforderungen des jeweiligen Spiels, eine 3D-Stereo-Wahrnehmung hoher Qualität erzielt. Die Liste mit diesen Spielen kann in der NVIDIA-Systemsteuerung unter Kompatibilität mit Spielen anzeigen eingeblendet werden. Dieses Menü enthält ferner eine Liste mit Anmerkungen zum jeweiligen Spiel. Die Anmerkungen können sich z. -
Page 155: Festlegen Eigener Tastenkombinationen
Tastenkombinationen vertraut sein. Sie können entweder die Standardeinstellungen verwenden oder die Tastenkombinationen nach Ihren Vorstellungen anpassen. Um die Standardeinstellungen für die Tastenkombinationen einzusehen, öffnen Sie die NVIDIA-Systemsteuerung und wählen Sie im linken Bildschirmbereich den Eintrag Stereoskopische 3D-Funktion einrichten. Klicken Sie auf die Schaltfläche Tastenkombinationen festlegen. -
Page 156: Richtlinien Zur Spielekonfiguration
INFORMATIONEN FÜR FORTGESCHRITTENE BENUTZER Richtlinien zur Spielekonfiguration In der folgenden Tabelle sind einige Richtlinien zur Anpassung von Einstellungen aufgeführt, die bei bestimmten Problemen während des Spiels hilfreich sind. Tab. 2: Richtlinien zur Spielekonfiguration Problem Empfehlung Das Objekt ist zu nahe Konvergenz verringern [Strg+F5] Die Konturen sind... - Page 157 Je schärfer das Bild auf dem Bildschirm, desto besser ist die Qualität. > Spielcursor und Fadenkreuzvisiere: Wenn Sie die NVIDIA-3D- Laservisiere verwenden, müssen Sie das spieleigene Visier abschalten. Das Visier des Spiels ist normalerweise in Bildschirmtiefe positioniert und beeinträchtigt die effektive Wah- rnehmung des NVIDIA-Laservisiers.
-
Page 158: Tipps Und Fehlersuche
TIPPS UND FEHLERSUCHE TIPPS UND FEHLERSUCHE NVIDIA stellt ein Online-Informationssystem zur Verfügung, über das jeden Tag rund um die Uhr Antworten auf die am häufigsten gestellten Fragen abgerufen werden können. Sie können damit auch online Fragen an unsere technischen Support-Mitarbeiter stellen. -
Page 159: Unscharfes Bild
BENUTZERHANDBUCH FÜR NVIDIA 3D VISION In unmittelbarer Nähe des Senders oder direkt davor dürfen sich keine Gegenstände befinden, die das Signal dämpfen könnten (z. B. eine Tastatur oder Kaffeetassen). Behindern Sie auch nicht den Infrarotempfänger an der Brille (vorne in der Nähe des linken Glases), z. - Page 160 Wenn Ihr Spiel in 3D-Stereo nicht funktioniert, überprüfen Sie die Liste der kompatiblen Spiele über die NVIDIA-Systemsteuerung. Überzeugen Sie sich davon, dass Ihr Spiel von NVIDIA getestet und als „3D Vision-Ready“, „Ausgezeichnet“, „Sehr gut“ oder „Gut“ bewertet wurde. Überprüfen Sie die Liste mit bekannten Problemen und empfohlenen Einstellungen am unteren Bildschirmrand.
-
Page 161: Augenbelastung Und Kopfschmerzen
Kein Laservisier Das Laservisier ist nicht aktiviert Wenn das Laservisier in einem Spiel nicht sichtbar ist, ist es möglicherweise nicht aktiviert. Rufen Sie in der NVIDIA- Systemsteuerung den Bildschirm Stereoskopische 3D-Funktion einrichten auf und klicken Sie auf die Schaltfläche 3D-Laservisier ändern, um den Bildschirm 3D-Laservisier ändern aufzurufen. -
Page 162: 120-Hz-Lcd-Bildschirme Brauchen Eine Gewisse Aufwärmzeit
Stereo-Bildqualität erzielt werden, braucht dieser eine gewisse Zeit zum Aufwärmen. Diese Aufwärmphase ist bei LCD-Bildschirmen völlig normal. Hinweis: Auf unserer Webseite www.nvidia.de/3dvision/support haben Sie rund um die Uhr Zugriff auf unser Online-Informationssystem und können Fragen an unser technisches Support-Team schicken. - Page 163 BENUTZERHANDBUCH FÜR NVIDIA 3D VISION...
-
Page 164: Zertifizierungen Und Standards
ZERTIFIZIERUNGEN UND STANDARDS ZERTIFIZIERUNGEN UND STANDARDS NVIDIA 3D Vision Systeme entsprechen den relevanten Vorschriften und verfügen über alle erforderlichen Zertifizierungen: > Australian Communications Authority (C-Tick) > Bureau of Standards, Metrology, and Inspection (BSMI) > Conformité Européenne (CE) > Federal Communications Commission (FCC) >... - Page 165 BENUTZERHANDBUCH FÜR NVIDIA 3D VISION Compliance für US Federal Communications Commission FCC − Federal Communications Commission Title 47 Code of Federal Regulation (CFR) Teil 15 - Hochfrequenzgeräte; Subpart B – Unbeabsichtigte HF-Emissionen (FCC Teil 15B:2008) VORSICHT: Änderungen oder Modifikationen an diesem Gerät, die nicht ausdrücklich von der für Compliance zustän-...
- Page 166 ZERTIFIZIERUNGEN UND STANDARDS Compliance für Kanada Industry Canada ICES-003: Digitale Apparate: Richtlinien zur Frequenzverwaltung und Telekommunikation; Standard für Interferenzen verursachende Geräte Dieses Gerät der Klasse B entspricht der kanadischen Richtlinie ICES-003. Cet appareil numérique de la classe B est conforme à la norme NMB-003 du Canada.
- Page 167 BENUTZERHANDBUCH FÜR NVIDIA 3D VISION Compliance für Korea MIC - Ministry of Information and Communications KCC - Korea Communication Commission KC - Korea Certification > KN 22 (CISPR 22): Einrichtungen der Informationstechnik - Funkstörungen; Grenzwerte und Prüfverfahren > KN 24 (CISPR 24): Einrichtungen der Informationstechnik - Störfestigkeitseigenschaften;...
- Page 168 ZERTIFIZIERUNGEN UND STANDARDS Compliance für die EU CE - European Conformity (Conformité Européenne) DDas Produkt entspricht sowohl der EMV-Richtlinie (2004/108/EC) als auch der Niederspannungsrichtlinie (2006/95/EC) der EU-Kommission. Die Konformität mit diesen Richtlinien bedeutet implizit auch die Konformität mit folgenden europäischen Normen. (Entsprechende internationale Standards in Klammern.) >...
- Page 169 BENUTZERHANDBUCH FÜR NVIDIA 3D VISION Flicker in öffentlichen Niederspannungs-Versorgungsnetzen für Geräte mit einem Bemessungsstrom ≤ 16 A je Leiter, die keiner Sonderanschlussbedingung unterliegen Underwriters Laboratories (UL/cUL, CB Scheme) UL – Underwriters Laboratories > UL 60950-1, Edition 2, 2007-03-27: Einrichtungen der Informationstechnik –...
-
Page 170: Wichtige Sicherheitshinweise
WICHTIGE SICHERHEITSHINWEISE CHTIGE SICHERHEITSHINWEISE Vorwort NVIDIA Produkte sind für sicheren Betrieb ausgelegt, wenn sie gemäß der Gebrauchsanweisung und allgemein üblichen Sicherheitsrichtlinien installiert und verwendet werden. Dieses Dokument erläutert mögliche Risiken im Zusammenhang mit dem Betrieb von Computern und liefert wichtige Sicherheitsrichtlinien, um diese Risiken zu minimieren. - Page 171 BENUTZERHANDBUCH FÜR NVIDIA 3D VISION Befolgen Sie die folgenden Anleitungen zur Produktsicherheit und zum Betrieb und bewahren Sie sie auf. Lesen Sie bei Bedarf in der Produktdokumentation nach. Beachten Sie alle Warnhinweise am Produkt und in der Betriebsanweisung. ACHTUNG: Die Nichtbeachtung dieser Sicherheitsrichtlinien kann zu Gefahren durch Brand, Stromschlag oder sonstigen Verletzungsrisiken oder Schäden führen.
- Page 172 > Wird das Produkt bei der Wartung beschädigt, trennen Sie es vom Computer und vom USB Ladeadapter und übergeben Sie es zur Wartung an einen NVIDIA autorisierten Wartungsdienst. > Brille und Infrarotsender sind wie alle Elektrogeräte gemäß den entsprechenden Vorschriften zu entsorgen.
- Page 173 5 °C bis 40 °C (41 °F bis 104 °F). > Lagertemperatur: Die empfohlene Lagertemperatur beträgt - 10 °C bis 45 °C (14 °F bis 113 °F). Lassen Sie das 3D Vision System nicht im Auto liegen, da Temperaturen im geparkten Auto diesen Bereich überschreiten können.
- Page 174 Weitere Informationen erhalten Sie von Ihrem Einzelhändler oder der örtlichen Abfallentsorgungs- behörde. Marken NVIDIA, das NVIDIA-Logo, GeForce und nForce sind Marken oder eingetragene Marken der NVIDIA Corporation. Bei anderen Firmen und Produktbezeichnungen kann es sich um Marken der jeweiligen damit verbundenen Unternehmen handeln.
- Page 175 www.nvidia.de...
- Page 176 3D VISION ™ USER GUIDE MANUEL D’UTILISATION...
- Page 178 Installation Connexion de l’écran Désinstallation des pilotes d’affichage existants Installation des pilotes et du logiciel Panneau de configuration NVIDIA Accès au Panneau de configuration NVIDIA Réglage 3D stéréoscopique Activation 3D stéréoscopique Réglage de la profondeur Type d’affichage 3D stéréoscopique Changement de viseur laser 3D Définition des touches de raccourci...
- Page 179 TABLE DES MATIÈRES Afficher la compatibilité avec les jeux Informations avancées Configuration prédéfinies Définition de vos touches de raccourci personnalisées Directives de configuration des jeux Méthodes d’affichage Conseils et dépannage La vision 3D stéréoscopique ne fonctionne pas L’image n’est pas nette Maux de tête/Fatigue visuelle Absence de viseur laser Amorçage de l’écran LCD à...
-
Page 180: Bienvenue
PC. Combinaison de lunettes sans fil de haute technologie et d’un logiciel de pointe, le kit 3D Vision transforme des centaines de jeux PC, de films et de photographies numériques en une expérience éblouissante et interactive. Utilisez les lunettes spéciales et couplez-les à... -
Page 181: Configuration Minimale
3D Vision. Pour consulter la configuration système et la liste des composants matériels requis, comprenant entre autres les GPU NVIDIA, les écrans LCD et les notebooks compatibles avec 3D Vision, veuillez vous rendre sur www.nvidia.fr/get3D puis sélectionnez la page... -
Page 182: Épilepsie
BIENVENUE Épilepsie AVERTISSEMENT ! SI VOUS-MÊME OU UN MEMBRE DE VOTRE FAMILLE ÊTES SUJET À DES CRISES D’ÉPILEPSIE, CONSULTEZ UN MÉDECIN AVANT D’UTILISER DES JEUX INFORMATIQUES. Un faible pourcentage de la population peut être sujet à des crises d’épilepsie lors de la visualisation de certains types d’images télévisées ou de jeux vidéo comprenant des lumières clignotantes. - Page 183 MANUEL D’UTILISATION NVIDIA 3D VISION...
-
Page 184: Déballage Du Matériel
DÉBALL AGE DU MATÉRIEL DÉBALLAGE DU MATÉRIEL Avant d’ouvrir votre nouveau coffret NVIDIA 3D Vision, vérifiez que vous disposez de la configuration système minimale (page 2) pour procéder à l’installation sans problème. N’oubliez pas d’inspecter chaque pièce du matériel fourni dans l’emballage. - Page 185 MANUEL D’UTILISATION NVIDIA 3D VISION Ne bloquez pas ce côté de vos lunettes. Il doit se trouver directement dans le champ visuel de l’émetteur. Bouton ON Voyant lumineux : pour vérifier la charge de la batterie, appuyez sur le bouton ON.
- Page 186 Émetteur USB infrarouge (inclus avec le kit de lunettes 3D Vision) Les produits 3D Vision comme les moniteurs de bureau, les projecteurs et certains notebooks 3D Vision utilisent un émetteur infrarouge USB pour communiquer avec les lunettes 3D Vision.
- Page 187 MANUEL D’UTILISATION NVIDIA 3D VISION AVERTISSEMENT: Sécurité des appareils infrarouges PRODUIT LED DE CLASSE 1 Ce produit comprend des diodes électroluminescentes émettant un faisceau infrarouge pour transmettre des signaux du contrôleur aux lunettes. Bien que ce faisceau invisible ne soit pas considéré comme nocif et qu’il soit conforme à la norme EN60825-1 (IEC60825-1), nous vous recommandons de prendre les mesures suivantes lorsque le système infrarouge...
-
Page 188: Émetteurs Infrarouges Intégrés
INSTALL ATION - CONFIGURATION Émetteurs infrarouges intégrés Les produits 3D Vision avec des émetteurs infrarouges intégrés ne requièrent pas d’émetteur infrarouge USB et communiquent directement avec les lunettes 3D Vision. Veuillez consulter les schémas ci-dessous pour savoir comment utiliser votre produit. - Page 189 MANUEL D’UTILISATION NVIDIA 3D VISION Écrans LCD et PC tout-en-un 3D Vision La plupart des écrans LCD et des PC tout-en-un 3D Vision ne possèdent pas de touches intégrées pour paramétrer les contenus 3D. Vous pouvez cependant modifier les fonctions 3D via les commandes suivantes : >...
-
Page 190: Lunettes Filaires
INSTALL ATION - CONFIGURATION Lunettes filaires Les lunettes filaires 3D Vision ont été conçues pour fonctionner avec les écrans compatibles avec 3D Vision. Les lunettes filaires n’utilisent pas l’émetteur infrarouge USB fourni avec les kits de lunettes sans fil 3D Vision et les notebooks 3D Vision. - Page 191 Fixation des lunettes filaires Les lunettes filaires 3D Vision peuvent être fixées à votre PC via le mécanisme de verrouillage de l’adaptateur USB et les systèmes de sécurité de la plupart des ordinateurs portables. NVIDIA a testé et recommande les systèmes de sécurité...
-
Page 192: Installation - Configuration
Windows pour paramétrer la 3D stéréoscopique avant la première utilisation. 120Hz Si votre écran LCD vous a été livré avec des lunettes NVIDIA 3D Vision et que vous voulez vous assurer de disposer de la dernière version des pilotes, rendez-vous sur www.nvidia.fr/3DUpdate... -
Page 193: Installation
Connectez votre écran compatible 3D Vision à votre carte graphique NVIDIA. L’écran que vous connectez doit être de type LCD ou CRT analogique compatible 3D Vision. Pour les écrans LCD, utilisez le câble Dual Link DVI-DVI fourni avec l'écran. Remarque: connectez UNIQUEMENT l’écran à ce moment.Le pilote et le logiciel doivent être installés avant la connexion de... - Page 194 Ordinateur afin de vous assurer que votre TV puisse traiter correctement le signal vidéo. Remarque: le câble DVI vers HDMI n’est pas inclus avec le kit 3D Vision. Vous pouvez en trouver dans la plupart des magasins ’informatique et d’électronique.
- Page 195 MANUEL D’UTILISATION NVIDIA 3D VISION Schéma de connexion des écrans LCD à 120 Hz avec émetteur infrarouge USB Émetteur IR NE PROCÉDEZ PAS À CETTE CONNEXION TANT QUE VOUS N’Y ÊTES PAS USB DVI INVITÉ Câble USB Câble Dual Link DVI...
- Page 196 Schéma de connexion des écrans LCD à 120 Hz avec émetteur infrarouge intégré Câble Dual Link DVI (fourni avec l’écran) Remarque: les écrans LCD avec émetteur infrarouge intégré ne requièrent pas de connecteurs USB additionnels du PC au moniteur.
-
Page 197: Désinstallation Des Pilotes D'affichage Existants
ATTENTION: si vous avez acheté un PC avec un émetteur infrarouge intégré (exemple : un notebook), les pilotes 3D Vision sont déjà installés. Ne désinstallez pas les pilotes. Ne suivez pas les étapes 2 à 7 et passez directement à l’etape 8. -
Page 198: Installation Des Pilotes Et Du Logiciel
Remplacez la carte par une carte NVIDIA GeForce prise en charge. Installation des pilotes et du logiciel Insérez le CD du logiciel et des manuels 3D Vision. L’écran Installation du logiciel s’affiche. Sélectionnez Installer les pilotes graphique GeForce. - Page 199 MANUEL D’UTILISATION NVIDIA 3D VISION Félicitations! L’installation et la configuration sont terminées : 3D Vision est à présent activé. Vous êtes prêt à découvrir l’expérience ludique la plus captivante jamais vue sur PC. Remarque: 3D Vision a été activé avec une profondeur par défaut de 15%.
-
Page 200: Panneau De Configuration Nvidia
Panneau de configuration NVIDIA. Accès au Panneau de configuration NVIDIA Pour ouvrir le Panneau de configuration NVIDIA, faites un clic-droit sur le bureau et sélectionnez le Panneau de configuration NVIDIA. Vous pouvez également y accéder via le Panneau de configuration Windows Matériel et audio... -
Page 201: Réglage 3D Stéréoscopique
ON/OFF de l’émetteur infrarouge USB, en appuyant sur le bouton ON/OFF de votre notebook ou en utilisant le raccourci-clavier Ctrl-T. Si cette option n’est pas activée, les autres applications ne sont pas affectées. Toutefois, les performances du jeu peuvent être réduites lorsque vous n’utilisez pas 3D Vision. -
Page 202: Réglage De La Profondeur
Réglage de la profondeur La profondeur dans un jeu est la profondeur à laquelle l’objet le plus éloigné est placé dans la scène. Lorsque vous installez 3D Vision sur votre système, la profondeur par défaut est définie sur 15%. Si vous êtes novice dans les jeux 3D, la valeur 15% est un bon point de départ. -
Page 203: Type D'affichage 3D Stéréoscopique
(FPS) sont généralement positionnés à la profondeur de l’écran lors de la vision 3D stéréoscopique, ce qui rend la visée plus difficile. Dans certains jeux, NVIDIA a créé une configuration qui place le viseur laser intrajeu à la profondeur correcte. Pour ces jeux, aucune configuration n’est nécessaire par l’utilisateur. -
Page 204: Définition Des Touches De Raccourci
Les touches de raccourci sont des touches d’accès rapide intrajeu utilisables pour effectuer diverses actions. Pour afficher ou modifier les raccourcis clavier dans l’écran Réglage 3D stéréoscopique du Panneau de configuration NVIDIA, cliquez sur le bouton Définir les touches de raccourci. - Page 205 MANUEL D’UTILISATION NVIDIA 3D VISION Pour afficher les paramètres intrajeu avancés, cliquez sur : L’écran Définir les touches de raccourci s’affiche alors dans son intégralité. Valeurs par défaut Pour activer l’utilisation de touches de raccourci clavier dans le jeu, vous devez activer la case Activer les paramètres avancés intrajeu.
- Page 206 Panneau de configuration NVIDIA. Ctrl+Alt+ Afficher/masquer la Affiche les paramètres recommandés Inser compatibilité dans par NVIDIA pour le jeu en cours le jeu dans le coin inférieur de votre écran. Ctrl+F6 Augmenter la Rapproche les objets vers vous. La...
-
Page 207: Masquer Les Effets 3D Stéréoscopique Au Démarrage Du Jeu
9 pouces (23 cm). La localisation de l’émetteur peut varier suivant le modèle de notebook. (Triangle vers le haut) Augmenter la profondeur de champ 3D (Bouton d’activation) Bouton de mise en marche de 3D Vision (Triangle vers le bas) Diminuer la profondeur de champ 3D... -
Page 208: Tester La 3D Stéréoscopique
3D stéréoscopique..., vous ouvrez un programme de test qui vous permet de régler les effets 3D stéréoscopiques pour que la visualisation 3D Vision soit adaptée à votre vue. Cliquez sur Exécuter le programme de test après avoir sélectionné les paramètres d’affichage. -
Page 209: Afficher La Compatibilité Avec Les Jeux
(voir l’étape 20, page 22). Afficher la compatibilité avec les jeux NVIDIA a testé et fourni des profils de nombreux jeux parmi les plus répandus afin de vérifier qu’ils fonctionnent correctement avec 3D Vision. Tous les jeux testés figurent dans la liste du Panneau de configuration NVIDIA avec leur note de compatibilité. - Page 210 NVIDIA sont affichés. des jeux. Liste des jeux testés par NVIDIA. Si votre jeu ne figure pas dans la liste des jeux testés par NVIDIA, consultez le site www.nvidia.fr pour connaître les jeux testés depuis la sortie de cette version du logiciel.
- Page 211 MANUEL D’UTILISATION NVIDIA 3D VISION...
-
Page 212: Informations Avancées
écrans HUD doivent être réglés à la profondeur de l’écran. Paramètres prédéfinis Pour la plupart des jeux, NVIDIA a défini des paramètres qui règlent l’écran de façon à obtenir une excellente qualité de vision 3D stéréoscopique, en fonction de chaque titre. -
Page 213: Définition De Vos Touches De Raccourci Personnalisées
à vos préférences. Pour afficher les paramètres des raccourcis clavier par défaut, allez dans le Panneau de configuration NVIDIA et sélectionnez Réglage 3D stéréoscopique dans le volet de gauche. Cliquez sur le bouton Définir les touches de raccourci. -
Page 214: Directives De Configuration Des Jeux
INFORMATIONS AVANCÉES Directives de configuration des jeux Le tableau suivant présente des instructions de réglage pour résoudre des problèmes particuliers lorsque vous êtes dans le jeu. Tableau 2. Directives de configuration Problème Solution L’objet est trop près. Réduisez la convergence [Ctrl+F5] Les bords latéraux sont Réglez le cône jusqu’à... - Page 215 > Viseurs de curseur/pointeur de jeu: si vous utilisez les viseurs laser 3D NVIDIA, n’oubliez pas de désactiver le viseur fourni par le jeu. Le viseur du jeu est généralement positionné à la profondeur de l’écran et il interfère avec l’affichage du viseur laser NVIDIA.
-
Page 216: Conseils Et Dépannage
Seules les questions en anglais sont acceptées. Les utilisateurs de 3D Vision peuvent également joindre notre support technique au numéro (non surtaxé) 1-800-797-6530 de 08h00 à 17h00, heure du Pacifique. Pour une assistance complémentaire, NVIDIA vous recommande d’enregistrer vos lunettes sans fil à... -
Page 217: L'image N'est Pas Nette
> Assurez-vous d'utiliser le câble DVI fourni avec votre écran LCD à 120 Hz compatible avec 3D Vision. Il s'agit d'un câble dual link sans lequel le système 3D Vision ne fonctionnera pas. Remarque: les explications ci-dessus ne concernent pas les notebooks disposant d’un émetteur infrarouge intégré. - Page 218 Afficher la compatibilité avec les jeux du Panneau de configuration NVIDIA. Vérifiez si votre jeu a été testé par NVIDIA et s’il est classé dans la catégorie Excellente, Bonne ou Normale. Consultez la liste de Problèmes et paramètres recommandés au bas de l’écran.
-
Page 219: Maux De Tête/Fatigue Visuelle
Si vous ne voyez pas le viseur laser dans un jeu, il n’est peut-être pas activé. Allez à l’écran Réglage 3D stéréoscopique du Panneau de configuration NVIDIA et cliquez sur le bouton Changer le viseur laser 3D pour afficher l’écran correspondant. Vérifiez que la case Activer le viseur laser 3D pour les jeux configurés est activée (voir... -
Page 220: Amorçage De L'écran Lcd À 120 Hz
- de transmettre vos questions à notre équipe d’assistancetechnique. Seules les questions en anglais sont acceptées.Les utilisateurs de 3D Vision peuvent également joindre notre support technique au numéro (non surtaxé) 1-800-797-6530 de 08h00 à 17h00, heure du Pacifique. Notre ligne de support technique est uniquement accessible aux résidents des États-Unis et du Canada. - Page 221 MANUEL D’UTILISATION NVIDIA 3D VISION...
-
Page 222: Conformité - Homologations
Russian System GOST R(GOST-R ) > Underwriters Laboratories (UL/cUL, CB Scheme) > Voluntary Control Council for Interference (VCCI) Le système NVIDIA 3D Vision inclut les modèles suivants: > Modèle P701 (lunettes sans fil à batterie rechargeable et à émetteur infrarouge 5 Vcc) >... - Page 223 MANUEL D’UTILISATION NVIDIA 3D VISION Conformité aux normes FCC (États-Unis) FCC (Federal Communications Commission) Titre 47 du Code des règlements fédéraux (CFR) Partie 15 – Dispositifs émettant des fréquences radioélectriques ; sous-partie B – Émetteur de rayonnement non intentionnel (FCC Part 15B:2008).
- Page 224 CONFORMITÉ ET HOMOLOGATIONS Conformité aux normes canadiennes Industrie Canada ICES-003:2004: Appareils numériques : Gestion du spectre et Politique des télécommunications ; Norme sur le matériel de brouillage. Cet appareil numérique de la classe B est conforme à la norme NMB- 003 du Canada.
- Page 225 MANUEL D’UTILISATION NVIDIA 3D VISION Conformité avec la Corée MIC - Ministry of Information and Communications KCC - Korea Communication Commission KC - Korea Certification > KN 22 (CISPR 22) : Matériel informatique - Caractéristiques des perturbations radio - Limites et méthodes de mesure >...
- Page 226 CONFORMITÉ ET HOMOLOGATIONS Conformité dans l’Union Européenne Conformité Européenne Ce produit est conforme à la fois aux Directives CEM (2004/108/ EC) et Basse tension (2006/95/EC) publiées par la Commission de la Communauté Européenne. La conformité à ces normes sous-entend la conformité aux normes européennes suivantes (les normes internationales équivalentes sont indiquées entre parenthèses) : >...
- Page 227 MANUEL D’UTILISATION NVIDIA 3D VISION tension, pour les matériels ayant un courant nominal ≤16A par phase et non soumis à un raccordement conditionnel Underwriters Laboratories (UL/cUL, CB Scheme) UL- Underwriters Laboratories > UL 60950-1, 2nd Edition, 2007-03-27 : Matériel informatique - Sécurité...
-
Page 228: Sécurité - Informations Importantes
SÉCURITÉ - INFORMATIONS IMPORTANTES IMPORTANTES Préambule Les produits NVIDIA sont conçus pour fonctionner sans risque lorsqu’ils sont installés et utilisés conformément aux instructions concernant le produit et aux recommandations générales de sécurité. Les directives présentées dans ce document expliquent les risques potentiels associés au fonctionnement du matériel et fournissent des recommandations... - Page 229 MANUEL D’UTILISATION NVIDIA 3D VISION du produit. Consultez toujours la documentation fournie avec le matériel. Respectez tous les avertissements indiqués sur le produit et dans les instructions d’utilisation. AVERTISSEMENT: en cas de non-respect des instructions de sécurité, vous vous exposez à des risques d’incendie, d’électrocution ou d’autres blessures ou dommages.
- Page 230 > Si le produit a subi des dommages qui nécessitent une réparation, débranchez l’appareil de l’ordinateur ou de l’adaptateur de charge USB et confiez la réparation à un fournisseur d’entretien NVIDIA agréé. > Comme pour tout matériel électronique, recyclez correctement les lunettes et l’émetteur IR.
- Page 231 3D AVERTISSEMENT : leur est spécifique. N’essayez PAS d’ouvrir le compartiment de la batterie ou de remplacer la batterie. Contactez NVIDIA ou un revendeur NVIDIA agréé si vous pensez que votre bat- terie est défectueuse. Températures ambiantes >...
- Page 232 CE MATÉRIEL, OU LA BONNE ADAPTATION DE CELUI-CI À UN USAGE PARTICULIER. Les informations fournies sont jugées dignes de foi et exactes. Toutefois, la société NVIDIA Corpora- tion décline toute responsabilité quant aux conséquences découlant de l’utilisation de ces informa- tions, ou toute violation de brevet ou autres droits de tiers pouvant en résulter.
- Page 233 www.nvidia.fr...
- Page 234 3D VISION ™ USER GUIDE GUIDA PER GLI UTENTI...
- Page 236 Installazione Collegamento dello schermo Rimozione dei driver dello schermo corrente Installazione di driver e software Pannello di controllo NVIDIA Accesso al Pannello di controllo NVIDIA Imposta 3D stereoscopico Abilita 3D stereoscopico Regolazione della profondità Tipo di schermo 3D stereoscopico Cambia mirino laser 3D Imposta tasti di scelta rapida Nascondi effetti 3D stereoscopici all’avvio del gioco...
- Page 237 Impostazione di tasti di scelta rapida personalizzati Indicazioni per la configurazione del gioco Procedure di visualizzazione Suggerimenti e soluzione dei problemi 3D Vision non funziona L’immagine non è nitida Affaticamento degli occhi e mal di testa Assenza del mirino laser Riscaldamento del monitor LCD a 120 Hz Conformità...
-
Page 238: Benvenuti
PC e fotografie digitali in un'esperienza interattiva mozzafiato. È sufficiente indossare gli eleganti occhiali e abbinarli a una GPU GeForce e a uno schermo 3D Vision- ready per vedere personaggi e ambienti prendere vita sullo schermo. 3D Vision vi offre immagini davvero spettacolari e indimenticabili. -
Page 239: Requisiti Di Sistema
PC soddisfi i requisiti hardware necessari per usufruire dell’esperienza 3D Vision. Per un elenco completo dei requisiti di sistema, comprensivo delle GPU NVIDIA supportate, degli LCD 3D Vision-Ready, dei notebook 3D Vision e degli altri componenti necessari, visitare www.nvidia.it/get3D e selezionare “Requisiti di sistema”. -
Page 240: Epilessia
BENVENUTI Epilessia AVVERTENZA SE SI HA UNA STORIA FAMILIARE CARATTERIZZATA DA ATTACCHI EPILETTICI, PRIMA DI USARE GIOCHI PER COMPUTER È OPPORTUNO CONSULTARE UN MEDICO. Alcune persone potrebbero essere affette da crisi epilettiche in seguito all'esposizione a determinate immagini televisive o di videogiochi che contengono luci lampeggianti o modelli luminosi. - Page 241 GUIDA DELL’UTENTE DI NVIDIA 3D VISION...
-
Page 242: Rimozione Dall'imballaggio Dell'apparecchiatura
RIMOZIONE DALL'IMBALLAGGIO DELL'APPARECCHIATURA Per un’installazione senza problemi, prima di rimuovere dall’imballaggio il kit NVIDIA 3D Vision, è buona norma assicurarsi che la propria macchina soddisfi tutti i requisiti di sistema (pagina 2). Verificare tutte le apparecchiature fornita nella confezione. Se qual- cosa manca o è... - Page 243 GUIDA DELL’UTENTE DI NVIDIA 3D VISION Non bloccare questo lato degli occhiali: si deve trovare sulla linea di visuale del pulsante ON dell’emettitore IR Pulsante ON Indicatore: per controllare la durata della batteria, premere il pulsante ON. Se l’indicatore è: Verde: fino a 60 ore di durata della batteria.
-
Page 244: Emettitore Ir Usb
Emettitore IR USB (compreso nel kit degli occhiali 3D Vision) I prodotti 3D Vision come i monitor per desktop, i proiettori e alcuni notebook 3D Vision utilizzano l’emettitore IR USB per comunicare con gli occhiali 3D Vision. Esaminare gli schemi seguenti per capire come utilizzare il proprio emettitore IR USB. - Page 245 GUIDA DELL’UTENTE DI NVIDIA 3D VISION AVVERTENZA: sicurezza dei dispositivi a infrarossi PRODOTTO LED CLASSE 1 Questo prodotto include diodi a emissione di luce a infrarossi per trasmettere segnali dal controller agli occhiali. Anche se questo raggio invisibile non è considerato pericoloso ed è...
-
Page 246: Emettitore Ir Incorporato
La maggior parte dei notebook 3D Vision dispongono di tasti di scelta rapida che consentono di controllare le funzioni principali di 3D Vision, in modo analogo ai tasti di scelta rapida per il controllo della luminosità o del volume audio. Questi tasti di scelta rapida. - Page 247 3D Vision LCD monitors and All-In-One PCs La maggior parte dei Monitor LCD e PC All-In-One compatibili con 3D Vision non dispongono di tasti per controllare le funzioni di 3D Vision durante la riproduzione di contenuti 3D. Si può controllare il 3D usando le seguenti combinazioni di tasti: >...
-
Page 248: Occhiali Cablati
INSTALL AZIONE E CONFIGURAZIONE Occhiali cablati Gli occhiali cablati per 3D Vision sono concepiti per funzionare in modo ottimale con gli schermi 3D Vision-Ready. Gli occhiali cablati non utilizzano l’emettitore IR USB in dotazione con i kit di occhiali 3D Vision Wireless e con i notebook 3D Vision. - Page 249 Fissaggio degli occhiali cablati Gli occhiali cablati 3D Vision possono essere fissati a un PC usando lo speciale intaglio presente nella presa USB e i dispositivi di sicurezza dei notebook. NVIDIA ha testato i dispositivi di sicurezza per notebook di Kensington e ha verificato la loro capacità...
-
Page 250: Installazione Econfigurazione
Scaricamento del software più recente Azioni richieste prima di iniziare l’installazione Se un notebook con emettitore IR 3D Vision incorporato offre in dotazione anche gli occhiali NVIDIA 3D Vision, i driver necessari sono già installati sul notebook. Lanciare "Configurazione di 3D Vision"... -
Page 251: Installazione
(saltare questa fase se si sta utilizzando un notebook 3D Vision) Connettere lo schermo 3D Vision-Ready alla scheda grafica NVIDIA. Lo schermo collegato deve essere un LCD 3D Vision- Ready o un CRT analogico. Per gli LCD, utilizzare il cavo DVI-DVI dual link in dotazione con lo schermo. - Page 252 TV passando a PC o Computer per assicurarsi che il TV sia in grado di elaborare correttamente il segnale video. Nota: il cavo di collegamento tra presa DVI e HDMI non è compreso nel kit 3D Vision. Il cavo va acquistato da un negozio di computer o di elettronica.
- Page 253 GUIDA DELL’UTENTE DI NVIDIA 3D VISION Schema di collegamento dell’LCD da 120 Hz LCD per l'emettitore IR USB Emettitore IR NON EFFETTUARE QUESTA CONNESSIONE FINO A QUANDO NON VIENE USB DVI SUGGERITO DI FARLO DALLA PROCEDURA DI INSTALLAZIONE GUIDATA Cavo USB...
- Page 254 Diagramma di collegamento di uno schermo LCD a 120 Hz per i monitor LCD con emettitori IR incorporati Cavo DVI dual link (in dotazione con lo schermo) Nota: i monitor LCD con emettitori IR incorporati non richiedono ulteriori connettori USB per il collegamento tra PC e monitor.
-
Page 255: Rimozione Dei Driver Dello Schermo Corrente
ATTENZIONE: se si è acquistato un PC con emettitore IR 3D Vision incorporato (per esempio un notebook) allora i driver per 3D Vision dovrebbero già essere installati sul PC. Non disinstallare i driver. Saltare le fasi da 2 a 7 e procedere alla... -
Page 256: Installazione Di Driver E Software
Vision inizia automaticamente non appena termina l'esecuzione di InstallShield. Gli utenti di notebook 3D Vision dovrebbero fare clic sull'icona del desktop Configura NVIDIA 3D Vision per dare il via alla procedura di installazione guidata. L’installazione guidata illustra le fasi di installazione dell’emettitore IR, l’impostazione dello schermo e la configurazione degli occhiali wireless. - Page 257 PC. Nota: 3D Vision è stato abilitato con la profondità predefinita pari a 15%. NVIDIA consiglia a tutti i nuovi utenti di iniziare con la profondità predefinita fino a quando non si sentiranno a loro agio. Col tempo, è possibile aumentare la profondità mano a mano che gli occhi si abituano alla visualizzazione 3D stereoscopica.
-
Page 258: Pannello Di Controllo Nvidia
Pannello di controllo NVIDIA. Accesso al Pannello di controllo NVIDIA Per aprire il Pannello di controllo NVIDIA, fare clic con il pulsante destro del mouse sul desktop e selezionare il Pannello di controllo NVIDIA. È anche possibile selezionare il Pannello di controllo di Windows e da lì... -
Page 259: Imposta 3D Stereoscopico
GUIDA DELL’UTENTE DI NVIDIA 3D VISION Imposta 3D stereoscopico Questa sezione del Pannello di controllo NVIDIA fornisce tutte le regolazioni necessarie a migliorare l’esperienza di gioco. Vengono trattate tutte le regolazioni di questa schermata. Abilita 3D stereoscopico Nota: gli effetti di 3D stereoscopico funzionano solo con le applicazioni DirectX a schermo intero. -
Page 260: Regolazione Della Profondità
è l'uso dei tasti di scelta rapida. Nota: queste sono le combinazioni di tasti di scelta rapida predefinite per i kit di occhiali di 3D Vision. Se si dispone di un notebook 3D Vision, la tastiera dovrebbe includere pulsanti speciali per la riduzione e l’aumento della profondità... -
Page 261: Tipo Di Schermo 3D Stereoscopico
Per tali giochi non è necessaria nessuna configurazione da parte dell’utente. Per tutti gli altri giochi FPS, NVIDIA fornisce una serie di mirini laser 3D che appaiono sull’oggetto preso di mira. I mirini laser dei giochi FPS funzionano mediante mirini centrati sullo schermo. -
Page 262: Imposta Tasti Di Scelta Rapida
Per visualizzare o modificare i tasti di scelta rapida dalla schermata Imposta 3D stereoscopico nel Pannello di controllo NVIDIA, fare clic sul pulsante Imposta tasti di scelta rapida. Per visualizzare le impostazioni del gioco avanzate, fare clic su Così facendo, si espande la schermata Imposta tasti di scelta rapida. - Page 263 GUIDA DELL’UTENTE DI NVIDIA 3D VISION Per abilitare l’uso di tasti di scelta rapida avanzati nel gioco è necessario selezionare la casella di controllo Abilita impostazioni avanzate nel gioco. I tasti di scelta rapida standard (mostrati nella parte superiore della finestra) sono sempre abilitati.
- Page 264 Pannello di controllo NVIDIA. Ctrl+Alt+ Mostra o nascondi Visualizza le impostazioni consigli- la compatibilità ate da NVIDIA per il gioco corrente all'interno del gioco nell'angolo inferiore del display. Ctrl+F6 Aumenta la Sposta gli oggetti verso lo spettatore.
-
Page 265: Nascondi Effetti 3D Stereoscopici All'avvio Del Gioco
3D stereoscopici vengono abilitati all’avvio. Per evitare che ciò accada, selezionare la casella apposita nella schermata Imposta 3D stereoscopico nel Pannello di controllo NVIDIA. Gli effetti 3D stereoscopici rimangono attivati, sono semplicemente nascosti all’avvio. Una volta che il gioco è stato caricato, è possibile mostrare gli effetti 3D stereoscopici premendo il pulsante 3D stereoscopico ON/OFF sull’emettitore IR USB, premendo... -
Page 266: Prova 3D Stereoscopico
Fare clic sul pulsante Prova 3D stereoscopico per far comparire un'applicazione di prova che consente di regolare gli effetti 3D stereoscopici in modo che la visione di 3D Vision risulti perfettamente confortevole. Fare clic su Avvia applicazione di prova dopo aver selezionato le impostazioni dello schermo. -
Page 267: Visualizza La Compatibilità Con I Giochi
NVIDIA ha testato e fornito profili driver incorporati per numerosi dei giochi più venduti in modo da assicurarne il perfetto funzionamento con 3D Vision. Tutti i giochi testati sono elencati nel pannello di controllo NVIDIA assieme al loro indice di compatibilità. Per ogni gioco viene fornito un indice di compatibilità... - Page 268 Per verificare eventuali problemi e le impostazioni consigliate che NVIDIA ha individuato al momento della prova del gioco, selezionare (evidenziare) un gioco nell’elenco e vedere le istruzioni elencate in Problemi e impostazioni consigliate.
- Page 269 GUIDA DELL’UTENTE DI NVIDIA 3D VISION...
-
Page 270: Informazioni Avanzate
HUD dovrebbero essere alla stessa profondità dello schermo. Configurazioni predefinite Per la maggior parte dei giochi, NVIDIA ha definito delle impostazioni che regolano lo schermo in modo da ottenere una visualizzazione 3D stereoscopica di alta qualità, a seconda delle esigenze di ciascun gioco. -
Page 271: Impostazione Di Tasti Di Scelta Rapida Personalizzati
Per visualizzare le impostazioni di scelta rapida predefinite, passare al Pannello di controllo NVIDIA e selezionare l’attività Imposta 3D stereoscopico nel riquadro sinistro della finestra. Fare clic sul pulsante Imposta tasti di scelta rapida. -
Page 272: Indicazioni Per La Configurazione Del Gioco
CONFIGURAZIONI AVANZATE Indicazioni per la configurazione del gioco La tabella seguente elenca alcune indicazioni per la regolazione utilizzabile per problemi specifici con un gioco. Tabella 2. Indicazioni per la configurazione del gioco Problema Suggerimento Gli oggetti sono troppo vicini Diminuisce la convergenza [Ctrl+F5] I bordi sono mossi, non Modificare le impostazioni... - Page 273 > Cursore/mirino del gioco: se si utilizzano i mirini laser 3D NVIDIA, disattivare il mirino messo a disposizione dal gioco. Di solito il mirino del gioco è posizionato alla profondità dello schermo e interferisce con la visualizzazione del mirino laser NVIDIA.
-
Page 274: Suggerimenti E Soluzione Dei Problemi
Le domande devono essere inviate in lingua inglese. I clienti di 3D Vision possono inoltre accedere al numero verde di assistenza tecnica 1-800-797-6530 dalle 08:00 alle 17:00 (fuso orario della costa ovest degli USA), dal lunedì al venerdì. -
Page 275: L'immagine Non È Nitida
Eseguire l'installazione guidata per verificare che l'hardware stia funzionando correttamente. Passare al pannello di controllo NVIDIA (fare clic con il pulsante destro del mouse sul desktop). Selezionare l’opzione Installa 3D Vision. Quindi selezionare Esegui installazione guidata dal menu a discesa Prova 3D stereoscopico. - Page 276 Eccessivo sfarfallamento Lo sfarfallamento nella zona di visione periferica può essere dovuto a differenze tra le frequenze di funzionamento di 3D Vision e quelle dell'illuminazione della stanza. Questo stipo di sfarfallamento può essere evitato spegnendo le luci o cambiando il refresh rate del 3D stereoscopico.
-
Page 277: Affaticamento Degli Occhi E Mal Di Testa
Se non si vede il mirino laser in un gioco, è possibile che l'opzione risulti disattivata. Passare alla schermata Imposta 3D stereoscopico del Pannello di controllo NVIDIA e fare clic sul pulsante Cambia mirino laser 3D per visualizzare la schermata Cambia mirino laser 3D. -
Page 278: Riscaldamento Del Monitor Lcd A 120 Hz
Le domande devono essere inviate in lingua inglese. I clienti di 3D Vision possono inoltre accedere al numero verde di assistenza tecnica 1-800-797-6530 dalle 8:00 alle 17:00 (fuso orario della costa ovest degli USA), dal lunedì al venerdì. - Page 279 GUIDA DELL’UTENTE DI NVIDIA 3D VISION...
-
Page 280: Conformità E Certificazioni
CONFORMITÀ E CERTIFICAZIONI CONFORMITÀ E CERTIFICAZIONI I sistemi NVIDIA 3D Vision sono conformi alle norme vigenti e hanno ricevuto le seguenti certificazioni obbligatorie: > Australian Communications Authority (C-Tick) > Bureau of Standards, metrology, and Inspection (BSmI) > Conformité Européenne/Conformità europea (CE) >... - Page 281 GUIDA DELL’UTENTE DI NVIDIA 3D VISION Conformità alle norme della commissione federale per le comunicazioni USA FCC – Federal Communications Commission Il titolo 47 del codice delle normative federali (CFR), parte 15 – Dispositivi di radiofrequenza; sottoparte B – radiazioni non intenzionali (FCC Part 15B:2008).
- Page 282 CONFORMITÀ E CERTIFICAZIONI Conformità alle norme canadesi Industry Canada ICES-003:2004: Apparecchio digitale: Spectrum management and Telecommunications Policy; Standard delle apparecchiature che provocano interferenze. Questo apparecchio digitale di classe B è conforme alle norme canadesi ICES-003. Cet appareil numérique de la classe B est conforme à la norme NmB- 003 du Canada.
- Page 283 GUIDA DELL’UTENTE DI NVIDIA 3D VISION Conformità alle norme coreane MIC - Ministry of Information and Communication KCC - Korea Communication Commission KC - Korea Certification > KN 22 (CISPR 22): Apparecchiature informatiche - Caratteristiche dei disturbi radio - Limite e metodi di misurazione >...
- Page 284 CONFORMITÀ E CERTIFICAZIONI Conformità alle norme dell’Unione europea CE - Conformità alle norme europee (Conformité Européenne) Il prodotto è conforme sia alla direttiva EMC (2004/108/CE) che alla direttiva sulla bassa tensione (2006/95/CE) emanata dalla Commis- sione della Comunità Europea. La conformità a queste direttive implica la conformità alle seguenti norme europee (gli standard internazionali equivalenti sono indicati tra parentesi): >...
- Page 285 GUIDA DELL’UTENTE DI NVIDIA 3D VISION delle fluttuazioni di tensione e dello sfarfallamento nei sistemi di alimentazione a bassa tensione pubblici, per le apparecchiature con corrente nominale ≤16A per fase e non soggette a connessione condizionale) Underwriters Laboratories (UL/cUL, CB Scheme) UL- Underwriters Laboratories >...
-
Page 286: Importanti Informazioni Per La Sicurezza
IMPORTANTI INFORMAZIONI PER L A SICUREZZA IMPORTANTI INFORMAZIONI PER LA SICUREZZA Prefazione I prodotti NVIDIA sono progettati per funzionare corret- tamente se installati e utilizzati conformemente alle is- truzioni e alle norme di sicurezza generali. Le indicazioni incluse in questo documento spiegano i rischi potenziali associati all’utilizzo del computer e indicano importanti in-... - Page 287 GUIDA DELL’UTENTE DI NVIDIA 3D VISION Conservare e seguire scrupolosamente tutte le istruzioni sulla sicurezza e l’uso del prodotto. Consultare sempre la documentazione fornita con l’apparecchiatura. Rispettare tutte le avvertenze riportate sul prodotto e nelle istruzioni per l’uso. AVVERTENZA: il mancato rispetto delle istruzioni di sicurezza può...
- Page 288 > Se il prodotto si danneggia e richiede riparazioni, scollegarlo dal computer o dall’adattatore di ricarica USB e chiedere assistenza a un fornitore di servizi autorizzato NVIDIA. > Come tutte le apparecchiature elettroniche, smaltire correttamente gli occhiali e l’emettitore IR.
- Page 289 Temperatura di conservazione: la gamma consigliata di temperature di conservazione va da -10°C a 45°C (da 14°F a 113°F). Non lasciare il sistema 3D Vision all’interno dell’automobile, in quanto all’interno delle automobili parcheggiate le temperature possono risultare superiori a questo intervallo.
- Page 290 Questa pubblicazione ha la precedenza e sostituisce tutte le informazioni fornite in precedenza. I prodotti di NVIDIA Corporation non sono certificati per l’uso come componenti critici in dispositivi o sistemi per il mantenimento in vita senza espresso consenso scritto di NVIDIA Corporation.
- Page 291 www.nvidia.it...
- Page 292 3D VISION ™ USER GUIDE GUÍA DEL USUARIO...
- Page 294 Conexión de la pantalla Desinstalación de los controladores de pantalla actuales Instalación de los controladores y el software Panel de control de NVIDIA Acceso al Panel de control de NVIDIA Establecer configuración 3D estereoscópica Activar 3D estereoscópico Ajuste de la profundidad Tipo de pantalla 3D estereoscópica...
-
Page 295: Índice
Forma de establecer tus propias teclas de acceso directo Directrices de configuración de los juegos Prácticas de visualización Consejos y solución de problemas 3D Vision no funciona La imagen no es clara Fatiga ocular/dolor de cabeza No se ve la mira láser... -
Page 296: Bienvenido
Sólo tienes que ponerte las gafas, y combinarlas con una GPU GeForce y una pantalla 3D Vision Ready para ver cómo cobran vida los personajes y entornos de los juegos. Pon tus ojos en acción con 3D Vision. -
Page 297: Requisitos Del Sistema
Antes de comenzar, examina los siguientes requisitos del sistema para comprobar si tu PC dispone de todos los componentes necesa- rios para proporcionar una adecuada experiencia de uso de 3D Vision. Para ver la lista completa de requisitos del sistema, lo que incluye las GPU NVIDIA compatibles, las pantallas LCD 3D Vision Ready, los portátiles 3D Vision y otros componentes necesarios, entra en... -
Page 298: Epilepsia
BIENVENIDO Epilepsia ¡CUIDADO! SI TÚ O ALGUNO DE TUS FAMILIARES TIENE ANTECEDENTES DE EPILEPSIA, CONSULTA CON UN MÉDICO ANTES DE UTILIZAR JUEGOS DE ORDENADOR. Un pequeño porcentaje de la población puede sufrir ataques epilépticos al ver ciertos tipos de imágenes de televisión o videojuegos que emiten destellos de luz. - Page 299 GUÍA DEL USUARIO DE NVIDIA 3D VISION...
-
Page 300: Desembalaje Del Equipo
DESEMBAL A JE DEL EQUIPO DESEMBALAJE DEL EQUIPO Antes de abrir la caja de NVIDIA 3D Vision, es aconsejable comprobar si el sistema cumple todos los requisitos necesarios (página 2) para instalar el producto sin problemas. Revisa con atención todas las piezas incluidas en el paquete recibido. - Page 301 GUÍA DEL USUARIO DE NVIDIA 3D VISION No obstaculices este lado de las gafas. Tienen que estar dentro del campo de acción del emisor de IR. Botón de encendido (ON) Indicador luminoso: para ver cuánta batería queda, pulsa el botón ON. Si el indicador está...
-
Page 302: Emisor De Ir
3D Vision. Observa las ilustraciones siguientes para ver cómo se utiliza el emisor de IR USB. Nota: algunos portátiles 3D Vision tienen un emisor de IR 3D Vision integrado. Consulta con el fabricante de tu portátil para saber si necesitas el emisor USB. - Page 303 GUÍA DEL USUARIO DE NVIDIA 3D VISION AVISO: seguridad para dispositivos de infrarrojos PRODUCTO LED DE CLASE 1 Este producto incluye diodos de emisión de luz infrarroja para transmitir señales desde el controlador a las gafas. Aunque este haz de luz invisible no se considera perjudicial y cumple...
-
Page 304: Emisores De Ir Integrados
Consulta con el fabricante para comprobar si tu portátil tiene las teclas de 3D Vision que se ilustran a continuación. Nota: el alcance efectivo del emisor de IR integrado en el portátil es de 3 metros. - Page 305 Monitores LCD y PC integrados 3D Vision La mayoría de los monitores LCD y los PC integrados dotados de tecnología 3D Vision carecen de teclas de función especiales para controlar el comportamiento de 3D Vision durante la reproducción de contenido en 3D. Es posible controlar este contenido mediante las siguientes combinaciones de teclas: >...
-
Page 306: Gafas Alámbricas
INSTAL ACIÓN Y CONFIGURACIÓN Gafas alámbricas Las gafas alámbricas 3D Vision están diseñadas para funcionar con las pantallas 3D Vision Ready. No utilizan el emisor de IR USB que se entrega con las gafas inalámbricas y los portátiles 3D Vision. Cable USB Este cable está... - Page 307 Forma de asegurar las gafas alámbricas El cable de las gafas alámbricas 3D Vision puede fijarse al PC utilizando el pestillo del conector USB y los dispositivos de bloqueo para portátiles. NVIDIA ha probado los dispositivos de seguridad de Kensington para asegurar las gafas en un PC de torre o de sobremesa.
-
Page 308: Instalación Y Configuración
Descarga del último software Procedimiento necesario antes de iniciar la instalación Si el portátil (de 120 Hz) tiene el emisor de IR 3D Vision integrado e incluye gafas NVIDIA 3D Vision, se entrega con los controladores instalados. Selecciona el icono de instalación de 3D Vision en el escritorio de Windows para configurar la función 3D por primera vez. -
Page 309: Instalación
Conecta la pantalla 3D Vision Ready a la tarjeta gráfica NVIDIA. Tiene que ser una pantalla LCD o una pantalla analógica de tubo 3D Vision Ready. Si es LCD, utiliza el cable DVI-DVI Dual Link suministrado con ella. Nota: de momento, conecta SÓLO la pantalla. Antes de conectar el emisor de IR USB, es necesario instalar el controlador y el software. - Page 310 Conexión de un televisor HD DLP Puerto HDMI Emisor de IR Cable VESA estéreo con conector de 3 patillas Puerto del emisor de las gafas 3D Cable DVI-HDMI NO CONECTES ESTE USB DVI CABLE HASTA QUE EL ASISTENTE DE INSTALACIÓN LO DIGA Cable USB Nota: consulta el manual de uso del televisor DLP para com- probar si debes utilizar un puerto HDMI concreto para conectar...
- Page 311 GUÍA DEL USUARIO DE NVIDIA 3D VISION Conexión de una pantalla LCD de 120 Hz con emisor de IR USB Emisor de IR NO CONECTES ESTE CABLE HASTA QUE EL ASISTENTE DE INSTALACIÓN LO DIGA USB DVI Cable USB Cable DVI Dual Link...
- Page 312 Conexión de una pantalla LCD de 120 Hz con emisor de IR integrado Cable DVI Dual Link (entregado con la pantalla) Nota: los monitores LCD con emisor de IR integrado no necesitan más conexiones USB entre el PC y el monitor.
-
Page 313: Desinstalación De Los Controladores De Pantalla Actuales
Antes de iniciar la instalación, tienes que desinstalar el controlador de gráficos que tengas instalado en el sistema. ATENCIÓN: si has comprado un PC con emisor de IR 3D Vision incorporado (por ejemplo, un portátil), ésta ya debería tener instalados los controladores de 3D Vision. No desinstales los controladores. -
Page 314: Instalación De Los Controladores Y El Software
InstallShield, se abre el asistente de instalación de 3D Vision. Los usuarios de portátiles 3D Vision deberán hacer clic en el icono de acceso directo del escritorio (Configurar NVIDIA 3D Vision) para iniciar dicho asistente. - Page 315 Para ver la lista completa de juegos compatibles, visita www.nvidia.es/3dvision. El Panel de control de NVIDIA contiene otros ajustes para configurar 3D Vision. Si precisas información sobre el uso de este panel, consulta Panel de control de NVIDIA 3D Vision en la página 21 de este manual.
-
Page 316: Panel De Control De Nvidia
Panel de control de NVIDIA. Acceso al Panel de control de NVIDIA Para abrir el Panel de control de NVIDIA, haz clic en el escritorio con el botón derecho del ratón y selecciona el panel de NVIDIA. También puedes ir a Windows Panel de control... -
Page 317: Activar 3D Estereoscópico
GUÍA DEL USUARIO DE NVIDIA 3D VISION Configuración 3D estereoscópica La sección Establecer configuración 3D estereoscópica del Panel de control de NVIDIA proporciona todas las opciones que necesitas para mejorar tu experiencia de juego. A continuación figuran todos los ajustes de esta pantalla. -
Page 318: Ajuste De La Profundidad
Ajuste de la profundidad El porcentaje de profundidad del juego determina el lugar donde se situará el objeto más lejano de la escena. Cuando 3D Vision se instala por primera vez en un sistema, este valor se ajusta al 15% de forma predeterminada. -
Page 319: Tipo De Pantalla 3D Estereoscópica
En esos casos, el usuario no necesita realizar ningún cambio en la configuración. En otros juegos FPS, NVIDIA ofrece una selección de miras láser 3D que aparecen sobre el objetivo. Estas miras funcionan en juegos de acción adecuadamente configurados con miras centradas en la pantalla. -
Page 320: Establecer Accesos Directos De Teclado
Para ver o cambiar estas teclas desde la pantalla Establecer configuración 3D estereoscópica en el Panel de control de NVIDIA, haz clic en el botón Establecer accesos directos de teclado. Pantalla con los valores predeterminados... - Page 321 GUÍA DEL USUARIO DE NVIDIA 3D VISION Para ver la configuración avanzada en los juegos, haz clic en. Al hacerlo, se amplía la pantalla Establecer accesos directos de teclado. Pantalla con los valores predeterminados Para activar el uso de teclas de acceso directo avanzadas durante el juego, tienes que marcar la casilla Activar configuración avanzada...
- Page 322 Panel de control de NVIDIA. Ctrl+F3 Disminuir Reduce la profundidad en tiempo real profundidad durante el juego. El cambio se refleja en el Panel de control de NVIDIA. Ctrl+Alt+ Ver/ocultar Muestra en la esquina inferior de la Insertar compatibilidad pantalla la configuración recomenda- durante el juego da por NVIDIA para el juego utilizado.
-
Page 323: Ocultar Efectos 3D Estereoscópicos Al Iniciar Juegos
Hay juegos que no se ejecutan bien cuando se inician con los efectos 3D activos. Para evitar el problema, marca esta casilla en la pantalla Establecer configuración 3D estereoscópica del Panel de control NVIDIA. Al hacerlo, el efecto 3D estereoscópico se mantiene activo, simplemente está... -
Page 324: Prueba De Efectos 3D Estereoscópicos
La lista desplegable Prueba de efectos 3D estereoscópicos de la pantalla Establecer configuración 3D estereoscópica del Panel de control de NVIDIA ofrece la posibilidad de probar la visión estereoscópica, y de ejecutar el asistente de instalación y la prueba de imagen médica. -
Page 325: Ver Compatibilidad Con Juegos
3D Vision. Todos los juegos probados figuran en una lista del Panel de control NVIDIA con su correspondiente nivel de compatibilidad. A cada juego se le ha asignado una de las siguientes calificaciones: Excelente, Bueno, Medio o No recomendado. - Page 326 Para ver todos los problemas y la configuración recomendada verificada por NVIDIA al probar un juego, selecciona (resalta) un juego en la lista y lee las instrucciones incluidas en Problemas y valores de configuración recomendados.
- Page 327 GUÍA DEL USUARIO DE NVIDIA 3D VISION...
-
Page 328: Información Avanzada
Puedes ver la lista de estos juegos en la ventana Ver compatibilidad con juegos situada en el Panel de control de NVIDIA. Este menú también muestra una lista de comentarios relativos al juego. Estos comentarios pueden incluir la configuración recomendada o ajustes y mensajes sobre la construcción del juego. -
Page 329: Forma De Establecer Tus Propias Teclas De Acceso Directo
Para verlas teclas de acceso directo predeterminadas, ve al Panel de control de NVIDIA y selecciona la tarea Establecer configuración 3D estereoscópica en la ventana izquierda. Haz clic en el botón Establecer accesos directos de teclado. -
Page 330: Directrices De Configuración De Los Juegos
INFORMACIÓN AVANZADA Directrices de configuración de los juegos La tabla siguiente contiene algunas recomendaciones de configuración para resolver determinados problemas de visualización durante el juego. Tabla 2. Directrices de configuración de los juegos Problema Sugerencia Los objetos están demasiado Reduce la convergencia cerca [Ctrl+F5] Los laterales están borro-... - Page 331 > Cursor/miras del juego: Si utilizas las miras láser 3D de NVIDIA, no olvides desactivar la mira del propio juego. La mira del juego suele estar situada a la profundidad de la pantalla e interfiere en la visión de la mira de NVIDIA.
-
Page 332: Consejos Y Solución De Problemas
Las preguntas deben enviarse en inglés para poder tramitarlas. Los clientes de 3D Vision también tienen acceso al servicio de asistencia telefónica llamando gratuitamente al 1-800-797-6530 de lunes a viernes entre las 8 de la mañana y 5 de la tarde, hora de la costa oeste estadounidense. -
Page 333: La Imagen No Es Clara
> Es importante que hayas utilizado el cable DVI entregado con la pantalla LCD 3D de 120 Hz. Es un cable Dual Link y 3D Vision no funciona sin él. Nota: este requisito no afecta a portátiles con monitores LCD 3D Vision integrados. - Page 334 El juego no está en modo de pantalla completa En la actualidad, 3D Vision sólo permite ver las aplicaciones a toda pantalla y no puede ejecutarse en modo ventana. Asegúrate de seleccionar el modo de pantalla completa en la configuración del juego.
-
Page 335: Fatiga Ocular/Dolor De Cabeza
Si no ves la mira láser en un juego, puede ser que no esté activada. Entra en la pantalla Establecer configuración 3D estereoscópica del Panel de control de NVIDIA y haz clic en el botón Cambiar visor de rayos láser 3D para abrir la ventana del mismo nombre. Asegúrate de que está... -
Page 336: Deja Que Se Caliente El Monitor Lcd De 120 Hz
Desde allí puedes enviar cualquier consulta a nuestro equipo de asistencia técnica. Las preguntas deben enviarse únicamente en inglés. Los clientes de 3D Vision también pueden utilizar un número de asistencia telefónica gratuita (1-800-797-6530) disponible de lunes a viernes, de 8 de la mañana a 5 de la tarde (hora de la costa oeste... - Page 337 GUÍA DEL USUARIO DE NVIDIA 3D VISION...
- Page 338 > Underwriters Laboratories (UL/cUL, CB Scheme) > Voluntary Control Council for Interference (VCCI) Los sistemas NVIDIA 3D Vision incluyen los siguientes modelos: > Modelo: P701 (emisor de IR alimentado por CC de 5 V y gafas inalámbricas alimentadas por batería) >...
- Page 339 GUÍA DEL USUARIO DE NVIDIA 3D VISION Cumplimiento de la normativa de la Comisión Federal de Comunicaciones (FCC) de EE.UU. FCC – Federal Communications Commission Título 47 del código de reglamentos federales (Code of Federal Regulation o CFR), Sección 15: dispositivos de radiofrecuencia;...
- Page 340 CUMPLIMIENTO DE NORMATIVAS Y CERTIFICACIONES Cumplimiento de la normativa canadiense Industry Canada ICES-003:2004 - Aparato digital: Gestión de espectros frecuencias y política de telecomunicaciones; Normas sobre equipos que causan interferencias. Este aparato digital de Clase B cumple la norma canadiense ICES-003. Cet appareil numérique de la classe B est conforme à...
- Page 341 GUÍA DEL USUARIO DE NVIDIA 3D VISION Cumplimiento de la normativa coreana MIC - Ministerio de Información y Comunicaciones KCC - Comisión Coreana de las Comunicaciones KC - Certificación de Corea > KN 22 (CISPR 22): Equipo de tecnología de la información - Características de radioperturbaciones - Límites y métodos de...
- Page 342 CUMPLIMIENTO DE NORMATIVAS Y CERTIFICACIONES Cumplimiento de la normativa de la Unión Europea CE - Conformidad Europea (Conformité Européenne) El producto cumple las dos directivas de la Comisión Europea: Directiva EMC (2004/108/EC) y Directiva sobre Bajo Voltaje (2006/95/EC). El cumplimiento de estas directivas implica la conformidad con las siguientes normas europeas (las normas interna¬cionales equivalentes figuran entre paréntesis): >...
- Page 343 GUÍA DEL USUARIO DE NVIDIA 3D VISION cambios de voltaje, fluctuaciones de voltaje y flicker en sistemas públicos de suministro de bajo voltaje para equipos con corriente de ≤ 16 A por fase y no sujetos a conexión condicional Underwriters Laboratories...
-
Page 344: Información Importante Sobre Seguridad
INFORMACIÓN IMPORTANTE SOBRE SEGURIDAD INFORMACIÓN IMPORTANTE SOBRE SEGURIDAD Prefacio Los productos NVIDIA están diseñados para que funcionen sin ningún peligro al instalarlos y utilizarlos de acuerdo con las instrucciones y prácticas generales de seguridad. Las pautas incluidas en este documento explican los posibles riesgos asociados al funcionamiento de equipos informáti-... - Page 345 GUÍA DEL USUARIO DE NVIDIA 3D VISION Conserva y sigue todas las instrucciones de seguridad y manejo del producto. Consulta siempre la documentación suministrada con el equipo. Respeta todas las advertencias referentes al producto y sigue las instrucciones de funcionamiento.
- Page 346 Si el producto sufre algún daño que requiera reparación, desconéctalo del ordenador o del cargador USB y acude a un proveedor de servicios autorizado de NVIDIA para efectuarla. > Como en el caso de cualquier otro equipo electrónico, desecha las gafas y el emisor de IR de forma apropiada.
- Page 347 No la dejes caer, ni la dobles o la aplastes para evitar que sufra daños. AVISO: la batería de ion de litio de las gafas 3D Vision tiene un diseño exclusivo. NO intentes abrir el compartimiento de la batería ni reemplazarla.
- Page 348 NVIDIA no otorga licencia alguna por implicación, ni de ningún otro modo, en virtud de ninguna patente o derecho de patente de NVIDIA Corporation. Las especificaciones mencionadas en esta publicación son susceptibles de cambios sin previo aviso. El contenido de este documento sustituye a otra información anteriormente suministrada por NVIDIA.
- Page 349 www.nvidia.es...
- Page 350 3D VISION ™ USER GUIDE РУКОВОДСТВО ПОЛЬЗОВАТЕЛЯ...
- Page 352 Подготовка перед установкой Установка Подключение дисплея Удаление драйверов дисплея Установка драйверов и программного обеспечения Панель управления NVIDIA Доступ к Панели управления NVIDIA Установка стереоскопического режима 3D Включение стереоскопического режима 3D Настройка глубины Тип стереоскопического 3D-дисплея Изменение лазерного 3D прицела Назначение сочетаний клавиш...
- Page 353 СОДЕРЖ АНИЕ Просмотр совместимости с играми Дополнительные настройки Предустановленные настройки Назначение собственных сочетаний клавиш Указания по настройке игры Процедуры просмотра Советы и устранение неисправностей Стереоскопический режим 3D не работает Нечеткое изображение Зрительное напряжение/головная боль Отсутствует лазерный прицел Прогревание 120 Гц LCD монитора Соответствие...
-
Page 354: Добро Пожаловать
впечатление от сотен компьютерных игр, цифровых фотографий и 3D-фильмов. Просто наденьте стильные очки, подключенные к карте GeForce и дисплею с поддержкой 3D Vision, и вы увидите, как на экране оживают персонажи и окружающая их среда. Пусть ваши глаза увидят нечто большее благодаря 3D Vision. -
Page 355: Системные Требования
что компьютер соответствует требованиям, необходимым для полноценного использования возможностей 3D Vision. Для просмотра полного списка системных требований, включая поддерживаемые NVIDIA графические процессоры, 3D Vision ЖК-мониторы, 3D Vision ноутбуки и другие компоненты, посетите, пожалуйста, страницу www.nvidia.ru/get3D и выберите раздел Подробнее -> Системные требования 3D Vision. -
Page 356: Памятка Для Страдающих Эпилепсией
ДОБРО ПОЖ А ЛОВАТЬ Памятка для страдающих эпилепсией ВНИМАНИЕ! ЕСЛИ ВЫ ИЛИ ЧЛЕНЫ ВАШЕЙ СЕМЬИ БОЛЬНЫ ЭПИЛЕПСИЕЙ, ПРОКОНСУЛЬТИРУЙТЕСЬ У ВРАЧА, ПРЕЖДЕ ЧЕМ ПОЛЬЗОВАТЬСЯ ПРОДУКТАМИ ДЛЯ КОМПЬЮТЕРНЫХ ИГР. У небольшого процента людей могут быть эпилептические припадки при просмотре определенных телевизионных изображений или видеоигр, в которых имеется... - Page 357 РУКОВОДСТВО ПОЛЬЗОВАТЕЛЯ NVIDIA 3D VISION...
-
Page 358: Распаковка Оборудования
РАСПАКОВК А ОБОРУДОВАНИЯ РАСПАКОВКА ОБОРУДОВАНИЯ Прежде чем распаковать новую систему NVIDIA 3D Vision, убедитесь, что ваш компьютер соответствует системным требованиям (см. стр. 2) для правильной установки. Проверьте каждый компонент в комплекте поставки.В случае отсутствия или повреждения какого-либо компонента в комплекте поставки обратитесь к реселлеру. - Page 359 РУКОВОДСТВО ПОЛЬЗОВАТЕЛЯ NVIDIA 3D VISION Не заслоняйте очки с этой стороны. Очки должны быть в пределах прямой видимости ИК - излучателя Кнопка включения Цвет индикатора: Чтобы проверить состояние аккумулятора, нажмите кнопку включения. Если цвет индикатора: Зеленый – время работы аккумулятора...
-
Page 360: Ик-Излучатель
на рисунке, и поставьте другой USB ИК-излучатель (входит в комплекте поставки набора 3D Vision ) Такие 3D Vision продукты, как мониторы, проекторы и некоторые ноутбуки 3D Vision, используют USB ИК-излучатель для работы с очками 3D Vision. Пожалуйста, ознакомьтесь с нижеприведенной... - Page 361 РУКОВОДСТВО ПОЛЬЗОВАТЕЛЯ NVIDIA 3D VISION ВНИМАНИЕ: Безопасность инфракрасного устройства СВЕТОДИОДНОЕ ИЗДЕЛИЕ КЛАССА 1 Данное изделие содержит инфракрасные светоизлучающие диоды, предназначенные для передачи сигналов от контроллера к очкам. Несмотря на то, что эти невидимые лучи считаются безопасными и соответствуют спецификации EN60825-1 (IEC60825-1), мы рекомендуем...
- Page 362 информацией по работе с 3D Vision продуктами. 3D Vision ноутбуки У большинства 3D Vision ноутбуков есть функциональные клавиши для управления 3D Vision, точно такие же, как для управления яркостью или звуком. Проконсультируйтесь с производителем ноутбука, чтобы убедиться, что на вашем...
- Page 363 3D Vision ЖК-мониторы и компьютеры класса "все - в - одном" Большинство 3D Vision LCD мониторов и компьютеров "всё - в - одном" не имеют клавиш для управления 3D Vision во время проигрывания 3D.Вы можете управлять 3D, используя следующие комбинации клавиш: >...
-
Page 364: Проводные Очки
УСТАНОВК А И НАСТРОЙК А Проводные очки Проводные очки 3D Vision предназначены для работы с 3D Vision мониторами. Проводные очки не используют USB ИК излучатель, который поставляется в комплекте с беспроводными очками и 3D Vision ноутбуками. USB кабель Этот кабель постоянно... - Page 365 Снимите носовой упор, как показано на рисунке, и замените его на другой. Закрепление проводных очков Проводные очки 3D Vision могут быть закреплены, используя отверстия на USB коннекторе и устройство безопасности ноутбука. NVIDIA протестировала устройство безопасности Kensington для закрепления очков к ПК и столу.
-
Page 366: Установка И Настройка
на ноутбуке. Пожалуйста, запустите "Установка 3D Vision" на рабочем столе Windows для первоначальной настройки 3D. 120Hz Если комплект поставки вашего ЖК-монитора включает очки NVIDIA 3D Vision или вы хотите убедиться, что у вас установлены самые последние драйверы для ЖК-монитора, зайдите на www.nvidia.ru/3DUpdate для загрузки последней версии... -
Page 367: Установка
РУКОВОДСТВО ПОЛЬЗОВАТЕЛЯ NVIDIA 3D VISION Установка Подключение монитора (пропустите этот шаг, если вы используете 3D Vision ноутбук) Подключите 3D Vision Ready монитор к видеокарте NVIDIA. Подключаемый монитор должен быть либо 3D Vision Ready ЖК или аналоговым ЭЛТ монитором. Для ЖК мониторов... - Page 368 ли у него специальный HDMI порт для подключения ПК к HDTV. Кроме того, измените режим в меню вашего ТВ на ПК или Компьютер , чтобы обеспечить корректную обработку видеосигнала Вашего ТВ. Примечание: кабель DVI-HDMI не включен в ваш комплект 3D Vision. Необходимо приобрести в специализированном магазине.
- Page 369 РУКОВОДСТВО ПОЛЬЗОВАТЕЛЯ NVIDIA 3D VISION Схема подключения 120 Гц ЖК монитора для USB ИК излучателя ЖК монитор ПК ИК излучатель НЕ ПОДКЛЮЧАЙТЕ РАЗЪЕМ ДО УКАЗАНИЯ МАСТЕРА УСТАНОВКИ USB DVI Кабель USB Двухканальный DVI кабель (поставляется с монитором)
- Page 370 Диаграмма подключения 120 Гц ЖК монитора для мониторов со встроенным ИК излучателем ЖК монитор ПК Двухканальный DVI кабель (поставляется с монитором) Примечание: ЖК мониторы со встроенным ИК излучателем не требуют дополнительного USB подключения ПК к монитору.
- Page 371 графический драйвер, установленный на компьютере. ВНИМАНИЕ: Если вы приобрели ПК со встроенным 3D Vision ИК-излучателем (например, ноутбук), то драйверы 3D Vision должны уже быть установлены на вашем ПК. Не удаляйте эти драйверы. Пропустите шаги 2-7 и перейдите к шагу 8.
-
Page 372: Установка Драйверов И Программного Обеспечения
системы прежде чем заменять карту. Замените карту на NVIDIA GeForce. Установка драйверов и программного обеспечения Вставьте компакт-диск с ПО и документацией для 3D Vision. Появится экран Установка программного обеспечения. Выберите пункт Установить графический драйвер GeForce. Мастер установки поможет вам выполнить установку. - Page 373 РУКОВОДСТВО ПОЛЬЗОВАТЕЛЯ NVIDIA 3D VISION Поздравляем! Установка и настройка завершены, система 3D Vision включена – можно начинать играть в компьютерные игры с максимальным приближением к реальности. Примечание: по умолчанию в системе 3D Vision установлена глубина стереоскопического эффекта 15%. NVIDIA рекомендует всем новым пользователям начинать...
-
Page 374: Панель Управления Nvidia
ПАНЕЛЬ УПРАВЛЕНИЯ NVIDIA NVIDIA предлагает инструменты для лучшей настройки 3D Vision. Эти инструменты можно найти в Панели управления NVIDIA. Доступ к Панели управления NVIDIA Чтобы открыть Панель управления NVIDIA, щелкните рабочий стол правой кнопкой мыши и выберите пункт Панель управления NVIDIA. Можно также открыть Панель Управления... -
Page 375: Установка Стереоскопического Режима 3D
РУКОВОДСТВО ПОЛЬЗОВАТЕЛЯ NVIDIA 3D VISION Установка стереоскопического режима 3D Этот раздел Панели управления NVIDIA предоставляет все необходимые настройки для управления стереоскопическим эффектом в играх. Рассмотрим каждую настройку. Включение стереоскопического режима 3D Примечание: Стереоскопические 3D-эффекты работают только в полноэкранных приложениях DirectX. -
Page 376: Настройка Глубины
Кроме того, глубину можно изменить во время игры с помощью сочетаний клавиш: Замечание: Ниже описаны горячие клавиши по умолчанию, которые используются с наборами 3D Vision. Если у вас 3D Vision ноутбук, то на клавиатуре должны быть специальные клавиши для увеличения и уменьшения глубины 3D. -
Page 377: Тип Стереоскопического 3D-Дисплея
отображаются на ползунке Глубина на Панели управления NVIDIA. Тип стереоскопического 3D-дисплея Тип стереоскопического 3D-дисплея — это раскрывающийся список всех дисплеев 3D Vision Ready, обнаруженных мастером установки. Этот список заполняется мастером. Если во время установки подключено несколько дисплеев 3D Vision-Ready, они отображаются... -
Page 378: Назначение Сочетаний Клавиш
Сочетания клавиш - это заданные в игре горячие клавиши, которые используются для выполнения различных действий. Для просмотра или изменения сочетаний клавиш на экране Установить стереоскопический режим 3D на Панели управления NVIDIA нажмите кнопку Назначить сочетания клавиш. Показано со значениями по умолчанию... - Page 379 РУКОВОДСТВО ПОЛЬЗОВАТЕЛЯ NVIDIA 3D VISION Показано со значениями по умолчанию Откроется экран Назначить сочетания клавиш . Чтобы разрешить использование дополнительных сочетаний клавиш в игре, необходимо установить флажок Включить дополнительные настройки игры. Стандартные сочетания клавиш, показанные вверху окна, всегда включены. Список всех функций для сочетаний клавиш приведен в табл.1 на...
- Page 380 Таблица 1. Сочетания клавиш Клавиши Описание Действие Ctrl+T Показать Включает и выключает 3D Vision. или скрыть cтереоскопические 3D-эффекты Ctrl+F4 Увеличить глубину Увеличивает глубину в реальном времени в работающей игре. Изменение отображается на Панели управления NVIDIA. Ctrl+F3 Уменьшить глубину Уменьшает глубину в реальном...
- Page 381 Некоторые игры плохо запускаются при включенных при запуске стереоскопических 3D-эффектах. Чтобы избежать этого, установите флажок на экране Установить стереоскопический режим 3D на Панели управления NVIDIA. Стереоскопические 3D-эффекты остаются включенными, они просто скрыты при запуске. После загрузки игры 3D-эффекты можно отобразить с помощью сочетания...
-
Page 382: Тест Стереоскопических 3D-Эффектов
Нажатие кнопки Тест стереоскопических 3D-эффектов... отображает тестовое приложение, которое позволяет настроить стереоскопические 3D-эффекты для комфортного просмотра с помощью системы 3D Vision. Выбрав настройки дисплея, нажмите кнопку Запуск тестового приложения. Если для дисплея установлено правильное разрешение, изображение отображается в полноэкранном режиме. Включив... -
Page 383: Просмотр Совместимости С Играми
тест по изображению, чтобы проверить, могут ли они просматривать изображения со стереоскопическими 3D-эффектами. Если вы не видите изображение, не пользуйтесь системой 3D Vision (см. этап 20 на стр. 22). Просмотр совместимости с играми Для многих популярных игр NVIDIA предоставляет протестированные... - Page 384 протестированы после выпуска данной версии программного обеспечения. Чтобы ознакомиться с проблемами, выявленными во время тестирования игры и рекомендуемыми NVIDIA настройками, выделите в списке игру и ознакомьтесь с указаниями в разделе Проблемы и рекомендуемые настройки. Для просмотра игры с наилучшим возможным качеством 3D-эффектов необходимо...
- Page 385 РУКОВОДСТВО ПОЛЬЗОВАТЕЛЯ NVIDIA 3D VISION...
-
Page 386: Дополнительные Настройки
Список этих игр можно посмотреть в разделе Просмотр совместимости с играми, который можно найти на Панели управления NVIDIA. В этом меню можно также найти комментарии к игре. Комментарии могут содержать предлагаемые настройки и пояснения по поводу построения игры. Эти инструкции можно... -
Page 387: Назначение Собственных Сочетаний Клавиш
настройками по умолчанию или изменить назначение сочетаний клавиш в соответствии с собственными предпочтениями. Чтобы увидеть настройки по умолчанию сочетаний клавиш, откройте Панель управления NVIDIA и в левой части окна выберите пункт Установить стереоскопический режим 3D. Нажмите кнопку Назначить сочетания клавиш. -
Page 388: Указания По Настройке Игры
ДОПОЛНИТЕЛЬНЫЕ НАСТРОЙКИ Указания по настройке игры В следующей таблице приводятся некоторые указания по настройке для устранения конкретных проблем во время игры. Таблица 2. Указания по настройке игры Проблема Решение Объект расположен Уменьшить схождение слишком близко [Ctrl+F5] Размытые, не ясные и не Циклически... - Page 389 очки поверх корректирующих очков. Чем контрастнее изображение, тем лучше качество. > Курсор / перекрестия игры: При использовании 3D лазерных прицелов NVIDIA прицел игры должен быть выключен. Прицел игры обычно позиционируется на глубине экрана и мешает нормальному просмотру лазерного прицела NVIDIA. >...
-
Page 390: Советы И Устранение Неисправностей
можно задавать только по- английски. Пользователи 3D Vision также могут получить бесплатную техническую поддержку по телефону: 1-800-797-6530 с 08:00:00 до 17:00:00 PST, с понедельника по пятницу. NVIDIA рекомендует зарегистрировать беспроводные очки по адресу: www.nvidia.ru/3dvision/register. для получения технической поддержки. Линия технической поддержки... -
Page 391: Нечеткое Изображение
подключив его к обычной настенной розетке. > Обязательно используйте кабель DVI, который входит в комплект поставки ЖК-дисплея 3D Ready 120 Гц. Это двухканальный кабель, система 3D Vision без него не работает. Замечание: Это требование не относится к ноутбукам со встроенными ЖК-панелями 3D Vision. Нечеткое изображение... - Page 392 настройках игры должен быть выбран полноэкранный режим. Чрезмерное мерцание Мерцание, заметное для периферического зрения, может быть вызвано тем, что система 3D Vision работает с частотой, отличной от частоты электросети в помещении. Этого мерцания можно избежать, выключив свет или изменив частоту обновления...
-
Page 393: Зрительное Напряжение/Головная Боль
Если в игре не просматривается лазерный прицел, возможно, он не включен. Откройте экран Усmановиmь сmереоскопический режcим 3D в Панели управления NVIDIA и нажмите кнопку Изменить 3D лазерный прицел. Появится экран изменения лазерного прицела. Убедитесь, что стоит флажок напротив пункта Включить лазерный... - Page 394 изображения при использовании 120Гц ЖК-монитора подождите, пока монитор разогреется. Это типичное требование для ряда ЖК-мониторов. Замечание: В круглосуточно работающей базе знаний по адресу t www.nvidia.ru/3dvision/support можно задавать вопросы техническим специалистам. Вопросы принимаются только по-английски. Пользователи 3D Vision также могут получить бесплатную техническую...
- Page 395 РУКОВОДСТВО ПОЛЬЗОВАТЕЛЯ NVIDIA 3D VISION...
-
Page 396: Соответствие Стандартам Исертификация
ГОСТ Р России (GOST-R ) > Организация UL США (UL, CUL) > Совет по добровольному контролю помех (VCCI) Продукты NVIDIA 3D Vision могут быть представлены следующими моделями: > Модель: P701 (ИК-излучатель, питающийся от переменного тока 5V, и беспроводные очки на батарейке) >... - Page 397 РУКОВОДСТВО ПОЛЬЗОВАТЕЛЯ NVIDIA 3D VISION Соответствие требованиям Федеральной комиссии связи (FCC) СШАФедеральная комиссия связи (FCC) СШАСвод Свод федеральных нормативных актов (CFR), раздел 47, часть 15 – Радиочастотное оборудование, подчасть В – излучатели непреднамеренных помех. (FCC Part 15B:2008). ПРЕДОСТЕРЕЖЕНИЕ: Изменения или модификации...
- Page 398 СООТВЕТСТВИЕ СТАНДАРТАМ И СЕРТИФИК АЦИЯ Соответствие стандартам канадской промышленности Промышленная палата Канады ICES-003: Цифровая аппаратура. Политика телекоммуникаций и распределения спектра, Нормативы по оборудованию, которое может вызывать радиопомехи. Эта цифровая аппаратура класса В отвечает требованиям нормативов ICES-003 канадской промышленности. Cet appareil numйrique de la classe B est conforme а la norme NMB-003 du Canada.
- Page 399 РУКОВОДСТВО ПОЛЬЗОВАТЕЛЯ NVIDIA 3D VISION Соответствие стандартам Кореи MIC: Министерство информации и коммуникаций Южной Кореи KCC – Корейская комиссия связи KC – Организация по сертификации Кореи > KN 22 (CISPR 22): Информационное оборудование. Характеристики радиочастотных помех. Ограничение и методы измерения.
- Page 400 СООТВЕТСТВИЕ СТАНДАРТАМ И СЕРТИФИК АЦИЯ Соответствие стандартам Европейского Союза CE: Соответствие европейским стандартам (Conformité Européenne) Изделие соответствует требованиям Указаний Европейского экономического сообщества по электромагнитной совместимости (2004/108/EC) и низковольтному оборудованию (2006/95/EC), опубликованным Комиссией ЕС. Соответствие этим указаниям означает соответствие следующим европейским нормативным документам (в скобках приводятся...
- Page 401 РУКОВОДСТВО ПОЛЬЗОВАТЕЛЯ NVIDIA 3D VISION Совместимость технических средств электромагнитная - Часть 3-2: Эмиссия гармонических составляющих тока техническими средствами с потребляемым током не более 16 А (в одной фазе). Нормы и методы испытаний. > ГОСТ Р 51317.3.3-99(МЭК 61000-3-3): Совместимость технических средств электромагнитная - Часть 3-3: Колебания напряжения и...
-
Page 402: Важная Информация По Безопасности
ВА ЖНАЯ ИНФОРМАЦИЯ ПО БЕЗОПАСНОСТИ ВАЖНАЯ ИНФОРМАЦИЯ ПО БЕЗОПАСНОСТИ Предисловие Продукты NVIDIA разработаны для безопасной работы при условии, что установка и использование этих продуктов выполняются в соответствии с инструкциями и общими процедурами по безопасности. В указаниях, содержащихся в этом документе, поясняется возможный... - Page 403 РУКОВОДСТВО ПОЛЬЗОВАТЕЛЯ NVIDIA 3D VISION Сохраните все инструкции по эксплуатации и безопасности продукта для будущего использования. Всегда следуйте указаниям документации, которая входит в комплект поставки оборудования. Соблюдайте все меры предосторожности, указанные в надписях на продукте и инструкциях по эксплуатации к данному продукту.
- Page 404 Если продукт поврежден и требует технического обслуживания, отключите его от компьютера или адаптера источника питания USB и обратитесь за помощью к сертифицированным поставщикам по техническому обслуживанию NVIDIA. > Храните очки и ИК-излучатель, так же как любое другое электронное оборудование, надлежащим образом.
- Page 405 5-40 градусов Цельсия (41-104 градусов Фаренгейта). > Температура хранения: Рекомендуемые значения температуры хранения: -10-45 градусов Цельсия (14-113 градусов Фаренгейта). Не оставляйте систему 3D Vision в автомобиле. Температура в припаркованной машине может превышать предельно допустимые значения. Безопасность инфракрасного устройства СВЕТОДИОДНОЕ ИЗДЕЛИЕ КЛАССА 1 Данное...
- Page 406 ЦЕННОСТИ ИЛИ СООТВЕТСТВИЯ КАКОМУ-ЛИБО ОПРЕДЕЛЕННОМУ ПРЕДНАЗНАЧЕНИЮ. Считается, что предоставляемая информация точна и достоверна. Тем не менее, корпорация NVIDIA не несет никакой ответственности за последствия использования этой информации и за какие-либо нарушения патентов или других прав третьих лиц, которые могут возникнуть...
- Page 407 www.nvidia.ru...
- Page 408 ™...
- Page 410 NVIDIA Control Panel ™ ® Control Panel...
- Page 411 120 Hz...
- Page 412 ™ ™ NVIDIA GeForce ® ® 3D Vision-Ready www.nvidia.com/3dvision ™ NVIDIA ® www.nvidia.com/3dvision/...
- Page 413 3D Vision-Ready www.nvidia.com/get3D > > > 2-2.5 > 0.6-0.75 > > > > > > • • • •...
- Page 414 癫痫症 > > > > > > > >...
- Page 417 Windows...
- Page 418 ON/OFF VESA...
- Page 419 EN60825-1 IEC60825-1 > >...
- Page 420 ON/OFF...
- Page 421 > 3D / –CTRL-T > > –CTRL-F4 > –CTRL-F3 > >...
- Page 422 3D Vision-Ready / 3D www.nvidia.com/Get3D...
- Page 423 Kensington...
- Page 424 120Hz Windows set up 3D Vision 120Hz www.nvidia.com/3DUpdate www.nvidia.com/3DUpdate...
- Page 425 3D Vision-Ready 3D Vision-Ready DVI DVI...
- Page 426 HDMI VESA 3 DVI HDMI USB DVI HDMI 计算机 DVI HDMI...
- Page 427 120 Hz USB DVI...
- Page 428 120 Hz...
- Page 430 Start > Control Panel > Programs and Features NVIDIA Drivers Remove only the following NVIDIA Display Driver Remove GeForce Software Installation Install GeForce Graphics driver Yes, I want to restart my computer now My Computer Next NVIDIA Stereoscopic 3D Viewer Next Install Finish Setup NVIDIA 3D Vision...
- Page 431 Control Panel www.nvidia.com/3dvision Control Panel Control Panel Control Panel...
-
Page 432: Control Panel
CONTROL PANEL CONTROL PANEL Control Panel Control Panel Control Panel Control Windows Control Panel Hardware and Panel Sound Control Panel Stereoscopic 3D "Stereoscopic 3D"... - Page 433 Control Panel DirectX CtrL-T...
- Page 434 CONTROL PANEL Set Up Stereoscopic 3D Control Panel Depth CtrL+F3 > > CtrL+F4 > > Control Panel Depth...
- Page 435 Stereoscopic 3D display type 3D Vision-Ready 3D Vision-Ready...
- Page 436 CONTROL PANEL Set Up Stereoscopic 3D Change 3D Laser Sight Enable laser sight for configured game Transparency 100% Ctrl+F12...
- Page 437 Control Panel Set Up Stereoscopic 3D Set Keyboard Shortcuts Set Keyboard Shortcuts advanced Enable advanced in-game settings...
- Page 438 CONTROL PANEL Ctrl+T Ctrl+F4 Control Panel Ctrl+F3 Control Panel Ctrl+Alt+ Insert Ctrl+F6 Ctrl+F5 Ctrl+F11 Cycle Frustum Ctrl+F7 Set keyboard Shortcuts Enable advanced in-game settings...
- Page 439 Control Panel Set Up Stereoscopic 3D Ctrl-T ON/OFF...
- Page 440 CONTROL PANEL Control Panel Set Up Stereoscopic 3D Test Stereoscopic 3D Test Stereoscopic 3D... Launch Test Application...
- Page 441 Set Up Stereoscopic 3D Run Setup Wizard Medical Image Test Run Setup Wizard Run Medical Image Test Control Panel...
- Page 442 CONTROL PANEL www.nvidia.com Issues and recommended settings Ctrl+Alt+Insert...
- Page 444 > > > > > > Control Panel View compatibility with games Ctrl+Alt+Insert...
- Page 445 Control Panel Set up stereoscopic 3D Set Keyboard Shortcuts...
- Page 446 [Ctrl+F5] [Ctrl+F11] [Ctrl+F6/Ctrl+F5] Ctrl-F7 > > 2-2.5 > > 0.6-0.75 > > > >...
- Page 447 > > > > > > > >...
- Page 448 > > > www.nvidia.com/3dvision/support > 8:00 5:00 1-800-797-6530 > > www.nvidia.com/3dvision/register > > > > Control Panel > > Up Stereoscopic 3D > > 0.45...
- Page 449 > Control Panel > Set Up 3D Vision Test Stereoscopic Run Setup Wizard > > • • • Windows 3D Ready 120Hz > >...
- Page 450 Control Panel Setup Ctrl+F3 Ctrl+F4 Control Panel View Compatibility with Games 3D Vision-Ready Issues and recommended settings Control Panel 120 Hz > > 110 Hz > > 50 Hz 100 Hz > >...
- Page 451 Test with this refresh rate Next Ctrl+F3 > > > > Control Panel Set Up Stereoscopic 3D > > Control Panel Set Up Stereoscopic 3D Change 3D Laser Change 3D laser Sight Sight Enable 3D laser sight for configured games Change 3D Laser Sight Control Panel Set Up Stereoscopic 3D...
- Page 452 120 Hz 120 Hz www.nvidia. com/3dvision/support 8:00 5:00 1-800-797-6530...
- Page 454 > C-Tick > VCCI > > > GOST R GOST-R > > > > > UL/cUL CB > > > > > > > BSMI > P701 5V > > > P854 5V > > P864 5V >...
- Page 455 FCC - FCC Part 15B:2008 • • • •...
- Page 456 ICES-003:2004 ICES-003 Cet appareil numérique de la classe B est conforme à la norme NMB-003 du Canada. C-Tick AS/NZS CISPR 22:2009 VCCI V-1/09.04 > > > V-2/09.04 > > V-3/09.04 > V-4/09.04 > > VCCI...
- Page 457 KN 22 CISPR 22 > > > KN 24 CISPR 24 > BSMI CNS 13438:2006 CISPR 22...
- Page 458 2004/108/EC 2006/95/EC > EN 55022:2006+A1:2007 CISPR 22 > > EN 55024:1998+A1:2001+A2:2003 IEC 61000-4-2 3 4 5 > 6 8 11 > EN 61000-3-2:2006 IEC 61000-3-2 > ≤ > EN 61000-3-3:2008 IEC 61000-3-3 > ≤ GOST-R GOST R > GOST R IEC 60950-1 >...
- Page 459 UL/cUL CB > UL 60950-1 2007 3 27 > > CSA C22.2 No. 60950-1-07 2007 3 > > IEC 60950-1:2005 > UL Listed I.T.E.
- Page 460 IEC-60950-1 IEC-60950-1 UL-60950-1 > > > > > > > > > > > > > >...
- Page 462 > > > > > > > > > > > > > > > > > > > > > > > > > > > > > > > >...
- Page 463 > > > > > > > > 1 LED EN60825-1 IEC60825-1 > > > >...
- Page 464 WEEE • • GeForce nForce ©2008 2009 2010...
- Page 465 www.nvidia.cn...
- Page 466 D VISION ™ USER GUIDE...
- Page 468 NVIDIA NVIDIA Stereoscopic 3D Stereoscopic 3D Stereoscopic 3D Change 3D Laser Sight Stereoscopic 3D Stereoscopic 3D Test Stereoscopic 3D...
- Page 469 3D Vision 120Hz LCD...
- Page 470 NVIDIA 3D Vision – ® Stereoscopic 3D 3D Vision GeForce GPU 3D Vision-Ready 3D Vision 3D Vision Stereoscopic 3D www.nvidia.com/3dvision NVIDIA NVIDIA www.nvidia.com/3dvision/register NVIDIA 3D Vision...
- Page 471 NVIDIA 3D VISION 3D Vision NVIDIA GPU 3D Vision-Ready LCD 3D Vision www.nvidia. com/get3D System Requirements Stereoscopic 3D > Stereoscopic 3D Stereoscopic 3D > > Stereoscopic 3D > Stereoscopic 3D > • • • • Stereoscopic 3D...
- Page 472 Stereoscopic 3D > > > Stereoscopic 3D > > > > > Stereoscopic 3D...
- Page 473 NVIDIA 3D VISION...
- Page 474 NVIDIA 3D Vision...
- Page 475 NVIDIA 3D VISION Windows...
- Page 476 3D Vision 3D Vision 3D Vision 3D Vision 3D Vision 3D Vision 3D Vision ON/OFF VESA DLP HDTV...
- Page 477 NVIDIA 3D VISION EN60825-1 IEC60825-1 > >...
- Page 478 3D Vision 3D Vision 3D Vision 3D Vision 3D Vision 3D Vision 3D Vision 3D Vision Stereoscopic 3D 3D Vision Stereoscopic 3D...
- Page 479 NVIDIA 3D VISION 3D Vision LCD 3D Vision LCD 3D Vision > 3D – CTRL-T > Stereoscopic 3D – CTRL-F4 > Stereoscopic 3D – CTRL-F3...
- Page 480 3D Vision 3D Vision-Ready 3D Vision 3D Vision 3D Vision 3D Vision www.nvidia.com/Get3D...
- Page 481 NVIDIA 3D VISION 3D Vision NVIDIA Kensington...
- Page 482 3D Vision NVIDIA 3D Vision 120Hz Windows Set up 3D Vision 120Hz NVIDIA 3D Vision www.nvidia. com/3DUpdate www.nvidia.com/3DUpdate...
- Page 483 NVIDIA 3D VISION 3D Vision 3D Vision Ready NVIDIA 3D Vision Ready LCD DVI-to-DVI...
- Page 484 DLP HDTV HDMI VESA 3-pin DVI-to-HDMI USB DVI HDTV HDMI Computer 3D Vision DVI-to-HDMI...
- Page 485 NVIDIA 3D VISION 120 Hz LCD USB DVI...
- Page 486 120 Hz LCD...
- Page 487 NVIDIA 3D VISION 3D Vision 3D Vision 2 – 7...
- Page 488 ] › [ ] › [ NVIDIA [NVIDIA Drivers]* [NVIDIA NVIDIA NVIDIA GeForce 3D Vision GeForce InstallShield Wizard 3D Vision 3D Vision NVIDIA Stereoscopic 3D Viewer InstallShield 3D Vision 3D Vision Setup NVIDIA 3D Vision 3D Vision...
- Page 489 NVIDIA 3D VISION 3D Vision 3D Vision 15% NVIDIA Stereoscopic 3D NVIDIA www.nvidia.com/3dvision NVIDIA 3D Vision NVIDIA 3D Vision...
- Page 490 NVIDA NVIDIA NVIDIA 3D Vision NVIDIA NVIDIA [NVIDIA Control Panel] NVIDIA [NVIDIA Control Panel] NVIDIA Windows [ ] [NVIDIA Control Panel] NVIDIA [Stereoscopic 3D] Stereoscopic [Stereoscopic 3D] Stereoscopic 3D...
- Page 491 NVIDIA 3D VISION Stereoscopic 3D NVIDIA Stereoscopic 3D Stereoscopic 3D DirectX Stereoscopic 3D Ctrl-T Stereoscopic 3D 3D Vision...
- Page 492 NVIDA 3D Vision Depth 3D Vision Stereoscopic 3D [Set up Stereoscopic 3D] Stereoscopic 3D NVIDIA [Depth] 3D Vision 3D Vision > Ctrl+F3 > Ctrl+F4 NVIDIA [Depth]...
- Page 493 NVIDIA 3D VISION Stereoscopic 3D [Stereoscopic 3D display type] Stereoscopic 3D 3D Vision 3D Vision-Ready Change 3D Laser Sight Stereoscopic 3D NVIDIA NVIDIA [Set up Stereoscopic 3D] Stereoscopic 3D...
- Page 494 NVIDA [Change 3D Laser Sight] [Enable laser sight for configured game] [Transparency] 100% Ctrl+F12 Stereoscopic 3D [NVIDIA Control Panel] NVIDIA [Set up Stereoscopic 3D] Stereoscopic 3D [Set Keyboard Shortcuts]...
- Page 495 NVIDIA 3D VISION [Set Keyboard Shortcuts] [Enable advanced in-game settings]...
- Page 496 NVIDA Ctrl+T Stereo- 3D Vision scopic 3D Ctrl+F4 NVIDIA Ctrl+F3 NVIDIA Ctrl+Alt+ NVIDIA Insert Ctrl+F6 Ctrl+F5 Ctrl+F11 Cycle frustum [Off] [Stretch to fill] [Clip sides] Ctrl+F7 [Set keyboard Shortcuts] [Enable advanced in-game settings]...
- Page 497 NVIDIA 3D VISION Stereoscopic 3D Stereoscopic 3D [NVIDIA Control Panel] NVIDIA [Set Up Stereoscopic 3D] Stereoscopic 3D Stereoscopic 3D Stereoscopic 3D ON/OFF Stereoscopic 3D 3D On/Off Ctrl-T Stereoscopic 3D 3D Vision Stereoscopic 3D 3D Vision Stereoscopic 3D...
- Page 498 NVIDA Stereoscopic 3D Test Stereoscopic 3D [Set Up Stereoscopic 3D] Stereoscopic NVIDIA [Test Stereoscopic 3D] Stereoscopic 3D Stereoscopic 3D Test Stereoscopic 3D [Test Stereoscopic 3D...] Stereoscopic 3D Stereoscopic 3D 3D Vision [Launch Test Application] Stereoscopic 3D...
- Page 499 NVIDIA 3D VISION [Set Up Stereoscopic 3D] Stereoscopic 3D Stereoscopic 3D Run Setup Wizard [Run Setup Wizard] [Run Medical Image Test] [Run Setup Wizard] Run Medical Image Test [Run Medical Image Test] NVIDIA Stereoscopic 3D Stereoscopi 3D 3D Vision NVIDIA...
- Page 500 NVIDA NVIDIA NVIDIA NVIDIA NVIDIA www.nvidia.com NVIDIA [Issues and recommended settings] Stereoscopic Stereoscopic 3D Ctrl+Alt+Insert...
- Page 501 NVIDIA 3D VISION...
- Page 502 NVIDIA 3D Vision Stereoscopic 3D Stereoscopic 3D Stereoscopic 3D Stereoscopic 3D > > > Stereoscopic 3D NVIDIA Stereoscopic 3D NVIDIA [View compatibility with games] Ctrl+Alt+Insert.
- Page 503 NVIDIA 3D VISION [NVIDIA Control Panel] NVIDIA [Set up stereoscopic 3D] Stereoscopic 3D [Set Keyboard Shortcuts] [OK]...
- Page 504 [Ctrl+F5] [Ctrl+F11] [Ctrl+F6/ Ctrl+F5] Stereoscopic 3D Stereoscopic 3D Ctrl-F7 > Stereoscopic 3D > > Stereoscopic 3D Stereoscopic 3D...
- Page 505 NVIDIA 3D VISION > Stereoscopic 3D > > NVIDIA 3D NVIDIA > Stereoscopic 3D Stereoscopic 3D > Stereoscopic 3D Stereoscopic 3D...
- Page 506 NVIDIA www.nvidia.com/3dvision/support 3D Vision 1-800-797-6530 NVIDIA www.nvidia.com/3dvision/register 3D Vision > ON/OFF > Stereoscopic 3D [NVIDIA Control Panel] NVIDIA [Set Up Stereoscopic 3D] Stereoscopic >...
- Page 507 NVIDIA 3D VISION > [NVIDIA Control Panel] NVIDIA [Set Up 3D Vision] 3D Vision [Test Stereoscopic 3D] Stereoscopic 3D [Run Setup Wizard] > • • • Windows > 3D Ready 120Hz LCD 3D Vision 3D Vision LCD Stereoscopic 3D...
- Page 508 [Setup] NVIDIA Ctrl+F3 Ctrl+F4 Stereoscopic 3D NVIDIA [View Compatibility with Games] NVIDIA 3D Vision-Ready 3D Vision Excellent Good Fair [Issues and recommended settings] NVIDIA [Not Recommended] Stereoscopic 3D 3D Vision 3D Vision 3D Vision 3D Vision Stereoscopic 3D NVIDIA Control...
- Page 509 NVIDIA 3D VISION [Setup Wizard] [Test with this refresh rate] [Next] > Ctrl+F3 > > [Set Up Stereoscopic 3D] Stereoscopic NVIDIA Stereoscopic 3D [Set Up Stereoscopic 3D] Stereoscopic 3D NVIDIA [Change 3D laser Sight] [Change 3D Laser Sight] [Enable 3D laser sight for configured games]...
- Page 510 120Hz LCD 60Hz 120Hz Stereoscopic 3D 120Hz LCD www.nvidia.com/3dvision/support 3D Vision 1-800-797-6530...
- Page 511 NVIDIA 3D VISION...
- Page 512 NVIDIA 3D Vision > VCCI > > GOST R GOST-R > > > BSMI > > C-Tick > UL/cUL CB Scheme NVIDIA 3D Vision > > P854 > P864...
- Page 513 NVIDIA 3D VISION FCC Part 15B:2008 • • • •...
- Page 514 ICES-003:2004 - ICES-003 Cet appareil numérique de la classe B est conforme à la norme NMB-003 du Canada. C-Tick ACMA AS/NZS CISPR 22:2009 VCCI > V-1/09.04 > V-2/09.04 > V-3/09.04 > V-4/09.04 VCCI...
- Page 515 NVIDIA 3D VISION > KN 22 CISPR 22 > KN 24 CISPR 24 BSMI CNS 13438:2006 CISPR 22...
- Page 516 Conformité Européenne 2004/108/EC 2006/95/EC > EN 55022:2006+A1:2007 CISPR 22 > EN 55024:1998+A1:2001+A2:2003 IEC 61000-4-2 3 4 5 6 8 11 > EN 61000-3-2:2006 IEC 61000-3-2 > EN 61000-3-3:2008 IEC 61000-3-3 GOST-R GOST R > GOST R IEC 60950-1 > GOST R 51318.22-99 >...
- Page 517 NVIDIA 3D VISION UL/cUL CB Scheme > UL 60950-1 2007 > CSA C22.2 No. 60950-1-07 2007 > IEC 60950-1:2005 UL Listed I.T.E. : INFORMATION...
- Page 518 NVIDIA IEC-60950-1 IEC-60509-1 UL-60509-1 > > > > > > >...
- Page 519 NVIDIA 3D VISION...
- Page 520 > > > > > > > > > > > > NVIDIA > > > > > >...
- Page 521 NVIDIA 3D VISION NVIDIA NVIDIA > > 3D Vision EN60825-1 IEC60825-1 > >...
- Page 522 NVIDIA REFERENCE BOARD NVIDIA NVIDIA Corporation NVIDIA Corporation NVIDIA Corporation NVIDIA Corporation WEEE • • NVIDIA NVIDIA GeForce nForce NVIDIA Corporation © 2008, 2009, 2010 NVIDIA Corporation.
- Page 523 www.nvidia.com.tw...
- Page 524 D VISION D VISION ™ ™...
- Page 526 NVIDIA NVIDIA Test Stereoscopic 3D...
- Page 527 TABLE OF CONTENTS 3D Vision 120Hz LCD...
- Page 528 NVIDIA® 3D Vision 3D Vision GPU 3D Vision-Ready 3D Vision 3D Vision 3D Vision http://www.nvidia.co.jp/3dvision NVIDIA Customer Care NVIDIA www.nvidia.com/register Welcome NVIDIA 3D Vision...
- Page 529 NVIDIA 3D VISION USER GUIDE PC 3D Vision NVIDIA GPU 3D Vision LCD 3D Vision http://www.nvidia.co.jp/get3d > > 60 75 > 3D 1 > > • • • •...
- Page 530 > > > > > > >...
- Page 531 NVIDIA 3D VISION USER GUIDE...
- Page 532 PC USB...
- Page 533 NVIDIA 3D VISION USER GUIDE Windows...
- Page 534 USB IR 3D Vision 3D Vision 3D Vision USB IR 3D Vision USB IR 3D Vision 3D Vision IR USB IR 3D Vision VESA DLP HDTV 4.5m...
- Page 535 NVIDIA 3D VISION USER GUIDE 1 LED EN60825-1 IEC60825-1 > >...
- Page 536 3D Vision USB IR 3D Vision 3D Vision 3D Vision 3D Vision 3D Vision 3D Vision 3D Vision IR 23cm 3D Vision...
- Page 537 NVIDIA 3D VISION USER GUIDE 3D Vision All-in-One PC 3D Vision All-in-One PC 3D Vision > 3D Vision CTRL-T > CTRL-F4 > CTRL-F3 4.5m All-in-One PC...
- Page 538 3D Vision 3D Vision 3D Vision 3D Vision 3D Vision 3D Vision www.nvidia.co.jp/3dvision...
- Page 539 NVIDIA 3D VISION USER GUIDE 3D Vision NVIDIA Kensington...
- Page 540 3D Vision IR NVIDIA 3D Vision 3D Vision Windows Set up 3D Vision 120Hz 3D Vision www.nvidia.co.jp/3dupdate www.nvidia.co.jp/3dupdate...
- Page 541 NVIDIA 3D VISION USER GUIDE 3D Vision 3D Vision Ready NVIDIA 3D Vision Ready LCD USB IR...
- Page 542 DLP HDTV HDMI VESA DVI-to-HDMI USB DVI PC HDTV HDMI DVI-to-HDMI...
- Page 543 NVIDIA 3D VISION USER GUIDE 120Hz LCD USB IR USB DVI...
- Page 544 120Hz LCD...
- Page 545 NVIDIA 3D VISION USER GUIDE 3D Vision IR 3D Vision...
- Page 546 NVIDIA Display Driver Remove * NVIDIA 3D Vision NVIDIA GeForce Installing the Drivers and Software 3D Vision GeForce InstallShield 3D Vision Software Installation 3D Vision Software Installation 3D Vision NVIDIA 3D Viewer Install InstallShield 3D Vision 3D Vision NVIDIA 3D Vision...
- Page 547 NVIDIA 3D VISION USER GUIDE 3D Vision 3D Vision NVIDIA 3D Vision www.nvidia.co.jp/3dvision 3D Vision NVIDIA NVIDIA NVIDIA...
- Page 548 NVIDIA NVIDIA 3D Vision NVIDIA NVIDIA NVIDIA NVIDIA Windows NVIDIA NVIDIA...
- Page 549 NVIDIA 3D VISION USER GUIDE NVIDIA DirectX Ctrl+T 3D Vision...
- Page 550 3D Vision 3D Vision NVIDIA 3D Vision 3D Vision > Ctrl+F3 > Ctrl+F4 NVIDIA...
- Page 551 NVIDIA 3D VISION USER GUIDE 3D Vision Ready Vision Ready...
- Page 552 Enable 3D laser sight for configured games Transparency Ctrl+F12...
- Page 553 NVIDIA 3D VISION USER GUIDE NVIDIA Enable advanced in-game settings...
- Page 554 Ctrl+T Show/Hide stereo- 3D Vision scopic 3D effects Ctrl+F4 Increase depth NVIDIA Ctrl+F3 Decrease depth NVIDIA Ctrl+Alt+ Show/Hide in-game NVIDIA Insert compatibility Ctrl+F6 Increase convergence Ctrl+F5 Decrease conver- gence Ctrl+F11 Cycle frustum adjust- ment Ctrl+F7 Save in-game set- tings Enable advanced in-game settings...
- Page 555 NVIDIA 3D VISION USER GUIDE NVIDIA Ctrl+T 3D Vision IR 23cm 3D Vision...
- Page 556 Test Stereoscopic 3D NVIDIA 3D Vision...
- Page 557 NVIDIA 3D VISION USER GUIDE Run Setup Wizard Run Medical Image Test 3D Vision NVIDIA 3D Vision NVIDIA NVIDIA 3D Vision...
- Page 558 NVIDIA NVIDIA NVIDIA www.nvidia.co.jp NVIDIA Ctrl+Alt+Insert...
- Page 559 NVIDIA 3D VISION USER GUIDE...
- Page 560 NVIDIA 3D Vision > > > NVIDIA NVIDIA Ctrl+Alt+Insert...
- Page 561 NVIDIA 3D VISION USER GUIDE NVIDIA...
- Page 562 Decrease convergence [Ctrl+F5] Cycle frustum adjustment [Ctrl+F11] Convergence Convergence [Ctrl+F6/Ctrl+F5] Ctrl+F7 > > 60 75 >...
- Page 563 NVIDIA 3D VISION USER GUIDE > 3D 1 > > NVIDIA NVIDIA > >...
- Page 564 NVIDIA www.nvidia.co.com/3dvision/support 8:00AM 5:00PM 1-800-797-6530 www.nvidia.co.com/3dvision/register 3D Vision > > NVIDIA > 45cm...
- Page 565 NVIDIA 3D VISION USER GUIDE > NVIDIA > > • • • Windows > 3D Vision Ready 120Hz LCD 3D Vision 3D Vision LCD...
- Page 566 NVIDIA Setup Ctrl+F3 Ctrl+F4 NVIDIA NVIDIA NVIDIA 3D Vision 3D Vision 3D Vision 3D Vision NVIDIA > 120Hz 60Hz > 110Hz > 100Hz 50Hz...
- Page 567 NVIDIA 3D VISION USER GUIDE > Ctrl+F3 > > NVIDIA NVIDIA Enable 3D laser sight for configured games NVIDIA Transparency...
- Page 568 120Hz LCD 60Hz 120Hz 120Hz LCD www.nvidia.com/3dvision/support 8:00AM 5:00PM 1-800-797-6530...
- Page 569 NVIDIA 3D VISION USER GUIDE...
- Page 570 NVIDIA 3D Vision > C-Tick Australian Communications and Media Authority > BSMI Bureau of Standards, Metrology, and Inspection > CE Conformité Européenne > FCC Federal Communications Commission > IC Industry Canada > KC Korea Certification > GOST-R > UL/cUL CB Underwriters Laboratories >...
- Page 571 NVIDIA 3D VISION USER GUIDE FCC Federal Communications Commission CFR Code of Federal Regulation 15B:2008 • • • •...
- Page 572 Industry Canada ICES-003:2004 - ICES-003 Cet appareil numérique de la classe B est conforme à la norme NMB-003 du Canada. C-Tick - ACMA Australian Communications and Media Authority RSM Radio Spectrum Management Group AS/NZS CISPR 22:2009 – VCCI Voluntary Control Council for Interference by Information Technology Equipment VCCI >...
- Page 573 NVIDIA 3D VISION USER GUIDE MIC Ministry of Information and Communications KCC Korea Communication Commission KC Korea Certification > KN 22 CISPR 22 > KN 24 CISPR 24 BSMI Bureau of Standards, Metrology, and Inspection CNS 13438:2006 CISPR 22...
- Page 574 Conformité Européenne 2004/108/EC 2006/95/ > EN 55022:2006/A1:2007 CISPR 22 > EN 55024:1998/A1:2001/A2:2003 IEC 61000-4-2 3 4 5 6 8 > EN 61000-3-2:2006 IEC 61000-3-2 > EN 61000-3-3:2008 IEC 61000-3-3 GOST-R > GOST R IEC 60950-1 > GOST R IEC 51318.22-99 >...
- Page 575 NVIDIA 3D VISION USER GUIDE UL/cUL CB Underwriters Laboratories Underwriters Laboratories > UL 60950-1 2007-03-27 > CSA C22.2 No. 60950-1-07 2007-03 > IEC 60950-1:2005...
- Page 576 NVIDIA IEC 60950-1 IEC-60950-1 UL-60950-1 > > > > 240 VA > > >...
- Page 577 NVIDIA 3D VISION USER GUIDE...
- Page 578 > > > > > > > > > > > > NVIDIA > > >...
- Page 579 NVIDIA 3D VISION USER GUIDE > > > NVIDIA NVIDIA > 5 40 > -10 45 3D Vision 1 LED EN 60825-1 IEC 60825-1 > >...
- Page 580 NVIDIA NVIDIA NVIDIA NVIDIA Corporation NVIDIA Corporation NVIDIA Corporation NVIDIA Corporation WEEE • • NVIDIA NVIDIA GeForce nForce NVIDIA Corporation Copyright © 2008, 2009, 2010 NVIDIA Corporation. All rights reserved.
- Page 581 www.nvidia.co.jp...
- Page 582 3D VISION ™ USER GUIDE...
- Page 584 NVIDIA NVIDIA...
- Page 585 3D Vision 120Hz LCD...
- Page 586 NVIDIA 3D Vision ® 3D Vision GeForce GPU 3D Vision 3D Vision 3D Vision www.nvidia.co.kr/3dvision : NVIDIA www.nvidia.co.kr/3dvision NVIDIA 3D Vision...
- Page 587 NVIDIA 3D VISION 3D Vision NVIDIA GPU, 3D Vision-Ready LCD, 3D Vision www.nvidia.co.kr/3dvision “ ” > > > 60~75cm > > > > > > > • • • •...
- Page 588 > > > > > > > >...
- Page 589 NVIDIA 3D VISION...
- Page 590 NVIDIA 3D Vision...
- Page 591 NVIDIA 3D VISION . IR (ON) (ON) (ON) LED: . PC . Windows (ON)
- Page 592 USB IR (3D Vision 3D Vision 3D Vision USB IR 3D Vision . USB IR 3D Vision 3D Vision IR USB IR 3D Vision (ON/OFF) VESA (DLP HDTV 4.5m...
- Page 593 NVIDIA 3D VISION EN60825-1 (IEC60825-1) > >...
- Page 594 3D Vision 3D Vision 3D Vision 3D Vision 3D Vision 3D Vision 3D Vision 3m(10 3D Vision IR 25cm 3D Vision ON/OFF...
- Page 595 NVIDIA 3D VISION 3D Vision LCD 3D Vision LCD Vision > 3D ON/OFF – CTRL-T > – CTRL-F4 > – CTRL-F3 4.5m(15 3m(10...
- Page 596 3D Vision 3D Vision-Ready 3D Vision 3D Vision USB IR . USB Vision : 3D Vision www.nvidia.com/Get3D...
- Page 597 NVIDIA 3D VISION 3D Vision . NVIDIA Kensington...
- Page 598 “ ” 3D Vision IR NVIDIA 3D Vision . Windows “ Set up 3D Vision ” 120Hz NVIDIA 3D Vision www.nvidia.co.kr/3DUpdate www.nvidia.co.kr/3DUpdate...
- Page 599 NVIDIA 3D VISION (3D Vision 3D Vision NVIDIA 3D Vision . LCD DVI-to-DVI . USB IR...
- Page 600 DLP HDTV HDMI VESA 3- DVI-to-HDMI USB DVI : DLP HDTV HDMI , TV : DVI-HDMI 3D Vision...
- Page 601 NVIDIA 3D VISION USB IR 120Hz LCD USB DVI...
- Page 602 120Hz LCD : IR...
- Page 603 NVIDIA 3D VISION : 3D Vision IR 3D Vision . 2-7...
- Page 604 > > NVIDIA NVIDIA NVIDIA NVIDIA NVIDIA GeForce 3D Vision GeForce InstallShield 3D Vision 3D Vision NVIDIA 3D Viewer Installshield GeForce 3D Vision . 3D Vision NVIDIA 3D Vision 3D Vision...
- Page 605 NVIDIA 3D VISION 3D Vision : 3D Vision . NVIDIA . NVIDIA www.nvidia.co.kr/3dvision NVIDIA 3D Vision NVIDIA 3D Vision...
- Page 606 NVIDIA NVIDIA NVIDIA 3D Vision NVIDIA NVIDIA NVIDIA NVIDIA (NVIDIA Control Panel) Windows NVIDIA...
- Page 607 NVIDIA 3D VISION NVIDIA DirectX Ctrl+T 3D On/Off USB IR (ON) 3D Vision...
- Page 608 NVIDIA 3D Vision . 3D . 3D Vision NVIDIA 3D Vision . 3D Vision > Ctrl+F3( > Ctrl+F4( NVIDIA...
- Page 609 NVIDIA 3D VISION 3D Vision 3D Vision FPS (First-Person Shooter: 1 . NVIDIA...
- Page 610 NVIDIA . 0% 100% Ctrl+F12( NVIDIA...
- Page 611 NVIDIA 3D VISION...
- Page 612 NVIDIA Ctrl+T 3D Vision Ctrl+F4 NVIDIA Ctrl+F3 NVIDIA Ctrl+Alt+ NVIDIA Insert Ctrl+F6 “ ” Ctrl+F5 " " Ctrl+F11 Ctrl+F7...
- Page 613 NVIDIA 3D VISION NVIDIA Ctrl+T USB IR (ON/OFF) 3D Vision IR 23cm 3D Vision ON/OFF...
- Page 614 NVIDIA NVIDIA 3D Vision...
- Page 615 NVIDIA 3D VISION : NVIDIA 3D Vision NVIDIA 3D Vision NVIDIA 3D Vision...
- Page 616 NVIDIA NVIDIA . NVIDIA NVIDIA NVIDIA www.nvidia.co.kr NVIDIA Ctrl+Alt+Insert...
- Page 617 NVIDIA 3D VISION...
- Page 618 NVIDIA 3D Vision > > > HUD (Heads up Display) NVIDIA NVIDIA . Ctrl+Alt+Insert...
- Page 619 NVIDIA 3D VISION NVIDIA...
- Page 620 . [Ctrl+F5] . [Ctrl+F11] [Ctrl+F6/ Ctrl+F5] Ctrl-F7 > > > 60~75cm >...
- Page 621 NVIDIA 3D VISION > > > > > : NVIDIA 3D > NVIDIA > > > > . 37...
- Page 622 NVIDIA www.nvidia.com/3dvision/support . 3D Vision 1-800-797-6530 www.nvidia.com/3dvision/register 3D Vision > ON/OFF > . NVIDIA (Set Up Stereoscopic 3D) > . IR 45cm...
- Page 623 NVIDIA 3D VISION > NVIDIA ). 3D Vision > (ON) • • • . PC Windows > 3D Ready 120Hz LCD > 3D Vision 3D Vision LCD...
- Page 624 NVIDIA Ctrl+F3 Ctrl+F4 NVIDIA NVIDIA 3D Vision-Ready, NVIDIA 3D Vision . 3D Vision 3D Vision 3D Vision NVIDIA > 120Hz > 110Hz > 100Hz : 50Hz...
- Page 625 NVIDIA 3D VISION > Ctrl+F3 > > NVIDIA . NVIDIA NVIDIA...
- Page 626 120Hz LCD 60Hz 120Hz 120Hz LCD www.nvidia.com/3dvision/support ). 3D Vision 1-800-797-6530...
- Page 627 NVIDIA 3D VISION...
- Page 628 NVIDIA 3D Vision > (BSMI) > (GOST-R ) > (UL/cUL, CB > (FCC) > (CE) > (VCCI) > (IC) > (KC) > (C-Tick) NVIDIA 3D Vision > : P701(5V DC > : P854(5V DC > : P864(5V DC...
- Page 629 NVIDIA 3D VISION FCC - (FCC Part 15B:2008 ) • • • •...
- Page 630 ICES-003:2004 - ICES-003 Cet appareil numérique de la classe B est conforme à la norme NMB-003 du Canada. C-Tick - (ACA) (Radio Spectrum Management Group) AS/NZS CISPR 22:2009 – VCCI - > V-1/09.04: > V-2/09.04: > V-3/09.04: > V-4/09.04: (VCCI)
- Page 631 NVIDIA 3D VISION MIC - KCC - KC - > KN 22 (CISPR 22): – > KN 24 (CISPR 24): – – BSMI - CNS 13438:2006 (CISPR 22): –...
- Page 632 (EU) CE - European Conformity (Conformité Européenne) (2004/108/EC) (2006/95/EC) > EN 55022:2006+A1:2007(CISPR 22) > > EN 55024:1998+A1:2001+A2:2003 (IEC 61000-4-2, 3, 4, 5, 6, 8, 11): > – – > EN 61000-3-2:2006 (IEC 61000-3-2): (EMC)-3-2 : > > EN 61000-3-3:2008 (IEC 61000-3-3): (EMC)-3-3 : >...
- Page 633 NVIDIA 3D VISION (UL/cUL, CB > UL 60950-1, 2 , 2007 27 : – – > > CSA C22.2 No. 60950-1-07, 2 , 2007 – – > > IEC 60950-1:2005( 2 ): – – >...
- Page 634 NVIDIA IEC-60950-1 ( : UL-60950-1) IEC-60950-1 > > > > (240V > > >...
- Page 635 NVIDIA 3D VISION...
- Page 636 > > > > > > > > > > > > > > > > > > > > > > > > NVIDIA > > > > > >...
- Page 637 NVIDIA 3D VISION > > > > > > NVIDIA NVIDIA > 5 ° C~40 ° C (41 ° F ~ 104 ° F) > > -10 ° C~45 ° C (14 ° F ~ 113 ° F) > 3D Vision EN60825-1(IEC60825-1) >...
- Page 638 NVIDIA “ ” “ ” . NVIDIA NVIDIA Corporation NVIDIA Corporation . NVIDIA Corporation NVIDIA Corporation WEEE • • NVIDIA, NVIDIA , GeForce nForce NVIDIA Corporation © 2008, 2009, 2010, 2011 NVIDIA Corporation. All rights reserved.
- Page 639 www.nvidia.co.kr...