Nvidia 3D VISION User Manual
Hide thumbs
Also See for 3D VISION:
- User manual (663 pages) ,
- Quick start manual (122 pages) ,
- User manual (49 pages)
Table of Contents
Advertisement
Quick Links
Advertisement
Table of Contents

Related Manuals for Nvidia 3D VISION


Summary of Contents for Nvidia 3D VISION
- Page 1 3D VISION ™ USER GUIDE USER GUIDE...
-
Page 3: Table Of Contents
Required action before You start the Installation Installation Connecting the Display Removing Current Display Drivers Installing the Drivers and software NVIDIA Control Panel accessing the nVIDIa Control Panel set Up stereoscopic 3D enable stereoscopic 3D adjusting the Depth stereoscopic 3D Display Type Change 3D laser sight... - Page 4 Advanced Information Preset Configurations setting Your own shortcut Keys Game Configuration Guidelines Viewing Practices Tips And Troubleshooting 3D Vision is not Working Image is not Clear eyestrain/Headache no laser sight allow your 120 Hz lCD to Warm Up Compliance and Certifications...
-
Page 5: Welcome
About this Guide This guide discusses the installation and operation of the nVIDIa 3D Vision hardware and software. There is a full section containing usage tips and troubleshooting guidelines. Please read through the safety precautions and recommended... -
Page 6: System Requirements
PC meets the hardware requirements necessary to enjoy the 3D Vision experience. for a full list of system Requirements including supported nVIDIa GPUs, 3D Vision-Ready lCDs, 3D Vision notebooks and other required components, please visit www.nvidia.com/get3D and select System Requirements. -
Page 7: Epilepsy
WelCome Epilepsy WARNING IF YOU OR ANY MEMBER OF YOUR FAMILY HAS A HISTORY OF EPILEPSY, CONSULT A DOCTOR BEFORE USING COMPUTER GAME PRODUCTS. a small percentage of the population may experience epileptic seizures when viewing certain types of TV images or video games that contain flashing patterns of light. - Page 8 3D VIsIon UseR GUIDe...
-
Page 9: Unpacking Equipment
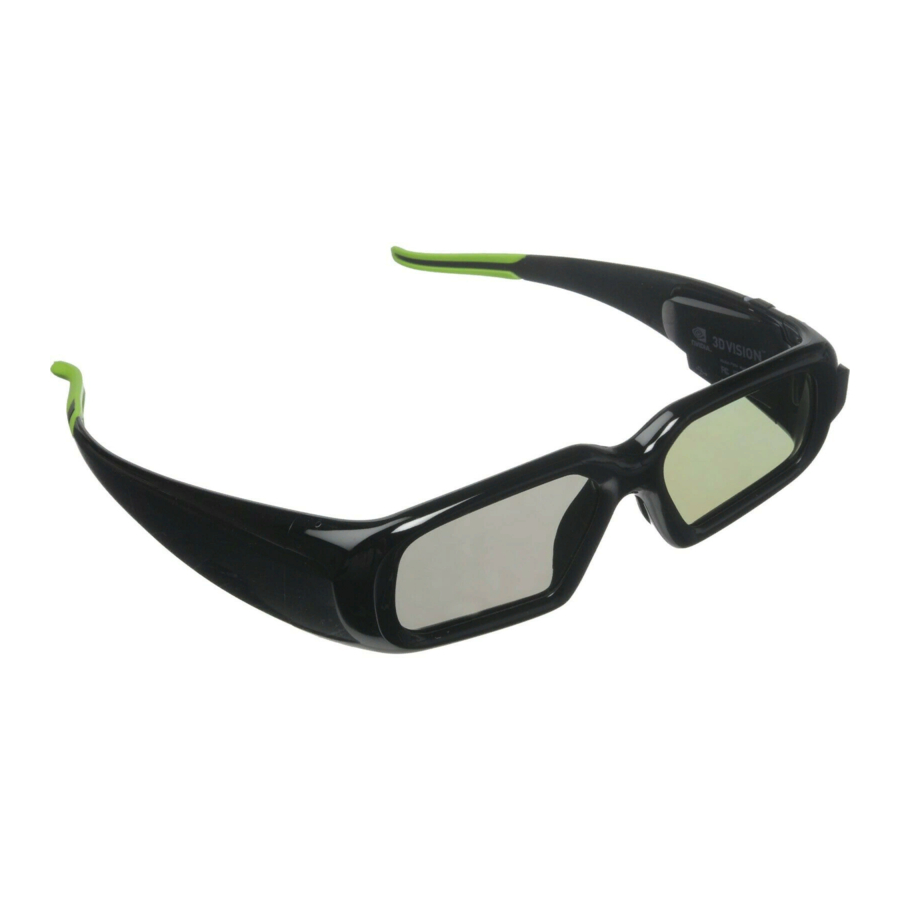
UnPaCKInG eqUIPmenT UNpaCkING EqUIpmENT Prior to unpacking your new nVIDIa 3D Vision box, it is a good idea to make sure you meet all the system requirements (page 2) for a smooth installation. be sure to inspect each piece of equipment shipped in the packing box. - Page 10 3D VIsIon UseR GUIDe Do not block this side of your glasses. It must be in-line-of-sight with the IR emitter ON button Indicator Light: To check the battery life, press the ON button. If the indicator light is: Green: Up to 40 hours of battery life.
- Page 11 (included with the 3D Vision glasses kit) 3D Vision products such as desktop monitors, projectors, and some 3D Vision notebooks use the Usb IR emitter to communicate to the 3D Vision glasses. Please view the diagrams below for information on how to use your Usb IR emitter.
- Page 12 3D VIsIon UseR GUIDe WARNING: Infrared Device Safety ClaSS 1 lED pRODUCT This product includes an Infrared light-emitting diodes for transmitting signals from the controller to the glasses. although this invisible beam is not considered harmful, and complies with EN60825-1 (IEC60825-1), we recommend the following precaution: when the Infrared device is transmitting: >...
-
Page 13: Ir Emitter
3D Vision products with built-In IR emitters do not require the Usb IR emitter and will communicate directly with the 3D Vision glasses. Please view the diagrams below for now to use 3D Vision you’re your product. 3D Vision notebooks... - Page 14 3D VIsIon UseR GUIDe 3D Vision lCD monitors and all-In-one PCs most 3D Vision lCD monitors and all-in-one PCs will not have keys for controlling 3D Vision when playing 3D content. You can control 3D using the following keyboard shortcuts: >...
-
Page 15: Wired Glasses
InsTall aTIon anD seTUP Wired Glasses 3D Vision Wired Glasses are designed to work with 3D Vision-Ready displays. The Wired Glasses do not use the Usb IR emitter that comes with 3D Vision Wireless Glasses kits and 3D Vision notebooks. - Page 16 Wired Glasses 3D Vision Wired Glasses can also be secured to be a PC using the notch in the Usb plug and notebook security devices. nVIDIa has tested Kensington notebook security devices to attach the glasses to a PC tower or table.
-
Page 17: Installation And Setup
Please launch the "set up 3D Vision" shortcut on your Windows desktop to set up 3D the first time. 120Hz If your lCD monitor includes nVIDIa 3D Vision glasses in the box or you want to ensure you have the latest drivers for your lCD monitor, visit www.nvidia.com/3DUpdate... -
Page 18: Installation
(skip this step if you are using a 3D Vision notebook) Connect your 3D Vision Ready display to your nVIDIa graphics card. The display you connect must be a 3D Vision Ready lCD or analogue CRT display. for lCDs use the dual-link DVI-to-DVI cable supplied with the display. - Page 19 TV’s menu to be PC or Computer to ensure the TV can process the video signal correctly. Note: The DVI-to-HDmI Cable is not included with your 3D Vision kit. Please obtain one from a computer or electronics store.
- Page 20 3D VIsIon UseR GUIDe 120 Hz lCD Connection Diagram for USb IR Emitter IR Emitter DO NOT MAKE THIS CONNECTION UNTIL TOLD TO DO SO BY THE INSTALL USB DVI WIZARD USB Cable Dual Link DVI cable (supplied with the display)
- Page 21 120 Hz lCD Connection Diagram for lCD monitors with built in IR Emitters Dual Link DVI cable (supplied with the display) Note: lCD monitors with built in IR emitters do not require additional Usb connectors from the PC to the monitor.
-
Page 22: Removing Current Display Drivers
STOP: If you purchased a PC with a built-in 3D Vision IR emitter (e.g. notebook) then 3D Vision drivers should already be installed on your PC. Do not uninstall the drivers. skip steps... -
Page 23: Installing The Drivers And Software
Click Remove Restart your computer If you are replacing a non nVIDIa graphics card, be sure to remove the graphics driver and power down your system to replace the card before continuing. Replace the card with a supported nVIDIa Geforce card. - Page 24 3D VIsIon UseR GUIDe Congratulations! setup and configuration are complete and 3D Vision is enabled and ready for you to begin the most immersive gaming experience for the PC. Note: 3D Vision has been enabled with the default depth amount of 15%.
-
Page 25: Nvidia Control Panel
3D Vision experience. To access the tool menus, go to the nVIDIa Control Panel. Accessing the NVIDIA Control Panel To open the NVIDIA Control Panel, right click on the desktop and select the nVIDIa Control Panel. You can also go to Windows Control Panel Hardware and Sound NVIDIA Control Panel. -
Page 26: Set Up Stereoscopic 3D
3D VIsIon UseR GUIDe Set Up Stereoscopic 3D This section of the nVIDIa Control Panel provides all the adjustments needed to enhance your gaming experience. each of the adjustments on this screen is discussed. Enable Stereoscopic 3D Note: stereoscopic 3D effects work only with full-screen DirectX applications. -
Page 27: Adjusting The Depth
The depth amount in a game is the depth that the farthest object is placed in a scene. When 3D Vision is first installed on your system, the Depth is set at the default of 15%. If you are new to 3D gaming, 15% is a good point to start with. -
Page 28: Stereoscopic 3D Display Type
Depth slider in the nVIDIa Control Panel. Stereoscopic 3D Display Type The Stereoscopic 3D display type is a drop-down list of all 3D Vision Ready displays that were found by the setup Wizard. This list is populated by the Wizard. If you had more than one 3D Vision-Ready display attached during setup, they will be reflected in the list. -
Page 29: Set Keyboard Shortcuts
The keyboard shortcuts are in-game hot keys that can be used to perform a variety of actions. To view or change the keyboard shortcut keys from the Set Up Stereoscopic 3D screen in the nVIDIa Control Panel, click on the Set Keyboard Shortcuts button. - Page 30 3D VIsIon UseR GUIDe This expands the Set Keyboard Shortcuts screen. To enable the use of advanced shortcut keys in-game, you must check the Enable advanced in-game settings check box. The standard shortcut keys (shown in the upper portion of the window) are always enabled.
- Page 31 Control Panel Ctrl+alt+ show/Hide in-game Displays the settings recommended Insert compatibility by nVIDIa for the current game in the lower corner of your display. Ctrl+f6 Increase moves objects towards you. maximum convergence convergence places all objects in front of the scene, in user space.
-
Page 32: Hide Stereoscopic 3D Effects When Game Starts
There are some games that do not launch very well when stereoscopic 3D effects are enabled at startup. To avoid this, check the box on the Set Up Stereoscopic 3D screen in the nVIDIa Control Panel. The stereoscopic 3D effects remain enabled, it is just hidden at startup. -
Page 33: Test Stereoscopic 3D
Test Stereoscopic 3D The Test Stereoscopic 3D button and drop-down list on the Set Up Stereoscopic 3D screen in the nVIDIa Control Panel provides the ability to test stereoscopic 3D viewing and the ability to run the setup Wizard and the medical Image Test. -
Page 34: View Compatibility With Games
3D user run the medical Image Test to verify their ability to view stereoscopic 3D-rendered images. If you can not see the image, do not use 3D Vision (see step 20 on page 22). View Compatibility With Games nVIDIa has tested and provided profiles for many of the top selling games to ensure they work properly with 3D Vision. - Page 35 Unchecked list all games tested of testing. by nVIDIa. list of games tested by nVIDIa If you have a game that is not on the list of those tested by nVIDIa, go to www.nvidia.com and consult the games that have been tested since the release of this version of software.
- Page 36 3D VIsIon UseR GUIDe...
-
Page 37: Advanced Information
You can view the list of these games on the View compatibility with games task located on the nVIDIa Control Panel. This menu also shows a list of comments pertaining to that game. These comments may include suggested settings or adjustments and comments on the construction of the game. -
Page 38: Setting Your Own Shortcut Keys
You can use the default setting or you can change the shortcut keys to suit your particular liking. To see the default keyboard shortcut key settings, go to the nVIDIa Control Panel and select the Set up stereoscopic 3D task in the left window pane. -
Page 39: Game Configuration Guidelines
aDVanCeD InfoRmaTIon Game Configuration Guidelines The following table lists some adjustment guidelines to use for specific issues when you are in a game. Table 2. Game Configuration Guidelines Issue Suggestion object are too close Decrease Convergence [Ctrl+F5] side borders are blurred, not Cycle frustum adjustments clear, not visible until borders are clear... - Page 40 The sharper the image on the screen, the better the quality. > Game Cursor/Cross-hair Sights: If you are using the nVIDIa 3D laser sights, be sure to turn off the sight that the game provides. The game sight is usually positioned at screen-depth, and inter- feres with useful viewing of the nVIDIa laser sight.
-
Page 41: Tips And Troubleshooting
> Check and make sure that stereoscopic 3D is enabled. Go to the nVIDIa Control Panel Set Up Stereoscopic 3D screen. > Re-evaluate your setup. ensure there is direct line-of-sight between the IR emitter and your wireless glasses at a range of at least 1.5 feet (45cm) or greater. -
Page 42: Image Is Not Clear
Run the setup Wizard to verify your hardware is operating properly. Go to the nVIDIa Control Panel (right click on the desktop). select Set Up 3D Vision. Then select Run Setup Wizard from Test Stereoscopic 3D drop down menu. >... - Page 43 Control Panel View Compatibility with Games screen. Verify that your game has been tested by nVIDIa and has been ranked as 3D Vision-Ready, Excellent, Good, or fair. Check out the Issues and recommended settings listed at the bottom of the screen. make any adjustments recommended by nVIDIa to make your gaming experience better.
-
Page 44: Eyestrain/Headache
If you do not see the laser sight in a game, the laser sight may not be enabled. Go to the nVIDIa Control Panel Set Up Stereoscopic 3D screen and click on the Change 3D laser Sight button to display the Change 3D Laser Sight screen. -
Page 45: Allow Your 120 Hz Lcd To Warm Up
24x7x365 online knowledgebase system, where you can submit questions to our tech support staff. questions may only be submitted in english. 3D Vision customers also have access to toll free technical support at 1-800-797-6530 from 8:00am-5:00Pm Pacific Time, m-f. The technical support... - Page 46 3D VIsIon UseR GUIDe...
-
Page 47: Compliance And Certifications
ComPlIanCe anD CeRTIfICaTIons COmplIaNCE aND CERTIfICaTIONS The nVIDIa 3D Vision systems are compliant with the relevant regulations and have received the required certifications: > australian Communications authority (C-Tick) > bureau of standards, metrology, and Inspection (bsmI) > Conformité européenne (Ce) >... - Page 48 3D VIsIon UseR GUIDe US Federal Communications Commission Compliance fCC – federal Communications Commission Title 47 of Code of federal Regulation (CfR) part 15 - Radio frequency devices; subpart b - Unintentional Radiator (fCC Part 15b:2008) CAUTION: Changes or modifications to this unit not expressly approved by the party responsible for compliance could void the user's authority to operate the equipment.
-
Page 49: Australia And New Zealand Compliance
ComPlIanCe anD CeRTIfICaTIons Canada Compliance Industry Canada ICES-003:2004 - Digital apparatus: spectrum management and Telecommunications Policy; Interference-Causing equipment standard. This Class b digital apparatus complies with Canadian ICes-003. Cet appareil numérique de la classe b est conforme à la norme nmb- 003 du Canada. - Page 50 3D VIsIon UseR GUIDe Korea Compliance MIC - ministry of Information and Communications KCC - Korea Communication Commission KC - Korea Certification > Kn 22 (CIsPR 22): Information technology equipment-Radio disturbance characteristics - limit and methods of measurement. >...
-
Page 51: European Union Compliance
ComPlIanCe anD CeRTIfICaTIons European Union Compliance Ce: european Conformity (Conformité européenne) Product comply with both the emC Directive (2004/108/ eC) and the low Voltage Directive (2006/95/eC) issued by the Commission of the european Community. Compliance with these directives implies conformity to the following european norms (The equivalent international standards are in parenthesis) >... - Page 52 3D VIsIon UseR GUIDe > GosT R 51317.3.3-99(IeC 61000-3-3): electromagnetic compatibility(emC)- Part 3-3: limits-limitation of voltage changes, voltage fluctuations and flicker in public low-voltage supply systems, for equipment with rated current ≤ 16a per phase and not subject to conditional connection).
-
Page 53: Important Safety Information
ImPoRTanT safeT Y InfoRmaTIon ImpORTaNT SafETY INfORmaTION nVIDIa products are designed to operate safely when installed and used according to the product instructions and general safety practices. The guidelines included in this document explain the potential risks associated with computer operation and provide important safety practices designed to minimize these risks. - Page 54 3D VIsIon UseR GUIDe always refer to the documentation supplied with your equipment. observe all warnings on the product and in the operating instructions. WARNING: Failure to follow these safety instructions could result in fire, electric shock or other injury or damage WARNING: Electrical equipment can be hazardous if misused.
-
Page 55: General Precautions
> If the product sustains damage requiring service, disconnect the product from the computer or Usb charging adapter and refer servicing to an nVIDIa authorized service provider. > as with any electronic equipment, dispose of glasses and IR emitter properly. - Page 56 5C to 40C (41f to 104f). > Storage temperature: The recommended storage temperature range is -10C to 45C(14f to 113f). Do not leave 3D Vision system in your car, because temperatures in parked cars can exceed this range. Infrared device safety Class 1 LED Product...
- Page 57 Corporation. specifications mentioned in this publi- cation are subject to change without notice. This publication supersedes and replaces all information previously supplied.
- Page 58 www.nvidia.com...