Table of Contents
Advertisement
Owner's Manual
Before using this unit, carefully read the sections entitled "USING THE
UNIT SAFELY" and "IMPORTANT NOTES" (Leaflet "USING THE UNIT SAFELY"
and Owner's Manual p. 16). These sections provide important information
concerning the proper operation of the unit. Additionally, in order to feel
assured that you have gained a good grasp of every feature of your new unit,
read Owner's Manual in its entirety. This manual should be saved and kept on
hand as a convenient reference.
Copyright © 2014 ROLAND CORPORATION
All rights reserved. No part of this publication may be reproduced in any form without the written permission of ROLAND CORPORATION.
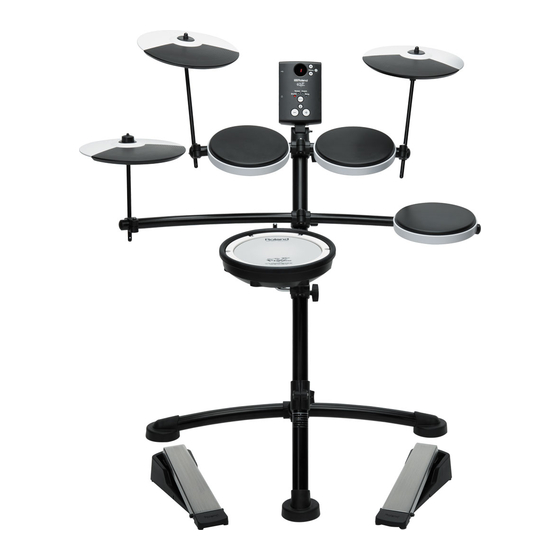
* The illustration shows the TD-1KV.
Contents
Let's Learn About Drums . . . . . . . . . . . . . . . . . . . . . . . . . . . . . . . . . . . . . . . 2
Drum Set Elements . . . . . . . . . . . . . . . . . . . . . . . . . . . . . . . . . . . . . . . . . . . .2
The Basics of Playing . . . . . . . . . . . . . . . . . . . . . . . . . . . . . . . . . . . . . . . . . .2
Assembly . . . . . . . . . . . . . . . . . . . . . . . . . . . . . . . . . . . . . . . . . . . . . . . . . . . . . . 4
Kit Assembly . . . . . . . . . . . . . . . . . . . . . . . . . . . . . . . . . . . . . . . . . . . . . . . . . .4
Connecting the Cables . . . . . . . . . . . . . . . . . . . . . . . . . . . . . . . . . . . . . . . .7
Quick Start . . . . . . . . . . . . . . . . . . . . . . . . . . . . . . . . . . . . . . . . . . . . . . . . . . . . 8
Connecting Your Equipment . . . . . . . . . . . . . . . . . . . . . . . . . . . . . . . . . . .8
Front Panel . . . . . . . . . . . . . . . . . . . . . . . . . . . . . . . . . . . . . . . . . . . . . . . . . . . .8
Switching the Power On and Off . . . . . . . . . . . . . . . . . . . . . . . . . . . . . . .8
Playing . . . . . . . . . . . . . . . . . . . . . . . . . . . . . . . . . . . . . . . . . . . . . . . . . . . . . . .9
Selecting a Drum Kit . . . . . . . . . . . . . . . . . . . . . . . . . . . . . . . . . . . . .9
Playing with the Metronome . . . . . . . . . . . . . . . . . . . . . . . . . . . .9
Practicing . . . . . . . . . . . . . . . . . . . . . . . . . . . . . . . . . . . . . . . . . . . . . . . . . . . .10
Practicing in Coach Mode . . . . . . . . . . . . . . . . . . . . . . . . . . . . . . . . . . . 10
Correctly Playing in Time with the Beat . . . . . . . . . . . . . . . . . 10
Playing Along with a Changing Rhythm . . . . . . . . . . . . . . . . 10
Playing Along with a Changing Tempo . . . . . . . . . . . . . . . . . 11
Developing Internal Timing Sense . . . . . . . . . . . . . . . . . . . . . 11
Continuing to Play at a Steady Tempo . . . . . . . . . . . . . . . . . . 11
Matching the Striking Strength of the Right and Left
Hands. . . . . . . . . . . . . . . . . . . . . . . . . . . . . . . . . . . . . . . . . . . . . . . . . 12
Practicing for a Specified Time . . . . . . . . . . . . . . . . . . . . . . . . . 12
Recording and Checking Your Own Performance . . . . . . . 12
Practicing Along with a Song . . . . . . . . . . . . . . . . . . . . . . . . . . . . . . . . 13
Selecting a Song . . . . . . . . . . . . . . . . . . . . . . . . . . . . . . . . . . . . . . 13
Playing/Stopping the Song . . . . . . . . . . . . . . . . . . . . . . . . . . . . 13
Connecting to your Computer/iPad . . . . . . . . . . . . . . . . . . . . . . . . . . . .13
Making Detailed Settings. . . . . . . . . . . . . . . . . . . . . . . . . . . . . . . . . . . . . .14
Adjust the Pad Sensitivity . . . . . . . . . . . . . . . . . . . . . . . . . . . . . . 14
Changing the Type of Pad . . . . . . . . . . . . . . . . . . . . . . . . . . . . . 14
Changing the Time of Auto Off . . . . . . . . . . . . . . . . . . . . . . . . . 14
Changing MIDI Note Number of the Pad . . . . . . . . . . . . . . . 14
Restoring the Factory Settings . . . . . . . . . . . . . . . . . . . . . . . . . . . . . . . 14
Appendix . . . . . . . . . . . . . . . . . . . . . . . . . . . . . . . . . . . . . . . . . . . . . . . . . . . . .15
Troubleshooting . . . . . . . . . . . . . . . . . . . . . . . . . . . . . . . . . . . . . . . . . . . . 15
Main Specifications . . . . . . . . . . . . . . . . . . . . . . . . . . . . . . . . . . . . . . . . . . 15
USING THE UNIT SAFELY . . . . . . . . . . . . . . . . . . . . . . . . . . . . . . . . . . . . . 16
IMPORTANT NOTES . . . . . . . . . . . . . . . . . . . . . . . . . . . . . . . . . . . . . . . . . . 16
To obtain the PDF manual
1.
Enter the following URL in your computer.
http://www.roland.com/manuals/
I
2.
Choose "TD-1KV" or "TD-1K" at the product name.
ENG
JPN
DEU
FRA
ESL
Advertisement
Table of Contents

Related Manuals for Roland V-Drums TD-1KV


Summary of Contents for Roland V-Drums TD-1KV
-
Page 1: Table Of Contents
IMPORTANT NOTES ......... . 16 Owner’s Manual Before using this unit, carefully read the sections entitled “USING THE To obtain the PDF manual UNIT SAFELY” and “IMPORTANT NOTES” (Leaflet "USING THE UNIT SAFELY" and Owner's Manual p. 16). These sections provide important information Enter the following URL in your computer. concerning the proper operation of the unit. Additionally, in order to feel assured that you have gained a good grasp of every feature of your new unit, http://www.roland.com/manuals/ read Owner's Manual in its entirety. This manual should be saved and kept on hand as a convenient reference. Choose “TD-1KV” or “TD-1K” at the product name. Copyright © 2014 ROLAND CORPORATION All rights reserved. No part of this publication may be reproduced in any form without the written permission of ROLAND CORPORATION. -
Page 2: Let's Learn About Drums
These are usually mounted above the bass drum. Snare drum Floor tom (Tom 3) The snare drum is the main “voice” of a drum kit. Sometimes called a bass tom, it either stands on it’s own legs or is mounted on a stand. Hi-hat/Hi-hat pedal Ride cymbal An acoustic hi-hat uses 2 cymbals mounted on a hi-hat stand. Pressing the hi-hat pedal opens and closes it. Usually mounted on the right side of the kit, the ride cymbal is principle elements in keeping time. * The TD-1KV/TD-1K uses a single pad. Crash cymbal Smaller than the ride, the crash cymbal is mainly used for accents. Acoustic drum TD-1KV/TD-1K Crash Ride Crash (CR1) Ride (RD) Tom 2 (T2) Tom 1 (T1) Hi-hat Tom 3 (T3) -
Page 3: Ita
Using the hi-hat In an acoustic drum set, the hi-hat consists of two cymbals placed Head shot facing each other vertically on a hi-hat stand. The two cymbals can Hit only the head of the pad. This is the most common method to be closed together by pressing the pedal. play the snare. A variety of playing techniques are possible, such as playing the cymbals with the pedal and/or playing them with sticks. When you press the pedal, the two cymbals will come together (closed). When you release the pedal, the two cymbals will separate (opened). Head Closed With the hi-hat pedal pressed firmly, strike the pad with a stick. A short “chick” sound will be heard. Rim shot TD-1KV only Strike the head and the rim of the pad simultaneously. A sound (rim sound) different than the head shot will be heard. Suitable position for rim shots Half-open With the hi-hat pedal pressed gently, strike the pad with a stick. A slightly longer “swish” sound will be heard. Open Using the cymbals With the hi-hat pedal completely released, strike the pad with a stick. An even longer “sound” than the half-open sound will be heard. Bow shot The most common method, playing the middle area of the cymbal. Foot closed Just press the pedal without using a stick. This sound will be softer and shorter than the closed sound played with a stick. Useful for... -
Page 4: Assembly
Assembly Check the included items As soon as you open the package, check to see that all items are included. If anything is missing, please contact your dealer. TD-1K TD-1KV Pipe A Kick pedal Cable clip × 4 Snare arm Snare arm Pipe B Hi-hat pedal Drum key Pipe C Snare pad Snare/Tom pad × 4 Hi-hat arm Cymbal Pipe D arm ×... -
Page 5: Por
Pipe E Rubber foot B Rubber foot A Adjust pipe D and pipe E so that they are level with the floor. Snare arm TD-1K Pipe C Pipe C TD-1K Snare pad TD-1KV Snare arm Underside of the pad Pipe C TD-1KV Snare pad TD-1KV Adjusting the head tension Use the drum key to evenly tighten the tuning bolts a little at a time in the order shown in the illustration. Adjust the tension so that the pad responds to your... - Page 6 Assembly Tom pad Tom pad Cymbal pad Tom pad Hi-hat arm Underside of the pad Cymbal arm Cymbal arm Sound module Hi-hat arm holder Cymbal pad Cymbal pad Beware of overturning The unit may overturn if a child pushes it or hangs on it. Make sure that an Cymbal arm adult is supervising and Cymbal arm providing guidance.
-
Page 7: Connecting The Cables
Assembly Note Be careful not to drop the sound module. Sound module Pull out Hi-hat pedal Kick pedal The label on the bottom of each pedal distinguishes the kick pedal (KIK) from the hi-hat pedal (HHC). Bottom of the pedal * Before you play, verify that the bolts and knobs are not loose. Connecting the Cables Connect the cable to the sound module and each pads as shown in the illustration. Each cable has a label indicating the pad to which it should be connected. Backside of the sound module Connect if you use the separately sold OP-TD1C to add a cymbal. If you’re not adding a cymbal, “CR2” is not used. Underside of the cymbal OP-TD1C Use the included cable clips to secure the... -
Page 8: Quick Start
Minimize the volume of the connected amplified speaker. Turning the power off Before turning the unit on/off, always be sure to turn the volume down. Even with the volume turned down, you might hear some sound when switching the unit on/off. However, this is normal and Turn the volume down on the TD-1KV/TD-1K and any does not indicate a malfunction. connected equipment. Press the [L] (power) button. Power-off the connected equipment. The power turns on. Long-press the [ ] (power) button. -
Page 9: Playing
Quick Start Playing Playing with the Metronome Here’s how you can play the drums while listening to the Playing drums is not only fun, but just about anyone can easily start metronome. This is the best way to practice and learn to play at a playing — they make sound when you simply hit them! Let’s start steady tempo. playing drums using the wide variety of built-in sounds. Selecting a Drum Kit Use the [Select] button to select Tempo mode. The display shows the metronome tempo. A drum kit consists of sounds assigned to each pad. In some cases, the sound will change depending upon your playing dynamics. Use the [Select] button to select Drums mode. * When you turn on the power, Drums mode is selected. Press the [ ] (metronome) button. The metronome turns on, and the button blinks in time with the metronome tempo. -
Page 10: Practicing
Practicing Practicing in Coach Mode Changing the number of measures to score You can change the number of measures after which the The TD-1KV/TD-1K Coach mode is a unique set of exercises Time Check result is shown. You can also make settings so specifically designed to help build speed, accuracy and stamina, as that the score result is not shown. well as develop better timing skills. Selecting a practice menu Long-press the [ ] (metronome) button. Press the [-][+] buttons to change the value. Use the [Select] button to select Coach mode. -
Page 11: Playing Along With A Changing Tempo
Practicing Playing Along with a Changing Tempo Changing the volume cycle of the metronome Long-press the [ ] (metronome) button. <C-4> Auto Up/Down Press the [-][+] buttons to change the value. The metronome increases and decreases tempo over time, to help develop stamina and endurance. The tempo will increase in steps Display Explanation for each beat until the metronome reaches the upper limit; then The volume of the metronome changes at intervals of one the tempo will continue slowing down in steps until it reaches the measure. initial tempo. This cycle will repeat. The volume of the metronome changes at intervals of two Press the [ ] (metronome) button to start practicing. -
Page 12: Hands
Press the [ ](metronome) button to return to the Coach mode menu Recording screen. Soft Press the [ ] (metronome) button. The metronome sounds, and the TD-1KV/TD-1K will enter recording-standby mode. Practicing for a Specified Time * You can use the [-][+] buttons to adjust the tempo. <C-g> Timer An alert tone informs you when the specified time has elapsed. You can use this to specify a daily time goal for practicing the basics. The default value is three minutes. Strike the pad to start recording. -
Page 13: Practicing Along With A Song
Connecting to your Computer/iPad Practicing Along with a Song Silencing the metronome The TD-1KV/TD-1K contains songs that are suitable for practicing. You can practice along with the song without hearing the metronome. Selecting a Song Long-press the [ ] (metronome) button. Use the [-][+] buttons to make the display indicate Press the [Select] button to select Song mode. -
Page 14: Making Detailed Settings
Use the [-][+] buttons to adjust the sensitivity. RD (Bow) The display shows the sensitivity value. Higher sensitivity allows RD (Edge) the pad to produce a loud volume even when played softly. Lower sensitivity will keep the pad producing a low volume even when MIDI channel: 10 played forcefully. * The TD-1KV/TD-1K does not receive any MIDI messages. Press the [ ](metronome) button to complete the setting. Changing the Time of Auto Off Changing the Type of Pad The TD-1KV/TD-1K is set to automatically power-off when a certain minutes have elapsed since it was last played or operated. When If you use a separately sold kick trigger or mesh pad, you’ll need to you want to turn the power on, switch the power on again. You can change the pad type. -
Page 15: Appendix
Can’t connect with a computer Is the USB cable connected correctly? Make sure that the USB cable is correctly connected. Problems with MIDI Is the MIDI channel set correctly? Set the MIDI channel of external MIDI device to 10. No sound from external MIDI device Has the note number been set properly? Check the pad’s “Note#. ” Main Specifications Roland TD-1KV: Drum kit Roland TD-1K: Drum kit Drum Kits TD-1KV 11.8 kg 26 lbs 1 oz Weight (excluding AC adaptor) Songs TD-1K 11.4 kg... -
Page 16: Using The Unit Safely
To completely turn off power to the unit, pull out the plug from the outlet Additional Precautions Even with the power switch turned off, this unit is not completely separated from its main source of power. When the power needs to be • Any data stored within the unit can be lost as the result of equipment failure, completely turned off, turn off the power switch on the unit, then pull incorrect operation, etc. To protect yourself against the irretrievable loss of data, out the plug from the outlet. For this reason, the outlet into which you try to make a habit of creating regular backups of the data you’ve stored in the choose to connect the power cord’s plug should be one that is within easy reach unit. and readily accessible. • Roland assumes no liability concerning the restoration of any stored content Concerning the Auto Off function that has been lost. • Since sound vibrations can be transmitted through floors and walls to a greater The power to this unit will be turned off automatically after a degree than expected, take care not to allow such sound to become a nuisance predetermined amount of time has passed since it was last used for to others nearby. Although the drum pads and pedals are designed so there is playing music, or its buttons or controls were operated (Auto Off a minimal amount of extraneous sound produced when they’re struck, rubber function). If you do not want the power to be turned off automatically, heads tend to produce louder sounds compared to mesh heads. You can disengage the Auto Off function (p. 14). -
Page 17: Kit List
Kit List Song List Kit name Song name Tempo Recommended kit# Standard Rock 1 Rock Rock 2 Funk Pop 1 Jazz Pop 2 House Jazz Funk 1, 5, 10 Fiber Funk 1 Light Funk 2 Coated Acid Jazz 1, 3 Heavy Metal 1 Acoustic...