Table of Contents
Advertisement
Digital truNkiNg
HaNDHelD raDio ScaNNer
This user's guide is available in Spanish at
www.radioshack.com.
Esta guía del usuario está disponible en español en
www.radioshack.com.
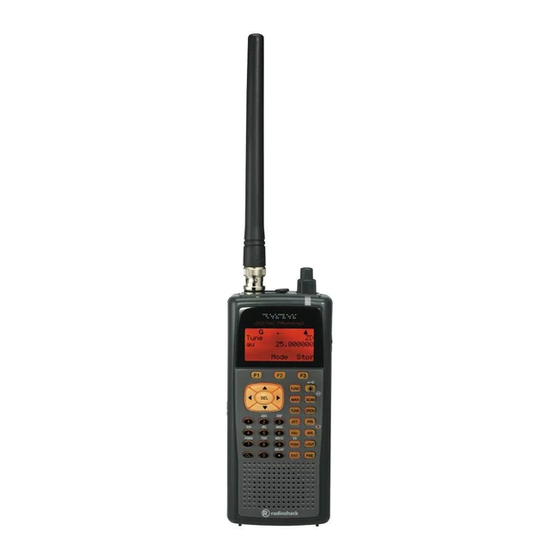
Thank you for purchasing your
Handheld Radio Scanner from
RadioShack. Please read this
user's guide before setting up
and using your new scanner.
www.radioshack.com
2000651 / PRO-651
User's Guide
Advertisement
Table of Contents

Related Manuals for Radio Shack PRO-651


Summary of Contents for Radio Shack PRO-651
- Page 1 2000651 / PRO-651 User’s Guide Digital truNkiNg HaNDHelD raDio ScaNNer Thank you for purchasing your Handheld Radio Scanner from RadioShack. Please read this user’s guide before setting up and using your new scanner. This user’s guide is available in Spanish at www.radioshack.com.
-
Page 2: Table Of Contents
Contents Service Search Object (SRVC) ....... 40 Signal Stalker II Object (STLK) ...... 42 Introduction .......... 4 Weather Features ....... 44 What is Object Oriented Scanning? ....4 SAME Standby ..........44 Features ............5 Configuring ........47 Package Contents ........... 5 Using V-Scanner Storage ...... -
Page 3: Introduction
• Intuitive Object Oriented User Interface Scanning technology has changed dramatically • Context Sensitive Help over the years. The Pro-651 scanner with Object Oriented User Interface is designed to help hobbyist • Scan List build a collection of channels to scan: • V-Scanner Technology - Save complete backup radio... -
Page 4: Scanning Legally
Scanning Legally FCC Statement Your scanner covers frequencies used by This equipment has been tested and found to many different groups including police and fire comply with the limits for a scanning receiver, departments, ambulance services, government pursuant to Part 15 of the FCC Rules. These limits agencies, private companies, amateur radio services, are designed to provide reasonable protection military operations, pager services, and wireline... -
Page 5: Setup
Setup WARNING: Use extreme caution when installing or removing an outdoor antenna. If the antenna starts to fall, let it go! It could contact overhead power lines. If the Antenna antenna touches a power line, touching the antenna, Your scanner's antenna connects easily, or you can mast, cable, or guy wires can cause electrocution and use a variety of antennas, such as an external mobile death. -
Page 6: Batteries
Batteries Battery Notes: • Always dispose of old batteries promptly and Two battery holders are included with your PRO- properly. Do not bury or burn them. 651, a black battery holder for non-rechargeable alkaline batteries and a yellow battery holder for • Use only fresh batteries of the required size and rechargeable NiMH or NiCAD batteries. -
Page 7: External Power
Wearing headphones while operating a motor vehicle or riding a bicycle can create a traffic hazard The PRO-651 ships with the belt clip already and is illegal in most areas. Even though some installed. To remove the belt clip, disengage the... -
Page 8: Understanding The Keypad
Understanding the Keypad Your PRO-651 features an easy-to understand backlit keypad. Referred to as "softkeys;" These keys activate functions currently displayed immediately BNC Antenna above them. Connector FUNC Function. Press and release the FUNC key first, and then press the next key. -
Page 9: Turning On The Scanner
Turning on the Scanner Understanding the Display Icons The squelch and attenuator control scanner Your PRO-651 features a high contrast, backlit sensitivity. If squelch is set too low, the scanner may Liquid Crystal Display (LCD). stop on noise or silence. -
Page 10: Programming
Programming Programming Cables The simplest method for programming a new scanner is using a USB synch cable, which is available at your local RadioShack store. The cable lets you use software provided by RadioReference.com and their constantly updated database to program your new scanner quickly and easily. -
Page 11: Scanner Cloning
(not included), terminated with 1/8” male stereo plugs at each end. The PRO-651 is compatible with the following scanner models: PRO-106, PRO-197, PRO-651, PRO-652, GRE PSR-500, PSR-600, Whistler WS1040, and WS1065. -
Page 12: Text Entry
Text Entry Use the 4-direction keypad to move the cursor. Press FUNC and the 4-direction keypad to move the Your scanner uses several text parameters, such as cursor to the beginning or end of the field. the tags that identify objects. Use CL as a backspace key, or press FUNC and then To enter a letter in a text field, press the number key CL to clear the entire field. -
Page 13: Scanning
Scanning To name your scan lists: 1. Press PGM. Objects and Scan Lists 2. Press the GLOB softkey. Instead of channels and banks, scannable objects 3. Scroll to Scan Lists. are assigned Object IDs and assigned to scan lists. 4. Press SEL. The Scan Lists sub menu appears. The number of objects that can be grouped in a 5. -
Page 14: Monitoring
Monitoring To find objects by text string: 1. Press PGM. Your scanner can monitor a single frequency or object. 2. Press the EDIT softkey. To tune a frequency to monitor: 3. Press the FIND softkey. 1. Press TUNE. 4. Press the Text softkey and enter the text string. 2. -
Page 15: Scanning
Scanning To enable Scan Lists from Global Settings: 1. Press PGM to enter Program Mode When scanning, the radio checks programmed scannable objects for transmissions, stopping when 2. Press the GLOB softkey. transmissions are received. 3. Scroll to the Scan Lists parameter and press SEL. You can use lock out functions to skip specific 4. -
Page 16: Priority Scan
Priority Scan To activate Priority Scan Mode: While the radio is scanning, press FUNC and then You can designate increased priority to certain press PRI. Repeat to cancel Priority Scan Mode. objects: NOTE: Priority sampling may cause brief muting of Priority Off received audio if another object is active. -
Page 17: Object Lockout
Object Lockout To remove a lockout: 1. Navigate to the object using the 4-direction Transmissions for locked out objects are ignored for keypad. all scan lists. Four lockout types are available: 2. Press L/OUT. • Temporary – The object is locked out until the scanner is turned off. -
Page 18: Multi-Site Mode (Motorola And P25)
Multi-Site Mode (Motorola and P25) Home Repeater AutoMove (LTR) Some Motorola and P25 system sites are networked LTR Home Repeater AutoMove lets you program to provide wider coverage, similar to a cellular LTR trunking systems, even if you don't know the network. -
Page 19: Searching
Searching To start a service search: Press the SRCH key repeatedly until the display Your scanner lets you search for frequencies in your indicates: Railroad, Public Safety, Aircraft, Ham, CB, area. When you find a frequency, you can save them Marine, or FRS/GMRS/MURS/DOT. -
Page 20: Limit Search Object (Lmit)
Limit Search Object (LMIT) LMIT Menu Reference Because a LMIT object is assigned to a scan list, it Scan Lists – Press SEL to assign the object to can be used to search while the radio is scanning. It scan lists. An asterisk (*) indicates an assigned can also be used as a stand-alone search. -
Page 21: Service Search Object (Srvc)
Service Search Object (SRVC) SRVC Menu Reference A Service Search Object (SRVC) is optimized for Scan Lists – Press SEL to assign the object to specific radio services across multiple frequency bands. scan lists. An asterisk (*) indicates an assigned scan list. -
Page 22: Signal Stalker Ii Object (Stlk)
Signal Stalker II Object (STLK) STLK Menu Reference Signal Stalker II can find distant or weaker signals. With Scan Lists – Press SEL to assign the object to default settings, the STLK object will sweep through scan lists. An asterisk (*) indicates an assigned important land mobile radio bands. -
Page 23: Weather Features
Weather Features NOTE: The text entry method for numbers requires that you precede each number with 1. For example, While scanning, your radio will check your Weather to enter 4, press 1 and then 4. To enter SAME code Priority channel periodically for the All Hazards 048113, press 10, 14, 18, 11, 11, 13. -
Page 24: Configuring
Configuring To activate SAME standby mode: 1. Press WX. The scanner quickly locates an active Your PRO-651 scanner includes Global Settings that weather radio frequency. store radio-wide settings. 2. When the scanner stops on a frequency, press Caution: The Special Global Settings menu (PGM + the stby softkey. - Page 25 GLOB Menu Reference (Cont.) GLOB Menu Reference (Cont.) Atten Mode – Attenuator reduces interference Pri Channels – Number of priority CONV channels from nearby transmitters. Global applies to check during a priority scan sampling (0-250, attenuation to all objects. Normal uses object 0=All CONV priority channels).
-
Page 26: Using V-Scanner Storage
Using V-Scanner Storage To load a saved V-Scanner folder into main memory: Your PRO-651 features two types of memory 1. Press FUNC and then PGM. storage: Main memory, which stores programming 2. Press the Load softkey. for monitoring and scanning, and Virtual Scanner (V-Scanner) memory. -
Page 27: Initializing Global Settings
Initializing Global Settings Initializing to Factory Defaults You can reset the global radio parameters to their You can initialize the entire scanner to factory defaults. factory state without losing information stored in the This clears all programmed data and global settings. scanner’s working memory. -
Page 28: Manual Programming Guide
Configuration Shortcuts Your PRO-651 features power-on shortcuts to configuration items, such as attenuator settings, backlight settings and memory information. Manual Programming Guide The following table lists the power-on key sequences available in the PRO-651. Unless otherwise specified, press each sequence while the scanner displays the Welcome/Owner screen. -
Page 29: Conventional Objects (Conv)
Conventional Objects (CONV) CONV Menu (Cont.) A Conventional Channel Object (CONV) is a single L/Out – Permanent lockout status for the object. conventional frequency. Priority – On or off. To create a new CONV object: LED Mode – Solid or Flash. 1. -
Page 30: Trunking System (Tsys) Object
Trunking System Object (TSYS) TSYS Menu (Cont.) You must create a TSYS object that contains the L/Out – Permanent lockout status for the object. system parameters for each trunked radio system. Atten – Attenuator, applies 20 dB of attenuation. To create a new TSYS object: Useful in areas with interference from strong 1. -
Page 31: Talkgroup (Tgrp) Object
Talkgroup Object (TGRP) TGRP Menu A Talkgroup Object (TGRP) stores the parameters Scan Lists – Press SEL to assign the object to for a talkgroup on a trunked radio system. scan lists. An asterisk (*) indicates an assigned scan list. To create a new TSYS object: 1. -
Page 32: Duplicating Objects
Duplicating Objects Deleting Objects To delete an object: Duplicating objects lets you define multiple objects with similar characteristics, especially TGRP objects 1. Press PGM. that are hosted on the same trunked system. 2. Select an object. TIP: Duplicate your wildcard TGRP object and then 3. -
Page 33: Hit Counter
Specifications Hit Counter Working Memory The Hit Counter feature keeps track of how many 1800 programmed objects (conventional channels, transmissions are received for each object type. By trunking talkgroups, limit searches, service searches, default, the hit counter is turned off. and Signal Stalker II configurations) using flexible To turn the Hit Counter on: “Scannable Object”... - Page 34 Frequency Coverage Signal Stalker II Band Groups 25.000-26.960 MHz ......(in 10 kHz steps/AM) All Bands: 26.965-27.405 MHz ......(in 10 kHz steps/AM) 27.410-29.505 MHz ......(in 5 kHz steps/AM) 0: 25-54 MHz VHF Low Band 29.510-29.700 MHz ......(in 5 kHz steps/FM) 1: 108-137 MHz VHF Aircraft Band 29.710-49.830 MHz ......(in 10 kHz steps/FM)
-
Page 35: Maintenance
Maintenance CB – Searches the Citizens Band radio frequencies. Marine – Searches the VHF-FM marine radio band. Keep the scanner dry; if it gets wet, wipe it dry immediately. Use and store the scanner only in FRS/GMRS/MURS/DOT/STAR (F/G/MURS) normal temperature environments. Handle the Railroad –... -
Page 36: Limited Warranty
Limited Warranty LAW, INCLUDING THE IMPLIED WARRANTY OF MERCHANTABILITY AND, IF APPLICABLE, RadioShack warrants this product against defects THE IMPLIED WARRANTY OF FITNESS FOR A in materials and workmanship under normal use PARTICULAR PURPOSE, SHALL EXPIRE ON THE by the original purchaser for one (1) year after the EXPIRATION OF THE STATED WARRANTY PERIOD. - Page 37 ©2014. radioShack corporation. all rights 2000651 reserved. radioShack is a registered Printed in Korea trademark used by radioShack corporation. 06A14...