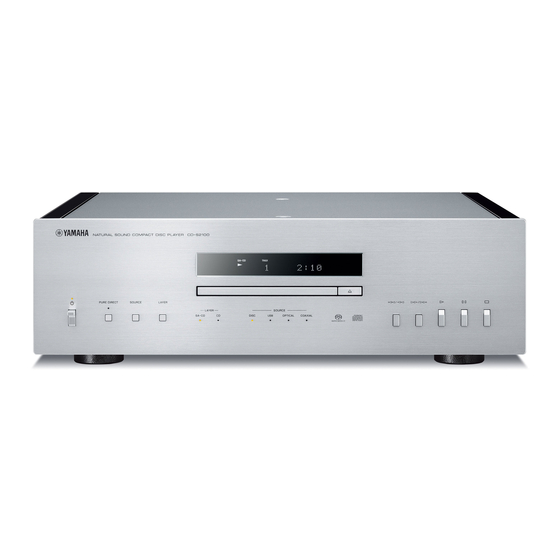
Yamaha CD-S2100 Owner's Manual
Hide thumbs
Also See for CD-S2100:
- Safety manual (10 pages) ,
- Owner's manual (62 pages) ,
- Service manual (86 pages)
Advertisement
Advertisement
Table of Contents

Related Manuals for Yamaha CD-S2100


Summary of Contents for Yamaha CD-S2100
- Page 1 Compact Disc Player OWNER’S MANUAL...
- Page 2 The technician performs exhaustive listening tests and every component is considered, in order to finally achieve the ideal sound. Yamaha’s tradition of audio quality stretches back over 125 years, and continues to live on in all Yamaha products today.
- Page 3 NS-10M Studio Monitor Speaker Became of the most popular studio monitors in the world. A-1 Integrated Amplifier PX-2 Turntable Yamaha’s first straight arm turntable. B-6 Power Amplifier B-2x Pyramid-shaped power amplifier. GT-2000/L Turntable First CD Player (CD-1) introduced in 1983...
-
Page 4: Table Of Contents
CD reproduction ◆ Independent power supplies with digital and analog completely separated ◆ Exclusive Yamaha loading mechanism and high precision CD drive ◆ Left-right symmetrical design with rigid, stable construction ◆ Pure Direct ◆ Super sound from Super Audio CDs ◆... -
Page 5: Controls And Functions
CONTROLS AND FUNCTIONS Controls and functions In this chapter, you will learn the controls and functions of CD-S2100. -
Page 6: Controls And Functions
Controls and functions ■ Front panel (pages 6 to 9) SA-CD HYBRID TRACK TOTAL REMAIN PROG SHUFFLE REPOFFSALL STANDBY/ON PURE DIRECT SOURCE LAYER LAYER SOURCE SA-CD DISC OPTICAL COAXIAL 1 STANDBY/ON, OFF switch 2 STANDBY/ON indicator Turns on or off this unit. Lit brightly: Shows that the power of the unit is ON. - Page 7 5 SOURCE key Selects the audio source to be played back. Each time you press this key, the audio source is switched. (coaxial digital input) (optical digital input) The audio source setting is retained even if you turn off this unit.
- Page 8 Controls and functions ■ Front panel (pages 6 to 9) SA-CD HYBRID TRACK TOTAL REMAIN PROG SHUFFLE REPOFFSALL STANDBY/ON PURE DIRECT SOURCE LAYER SOURCE LAYER SA-CD DISC OPTICAL COAXIAL 9 Remote control sensor C Time display mode indicator Receives signals from the remote control. Indicates the time display mode of the display.
- Page 9 F Disc tray (Play) key Starts playback. Loads a disc. (Pause) key (Open/Close) key Pauses playback. Press the key to resume Opens or closes the disc tray. playback. The disc tray also closes automatically when you press: (Stop) key • the (Play) key on the front panel or on the remote Stops playback.
-
Page 10: Rear Panel
Controls and functions ■ Rear panel OPTICAL COAXIAL OPTIC BALANCED OUT ANALOG OUT BALANCED OUT DIGITAL IN SYSTEM CONNECTOR REMOTE +HOT - COLD See page 18 for connection information. 1 BALANCED OUT jacks (male) 8 SYSTEM CONNECTOR Use this connector to connect a product testing device 2 ANALOG OUT jacks for servicing. - Page 11 OPTICAL COAXIAL DIGITAL OUT AC IN 0 AC IN inlet Caution Use this inlet to plug in the supplied power cable. • Take care that the magnet foot is not accidentally See page 20 for connection information. swallowed by small children. A Foot •...
-
Page 12: Remote Control
Controls and functions ■ Remote control OPEN/CLOSE key Opens or closes the disc tray. 4 p AMP key Turns the Yamaha amplifier ON or switches it to STANDBY mode. OPEN/CLOSE Note Some Yamaha amplifiers cannot be controlled with the DIMMER PURE DIRECT DISPLAY p AMP key of this remote control. - Page 13 Refer to the owner’s manual of your amplifier for details. (coaxial digital input) (optical digital input) Note Some Yamaha amplifiers cannot be controlled with the keys The audio source setting is retained even if you turn off this of this remote control. unit. 0 PURE DIRECT key Allows you to enjoy high audio quality.
-
Page 14: Program Playback
Controls and functions ■ Program playback ■ Setting the AUTO POWER STANDBY In the program playback mode, you can play back tracks function in a programmed sequence. The AUTO POWER STANDBY function can be set to ON or OFF. When set to ON, if the unit is not operated for 30 minutes with no audio signal detected, it automatically Press PROGRAM while playback is stopped. - Page 15 ■ Setting the DPLL (Digital Phased Lock Loop) bandwidth Press ENTER. The audio DAC (ES9016) of this unit employs DPLL to The setting value flashes for 3 seconds, then the unit generate accurate clock signals synchronized with the resumes to normal mode. clock of the input digital audio signal.
-
Page 16: Installing Batteries In The Remote Control
Controls and functions ■ Installing batteries in the remote control ■ Operating range of the remote control Remove the battery compartment cover. Insert the two batteries (AAA, R03, UM-4) according to the polarity markings (+ and -) Approximately on the inside of the battery compartment. 6 m (20 ft) The remote control transmits a directional infrared beam. -
Page 17: Connections
Connections In this section, you will make connections between CD-S2100 and your amplifier. - Page 18 CONNECTIONS Connections BALANCED OUT ANALOG OUT BALANCED OUT SYSTEM CONNECTOR REMOTE +HOT - COLD XLR balanced cable Stereo pin cable Amplifier If your amplifier is equipped with XLR balanced input jacks, we recommend balanced connection for optimum audio performance. When the SA-CD layer is played, the audio signals are output only from the BALANCED OUT and ANALOG OUT jacks.
- Page 19 CONNECTIONS OPTICAL COAXIAL OPTICAL COAXIAL DIGITAL IN DIGITAL OUT AC IN Optical Optical digital cable digital cable Coaxial digital Coaxial digital USB cable cable cable (Type B) AV receiver equipped with a Component equipped with a digital input jack digital output (PCM) jack Note Only PCM signals can be input to the DIGITAL IN (OPTICAL/COAXIAL) jacks of this unit.
-
Page 20: Connecting The Power Cable
The pin assignments for these jacks are shown below. Refer to the owner’s manual supplied with your amplifier and verify that its XLR balanced input jacks are Rear panel of CD-S2100 compatible with the pin assignments. 1: ground 2: hot... - Page 21 REMOTE IN jack of the other component to the REMOTE IN/OUT jacks of this unit, using cables with monaural miniplugs. Up to three Yamaha components (including this unit) can be connected. Rear panel of CD-S2100 Rear panel of CD-S2100...
-
Page 22: Playback Of Music Files Stored On A Pc
PC. • The “Yamaha Steinberg USB Driver” is subject to change • Operations may not be executed correctly if the PC is connected without prior notice. For details and the latest information, refer to this unit before the driver is installed. - Page 23 • The music files stored on a PC cannot be controlled from this Set the audio output destination of the PC to unit or the remote control of this unit. Operate them on the PC. “Yamaha CD Player.” With Windows OS: Control Panel → Sound → [Playback] tab With Mac OS: System Preferences →...
- Page 24 CONNECTIONS...
-
Page 25: Specifications
Specifications In this section, you will find technical specifications for CD-S2100. - Page 26 • Wavelength SA-CD ................655 nm Polish finish on the side panels CD ..................790 nm Use of Yamaha Unicon cloth (sold separately) is • Output Power recommended. For heavy dirt, use Yamaha Piano SA-CD ..............1.89 mW (max) Unicon (sold separately). For puschasing, contact your CD ................
-
Page 27: Playable Disc Format
SPECIFICATIONS Playable disc format ■ Supported disc types CD-R, CD-RW digital audio discs This unit is designed to play back compact discs bearing the marks shown below. Never attempt to load any other types of discs into this unit. This unit can also play back 8- cm (3-inch) compact discs. -
Page 28: Handling Compact Discs
SPECIFICATIONS Playable disc format ■ About MP3 and WMA discs ■ Handling compact discs You can play back MP3 and WMA files recorded on a • Always handle a disc with care so that its surface is not CD-R or CD-RW with similar uses as a music CD. scratched. -
Page 29: Troubleshooting
Refer to the chart below if this unit does not function properly. If the problem you are experiencing is not listed below or if the instructions below do not help, turn off this unit, disconnect the power cable, and contact the nearest authorized Yamaha dealer or service center. Problem... - Page 30 “USB” while the music application and start playback. music application is running on the PC. The dedicated “Yamaha Steinberg USB Driver” Install the “Yamaha Steinberg USB Driver” has not been installed correctly. again, following the correct procedure.
- Page 31 Status No disc is set on the disc tray. NO DISC The dedicated “Yamaha Steinberg USB Driver” has not been installed correctly. Or, the audio output Check Cable of the computer has not been set to “Yamaha CD Player.” The audio signal from the computer cannot be recognized.
- Page 32 © 2014 Yamaha Corporation Printed in Malaysia ZK27080...