Table of Contents
Advertisement
Advertisement
Table of Contents

Related Manuals for KYMCO MAXER


Summary of Contents for KYMCO MAXER
-
Page 2: Table Of Contents
Contents Contents BEFORE DRIVING ........1 1. INSTRUCTIONS FOR USE ......1 2. INTRODUCTION ........2 3. GENERAL SAFETY INFORMATION ....3 4. GETTING TO KNOW YOUR SCOOTER ..14 5. PRODUCT SPECIFICATIONS ....17 6. PUSHING AND TRANSPORTING THE SCOOTER ........... - Page 3 Contents 8.8 SWITCHING ON THE HORN ..... 28 8.9 SWITCHING ON THE HAZARD Lights 28 8.10 SWITCHING ON THE TURN SIGNAL 28 8.11 SWITCHING ON THE TEMP .... 29 8.12 SWITCHING ON THE ADJ ....29 8.13 SWITCHING ON THE MOD ..... 29 8.14 SWITCHING ON THE TIME ....
-
Page 4: Before Driving
INDICATION FOR USE BEFORE DRIVING The scooter is a motorised electric scooter for use outdoors primarily on flat surfaces such as pavements, roads, parking lots and drive ways. It is intended to increase the mobility of persons who are both physically and mentally capable of correctly assessing driving situations and reacting correspondingly to them at any time. -
Page 5: Introduction
INTRODUCTION DEAR CUSTOMER With your MAXER ForU, you have now purchased a product, which has been manufactured in accordance with the newest technical capabilities and based on the highest operating user comfort. We have placed great value on the simplest possible operation and long service life in both construction and material selection. -
Page 6: General Safety Information
GENERAL SAFETY INFORMATION WARNING! Before you operate your scooter, please read and understand all information provided with your scooter for your safety. As operating any vehicle, only drive with full alertness to ensure safety. WARNING! Please observe the warnings below to avoid any damage or injury resulting from improper use of your scooter. - Page 7 GENERAL SAFETY INFORMATION WARNING! Anti-tippers substantially reduce your risk of falling over backwards, which can cause serious injury. WARNING! Have someone help you practice bending and reaching on the scooter and transferring to and from the scooter until you learn how to do it safely.
- Page 8 GENERAL SAFETY INFORMATION Keep ashtrays a safe distance from the seat cushions. Always make sure cigarettes are completely extinguished before disposal. WARNING! Do not modify your scooter in any way by yourself. For any accessories, please contact your approved service provider for installation by an authorized service technician.
- Page 9 GENERAL SAFETY INFORMATION WARNING! Do not place the scooter in “freewheel” mode while the unit is powered up. Always power off the scooter and remove the key from the key switch before engaging or disengaging “freewheel” mode. WARNING! To prevent the scooter from rolling uncontrollably on its own, never place the scooter in “freewheel”...
- Page 10 GENERAL SAFETY INFORMATION electrical system and/or personal injury. Check any actuators for loose, worn, or damaged items and have any damaged wires replaced immediately. WARNING! Check electrical components frequently for signs of corrosion and have them replaced as necessary. WARNING! Always secure the scooter and its batteries when it is being transported.
- Page 11 GENERAL SAFETY INFORMATION WARNING! Always protect the batteries from freezing; for those living in cold climates, make sure you store the scooter properly. Never charge a frozen battery. Charging a frozen battery may result in damage to the battery. WARNING! Do not remove the fuse links from the battery harnesses.
- Page 12 GENERAL SAFETY INFORMATION WARNING! The maximum recommended incline angles (see specifications) are tested in a controlled environment. Your scooter’s ability to climb up inclines is affected by your weight, speed and the angle you approach the incline among other factors. WARNING! Only drive backwards on a flat surface.
- Page 13 GENERAL SAFETY INFORMATION WARNING! Do not use the armrests for any weight bearing purposes. Such use may cause the scooter to tip, which may result in a fall from the scooter and personal injury. WARNING! Do not put all of your weight on one side of the scooter deck.
- Page 14 GENERAL SAFETY INFORMATION WARNING! Do not expose your scooter to open flames. WARNING! Keep your scooter in a dry and clean condition. Never take your scooter into a shower, tub, pool, or sauna. Rain, snow, salt, mist/spray conditions, and icy/slippery surfaces can damage the scooter components or cause the scooter frame to prematurely rust.
- Page 15 GENERAL SAFETY INFORMATION WARNING! It is dangerous to transfer to and from your scooter on your own. It requires good balance and agility. Be aware that there is a point during every transfer when the seat is not below you. WARNING! To make a safe transfer: Always turn off the power before you transfer to or from your scooter.
- Page 16 GENERAL SAFETY INFORMATION WARNING! Be aware that washing of upholstered items may reduce the fabric’s resistance to flammability. WARNING! Radio wave sources, such as radio stations, TV stations, amateur radio (HAM) transmitters, two-way radios, and cellular phones ,can affect motorised scooter control. Following the warnings listed below should reduce the chance of unintended brake release or motorised scooter movement, which could result in serious injury.
-
Page 17: Getting To Know Your Scooter
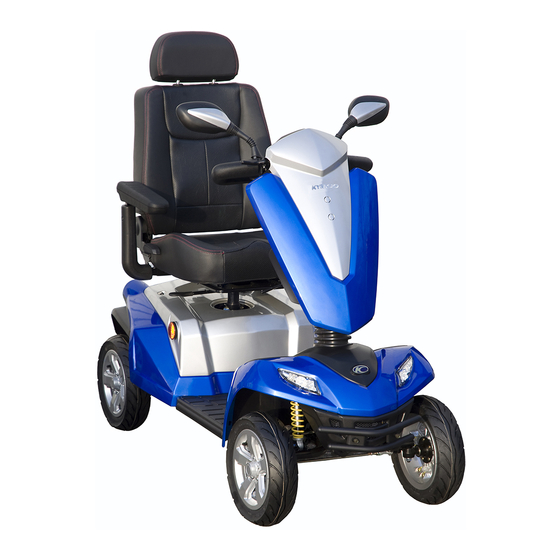
GETTING TO KNOW YOUR SCOOTER Seat with backrest, headrest and armrests Delta bar handle Dashboard with controls Hand brake Tiller 12V power socket Signal lights and rear Signal lights and lights front lights Wheel Foot area MOD switch ADJ switch Time switch LCD panel Temp switch... - Page 18 GETTING TO KNOW YOUR SCOOTER Head light Speed control Service dial Turn signal switch Temp switch Battery status display ODO/TRIP Speed Time Speed H/L 44.43 in 46.65 in 20.27 in 50 in 18.1 in 6.69 in...
- Page 19 GETTING TO KNOW YOUR SCOOTER 58.66 in 84in 84in 24.21 in...
-
Page 20: Product Specifications
PRODUCT SPECIFICATIONS Model Name EQ40DA(UK) Maximum weight capacity 440 lbs (200kg) Overall height 43.3 in (1100 mm) Overall length 58.7 in (1490 mm) Overall width 24.2 in (615 mm) Rear-wheel drive, sealed Drive System transaxle, 24-volt DC motor Battery 12 V × 80 Ah × 2 Pcs Off-board Input voltage : 200/250VAC, Battery charger... -
Page 21: Pushing And Transporting The Scooter
PUSHING AND TRANSPORTING THE SCOOTER 1. Please carefully read the safety information in section 3 related to transportation first. 2. Pushing the scooter: In order to push the scooter, you must place the scooter in “freewheel” mode, which disengages the drive motor. -
Page 22: Adjusting The Scooter
ADJUSTING THE SCOOTER speed is exceeded while you are pushing the scooter, the drive motor will switch on automatically and brake the scooter. After any adjustments, repair or service and before use, make sure all hardware is tightened securely - otherwise injury or damage may result. The following describes how to set up and adjust your Scooter in order to have a comfortable and safe drive. -
Page 23: Adjusting The Backrest Angle
ADJUSTING THE SCOOTER (left or right) to get on. 2. Sit on the seat and turn the seat back to the direction of travel. Lock the seat in place by releasing the seat lever. Fasten your seat belt. Ensure that the seat is properly engaged after adjustment by seeing that the seat doesn’t move when you try rotating it to either side. -
Page 24: Adjusting The Tiller Angle
ADJUSTING THE SCOOTER Lowering the headrest: Press the locking lever in and push the headrest down to the desired position. Release the locking lever, and engage the lowering protection by moving the headrest slightly. 7.5 ADJUSTING THE TILLER ANGLE Always adjust the tiller so that you can reach the dashboard and control your scooter easily at any time. - Page 25 ADJUSTING THE SCOOTER engaged in 8 positions (at 45° intervals). Pull the turning lock (1), turn the seat in the required direction or position (2) and engage. Accident hazard due to incorrect seat position: Always turn the seat to face forward and lock it before driving.
-
Page 26: Operating
OPERATING THE SCOOTER OPERATING Always carry out the safety information described in the “General Safety Information” section: Before starting to drive, adjust the seat and tiller to a comfortable position. WARNING! Every scooter is different. Take the time to learn the feel of your scooter before you begin riding. -
Page 27: Powering On/Off
OPERATING THE SCOOTER Check before you power on the scooter: Ensure your scooter is in Check the “freewheel” drive mode (not in mode lever is in the “freewheel” mode) pushed down position Seat is locked into the Move the seat forwards desirable position and backwards to ensure it is stationary. -
Page 28: Adjusting The Speed
OPERATING THE SCOOTER 8.3 ADJUSTING THE SPEED Use the two speed adjustment mechanisms to adjust the speed to suit your driving conditions. Always use lower speed if you are uncertain about the driving conditions. There are two mechanisms to control the speed of your scooter. -
Page 29: Driving Forwards And Backwards
OPERATING THE SCOOTER EQ40DA(UK) 1. High/Low Speed 2. Speed Control Dial: to Toggle: to preselect further adjust the speed level the maximum speed Driving Forwards Turtle Rabbit High 3.5 mph 8 mph 2.2 mph 3.7 mph Driving Backwards Turtle Rabbit High 2.4mph 2.8 mph... -
Page 30: Using The Brakes
OPERATING THE SCOOTER 8.5 USING THE BRAKES 1. Using the motor electromagnetic brake: When the throttle control lever is released and returns to the center position, the brake is engaged to stop the scooter. Emergency braking = let go of the drive lever: The throttle control lever automatically returns to the central... -
Page 31: Switching On The Headlights
OPERATING THE SCOOTER 8.7 SWITCHING ON THE HEADLIGHTS Headlight button : Switch on = press button once Switch off = press button again A switch indicator will light up to show that the headlight is switched on. If you drive with the headlights on, the batteries will drain faster and the scooter driving range will be slightly reduced. -
Page 32: Switching On The Temp
OPERATING THE SCOOTER 8.11 SWITCHING ON THE TEMP Press the temp button. It will be change the temperature unit of measure. 8.12 SWITCHING ON THE ADJ Press the ADJ button. Hold the ADJ button. 1. set value 2. change speed unit.(km/h or mph) Hold the ADJ and MOD button about 3 seconds. -
Page 33: Power Socket
OPERATING THE SCOOTER - intend to stop for long periods. Always remove the key if you: - want to park the scooter and get off. 8.16 12V POWER SOCKET The power socket provides 12V 2A Voltage-12V. Ampere- 2A. Watt-24W Don’t exceed the applicable power rating when using. If KEY ON over ten minute, 1. -
Page 34: Battery And Charging The Battery
BATTERY AND CHARGING THE BATTERY Corrosive chemicals contained in battery. Explosive conditions exist! Do not use batteries with different amp- hour (Ah) capacities. Keep tools and other metal objects away from battery terminals. Contact with tools can cause electrical shock. Flammable material contained in battery. -
Page 35: Battery Status Display
BATTERY AND CHARGING THE BATTERY 9.1 BATTERY STATUS DISPLAY The battery status display on the dashboard shows the current level of battery power. F = max range E = decreased driving range, charge batteries as soon as possible. If the scooter is at a standstill, it is often the case that the battery status may show full than it actually is. -
Page 36: Charging The Batteries
BATTERY AND CHARGING THE BATTERY 9.2 CHARGING THE BATTERIES It is imperative that you observe the sequence for connecting and disconnecting the battery charger. 1. Position the scooter near an electric outlet. 2. Switch the scooter off and remove the key. 3. - Page 37 BATTERY AND CHARGING THE BATTERY Step 2. Switch the scooter off and remove the key. Step 3. Ensure the lever for “freewheel” mode is pushed down to the “drive” position. Step 4. Connect the battery charger plug (4) into the scooter charging socket located in the centre of the tiller.
- Page 38 BATTERY AND CHARGING THE BATTERY Step 5. Plug the battery charging power cord (1) into the jack socket (2) on the battery charger. Step 6. Connect the battery charger power plug into an electrical outlet (AC115-230V, 50 to 60 Hz) and charge the battery.
-
Page 39: After Charging
BATTERY AND CHARGING THE BATTERY LED information at battery charger during Charging: LED-> Color-> Meaning 1 --- Green --- battery charger switched on 2 --- Yellow --- charging in progress 3 --- Yellow --- charging 90% 4 --- Green --- charging is complete 9.3 AFTER CHARGING (1.) Remove the battery charger plug from the electric outlet. - Page 40 By KWANG YANG Motor Co., Ltd. Third Edition, NOV. 2013 All rights reserved. Any reproduction or unauthorized use without the written permission of KWANG YANG Motor Co., Ltd. is strictly prohibited. T300-EQ40DA-A1 •NO.35 Wan Hsing Street,San Min District Kaohsiung City, Taiwan, Republic Of China •NO.61,Chung-Shan Sth Rd ,Lu-Chu District ,Kaohsiung City, Taiwan, Republic Of China Date printed:Apr.2013...
- Page 41 KWANG YANG MOTOR CO., LTD No.35 Wan Hsing Street,San Min Distrist Kaohsiung Taiwan, Republic of China Telephone:886-7-3822526 FAX : 886-7-3950021...