
Related Manuals for Pioneer DV-686A-s


Summary of Contents for Pioneer DV-686A-s
-
Page 1: Dvd Player
DVD Player DV-686A-s Operating Instructions Downloaded From Disc-Player.com Pioneer Manuals... -
Page 2: Operating Environment
Do not install this unit in a poorly ventilated area, or in unused for a long period of time (for example, when locations exposed to high humidity or direct sunlight (or Downloaded From Disc-Player.com Pioneer Manuals on vacation). strong artificial light) - Page 3 Macrovision the power cord once in a while. When you find it Corporation and other rights owners. Use of damaged, ask your nearest PIONEER authorized this copyright protection technology must be service center or your dealer for a replacement.
-
Page 4: Table Of Contents
Using repeat play ....27 Using random play ....27 Downloaded From Disc-Player.com Pioneer Manuals... -
Page 5: Before You Start
PureCinema Progressive Scan video When connected to a progressive scan- compatible TV or monitor using the component video outputs, you can enjoy extremely stable, flicker free images, with the same frame refresh rate as the original movie. Downloaded From Disc-Player.com Pioneer Manuals... -
Page 6: What's In The Box
• Don’t use different kinds of battery together—although they may look similar, • Use on a thick rug or carpet, or cover with different batteries may have different cloth—this may prevent proper cooling of voltages. the unit. Downloaded From Disc-Player.com Pioneer Manuals... -
Page 7: Disc / Content Format Playback Compatibility
• WMA/MP3/JPEG file playback on DVD-R/ Fujicolor CD RW: No • is a trademark of DVD Format/Logo Licensing Corporation. • is a trademark of Fuji Photo Film Co. Ltd. • Also compatible with KODAK Picture CD Downloaded From Disc-Player.com Pioneer Manuals... -
Page 8: Compressed Audio Compatibility
• The filename of the movie file has to be logo are trademarks, or registered trademarks of repeated at the beginning of the filename Microsoft Corporation in the United States and/ for the external subtitle file. or other countries. Downloaded From Disc-Player.com Pioneer Manuals... -
Page 9: Divx Video Compatibility
3072 x 2048. *File format used by digital still cameras • Progressive JPEG compatible: No • File extensions: .jpg (must be used for the player to recognize JPEG files – do not use for other file types) Downloaded From Disc-Player.com Pioneer Manuals... -
Page 10: Connecting Up
VCR using audio/video or S-video cables, as the picture from this player will not appear properly on your TV. (This player may also not be compatible with some combination TV/VCRs for the same reason; refer to the manufacturer for more information.) Downloaded From Disc-Player.com Pioneer Manuals... -
Page 11: Connecting Using The S-Video Output
TV (or monitor or AV AUDIO OUT S-VIDEO OUT (2ch) AUDIO OUT (5.1ch) COMPONENT VIDEO OUT receiver). Line up the small triangle above the jack with the same mark on the plug before plugging in. Downloaded From Disc-Player.com Pioneer Manuals... - Page 12 Interlace (see below). Switching the video output to interlace using the front panel controls Switch the player to standby then, using the STANDBY/ON front panel controls, press while pressing to switch the player back to Interlace. STANDBY/ON Downloaded From Disc-Player.com Pioneer Manuals...
-
Page 13: Connecting To An Av Receiver
• You usually have to connect the same kind default 2 Channel to 5.1 Channel. See of video cable between your DVD player also Audio Output Mode on page 40. and AV receiver, and between your AV receiver and TV. Downloaded From Disc-Player.com Pioneer Manuals... -
Page 14: Connecting The Digital Output
DIGITAL AUDIO OUT jack to an optical input on your AV receiver. For a coaxial connection, use a coaxial cable (similar to the supplied video cable) to connect the COAXIAL DIGITAL AUDIO OUT jack to a coaxial input on your AV receiver. Downloaded From Disc-Player.com Pioneer Manuals... -
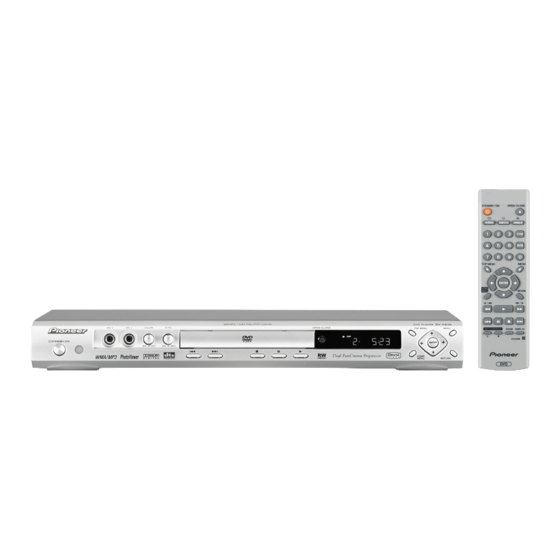
Page 15: Controls And Displays
11 TOP MENU (page 21) (page 20) (page 20) 12 Display OPEN/CLOSE (page 19) (page 20) RW Compatible (page 7) 14 Disc tray HOME MENU (page 17) 15 Remote control sensor (page 16) RETURN (page 21) Downloaded From Disc-Player.com Pioneer Manuals... -
Page 16: Remote Control
ENTER & cursor buttons (page 17) • Replace the batteries when you notice a HOME MENU (page 17) fall off in the operating range of the remote. (page 20, 23) (page 20) (page 20) Downloaded From Disc-Player.com Pioneer Manuals... -
Page 17: Getting Started
If the disc tray is closed but no disc remote work in exactly the same is playing and no control is pressed for way). about 30 minutes, the player automatically goes into standby. RETURN Returns to the main menu without saving changes. Downloaded From Disc-Player.com Pioneer Manuals... -
Page 18: Setting Up The Player For Your Tv
Press HOME MENU to exit the menu change the setting from 4:3 (Letter Box) to 4:3 screen. (Pan & Scan) if you prefer. See Video Output settings on page 35 for more details. Press HOME MENU to exit the menu screen. Downloaded From Disc-Player.com Pioneer Manuals... -
Page 19: Playing Discs
(MP3 / WMA / JPEG) from the If you’re playing a DVD, disc containing DivX on-screen display. video files or Video CD/Super VCD, also turn on your TV and make sure that it is set to the correct video input. Downloaded From Disc-Player.com Pioneer Manuals... - Page 20 When one of these discs is next loaded, you can resume playback. Note • The Last Memory function doesn’t work with VR format DVD-RW, DVD-Audio or SACD discs. Downloaded From Disc-Player.com Pioneer Manuals...
- Page 21 Displays the PBC menu. varies with the disc and may be the same as the ‘top menu’. Numbers Use to enter a numbered menu Moves the cursor around the ENTER (remote option. Press to select. screen. only) Downloaded From Disc-Player.com Pioneer Manuals...
- Page 22 TV, black limitations. bars are necessary at the top and bottom of the screen. This is not a malfunction. • My DVD-Audio disc starts playing, but then suddenly stops! The disc may have been illegally copied. Downloaded From Disc-Player.com Pioneer Manuals...
-
Page 23: Playing Discs
• The scanning speed is shown on-screen. To resume normal playback, press (play). • When scanning a Video CD/Super VCD playing in PBC mode or a WMA/MP3 track, playback automatically resumes at the end or beginning of the track. Downloaded From Disc-Player.com Pioneer Manuals... -
Page 24: Frame Advance/Frame Reverse
‘Disc Navigator’ from the on- screen menu. Displays the previous picture. Displays the next picture. Disc Navigator Pauses the slideshow and rotates the displayed picture 90º (counter) clockwise. (Press (play) to restart slideshow.) Downloaded From Disc-Player.com Pioneer Manuals... -
Page 25: Browsing Wma, Mp3, Divx Video And Jpeg Files With The Disc Navigator
) to open a highlighted folder. • You can also return to the parent folder by going to the top of the list to the ‘..’ folder, Disc Navigator: Title 01- 49: then pressing ENTER. Downloaded From Disc-Player.com Pioneer Manuals... -
Page 26: Looping A Section Of A Disc
After pressing ENTER, playback jumps back to rather than just the current folder, exit the the start point and plays the loop. Disc Navigator and start playback using (play) button. To resume normal playback, select ‘Off’ from the menu. Downloaded From Disc-Player.com Pioneer Manuals... -
Page 27: Using Repeat Play
Random Chapter Random Random Off Program Search Mode Play Mode A-B Repeat Title Repeat Repeat Chapter Repeat Random Repeat Off Program Search Mode • For DVD-Audio discs, select Group Repeat or Track Repeat (or Repeat Off). Downloaded From Disc-Player.com Pioneer Manuals... -
Page 28: Creating A Program List
• For a DVD-Audio disc, you can add a whole group, or a track within a group to the program list. • For a CD, SACD or Video CD/Super VCD, select a track to add to the program list. Downloaded From Disc-Player.com Pioneer Manuals... -
Page 29: Searching A Disc
45 minutes into saved program list the disc. For 1 hour, 20 minutes and 30 • Playback Stop – Turns off program play, seconds, press 8, 0, 3, 0. but does not erase the program list Downloaded From Disc-Player.com Pioneer Manuals... -
Page 30: Switching Subtitles
• Some DVD discs only allow you to change audio language from the disc menu. Press TOP MENU or MENU to access. • To set DVD audio language preferences, see Language settings on page 35. Downloaded From Disc-Player.com Pioneer Manuals... -
Page 31: Zooming The Screen
(this can be switched off if you prefer—see Display settings on page 36). During playback (or when paused), press ANGLE to switch angle. Downloaded From Disc-Player.com Pioneer Manuals... -
Page 32: Audio Settings And Video Adjust Menus
2 Channel in order to be How much of a difference you hear depends on able to use Virtual Surround. the material you’re listening to. If the material doesn’t have wide variations in volume, you may not notice much change. Downloaded From Disc-Player.com Pioneer Manuals... -
Page 33: Video Adjust Menu
(cursor) buttons, and ENTER. Video Adjust Sharpness Standard Brightness Contrast Gamma Chroma Level You can adjust the following picture quality settings: • Sharpness – Adjusts the sharpness of edges in the picture (Fine, Standard (default), Soft). Downloaded From Disc-Player.com Pioneer Manuals... -
Page 34: Initial Settings Menu
(Noise will be output if your amplifier/receiver is not compatible with DTS audio.) DTS > PCM No digital audio is output when playing a DTS disc.DTS audio is converted to PCM audio before being output. Downloaded From Disc-Player.com Pioneer Manuals... -
Page 35: Video Output Settings
If there is an English soundtrack on the disc then it will be played. Languages as displayed If there is the language selected on the disc, then it will be played. Other Language Select to choose a language other than the ones displayed (see page 47). Downloaded From Disc-Player.com Pioneer Manuals... -
Page 36: Display Settings
What it means Parental Lock – See Parental Lock on page 37. DVD Playback DVD-Audio All material on a DVD-Audio disc is playable. Mode DVD-Video Only the DVD-Video part of a DVD-Audio disc is playable. Downloaded From Disc-Player.com Pioneer Manuals... -
Page 37: Parental Lock
ENTER. change the Parental Lock level or enter a Country code. Enter a new password and press ENTER. This registers the new password and you will return to the Options menu screen. Downloaded From Disc-Player.com Pioneer Manuals... -
Page 38: Dts Downmix
(or the current disc registered devices. is reloaded). • If you load a disc that contains DivX VOD content not authorized for your player, the message Authorization Error is displayed and the content will not play. Downloaded From Disc-Player.com Pioneer Manuals... -
Page 39: Playing Divx Vod Content
DivX VOD Registration Code Video Output Language 0 1 2 3 4 5 6 7 Display Options Speakers Make a note of the code as you will need it when you register with a DivX VOD provider. Downloaded From Disc-Player.com Pioneer Manuals... -
Page 40: Speakers Settings
• When set to 5.1 Channel, only the front left/right channels are output from the AUDIO OUT (2ch) jacks. Change to 2 Channel if you want to listen to downmixed stereo audio (for example, because you are listening through the TV’s built-in speakers). Downloaded From Disc-Player.com Pioneer Manuals... -
Page 41: About The Audio Output Settings
Discs that prohibit downmixing will be output as 5.1 channel even if 2 Channel is selected as the Audio Output Mode setting (see page 40). Discs that prohibit downmixing also mute the digital output. When Audio Output Mode is set to 5.1 Channel, mono sources are heard from the center speaker only. Downloaded From Disc-Player.com Pioneer Manuals... -
Page 42: Speaker Distance
Use the (cursor up/down) to change the distance. • When you change the distance settings of the front left (L) or front right (R) speakers, all the other speaker distances change relative to it. Downloaded From Disc-Player.com Pioneer Manuals... -
Page 43: Speaker Installation
• Except for the subwoofer, you can set speaker size to Large or Small. If the main speaker cone in the speaker is 12cm or more, set to Large, otherwise set to Small (or Off if you don’t have that speaker). Downloaded From Disc-Player.com Pioneer Manuals... -
Page 44: Additional Information
Taking care of your player and This player is designed to be used only with conventional, fully circular discs. Do not use discs shaped discs. Pioneer disclaims all liability arising in connection with the use of shaped discs. General Hold discs by the edge or by the center hole Cleaning discs and edge. -
Page 45: Moving The Player
Please note that some movie aspect ratios are nearest Pioneer-authorized service center. We wider than 16:9, so even though you have a do not recommend using commercially widescreen TV, these discs will still play in a available lens cleaners for CD players. -
Page 46: Setting The Tv System
Discs marked ALL will play in any Note player. • You have to switch the player into standby The diagram below shows the various DVD (press STANDBY/ON) before each regions of the world. change. Downloaded From Disc-Player.com Pioneer Manuals... -
Page 47: Selecting Languages Using The Language
Use the (cursor up/down) buttons to select a code letter or a code number. See Language code list on page 48 for a complete list of languages and codes. Downloaded From Disc-Player.com Pioneer Manuals... -
Page 48: Language Code List
Chile, 0312, cl Italy, 0920, it Philippines, 1608, ph United Kingdom, 0702, gb China, 0314, cn Japan, 1016, jp Portugal, 1620, pt USA, 2119, us Denmark, 0411, dk Korea, Republic of, 1118, kr Russian Federation, 1821, ru Downloaded From Disc-Player.com Pioneer Manuals... -
Page 49: Troubleshooting
Sometimes the trouble may lie in another component. Inspect the other components and electrical appliances being used. If the trouble cannot be rectified after checking the items below, ask your nearest Pioneer authorized service center or your dealer to carry out repair work. - Page 50 • SACDs and DVD-Audio discs do not output digital audio. Listen through the player’s analog audio outputs. Noticeable difference in • This is due to differences in the audio format and is not a DVD and CD volume. malfunction. Downloaded From Disc-Player.com Pioneer Manuals...
- Page 51 • The Virtual Surround effect is only output through the AUDIO OUT (2ch) analog audio outputs. • Make sure that Audio Output Mode is set to 2 Channel (page 40). • The effectiveness of Virtual Surround varies with the disc. Downloaded From Disc-Player.com Pioneer Manuals...
-
Page 52: Glossary
• Static electricity or other external influences may cause malfunctioning of this unit. In this case, unplug the power cord and then plug back in. This will usually reset the unit for proper operation. If this does not correct the problem, please consult your nearest Pioneer service center. - Page 53 CD audio all on the same disc. Manufactured under license from Dolby Laboratories. “Dolby” and the double-D symbol are trademarks of Dolby Laboratories. “DTS” and “DTS Digital Surround” are registered trademarks of Digital Theater Systems, Inc. Downloaded From Disc-Player.com Pioneer Manuals...
-
Page 54: Specifications
Jack ....... . RCA Published by Pioneer Corporation. Copyright © 2005 Pioneer Corporation. Audio output (1 stereo pair) All rights reserved Output level . - Page 55 253 Alexandra Road, #04-01, Singapore 159936 TEL: 65-6472-7555 PIONEER ELECTRONICS AUSTRALIA PTY. LTD. 178-184 Boundary Road, Braeside, Victoria 3195, Australia, TEL: (03) 9586-6300 PIONEER ELECTRONICS DE MEXICO S.A. DE C.V. Blvd.Manuel Avila Camacho 138 10 piso Col.Lomas de Chapultepec, Mexico,D.F. 11000 TEL: 55-9178-4270 K002_A_En <TPTZZ>...