Klipsch DVD Audio/Video System CS-700 Owner's Manual
Klipsch mp3 player owner's manual
Hide thumbs
Also See for DVD Audio/Video System CS-700:
- Owner's manual (8 pages) ,
- Specifications (1 page) ,
- Brochure (8 pages)
Table of Contents
Advertisement
Advertisement
Table of Contents

Related Manuals for Klipsch DVD Audio/Video System CS-700


Summary of Contents for Klipsch DVD Audio/Video System CS-700
- Page 1 CS-700 Owner's Manual...
-
Page 2: Table Of Contents
Speaker Setup Considerations ...6 Step 6: Connect other components (OPTIONAL) ...7 Step 7: Connect AM and FM antennas ...8 Step 8: Turn on the TV and the Klipsch system ...8 Step 9: Complete the on-screen setup ...9 Your Klipsch Controller ...11 Buttons ...11... - Page 3 Important Safety Information READ these instructions. KEEP these instructions. HEED all warnings. FOLLOW all instructions. DO NOT use this apparatus near water. CLEAN ONLY with dry cloth. DO NOT block any ventilation openings. Install in accordance with the manufacturer’s instructions. DO NOT install near any heat sources such as radiators, heat registers, stoves, or other apparatus (including amplifiers) that produce heat.
-
Page 4: Chapter 1: Connecting Your System
Horn- ® able to serve you. Again, thank you for choosing Klipsch and we hope that your ® developed in Klipsch CS-700 brings life to your music and movies for many years. -
Page 5: Step 1: Unpack The Box
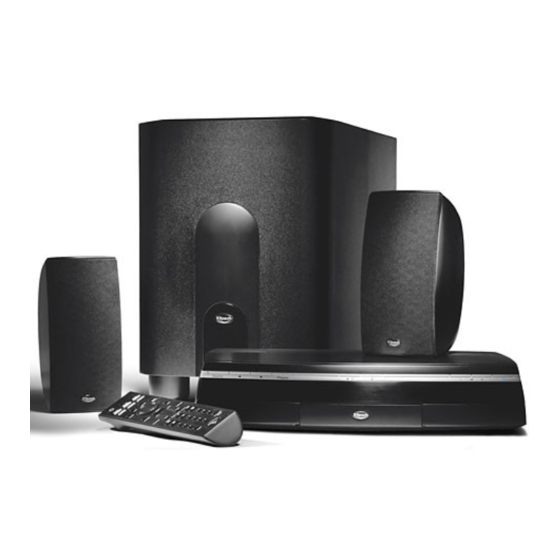
STeP 1: unpack the box Make sure you have the following items as you unpack your Klipsch system. Controller Subwoofer Subwoofer Subwoofer Remote Control 2 AA Remote Batteries 2 20-Ft. Left/Right AM Antenna Speaker Cables Step 2: Put the batteries in the remote control... -
Page 6: Step 3A: Set-Top Box Connection
(P. SCAN) “On”. If the HDMI connections are used and P. SCAN is “Off”, you will not see a picture. If the set-top box has a VIDEO (yellow) the supplied yellow video cable into that jack and to the Klipsch system’s SAT/CABLE/HD INPUT COMPOSITE... -
Page 7: Step 3B: Tv Audio Connection
HD), simply connect the Audio OUTPUT jacks on the TV to the AUDIO INPUT jacks on the Klipsch system. If you want the TV sound to come through the Klipsch system, you need to make this audio connection. -
Page 8: Step 4: Connect Klipsch System To The Tv's Input
KLIPSCH CONTROLLER If your TV has an HDMI INPUT, connect the corresponding HDMI cable (not supplied) from the HDMI OUTPUT of the Klipsch system to the HDMI INPUT of the TV. If you’re using COMPONENT jacks or HDMI and your TV supports progressive scanning technology (see the TV owner’s manual if you... -
Page 9: Step 5: Connect The Speakers
This staggering helps smooth the bass range. Each speaker can be set on its bottom or side. If you set them on the side and want to turn the Klipsch logo, carefully pull the logo forward, turn and release it. -
Page 10: Step 6: Connect Other Components (Optional)
Connecting a component to AuX 2 INPuT (side) The AUX 2 INPUT jacks on the side of your Klipsch system were designed for convenience when connecting temporary components, such as a video game system or a digital camera/camcorder. -
Page 11: Step 7: Connect Am And Fm Antennas
STeP 7: Connect AM and FM Antennas (supplied) The back of your Klipsch System has jacks for the AM and FM antennas that were packed with your system. Unwind the wires for each antenna to provide the best reception. An outdoor antenna may be used in place of the supplied indoor antennas. -
Page 12: Step 9: Complete The On-Screen Setup
Klipsch system. AUX 1: Choose this option if you connected audio from the TV to one of the audio options in the AUX 1 INPUT section on the back of the Klipsch system. AUX 2: Choose this option if you connected the TV’s audio to one of the AUX 2 INPUT audio options on the side of the Klipsch system. - Page 13 RDS (Radio Data System): RDS is the system that allows broadcasters to embed programming information in to the radio signal, such as the name of the artist or song. Your Klipsch system is RDS-enabled. If you want to turn on RDS, choose On and press radio station will appear on the Klipsch display).
-
Page 14: Your Klipsch Controller
(currently referred to as DTS). Film director Steven Spielberg was one of the company’s initial investors. Spielberg films use the DTS audio format. P.SCAN (Progressive Scan) Lights if the P.SCAN switch on the back of the Klipsch system is in the ON position. OPEN/CLOSE... -
Page 15: The Basics
(DISC, AM/FM, SAT/CAB) or keep pressing SOURCE on the front of your Klipsch system to access the different options. When you turn on your Klipsch system, it tunes to the last source you used. The front panel indicates what source is active. -
Page 16: Chapter 2: Remote Control
ChAPTeR 2: ReMOTe CONTROL The universal remote control that came packed with your Klipsch system can be programmed to operate the basic functions of many other brands of audio and video components, such as TVs, satellite receivers, cable boxes, DVD players, and others. The design of the remote control groups the buttons to help you achieve better performance from your remote. -
Page 17: Programming Your Remote Control
Opens and closes the disc drawer. POwEr Turns the Klipsch controller on and off and tunes it to the last selected input. If the remote is programmed to operate other components, the button is used together with the component buttons and SAT/CAB) to turn the components on and off. -
Page 18: Chapter 3: Operation
Regional Coding DVD Players and DVDs are coded by region. The region codes must match in order for the disc to play. The Klipsch system’s DVD player is Region 1. You can only play Region 1 DVDs in this player. -
Page 19: Dvd And Vcd Playback
DVD and VCD Playback Features You can use the remote control to access various features during playback if the disc was formatted to support the features. LeFt ARRoW ReVeRSe PLAY Transport To move forward or backward on the disc, simply press during playback. -
Page 20: Navigating Info Banners
Navigating Info Banners Your Klipsch system is equipped with on-screen Info Banners that enable you to quickly access various playback features. The content of the banner changes depending upon the type of media you are playing, but the way you navigate the banners is the same. -
Page 21: Playing Cds
Playing CDs You’ll get maximum sound while playing audio CDs in your Klipsch system. To access playback features, press (the Info Banner appears). Time Time elapsed of the track playing Transport Resume Resumes Playback status of disc playback TIME DISPLAY:... -
Page 22: Playing Cds With Mp3 Or Jpeg Files
Playing CDs with mp3 or JPeG files What you see on the TV screen when playing CDs with audio and picture files depends upon the way the discs were formatted and the file type used. Initially, the root menu will be displayed on the left side. Folders or files will be displayed on the right and can be selected. -
Page 23: Chapter 4: Menu System
ARRoW LeFt ARRoW DoWN ARRoW On-Screen Menu System Your Klipsch CS-700 System contains on-screen menus that let you personalize settings to get the most out of your home theater experience. Navigating Menus To access the menu system, press Use the arrow buttons to move the direction you want to go. You’ll notice the menu is highlighted to let you know where you are. -
Page 24: On-Screen Menus
The Setup menu is described in Chapter 1. If you add components to your system or change how they are connected, you may need to access the Setup menu to tell your Klipsch system what is where and how it is connected. Go to page 9 for detailed instructions. -
Page 25: Parental Control
The codes are in Chapter 6, but are also provided in this menu. TV: In order for your Klipsch remote control to operate your TV, follow the instructions in Chapter 2. To enter the code for your TV, access the Control menu. -
Page 26: Chapter 5: Troubleshooting
5). • Make sure the cables are attached securely (check your connections on page 5). You must connect Klipsch output jacks to a set of the TV’s input jacks. • Check the P.SCAN switch on the back of the Klipsch system. Make sure it is in the OFF position unless you are certain your TV supports progressive scan. -
Page 27: Chapter 6: Care And Maintenance
ChAPTeR 6: CARe AND MAINTeNANCe Klipsch System • If your unit has been stored in a cool place for any length of time, during a journey for example, wait for about 2 hours before using it. • Keep the equipment away from sources of heat, such as a stove or radiator. -
Page 28: Remote Control Codes
Remote Control Code Lists Audio-Digital tape Star Trak ... 3021 (AuX 1 / AuX 2 buttons) STS ... 3020 Sony ... 5043 SuperDish ...3023, 3025 Toshiba ...3008, 3029 Cable Uniden ...3016, 3017, 3041 (SAt-CAB / AuX 1 / AuX 2 Buttons) Zenith ...3009, 3022 ABC ...4000, 4001, 4002, 4030 Archer ... - Page 29 Remote Control Code Lists (continued) ... 0073, 0075, 0078, 0092, Sharp ...5028, 5035 ... 0093, 0120, 0131, 0132, Sony ... 5026 ...0134, 0139, 0141 Sylvania... 5044 Signature... 0071 Toshiba ... 5024 Signature 2000...0115, 0132 Zenith ... 5061 Sony ... 0002, 0018, 0026, 0098, ...0100, 0121, 0123, 0134 Soundesign ...0073, 0075, ...
-
Page 30: Warranty
(subject to the terms set forth below) for a period of five (5) years from the date of purchase. During the Warranty period, KLIPSCH will repair or replace (at KLIPSCH’s option) this product or any defective parts (excluding electronics and amplifiers). -
Page 31: Connection Overview
Output jacks send the signal OuT from your Klipsch system to the TV (for video) and to the speaker system (for audio) For instance, in order to see the DVD movie you’re playing in your Klipsch system, you must connect cables to the TV so you can see the picture on the TV screen. Therefore, you connect a cable to the output jack on the Klipsch system (sending the DVD signal OUT to the TV) and connect the other end of that cable to the matching input jack(s) on the TV. - Page 32 For over 60 years, we’ve made speakers for people who are as passionate about great sound as we are. That’s why every Klipsch speaker is horn-loaded to create a remarkably accurate listening experience for your music and movies. From our smallest satellites to our acclaimed professional theater installations, our speakers deliver sound that’s so lifelike, you have to feel it to believe it.