Table of Contents
Advertisement
Quick Links
Download this manual
See also:
User Manual
Trademarks
NETGEAR, the NETGEAR logo, and Connect with Innovation are trademarks
and/or registered trademarks of NETGEAR, Inc. and/or its subsidiaries in the
United States and/or other countries. Information is subject to change without
notice. © NETGEAR, Inc. All rights reserved.
Compliance
For the current EU Declaration of Conformity, visit
http://support.netgear.com/app/answers/detail/a_id/11621/.
For regulatory compliance information, visit
http://www.netgear.com/about/regulatory/.
See the regulatory compliance document before connecting the power supply.
NETGEAR, Inc.
350 East Plumeria Drive
San Jose, CA 95134 USA
August 2014
N900 Wireless Dual Band
Gigabit Router
Model WNDR4500v2
Installation Guide
Package Contents
The box contains the following items.
Ethernet cable
Power adapter
N900 Wireless Router
(with stand attached)
Advertisement
Table of Contents

Related Manuals for NETGEAR WNDR4500v2


Summary of Contents for NETGEAR WNDR4500v2
-
Page 1: Package Contents
Package Contents Trademarks NETGEAR, the NETGEAR logo, and Connect with Innovation are trademarks and/or registered trademarks of NETGEAR, Inc. and/or its subsidiaries in the The box contains the following items. United States and/or other countries. Information is subject to change without notice. -
Page 2: Power On The Router
Unplug your modem’s power. If it has a your product and use it to register your product at battery backup, remove the battery. https://my.netgear.com. You must register your product before you can use NETGEAR 2. Connect your modem. 3. Power on the router. 4. Connect a computer. -
Page 3: Table Of Contents
TiVo ..........16 NETGEAR genie App ........17... -
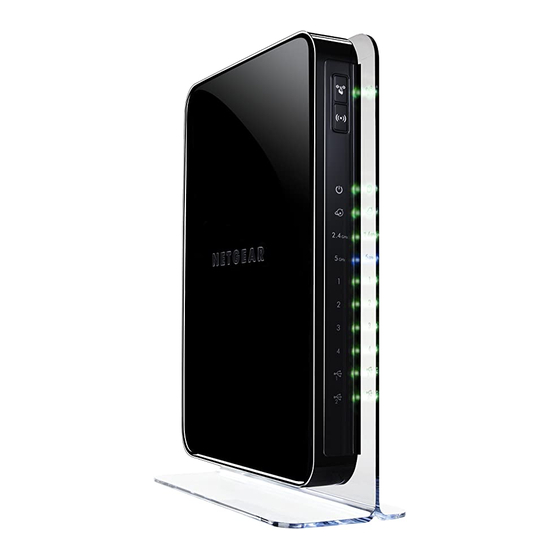
Page 4: Getting To Know Your Router
Getting to Know Your Router Most connectors are on the rear panel. USB ports LAN ports 1–4 (Internet) Reset port Power connector Power On/Off The following figure shows the front panel. WPS button WPS LED WiFi On/Off button Power LED Internet LED 2.4 GHz LED 5 GHz LED... -
Page 5: Led Description
The router has two buttons and several LEDs on the front. • WPS button. Use WPS to add a wireless computer or device to the network. • WiFi On/Off button. Turn the wireless radios on and off. Table 1. LEDs Description •... - Page 6 Table 1. LEDs (continued) Description 5 GHz • Solid blue. The wireless radio is operating. • Blinking. The router is in WPS mode. • Off. The wireless radios is off. LAN ports 1–4 • Solid green. The LAN port has detected a 1,000 Mbps link with an attached device.
-
Page 7: Install Your Router
Install Your Router Make sure that your Internet service is active before you install the router. Follow steps 1 through 5. 1. Prepare your modem. DSL or cable a. Unplug the power to the modem. b. If the modem has a battery backup, remove its batteries. -
Page 8: Power On The Router
3. Power on the router. Modem Router Power On/Off button a. Connect the power adapter to the router and the power cord. b. Plug the power cord into an outlet. c. Before going to Step 4, wait for the 2.4 GHz LED on the front panel of the router to turn green. -
Page 9: Connect A Computer
Or connect wirelessly by using the preset wireless security settings on the label on the product label. 5. Open a browser. NETGEAR genie displays and guides you through the installation. If genie does not display, close and reopen the browser and type http://www.routerlogin.net in the address bar, or see... -
Page 10: Preset Wireless Security
This information is on the product label. NETGEAR recommends that you do not change the preset SSID or password. If you do change the settings, the security SSID and password on the product label no longer apply. -
Page 11: Wireless Network Settings
Wireless Network Settings For easy reference, record here the default preset wireless settings that are printed on the label. WiFi network name (SSID): Network key (Password): If you change the default settings, record them here for easy reference, and then store this booklet in a safe place: WiFi network name (SSID): Network key (Password): To retrieve or update your wireless password, type... -
Page 12: Join The Wireless Network
Wi-Fi Protected Setup (WPS) lets you connect to a secure WiFi network without typing its password. Instead, you press a button or enter a PIN. NETGEAR calls WPS Push 'N' Connect. Some older WiFi equipment is not compatible with WPS. WPS works only with WPA2 or WPA wireless security. -
Page 13: Access The Router To Make More Changes
Access the Router to Make More Changes After you use NETGEAR genie to set up the router, you can log in to the router to view or change its settings. To log in to the router: Launch a web browser from a computer or wireless device that is connected to the router. -
Page 14: Change Your Password
Select ADVANCED > Administration > Set Password. The Set Password screen displays: Type your old password, and type the new password twice. NETGEAR recommends that you use the password recovery feature when you change your password. Select the Enable Password Recovery check box. -
Page 15: Troubleshooting
Troubleshooting If the browser does not display the web page: • Restore the router to factory default settings. Use a paper clip to press the Reset button for 5 seconds. Release the button when you see that the Power LED is blinking amber. The router reboots immediately. -
Page 16: Readyshare Access
Note: If your USB device requires a power supply, you must use it when connecting your USB device to a NETGEAR router or gateway. It might take up to 2 minutes before the USB drive is ready for sharing after it is connected to the router. -
Page 17: Readyshare Printer
On each computer that will share the printer: a. Install the current USB printer driver software (available from the printer manufacturer). b. Download and install the NETGEAR USB Control Center utility (available in the ReadySHARE Printer area at www.netgear.com/readyshare). Note: •... -
Page 18: Time Machine
Time Machine works on Mac computers only, and automatically backs up your computer to a USB hard drive connected to it. To back up a Mac: Visit http://www.netgear.com/readyshare. ® In the Time Machine Compatible area, click Easy to Set-up: Instructions, and follow the instructions. -
Page 19: Netgear Genie App
Network Map ReadySHARE Number of devices 16 Click here Click here Visit the NETGEAR genie web page at www.netgear.com/genie. The genie app provides these functions: • Internet. Monitor and repair Internet connectivity issues for both wired and wireless connections. •... -
Page 20: Netgear Genie Mobile App
To install the genie mobile app: Use your mobile device to navigate to the Apple AppStore or Google Play for Android and search for NETGEAR genie. You can use the following QR codes to speed up this process: iPad App...