Table of Contents
Advertisement
Quick Links
Download this manual
See also:
Service Manual
Advertisement
Table of Contents

Related Manuals for FUNAI HT2-M200

Summary of Contents for FUNAI HT2-M200
-
Page 1: Home Theater System
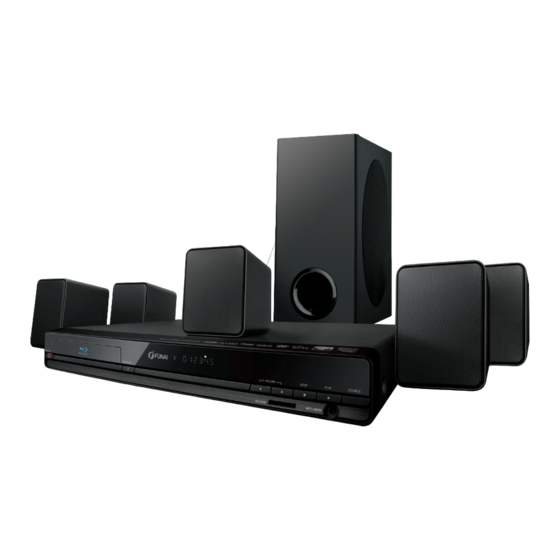
Home Theater System HT2-M200 OWNER’S MANUAL For Customer Use: Carefully read the Model No. and Serial No. located at the back of the unit and enter the information below. Retain this information for future reference. Model No. __________________________ Serial No. -
Page 2: Introduction
INTRODUCTION Safety Instructions WARNING: TO REDUCE THE RISK OF FIRE OR ELECTRIC SHOCK, DO NOT EXPOSE THIS APPLIANCE TO RAIN OR MOISTURE. The lightning flash with arrowhead symbol, CAUTION within an equilateral triangle, is intended to alert the user to the presence of uninsulated RISK OF ELECTRIC SHOCK “dangerous voltage”... - Page 3 INTRODUCTION Installation Location A NOTE ABOUT RECYCLING This product’s packaging materials are recyclable and For safety and optimum performance of this unit: can be reused. Please dispose of any materials in • Install the unit in a horizontal and stable position. accordance with your local recycling regulations.
- Page 4 INTRODUCTION Maintenance Cleaning the Unit Use a soft cloth slightly moistened with a mild detergent solution. Do not use solutions containing alcohol, spirits, ammonia or abrasives. Cleaning Discs If a disc becomes dirty, clean it with a cleaning cloth. Wipe the disc from the centre out.
-
Page 5: Table Of Contents
INTRODUCTION Supplied Accessories • Remote Control • Owner’s Manual • Batteries (R6,1.5V × 2) • Quick Start Guide • Video cable • CD-ROM • FM wire antenna • Warranty card • 1 centre, 2 front, 2 rear speakers and 1 subwoofer Contents INTRODUCTION Search....................28... -
Page 6: Trademark Information
INTRODUCTION DivX®, DivX Certified® and associated Trademark Information logos are registered trademarks of DivX, Inc. and are used under license. HDMI, the HDMI Logo, and High-Definition Multimedia Interface are trademarks or Windows Media and the Windows registered trademarks of HDMI logo are trademarks or registered Licensing LLC in the United trademarks of Microsoft Corporation... -
Page 7: Features
INTRODUCTION Playing Back AVCHD Files Features This unit supports playback of AVCHD format files (new format for high definition video camcorders) recorded on Blu-ray Disc disc/SD card. Your high definition personal archive is You can enjoy Blu-ray Disc which is capable of storing five playable in HD quality. -
Page 8: Front Panel
INTRODUCTION Front Panel 9* 10 STANDBY/ON OPEN/CLOSE VOLUME STOP PLAY SOURCE SD CARD MP3 LINE-IN (*) The unit can also be turned on by pressing these buttons. Display 11. MP3 LINE-IN jack STANDBY/ON Q button VOLUME K / L buttons 12. -
Page 9: Opening Screen
INTRODUCTION Installing the Batteries in the Remote Control Opening Screen Install 2 R6 (1.5V) batteries matching the polarity indicated In stop mode and “Mode Select” is set to “Network”, inside battery compartment of the remote control. opening screen is displayed. Make sure to match + and - on the batteries to the marks indicated in the battery compartment. -
Page 10: Front Panel Display
INTRODUCTION Front Panel Display * Brightness of the display can be adjusted. Refer to “Panel Display” in “List of Setup Menus” on page 40. 1. Displays repeat icon. (Appears during repeat playback.) 2. Displays media icon (disc mode or SD card mode). 3. -
Page 11: Connections
CONNECTIONS Placing the Speakers Make the following connection to ensure an optimum sound experience. Place the main unit near to the TV. Place the speakers system at normal listening ear-level and directly parallel to the listening area. Place the subwoofer at the corner of the room or at least 1 metre away from the TV. Note •... - Page 12 CONNECTIONS Better (Supports up to 1080i resolution.) Your TV COMPONENT VIDEO IN PB/CB PR/CR Component video cable No supplied cables are used in this connection: Please purchase the necessary cables at your local store. Basic (Supports only 480i/576i resolution.) Your TV VIDEO IN Video cable •...
-
Page 13: Connecting Speakers And Subwoofer
CONNECTIONS Connecting Speakers and Subwoofer Subwoofer Front centre Rear right Rear left Front right Front left Connect the speaker cables to the matching colour sockets on the speakers. Connect all the speakers and subwoofer to the matching sockets at the rear of the main unit. Make sure that the colours of the cables and sockets are matched. -
Page 14: Connecting Portable Media Player
CONNECTIONS Connecting Portable Media Player Network Connection with LAN By connecting this unit to the Internet, you can update the software via the Internet or access the BD-Live and vTuner STANDBY/ON VOLUME STOP PLAY SOURCE OPEN/CLOSE service. SD CARD MP3 LINE-IN Hub or broadband router MP3 LINE-IN Networking equipment... -
Page 15: Finding The Video Channel On Your Tv
CONNECTIONS After you have completed all the connections, you must find the correct video channel (external input channel) on your TV. Finding the Video Channel on Your TV After you have completed all the connections, you must find the correct video channel (external input channel) on your TV. -
Page 16: Playback
PLAYBACK Information on Playback Before you start playing back a disc, read the following information. Playable Discs and Files Readable cards Playable files / data ® SD Memory Card (8 MB - 2 GB) AVCHD, DivX , MP3, WMA, This unit is compatible to play back the following discs / JPEG, picture-in-picture SDHC Memory Card (4 GB - 8 GB) files. - Page 17 PLAYBACK Colour Systems Note for SD Memory Cards BD and DVD are recorded in different colour systems • This unit supports SD Memory Card with FAT12/ throughout the world. The most common colour system, FAT16 file system, and SDHC Memory Card with FAT32 used primarily in the U.K.
- Page 18 PLAYBACK Chapter information On-Screen Display <Title / Chapter information for BD / AVCHD> You can check information about the current disc by pressing [DISPLAY]. 1/10 To call the on-screen display menu, press [DISPLAY] during playback. Every time you press [DISPLAY], the information changes.
-
Page 19: How To Insert A Disc
PLAYBACK File name information How to Insert a Disc File_name_001 Press [OPEN/CLOSE A] to open the disc tray. Place the disc on the disc tray with its label side facing up. 1. Media icon and file name ® : DivX files : MP3 files : WMA files... -
Page 20: Playing Back A Bd, Dvd Or A Disc With Avchd Files
PLAYBACK Playing Back a BD, DVD or a Disc with Using the Title / Disc / Pop-up Menu AVCHD Files Many of BD-video and DVD-video discs contain title menu (BD-video / DVD-video / AVCHD), disc menu (DVD-video) Insert a disc (refer to “How to Insert a Disc” on or pop-up menu (BD-video) which guides you through the page 19 ). -
Page 21: Playing Back An Audio Cd Or A Disc With Divx / Mp3 / Windows Media™ Audio / Jpeg Files
PLAYBACK 5. Current page / Total page number Playing Back an Audio CD or a Disc 6. Playback status with DivX ® / MP3 / Windows Media™ 7. Media icon Audio / JPEG Files : Folder : audio CD tracks : DivX ®... -
Page 22: Kodak Picture Cd
PLAYBACK KODAK Picture CD Reading the SD Memory Card ® This unit can also run JPEG files stored on KODAK Picture You can play back the AVCHD / DivX / MP3 / WMA / JPEG CD. You can enjoy picture images on the TV set by playing files in an SD Memory Card. -
Page 23: About Divx And Divx Vod
PLAYBACK ® ® About DivX and DivX Caution • Do not remove the SD Memory Card or turn the unit to the standby mode while the contents of the card are in playback. It may result in malfunction or loss of Useful tips for purchased or rented official DivX ®... -
Page 24: Playing Back Divx With Divx External Subtitle
PLAYBACK ® ® Fast Forward / Fast Reverse Playing Back DivX with DivX External Subtitle Subtitles created by the user can be displayed during During playback, press [D (forward)] ® DivX playback. repeatedly for fast forward. Follow steps 1 to 3 in “Playing Back an Audio During playback, press [E (reverse)] repeatedly CD or a Disc with DivX®... -
Page 25: Step By Step Playback
PLAYBACK Step by Step Playback Programme Playback You can play back the disc/card in your desired order. In pause mode, press [F (pause)] repeatedly. In stop mode, press [MODE]. Every time you press [F (pause)], playback will advance one step at a time. Use [K / L] to select a track / folder / file, then press [ENTER]. -
Page 26: Random Playback
PLAYBACK Press [B (play)] to start programme playback. Random Playback • The programme playback will start. To exit from the programme playback mode: • Press [RETURN] in stop mode. This function shuffles the playback order of tracks / files. Note In stop mode, press [MODE] twice. -
Page 27: Noise Reduction
PLAYBACK Noise Reduction Note • The secondary audio will not be output when the secondary audio is set to “Off” or when “BD Audio Mode” is set to “HD Audio Output”. Refer to Reduces the noise of the playback picture. “Switching Audio Soundtrack”... -
Page 28: Search
PLAYBACK Using [SEARCH] Note By using [SEARCH], you can select the following search • You must connect the unit to the Internet and set up modes. necessary settings in order to use BD-Live. • For certain discs, “BD-Live Setting” may need to be Search mode Available media changed. -
Page 29: Switching Subtitles
PLAYBACK You can select the format of audio and video as you prefer depending on the contents of the disc you are playing back. Switching Subtitles Switching Audio Soundtrack Some video materials may have subtitles in 1 or more When playing back video material recorded with 2 or more languages. -
Page 30: Setting The Bd Audio Mode
PLAYBACK Note Note • The secondary audio will not be output when the • In “Mix Audio Output” mode, if there is no secondary secondary video is not displayed or when “BD Audio and interactive audio, the audio will be output as Mode”... -
Page 31: Selecting Surround Mode
PLAYBACK Selecting Surround Mode Selecting Sound Effect Mode Select the surround mode for the audio output from 5.1ch Select the sound effect mode for the audio output from speakers. 5.1ch speakers to suit your video or music. During playback, press [SURROUND] During playback, press [SOUND MODE] repeatedly to select the desired surround repeatedly to select the desired sound effect... -
Page 32: Switching Active Source Mode
PLAYBACK To cancel sleep timer : Switching Active Source Mode Press [SLEEP] repeatedly until “SLP OFF” is displayed. You can change the active source mode to the desired external audio inputs and enjoy audio from the connected Note device with the multi-channel surround sound capabilities. •... -
Page 33: Enjoying Internet Radio With Vtuner
PLAYBACK Deleting a Preset Radio Station Note Follow steps 1 to 2 in “Presetting Radio • While auto tuning, audio will be muted until this unit finds a radio station with sufficient signal strength. Stations” on page 32. Use [RED] / [GREEN] / [YELLOW] / [BLUE] to select the desired preset station. - Page 34 PLAYBACK “Recently : List of stations which are Guide to the Playback Screen Played” recently played e.g.) Recently Played “Favorites” : List of your favourite radio stations “My Added : List of stations which are added Stations” on vTuner website (This category will appear only >...
- Page 35 PLAYBACK Remove from Favourite List Reset the Station List You can remove all stations in “Recently Played”, Follow step 1 in “Internet Radio Playback” on “Favorites” and “My Added Stations”. page 33. Follow step 1 in “Internet Radio Playback” on Use [K / L] to select “Favorites”, then press page 33.
-
Page 36: Function Setup
FUNCTION SETUP In the setup menu screen, you can access various kinds of menus, and customise them as you prefer. To call up the setup menu screen, press [SETUP]. Then follow the instructions below to navigate through the screen. < Setup menu screen > 1. - Page 37 FUNCTION SETUP Category Menus / Options Description Language Player Menu* Auto(XXX) Sets the language for player menu. (on-screen display menu) English “Auto”: Deutsch Activates the Get & Set Menu Français Language function (refer to page 45). Polski • “Auto” is available only when “fun- Italiano Link(HDMI CEC)”...
- Page 38 FUNCTION SETUP Category Menus / Options Description Video Still Mode Auto Adjusts picture resolution and quality in still mode. Field “Auto”: Frame Automatically selects the best resolution setting (“Frame” or “Field”) based on the data characteristics of the pictures. “Field”: Stabilises the pictures, although the picture quality may become coarse due to the limited amount of data.
- Page 39 FUNCTION SETUP Category Menus / Options Description Audio BD Audio Mode Mix Audio Output For BD, selects whether to output the secondary and HD Audio Output interactive audio with primary audio if it is available or only the primary audio. Refer to “Setting the BD Audio Mode”...
- Page 40 FUNCTION SETUP Category Menus / Options Description Audio Speaker Setup Delay Time Distance Feet Sets the unit of measure for • This is a parameter “Delay Time”. Meters for optimizing the Front 0 to 4.5 m Sets the distance from the timing at which (Default : 0.9 m) listening point to each speaker...
- Page 41 FUNCTION SETUP Category Menus / Options Description ® Others DivX Registration Code Your registration code is : This menu item provides you with the DivX ® VOD registration VVVVVVVVVV To learn more visit code. The DivX ® registration www.divx.com/vod code is required when downloading DivX ®...
- Page 42 FUNCTION SETUP Category Menus / Options Description Others Network Connection Enable(Custom) Connection Auto Set the connection speed. Speed In most cases, you can connect 10BASE Half to the Internet without making 10BASE Full any changes to the default 100BASE Half setting.
-
Page 43: Tv Aspect
FUNCTION SETUP TV Aspect A “Custom” A “TV Aspect” [SETUP] “Video” Use this feature to adjust the aspect ratio of the video source which is different from your TV’s ratio to fit your TV monitor without distorting the picture. Descriptions of each setting are as follows: Video source Your TV Option... - Page 44 FUNCTION SETUP “Audio Output” setting A “HDMI Normal” “HDMI LPCM” “HD Audio “Mix Audio “HD Audio “Mix Audio “BD Audio Mode” setting A Output” Output” Output” Output” Media Audio Source Which audio format can be output depends on the compatibility of the connected device.
-
Page 45: Parental
FUNCTION SETUP To Cancel Parental Lock Temporarily Parental Some discs allow you to cancel the parental lock temporarily. With those discs, the message below will A “Custom” A “Parental” [SETUP] appear when you try to play them back. Some BD-videos or DVD-videos feature a parental lock “Enter current password. -
Page 46: Network Connection
Note • Depending on the connected TV, two device names (“FUNAI BD” and “Audio System”) may be displayed • If the connection test passes, you are ready to use in the device list of TV’s menu screen. To select this BD-Live, vTuner service or network update function unit, please select “FUNAI BD”. - Page 47 FUNCTION SETUP [ENTER] 3-d) After you enter all correctly, press Enable(Custom) • Confirmation message will appear. Select “Yes” In following cases, select “Enable(Custom)” to set each to complete the settings. setting as necessary. Press [RETURN] to go back to the previous - When connection test failed with the setting of screen, or press [SETUP] to exit.
- Page 48 FUNCTION SETUP BD-Live Setting Press [RETURN] to go back to the previous screen, or press [SETUP] to exit. You can limit Internet access for BD-Live discs. (The default setting is “Allow”.) Note Follow steps 1 to 4 in “Connection Test” on page 46.
-
Page 49: Software Update
Press [ENTER]. Note • The unit will start updating the software version. • Please visit www.funai.eu to download the latest • It may take a while to complete the updating. software version. After updating finishes, this unit will restart and open the disc tray automatically. -
Page 50: Initialise
FUNCTION SETUP Initialise A “Initialize” [SETUP] Initialise the setting or SD Memory Card. In stop mode, press [SETUP]. Use [K / L] to select , then press [ENTER]. Use [K / L] to select a desired option, then press [ENTER]. “Setup”: Resets the setup menu to the default. -
Page 51: Others
OTHERS Troubleshooting If the unit does not perform properly when operated as instructed in this manual, check the unit, consulting the following checklist. Problem Solution No power. - Check if the mains cable is properly connected. - Unplug the mains cable once, and wait for 5-10 seconds and then plug it in again. - Page 52 OTHERS Problem Solution The unit does not respond to the - Aim the remote control directly at infrared sensor window on the front panel. remote control. - Reduce the distance to infrared sensor window. - Replace the batteries in the remote control. - Re-insert the batteries with their polarities (+ / - signs) as indicated.
-
Page 53: Glossary
OTHERS Glossary Analogue Audio ® DivX An electrical signal that directly represents sound. ® DivX is a codec (compression/decompression) that can Compare this to digital audio which can be an electrical compress pictures to a very small amount of data. The signal, but is an indirect representation of sound. - Page 54 OTHERS HDMI (High-Definition Multimedia Interface) Region Code A digital interface between audio and video source. It can Regions associate discs and players with particular areas of transmit component video, audio, and control signal with the world. This unit will only play back discs that have one cable connection.
-
Page 55: Language Code List
OTHERS Language Code List Language Code Language Code Language Code Language Code French [FRE] 5264 Macedonian 5957 Shona 6560 Abkhazian 4748 Frisian 5271 Malagasy 5953 Sindhi 6550 Afar 4747 Galician 5358 Malay 5965 Singhalese 6555 Afrikaans 4752 Georgian 5747 Malayalam 5958 Siswat 6565... -
Page 56: Specifications
OTHERS Specifications General Signal system NTSC/PAL colour Power requirements 220 - 240 V AC, 50 Hz Power consumption 70 W (standby: 0.7 W) Total output power (Amplifier) Home theater mode: 1000 W FTC* output power: 700 W *(Main Ch @ 1 kHz within 10% THD, Sub Ch 60 Hz within 2.5% THD) Dimensions (width x height x depth) 435 x 59 x 297 mm Weight... -
Page 57: Network Service Disclaimer
OTHERS Network Service Disclaimer Content and services made available through this product are transmitted by third parties by means of networks and transmission facilities over which Company has no control and third party services may be terminated or interrupted at any time, and Company makes no representation or warranty that any content or service will remain available for any period of time. - Page 58 MEMO...
- Page 59 MEMO...
-
Page 60: Declaration Of Conformity
Model: HT2-M200 Trade Name: Funai is in compliance with the related regulations. Printed in China 1VMN29873 / E1T12ED ★★★★★ Web Site: http://www.funai.eu © 2010-2011 FUNAI ELECTRIC All rights reserved. * 1 V M N 2 9 8 7 3 *...