Table of Contents
Advertisement
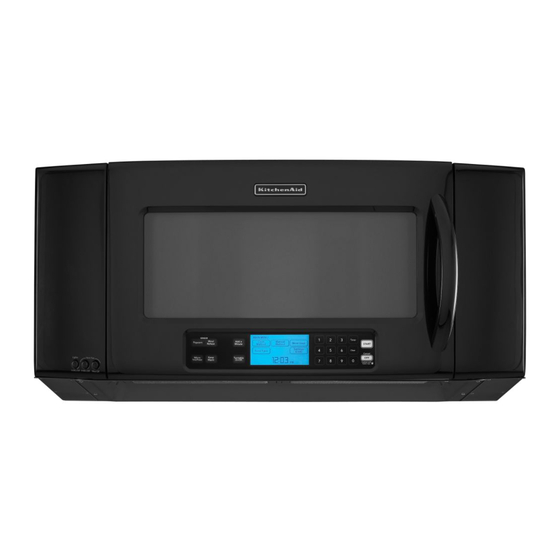
MICROWAVE HOOD COMBINATION
Use & Care Guide
For questions about features, operation/performance, parts, accessories or service, call: 1-800-422-1230,
or visit our website at... www.kitchenaid.com
Table of Contents............................................................................................................ 2
Models KHMS2050S KHMS2056S
W10131854
Advertisement
Table of Contents

Related Manuals for KitchenAid KHMS2056SBL


Summary of Contents for KitchenAid KHMS2056SBL
- Page 1 MICROWAVE HOOD COMBINATION Use & Care Guide For questions about features, operation/performance, parts, accessories or service, call: 1-800-422-1230, or visit our website at... www.kitchenaid.com Table of Contents... 2 Models KHMS2050S KHMS2056S W10131854...
-
Page 2: Table Of Contents
MICROWAVE HOOD COMBINATION SAFETY ...3 Electrical Requirements ...4 PARTS AND FEATURES...5 Microwave Oven Cavity Coating ...5 Microwave System – OPTIMAWAVE™ Technology ...5 Turntable ...5 ACCESSORIES ...6 Cooking Rack...6 Browning Pan and Handle ...6 MICROWAVE OVEN CONTROL...7 Control Panel...7 Interactive Touch Display...7 Main Menu...8... -
Page 3: Microwave Hood Combination Safety
■ Oversized foods or oversized metal utensils should not be inserted in the microwave oven as they may create a fire or risk of electric shock. ■ Do not clean with metal scouring pads. Pieces can burn off the... -
Page 4: Electrical Requirements
■ Do not cover or block any openings on the microwave oven. ■ Do not store this microwave oven outdoors. Do not use the microwave oven near water - for example, near a kitchen sink, in a wet basement, or near a swimming pool, or similar locations. -
Page 5: Parts And Features
E. Halogen cooktop lights (2) I. Interactive touch display Microwave Oven Cavity Coating The microwave oven has a durable, nonstick coating that resists soil buildup by making cleaning easier than in conventional microwave ovens. See “General Cleaning” section for cleaning instructions. -
Page 6: Accessories
When the manual cycle is over, the turntable will automatically default to the “ON” mode. The following accessories have been provided with your new microwave oven. Any of the parts may be ordered for replacement. Cooking Rack The rectangular cooking rack is ideal for two-level cooking. It provides extra cavity space for cooking 2 or more containers at the same time. -
Page 7: Microwave Oven Control
MICROWAVE OVEN CONTROL The microwave oven’s controls are accessed through its control panel and interactive touch display. NOTE: Due to the sensitivity of the control panel, we have provided special instructions for cleaning the panel as well as the touch screen display. -
Page 8: Main Menu
The Main Menu is displayed on the default screen. From the Main Menu, all automatic cooking programs can be activated; all manual cooking can be programmed; settings can be adjusted; and instructions, preparation and tips can be accessed. The following demonstrates how to pan brown 2 boneless chicken breasts, using the Cook Method menus, starting from the Main Menu: 1. -
Page 9: Settings & Info
While the poultry breasts are being pan browned, the cooking animation and countdown are active in the display. About halfway through the cycle, the microwave oven will stop, and the display will direct you to turn over the poultry breasts. -
Page 10: Clock
Clock This is a standard 12-hour clock (12:00 AM-11:59 PM). When power is first supplied to the microwave oven, or after a power failure, the “Welcome” screen will appear, asking whether you would like to set the clock. If you choose to set the clock at that time, the display will take you directly to the Clock screen. -
Page 11: Learning Mode
If non-sensor cooking is interrupted, touching the START control pad will resume the preset cycle. If the microwave oven has not been in use and the door has not been opened in the past 5 minutes, the cooking function will not start. -
Page 12: Timer
NOTE: The Timer does not start or stop the microwave oven. A. Timer indicator While the Timer is in use, the microwave oven can still operate. During a microwave oven operation, the Timer countdown will be minimized. If the Timer ends while microwave oven is still operating, the end-of-Timer tones will sound, and the set operating mode will remain active on the screen. -
Page 13: Trucapture Vent Fan And Cooktop Lights
TRUCAPTURE ® and Cooktop Lights Lights Vent Fan The microwave oven’s hood controls, on the lower, left side of the microwave oven (see “Parts and Features”) operate the vent fan and cooktop lights. TRUCAPTURE ® Vent Fan The vent fan has 3 regular speeds: high, medium and low. The vent fan also has a max speed, which is the highest speed. -
Page 14: Microwave Oven Use
■ To avoid damage to the microwave oven, do not lean on or allow children to swing on the microwave oven door. ■ To avoid damage to the microwave oven, do not operate when it is empty. -
Page 15: Cookware And Dinnerware
If not used properly, arcing (a blue flash of light) can occur and cause damage to the microwave oven. OK for Use Racks and bakeware supplied with the microwave oven (on some models), aluminum foil for shielding, and approved meat thermometers may be used with the following guidelines: ■... -
Page 16: Manual Cooking
Add a Minute The ADD A MINUTE control automatically starts the microwave oven at 100% power for 1 minute, and adds 1 minute of cook time, up to 10 minutes, with each additional touch of the control. Time may be added in 1-minute increments by touching ADD A MINUTE, or by minutes and seconds using the interactive touch screen display. -
Page 17: Keep Warm
Doing so can result in food poisoning or sickness. Hot cooked food can be kept warm in the microwave oven. The Keep Warm function uses 10% cook power. Keep Warm can be used by itself, or it can be programmed to follow a cooking cycle. -
Page 18: Programmed Cooking
■ For best results, do not place bag on cooking rack. ■ To avoid damage to the microwave oven, do not use regular paper bags or glassware. ■ Pop only 1 package of popcorn at a time. -
Page 19: Using Food Type
“Cook Method” on Main Menu, touch “Reheat,” and then follow screen prompts to make your selections, prepare your food and/ or microwave oven for reheating, and start the cycle. The Defrost menu has a selection of main food categories, plus a shortcut to Manual Defrost (see “Manual Method Cooking”... -
Page 20: Cook
When the water boils, the microwave oven will stop and prompt you to add the pasta. If manually simmering, place the covered dish of water in the microwave oven, and set a simmer time of 1 second. The water will start to boil, the 1-second simmer time will end, and the microwave oven will stop. -
Page 21: Melt
■ Do not remove the lid while the steamer is inside the microwave oven, as the rush of steam will disrupt the sensor readings. ■ The steamer will become hot. Always use oven mitts or pot holders when handling. -
Page 22: Food Type Chart
Use this chart as a reference for menu items available in the “Food Type” menu BREAKFAST FOODS Bacon Cook or Browning Pan Cereal Instant Cook Fried - Cook or Browning Pan Omelet - Cook or Browning Pan Poached - Cook Scrambled - Cook DAIRY/DESSERT... - Page 23 VEGETABLE Canned Vegetable Cook Fresh Vegetable Asparagus - Cook or Steam Cook Broccoli - Cook or Steam Cook Carrots - Cook or Steam Cook Cauliflower - Cook or Steam Cook BREAD Bagel Small - Defrost Medium - Defrost Large - Defrost CASSEROLE Casserole, Leftover Reheat...
-
Page 24: Cook Method Chart
MEAT Beef Ground Beef - Defrost or Cook Hamburger Patty - Cook or Browning Pan Steak Defrost Hot Dog Cook POULTRY Chicken Nuggets Cook or Browning Pan Chicken Pieces, Boneless Defrost or Cook Chicken Pieces, Bone-In Defrost or Cook Use this chart as a reference for menu items and amounts available in the “Cook Method” menu. REHEAT Beverage 1 or 2 cups (250-500 mL) - Page 25 COOK Cereal/Oatmeal Grits - Quick: senses 1-4 servings - Regular: senses 1-4 servings Hot Wheat: 1-4 servings Instant Cereal: 1-4 servings Oatmeal - Instant: 1-4 servings - Regular: 1-4 servings Couscous senses 1-4 servings Fried: 1-4 eggs Omelet: 2-4 eggs Poached: 1-4 eggs Scrambled: 1-4 eggs Fish/Seafood...
- Page 26 BOIL & SIMMER Couscous senses 1-4 servings Dried Pasta Fettuccine: senses 2-8 oz (57-227 g) Macaroni: senses 0.5-2.0 cups (125-500 mL) Penne: senses 0.5-2.0 cups (125-500 mL) Rotini: senses 0.5-2.0 cups (125-500 mL) Spaghetti: senses 2-8 oz (57-227 g) Fresh Pasta Linguine: senses 9 or 18 oz (255 or 510 g) Ravioli: senses 9 or 18 oz (255 or 510 g) Tortellini: senses 9 or 18 oz (255 or 510 g)
-
Page 27: Microwave Oven Care
MICROWAVE OVEN CARE IMPORTANT: Before cleaning, make sure all controls are off and the microwave oven is cool. Always follow label instructions on cleaning products. Soap, water and a soft cloth or sponge are suggested unless otherwise noted. GREASE FILTERS Do not use ammonia or corrosive cleaning agents such as lye- based oven cleaners. -
Page 28: Replacing Filters
RACK SUPPORTS To avoid soil buildup which may lead to arcing and cause damage to the microwave oven, clean rack supports often. Do not use soap-filled scouring pads, abrasive cleaners, steel- wool pads, gritty washcloths or some recycled paper towels. -
Page 29: Replacing Cooktop Light
6. Plug in microwave oven or reconnect power. Replacing Microwave Oven Light The microwave oven light is a 10W low-voltage halogen capsule bulb. It will automatically come on when the door is opened and when the microwave oven is operating. See “Assistance or Service”... -
Page 30: Troubleshooting
Some steam is normal. Fan running slower than usual ■ Has the microwave oven been stored in a cold area? The fan will run slower until the microwave oven warms up to normal room temperature. Fan running during cooktop usage ■... -
Page 31: Assistance Or Service
To locate the KitchenAid designated service company in your area, you can also look in your telephone directory Yellow Pages. For further assistance If you need further assistance, you can write to KitchenAid with any questions or concerns at: KitchenAid Brand Home Appliances Customer eXperience Center... -
Page 32: Warranty
If you need service, first see the “Troubleshooting” section of the Use & Care Guide. After checking “Troubleshooting,” additional help can be found by checking the “Assistance or Service” section or by calling KitchenAid. In the U.S.A., call 1-800-422-1230. In Canada, call 1-800-807-6777.