Table of Contents
Advertisement
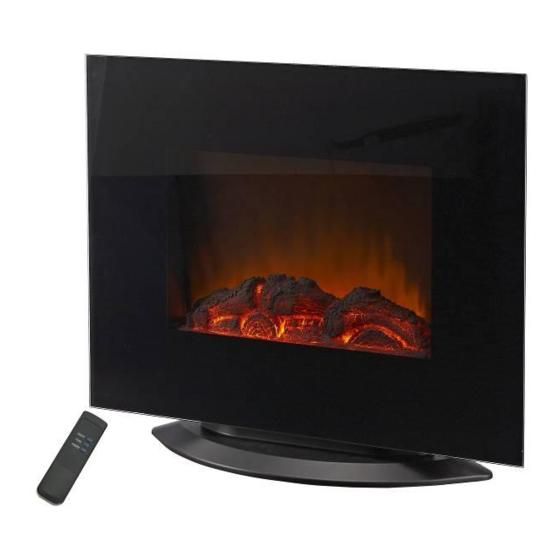
INFRARED HEATER OWNERS INSTALLATION AND USER GUIDE
C
O
M
B
I
N
A
T
I
O
C
O
M
B
I
N
A
T
I
O
Please read this entire Installation and Operating Manual BEFORE installing and using your new Infrared
Heater. Failure to fully understand and follow instructions may result in property damage, bodily injury, or
even death.
Unexpected mishaps may occur if the Infrared Heater in not used properly. For everyone's safety, follow ALL
Installation and Operating Directions.
IMPORTANT: THESE INSTRUCTIONS SHOULD BE READ CAREFULLY AND
KEEP SAFE FOR FUTURE REFERENCE.
N
T
A
B
L
E
T
O
P
/
W
N
T
A
B
L
E
T
O
P
/
W
M
o
d
e
l
:
M
o
d
e
l
:
Safety Notice
A
L
L
M
O
U
N
T
A
B
L
A
L
L
M
O
U
N
T
A
B
L
L
-
E
F
4
5
0
-
C
O
M
B
O
L
-
E
F
4
5
0
-
C
O
M
B
O
1
E
F
I
R
E
P
L
A
C
E
H
E
E
F
I
R
E
P
L
A
C
E
H
E
A
T
E
R
A
T
E
R
Advertisement
Table of Contents

Related Manuals for lifeSMART INFRARED HEATER


Summary of Contents for lifeSMART INFRARED HEATER
- Page 1 Heater. Failure to fully understand and follow instructions may result in property damage, bodily injury, or even death. Unexpected mishaps may occur if the Infrared Heater in not used properly. For everyone’s safety, follow ALL Installation and Operating Directions. IMPORTANT: THESE INSTRUCTIONS SHOULD BE READ CAREFULLY AND...
-
Page 2: Important Safety Instructions
READ AND SAVE THESE INSTRUCTIONS IMPORTANT SAFETY INSTRUCTIONS When using electrical appliances, basic precautions should always be followed to reduce the risk of fire, electric shock and injury to person, including the following: CAUTION- High temperature, keep electrical cords, drapery, and other furnishings at least 3 feet (0.9m) from the front of the heater and away from the side and rear. - Page 4 ALWAYS UNPLUG THE CORD BEFORE MOVING OR SERVICING. DO NOT IMMERSE HEATER IN WATER! Do not attempt to service the unit yourself, unless authorized by a LIFESMART technical support agent. Any servicing needed (other than those authorized by the manufacturer’s technical ...
-
Page 5: Getting Started
Getting Started 1. Remove the heater from the box. 2. Remove any packaging materials from the product. 3. Place the packaging inside the box and either store or dispose of safely. 4. Install 2 AAA Batteries (Sold Separately) into the rear of the remote as shown below. - Page 6 This section outlines the mounting of your heater to a wall (if this is how you choose to use it). To prevent any accidents (or setup/assembly) miscues, please read and understand all precautions prior to start. This ensures your safety and that all minimum mounting requirements are met.
- Page 7 2 People Mounting Hardware Pack Power Drill #6 Drill Bit Medium Phillips Screwdriver Small Level Pencil for marking the wall (if you think you may have to erase) or a Fine Tip Marker ...
- Page 8 7. With the heater resting, you can now take the small mounting bracket, and line it up against the heater’s underside and the wall. Mark the 2 remaining wall plug locations accordingly (Ref. Fig. 3A and 3B). 8. With a second person assisting, remove the heater and place to one side, and safely out of the way. 9.
- Page 9 This section outlines the mounting of your heater to the base (if you plan on using it freestanding on a flat surface). To prevent any accidents (or setup/assembly) miscues, please read and understand all directions prior to start. Items/Tools Recommended For Base Mounting: ...
- Page 10 7. Align the base to a centralized position, in relation to the heater’s underside (reference fig. 2). Note that only 4 long screws will be used to attach the base. There are no screw holes missing on the base. 8.
- Page 11 The Process 1. Power off and unplug the heater. Allow at least 10 minutes for the bulbs to cool off. 2. Gently remove the glass panel from the heater “face.” 3. Store the glass safely out of the way so that it does not get tripped on or damaged. 4.
- Page 12 The heater can be operated either with the switches located on the top right hand side of the fire place heater or with the supplied remote control. Notes to keep in mind: The switches/Control Panel are located at the top, right hand side of the heater (reference only-below) ...
- Page 13 This heater is equipped with an overheat safety shut-off switch that will engage if the heater overheats for any reason. For safety reasons, the heater will NOT automatically reset after the safety cut-off switch has engaged. To reset it, disconnect the heater from the main power outlet for at least 15 minutes to allow for the overheat sensor to reset.
- Page 14 Problem Solution Plug in but no power or beeps Master switch on panel should be turned ON Master Switch ON but no power Verify you have Power from your outlet by testing or beeps another small appliance on it Low Heat Mode Does Not work Control Panel Issue-Replace the control panel but High does High Heat Mode Does Not work...
- Page 15 LIFESMART warranty department. The purchaser may also opt to ship the product to LIFESMART to have it repaired. The purchaser will be responsible to prepay any shipping charges (both ways), export taxes, custom duties and taxes, or any other charges associated with the transportation of the unit.
- Page 16 Protectors/GFCI Disclaimers LIFESMART shall not be liable for any loss due to use (or misuse) of the heater or other LIFESMART or other incidental or consequential costs, expense or damages without irrefutable foundations. Under no circumstances shall LIFESMART or any of its representatives be held liable for injury to any person or damage to any property, however arising.
- Page 17 Be Patient, Clear, and Concise. Describe the issue and symptoms you have for, and about the product. A certified LIFESMART Technical Support agent will give you an evaluation of your issue and your resolution options. If the answer is not available at that time, you will be referred to the appropriate channels, or given a call/e- mail back within 72 hours with an answer or resolution.