Brother MFC-7470D Basic User's Manual
Hide thumbs
Also See for MFC-7470D:
- Service manual (343 pages) ,
- User manual (239 pages) ,
- Basic user's manual (170 pages)
Table of Contents
Advertisement
Quick Links
Advertisement
Table of Contents

Related Manuals for Brother MFC-7470D


Summary of Contents for Brother MFC-7470D
- Page 1 BASIC USER’S GUIDE MFC-7360 MFC-7470D MFC-7860DN Version A CHN-ENG...
- Page 2 Firstly, thank you very much indeed for using our Brother products! Brother focuses on the earth environment concerned. And make a basic policy which is to concern about the earth environment, including any workflow from product development to discard. The local citizen should be responsible for local society and its environment during these environment protection activities.
- Page 3 In the Box Software User’s Follow these instructions for Printing, Guide Scanning, Network Scanning, Remote Setup, PC-Fax, and using the Brother ControlCenter utility. Network Glossary This Guide provides basic information about advanced network features of Brother machines along with explanations about general networking and common terms.
-
Page 4: Table Of Contents
Accessing the Advanced User's Guide, Software User's Guide and Network User's Guide..................2 Viewing Documentation...................2 ® Accessing Brother Support (Windows ) ..............4 Accessing Brother Support (Macintosh) ..............5 Control panel overview ..................6 Volume settings .....................9 Ring volume.....................9 Beeper volume ....................9 Speaker volume....................9 Loading paper Loading paper and print media ................10... - Page 5 Connecting an external or extension telephone ..........34 Operation from external telephones .............. 35 For Fax/Tel mode only................... 35 Using a non-Brother cordless external handset ..........35 Using Remote Codes ..................36 Dialling and storing numbers How to dial ......................37 Manual dialling....................
- Page 6 Paper is jammed at the back of the machine ..........87 Paper is jammed inside the machine.............89 Paper is jammed in the Duplex Tray (MFC-7470D / MFC-7860DN) .....94 If you are having difficulty with your machine ............96 Setting Dial Tone detection .................105 Telephone line interference .................105...
- Page 7 Menu and features On-screen programming..................118 Menu table....................118 How to access the menu mode ..............118 Menu table ......................119 Entering text ......................132 Specifications General ......................134 Document Size ....................136 Print media......................137 Fax........................138 Copy ........................139 Scanner ......................140 Printer ........................141 Interfaces ......................142 Computer requirements ..................143 Consumable items .....................
- Page 8 Reports receiving Sequence) Dial Prefix Making copies Security features Copy settings Security Duplex Copying (1-sided to 2-sided) (MFC-7470D / MFC-7860DN) Sending a fax Routine maintenance Additional sending options Cleaning the machine Additional sending operations Checking the machine Polling overview Packing and shipping the machine...
-
Page 9: General Information
Using the documentation WARNING WARNING indicates a potentially Thank you for buying a Brother machine! hazardous situation which, if not avoided, Reading the documentation will help you could result in death or serious injuries. make the most of your machine. -
Page 10: Accessing The Advanced User's Guide, Software User's Guide And Network User's Guide
Chapter 1 Accessing the Click your country. Advanced User's Guide, Software User's Guide and Network User's Guide This Basic User's Guide does not contain all the information about the machine such as how to use the advanced features Fax, Copy, Printer, Scanner, PC-Fax and Network. - Page 11 General information Presto! PageManager User’s Guide Note ® Note • (Windows users only) Your web browser may display a yellow bar at the top of the Presto! PageManager must be page that contains a security warning downloaded and installed before use. about Active X controls.
-
Page 12: Accessing Brother Support (Windows ® )
You can find all the contacts you will need, such as Web support (Brother Solutions Center) on the Installation CD-ROM. Click Brother Support on the main menu. The following screen will appear: To access our website, click Brother Home Page. -
Page 13: Accessing Brother Support (Macintosh)
The following screen will appear: To download and install Presto! PageManager, click Presto! PageManager. For the latest news and product support information, click Brother Solutions Center. To visit our website for original Brother Supplies, click Supplies Information. -
Page 14: Control Panel Overview
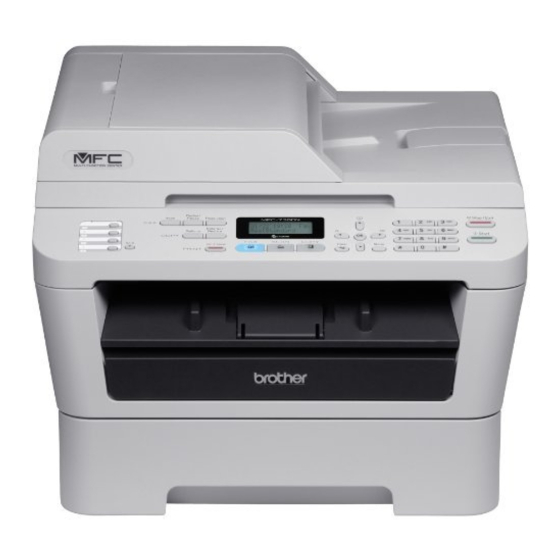
Chapter 1 Control panel overview MFC-7470D and MFC-7860DN have the same keys 01/01 18:00 Res:Standard MFC-7360 01/01 18:00 Res:Standard... - Page 15 General information 9 10 01/01 18:00 Res:Standard 9 10 01/01 18:00 Res:Standard...
- Page 16 Duplex Press to scroll through the menus and options. (For MFC-7470D and MFC-7860DN) Address Book You can choose Duplex to copy on both sides of the paper. Let you access speed dial numbers directly.
-
Page 17: Volume Settings
General information Volume settings Speaker volume You can choose a range of speaker volume Ring volume levels, from High to Off. Press Menu, 1, 3, 3. You can choose a range of ring volume levels, from High to Off. Press a or b to choose Off, Low, Med or While in Fax mode press to adjust High. -
Page 18: Loading Paper
Loading paper Loading paper and Loading paper in the standard paper tray print media You can load up to 250 sheets. Paper can be The machine can feed paper from the loaded up to the maximum paper mark (b b b) standard paper tray or manual feed slot. - Page 19 Loading paper While pressing the green paper-guide Put paper in the tray and make sure: release lever, slide the paper guides to The paper is below the maximum fit the paper size you are loading in the paper mark (b b b) (1). tray.
-
Page 20: Loading Paper In The Manual Feed Slot
Chapter 2 Unfold the support flap (1) to prevent Printing on plain paper, thin paper or paper from sliding off the face-down recycled paper from the manual feed output tray. slot Unfold the support flap (1) to prevent paper from sliding off the face-down output tray, or remove each page as soon as it comes out of the machine. - Page 21 Loading paper Using both hands, slide the manual feed Printing on thick paper, bond paper, slot paper guides to the width of the labels and envelopes paper that you are going to use. When the back output tray is pulled down, the machine has a straight paper path from the manual feed slot through to the back of the machine.
- Page 22 Chapter 2 Using both hands, slide the manual feed Note slot paper guides to the width of the <For envelopes only> paper that you are going to use. Pull down the two green levers, one on the left-hand side and one on the right-hand side, as shown in the following illustration.
- Page 23 Loading paper • To easily remove a small printout from the output tray, lift up the scanner cover by using both hands as shown in the illustration. Note • Put the paper into the manual feed slot with the side to be printed face up. •...
-
Page 24: Unscannable And Unprintable Areas
Chapter 2 Unscannable and unprintable areas The figures below show maximum unscannable and unprintable areas. The unscannable and unprintable areas may vary depending on the paper size or settings in the application you are using. Usage Document Top (1) Left (2) Size Bottom (1) Right (2) -
Page 25: Paper Settings
Loading paper Paper settings Acceptable paper and other print media Paper Type Print quality may vary according to the type of Set up the machine for the type of paper you paper you are using. are using. This will give you the best print You can use the following types of print quality. -
Page 26: Type And Size Of Paper
Chapter 2 Type and size of paper The name for the paper trays in the printer driver in this Guide are as follows: The machine loads paper from the installed standard paper tray or manual feed slot. Tray and optional unit Name Standard paper tray Tray 1... -
Page 27: Handling And Using Special Paper
• that is multipart or carbonless • that is designed for inkjet printing If you use any of the types of paper listed , they may damage your machine. This damage is not covered under any Brother warranty or service agreement. -
Page 28: Types Of Envelopes To Avoid
This damage may not be • that are extremely shiny or textured covered under any Brother warranty or service agreement. • with clasps, staples, snaps or tie strings • with self-adhesive closures •... - Page 29 Loading paper Labels Types of labels to avoid The machine will print on most types of labels Do not use labels that are damaged, curled, designed for use with a laser machine. Labels wrinkled or an unusual shape. should have an adhesive that is acrylic-based since this material is more stable at the high temperatures in the fuser unit.
-
Page 30: Loading Documents
Loading documents How to load Note documents • To scan documents that are not suitable for the ADF, see Using the scanner glass on page 23. You can send a fax, make copies, and scan from the ADF (Automatic Document Feeder) •... -
Page 31: Using The Scanner Glass
Loading documents Using the scanner glass Stagger the pages of your document face up top edge first, in the ADF until the LCD display message changes and You can use the scanner glass to fax, copy or you feel it touch the feed rollers. scan pages of a book one page at a time. - Page 32 Chapter 3 Lift the document cover. Close the document cover. Using the document guidelines on the IMPORTANT left and top, place the document If the document is a book or is thick, do not face down in the upper left corner of the slam or press on the cover.
-
Page 33: Sending A Fax
Sending a fax How to send a fax Enter the fax number using the dial pad, a One touch key or (Address Book) The following steps show how to send a fax. and enter three-digit number. When you want to send a fax, or change Press Start. -
Page 34: Faxing Letter Size Documents From The Scanner Glass
Make sure you are in Fax mode was successful. (MFC-7360 / MFC-7470D) There are several settings available for the Press Menu, 1, 7. Transmission Verification Report: (MFC-7860DN) ... -
Page 35: Receiving A Fax
Receiving a fax Receive modes By default, your machine will automatically receive any faxes that are sent to it. There are four receive modes of this machine as below. (For more detailed information about the receive modes, see Using receive modes on page 28.) LCD Display Factory Default Ring Delay Ring Delay: 4 times... -
Page 36: Using Receive Modes
Chapter 5 Using receive modes Mode Function Help Each call Factory setting of Ring Delay is 4 (0-10 times available, please Fax Only recognized as fax see Ring Delay on page 29). After ringing 4 times, the fax and send fax signal. machine send fax-receiving signals automatically;... -
Page 37: Receive Mode Settings
Receiving a fax Receive Mode settings F/T Ring Time (Fax/Tel mode only) Ring Delay When somebody calls your machine, you and your caller will hear the normal telephone ring The Ring Delay setting sets the number of sound. The number of rings is set by the Ring times the machine rings before it answers in Delay setting. -
Page 38: Fax Detect
Chapter 5 Fax Detect If Fax Detect is On: The machine can receive a fax automatically, even if you answer the call. When you see Receiving on the LCD or hear a click on the phone line through the handset you are using, just replace the handset. -
Page 39: Using Pc-Fax
PC-Fax Send you have not started the PC-FAX Receive program, see PC-FAX The Brother PC-FAX feature lets you use receiving in the Software User’s Guide. your PC to send a document from an application as a standard fax. You can send a Press a or b to choose <USB>... -
Page 40: Telephone And External Devices
Telephone and external devices Voice operations Connecting an external Voice calls can be made with the handset by using the dial pad, One touch key or a You can connect an external Telephone (Address Book) and enter three-digit Answering Device (TAD) to the same line as number. -
Page 41: Connections
TAD. (See Using receive modes on page 28.) Most offices use a central telephone system. Brother recommends that all our Fax/MFC machines be connected to a discreet (dedicated) line. Although a particular PABX may appear to work with a particular model of fax machine, we cannot guarantee that the unit will operate correctly. -
Page 42: External And Extension Telephones
Chapter 7 External and extension Brother does not recommend the use of a PABX line. PABX limitations in general can telephones cause some functions of the fax machine not to work correctly. Note You need to turn the Remote Codes... -
Page 43: Operation From External Telephones
Using a non-Brother cordless telephones external handset If you answer a fax call on an external If your non-Brother cordless telephone is telephone that is correctly connected to the connected to the telephone line cord (see machine through the T-piece connection, you... -
Page 44: Using Remote Codes
Chapter 7 Using Remote Codes Changing the Remote Codes The preset Remote Activation Code is l51. The preset Remote Deactivation Code is #51. Remote Activation Code If you are always disconnected when accessing your External TAD, try changing If you answer a fax call on an external the three-digit remote codes, for example ### telephone, you can tell your machine to and 555. -
Page 45: Dialling And Storing Numbers
Dialling and storing numbers How to dial Speed Dialling You can dial in any of the following ways. Press (Address Book) and enter the three digit Speed Dial number. (See Storing Manual dialling Speed Dial numbers on page 43.) Use the dial pad to enter all the digits of the telephone or fax number. -
Page 46: Search
• If you do not enter a letter and press OK in option. (I-FAX and E-mail options are available step b, all registered names will appear. as a download from the Brother Solutions Press a or b to scroll until you find the Center (http://solutions.brother.com/) for name you are looking for. -
Page 47: One Touch And Speed Dial Options
Dialling and storing numbers One Touch and Speed Dial Options The following chart shows the options for storing One Touch or Speed Dial numbers after you download the IFAX and E-mail options for MFC-7860DN. Step 1 Step 2 Step 3 Step 4 Step 5 Step 6... -
Page 48: Storing A Pause
Press OK to store the number without a pinyin. Press Redial/Pause to insert a 3.5-second (For MFC-7470D/MFC-7860DN) pause between numbers. You can press If you want to save a fax resolution along with Redial/Pause as many times as needed to the number, choose one of the following: increase the length of the pause. - Page 49 Dialling and storing numbers • If you selected the IFAX Registration Type Note in step b and save the E-mail address, • When you do a broadcast and you have you can only use the E-mail address when saved a scan profile along with the you are in Fax mode.
- Page 50 Chapter 8 Select the PDF type from PDF or SPDF (Secure PDF) that will be used to send to your PC. Press OK and then go to step m. Press Stop/Exit.
-
Page 51: Storing Speed Dial Numbers
E-mail address, you can only use the E-mail address when (For MFC-7470D/MFC-7860DN) you are in Fax mode. If you want to save a fax resolution along with the number, do one of the following: Do one of the following: ... - Page 52 Chapter 8 Do one of the following: Press a or b to select 100dpi, 200dpi, 300dpi or 600dpi. Enter the pinyin using the dial pad Press OK. (up to 15 characters). If you chose Email Color PDF, go Press OK.
-
Page 53: Changing One Touch And Speed Dial Numbers
Dialling and storing numbers Changing One Touch and (For MFC-7470D/MFC-7860DN) If you want to save a fax resolution along Speed Dial numbers with the number, do one of the following: To store the fax resolution, press a or If you try to change an existing One Touch or b to select Std, Fine, S.Fine or... -
Page 54: Deleting One Touch And Speed Dial Numbers
Chapter 8 Deleting One Touch and Press a or b to select one of the following: Speed Dial numbers Fax/Tel IFAX If you try to delete an existing One Touch or Email Color PDF Speed Dial number, the LCD will show the Email Color JPG name or number already stored there. -
Page 55: Tone Or Pulse
Dialling and storing numbers Tone or Pulse If you have a Pulse dialling service, but need to send Tone signals (for example, for telephone banking), follow the instructions below. If you have Touch Tone service, you will not need this feature to send tone signals. Press Hook/Hold. -
Page 56: Making Copies
100% Auto Duplex Note Duplex Copying (1 sided to 2 sided) for MFC-7470D/ MFC-7860DN The default setting is Fax mode. You can change the amount of time that the machine stays in Copy mode after the last copy operation. (See Mode Timer in Chapter 1 of the Advanced User's Guide.) -
Page 57: How To Print From A Computer
Printing for Windows or Printing and Faxing for Macintosh in Software User’s Guide for the details about the print settings.) Install the Brother printer driver on the Installation CD-ROM. (See the Quick Setup Guide.) From your application, choose the Print command. -
Page 58: How To Scan To A Computer
You can use ControlCenter4 on your computer. Load your document. (See How to load documents on page 22.) Open ControlCenter4 by clicking start/All Programs/Brother/XXX-XXXX (where XXX-XXXX is your model name)/ControlCenter4. The ControlCenter4 application will open. Choose Home Mode or Advanced Mode before you use ControlCenter4. - Page 59 How to scan to a computer Set the file type for saving to a folder. By default, the scanned data is saved as JPEG (*.jpg). Click Configuration, and then select Button settings, Scan and File. The configuration dialog box appears. You can change the default settings. 1 Choose PDF (*.pdf) from the File Type pull-down list.
- Page 60 Chapter 11 Click File. The machine starts the scanning process. The folder where the scanned data is saved will open automatically.
-
Page 61: Changing The Scan Key Settings
SCAN key settings You can change your machine’s SCAN key settings using ControlCenter4. Open ControlCenter4 by clicking start/All Programs/Brother/XXX-XXXX (where XXX-XXXX is your model name)/ControlCenter4. The ControlCenter4 application will open. Make sure the machine you want to use is selected from the Model pull-down list. - Page 62 Chapter 11 Choose the File tab. You can change the default settings. 1 You can choose the file type from the pull-down list. 2 You can enter the file name you want to use for the document. 3 You can save the file to the default folder, or choose your preferred folder by clicking the Browse button.
-
Page 63: Scanning Using The Scan Key
How to scan to a computer Scanning using the SCAN key Load your document. (See How to load documents on page 22.) Press (SCAN). Press a or b to choose scan to PC. Press OK. Press a or b to choose File. Press OK. -
Page 64: Routine Maintenance
Routine maintenance Replacing the consumable items The machine will indicate when it is time to replace the consumable items. (See Replacing the toner cartridge on page 57 and Replacing the drum unit on page 62.) Toner cartridge Drum unit See Replacing the toner cartridge on page 57. See Replacing the drum unit on page 62. -
Page 65: Replacing The Toner Cartridge
Approx. cartridge yield is declared in accordance replace the toner cartridge. A new and with ISO/IEC 19752. unused original Brother toner cartridge will reset the Replace Toner mode. Note • It is a good idea to keep a new toner... - Page 66 Replacing the toner cartridge Make sure that the machine is turned Open the front cover and leave the machine turned on for 10 minutes to cool down. Take out the drum unit and toner cartridge assembly. CAUTION HOT SURFACE After you have just used the machine, some internal parts of the machine will be extremely hot.
- Page 67 Routine maintenance Push down the green lock lever and take IMPORTANT the toner cartridge out of the drum unit. • We recommend that you place the drum unit and/or the toner cartridge on a clean, flat, level, stable surface with a sheet of disposable paper or cloth underneath it in case you accidentally spill or scatter toner.
- Page 68 If a toner cartridge is left unpacked for a long time, the toner life will be shortened. • Brother machines are designed to work with toner of a particular specification and will work to a level of optimum performance when used with genuine Brother Original toner cartridges.
- Page 69 Routine maintenance Put the new toner cartridge firmly into Clean the corona wire inside the drum unit by gently sliding the green tab from the drum unit until you hear it lock into left to right and right to left several times. place.
-
Page 70: Replacing The Drum Unit
For best performance, use only a genuine Replacing the drum unit Brother Original drum unit and genuine Brother Original toner units. Printing with a IMPORTANT third-party drum unit or toner unit may reduce not only the print quality but also •... - Page 71 Routine maintenance Push down the green lock lever and take the toner cartridge out of the drum unit. Take out the drum unit and toner WARNING cartridge assembly. DO NOT put a toner cartridge into a fire. It could explode, resulting in injuries. DO NOT use cleaning materials that contain ammonia, alcohol, any type of spray, or any type of flammable substance...
- Page 72 IMPORTANT Note • Be sure to seal up the used drum unit • To prevent damage to the machine from tightly in a bag so that toner powder does static electricity, DO NOT touch the not spill out of the unit. electrodes shown in the illustration.
-
Page 73: Resetting The Drum Counter
Routine maintenance Put the toner cartridge firmly into the Clean the corona wire of the drum unit new drum unit until it locks into place. If by gently sliding the green tab from left you put the cartridge in properly, the to right and right to left several times. -
Page 74: Cleaning The Machine
Cleaning the machine Cleaning the outside of the machine Clean the outside and inside of the machine regularly with a dry, lint-free cloth. When you Turn off the machine. Unplug the replace the toner cartridge or the drum unit, telephone line cord first, disconnect all make sure that you clean the inside of the cables, and then unplug the power cord machine. -
Page 75: Cleaning The Scanner Glass
Routine maintenance Cleaning the scanner glass Wipe the outside of the machine with a dry, lint-free soft cloth to remove dust. Turn off the machine. Unplug the telephone line cord first, disconnect all cables, and then unplug the power cord from the eclectrical socket. -
Page 76: Cleaning The Corona Wire
Cleaning the corona wire In the ADF unit, clean the white bar (1) and the scanner glass strip (2) underneath it with a soft lint-free cloth If you have print quality problems, clean the moistened with water. corona wire as follows: Make sure the machine is turned on, then open the front cover and wait for 10 minutes to cool down the machine. - Page 77 Routine maintenance Slowly take out the drum unit and toner Clean the corona wire inside the drum cartridge assembly. unit by gently sliding the green tab from right to left and left to right several times. CAUTION We recommend that you place the drum unit and toner cartridge assembly on a clean, flat surface with a sheet of Note...
-
Page 78: Cleaning The Drum Unit
Cleaning the drum unit Using both hands, slide the manual feed paper guides to the width of the paper that you are going to use. If you have print quality problems, the drum may have foreign material, such as glue from a label stuck on the drum surface. - Page 79 Routine maintenance If the problem is not solved yet, follow the Note steps below: • The machine makes a mechanical noise during the Drum Cleaning process Open the front cover and leave the because the machine rotates the OPC machine turned on for 10 minutes to drum in reverse.
- Page 80 Push down the green lock lever and take CAUTION the toner cartridge out of the drum unit. We recommend that you put the drum unit and toner cartridge assembly on a clean, flat surface with a sheet of disposable paper or cloth underneath it in case you accidentally spill or scatter toner.
- Page 81 Routine maintenance • To prevent damage to the machine from Turn the drum unit gear by hand while static electricity, DO NOT touch the looking at the surface of the OPC drum (1). electrodes shown in the illustration. Put the print sample in front of the drum unit, and find the exact position of the poor print.
- Page 82 Put the toner cartridge back into the Put the drum unit and toner cartridge drum unit until it locks into place. If you assembly back in the machine. put the cartridge in properly, the green lock lever will lift automatically. Close the front cover.
-
Page 83: Cleaning The Paper Pick-Up Rollers
Routine maintenance Cleaning the paper pick-up Tightly wring out a lint-free cloth soaked in lukewarm water, and then wipe the rollers separator pad (1) of the paper tray with it to remove dust. If you have paper feed problems, clean the pick-up rollers as follows: Turn off the machine. - Page 84 Wipe the two pick-up rollers (1) inside of the machine to remove dust. Put the paper tray back in the machine. Plug the machine’s power cord back into the electrical socket. Turn on the machine.
-
Page 85: Troubleshooting
The most common error and maintenance messages are shown below. You can clear most errors and perform routine maintenance messages by yourself. If you need more help, the Brother Solutions Center offers the latest FAQs and troubleshooting tips: Visit us at http://solutions.brother.com/. Error Message... - Page 86 Error Message Cause Action The ADF cover is not completely Close the ADF cover of the machine. Cover is Open closed. The ADF is open while loading a Close the ADF cover of the machine, then document. press Stop/Exit. The fuser cover is not completely ...
- Page 87 The paper is jammed in the (See Paper is jammed in the Duplex Tray Jam Duplex duplex tray at the back of the (MFC-7470D / MFC-7860DN) on page 94.) machine. The paper is jammed inside the (See Paper is jammed inside the machine Jam Inside machine.
- Page 88 Error Message Cause Action The machine is out of paper or Do one of the following: No Paper paper is not correctly loaded in Refill the paper in the paper tray and the paper tray. press Start. Remove the paper and load it again. Then press Start.
- Page 89 Brother toner cartridge. This will reset the Replace Toner mode. (See Replacing the toner cartridge on page 57.) If you have set the Toner setting to...
- Page 90 Error Message Cause Action The paper in the tray is not a Load an appropriate size of paper in the Size mismatch correct size. tray, and re-set the “Paper Size” (Menu, 1, 2, 2). (See Paper Size on page 17.) It is time to replace the toner Replace the toner cartridge with a new one.
-
Page 91: Transferring Your Faxes Or Fax Journal Report
Troubleshooting Transferring your faxes or Fax Transferring faxes to your PC Journal report You can transfer the faxes from your machine’s memory to your PC. If the LCD shows: Make sure that you have installed MFL- Init Unable XX Pro Suite on your PC, and then turn on PC-Fax Receiving on the PC. -
Page 92: Document Jams
Document Jams Document is jammed under the document cover Document is jammed in the Take out any paper from the ADF that is top of the ADF unit not jammed. Lift the document cover. Take out any paper from the ADF that is not jammed. -
Page 93: Removing Small Documents Jammed In The Adf
Troubleshooting Removing small documents Document is jammed at the jammed in the ADF output tray Lift the document cover. Take out any paper from the ADF that is not jammed. Insert a piece of stiff paper, such as cardstock, into the ADF to push any Pull the jammed document out to the small paper scraps through. -
Page 94: Paper Jams
Paper Jams IMPORTANT If the paper cannot easily be removed in Paper is jammed in the this direction, stop and follow the instructions for Paper is jammed inside the standard paper tray machine on page 89. If the LCD shows Jam Tray, follow these steps: Note Pull the paper tray completely out of the... -
Page 95: Paper Is Jammed At The Back Of The Machine
Troubleshooting Paper is jammed at the back CAUTION of the machine HOT SURFACE If the LCD shows Jam Rear, a paper jam occurred behind the back cover. Follow these After you have just used the machine, some steps: internal parts of the machine will be extremely hot. - Page 96 Pull down the tabs at the left and right IMPORTANT hand sides to open the fuser cover (1). • We recommend that you place the drum unit and the toner cartridge on a clean, flat surface with a sheet of disposable paper or cloth underneath it in case you accidentally spill or scatter toner.
-
Page 97: Paper Is Jammed Inside The Machine
Troubleshooting Paper is jammed inside the Using both hands, gently pull the jammed paper out of the fuser unit. machine If the LCD shows Jam Inside, follow these steps: Open the front cover. Leave the machine turned on for 10 minutes to cool down. - Page 98 Slowly take out the drum unit and toner CAUTION cartridge assembly. The jammed paper may be pulled out with the drum unit and toner cartridge assembly, or this may HOT SURFACE release the paper so you can pull it out After you have just used the machine, some inside of the machine.
- Page 99 Troubleshooting IMPORTANT IMPORTANT • We recommend that you put the drum unit • Handle the toner cartridge carefully. If and toner cartridge assembly on a piece of toner scatters on your hands or clothes, disposable paper or cloth in case you immediately wipe or wash it off with cold accidentally spill or scatter toner.
- Page 100 Put the toner cartridge back into the Do one of the following: drum unit until it locks into place. If you If you were able to remove the drum put the cartridge in correctly, the green unit and toner cartridge assembly lock lever will lift automatically.
- Page 101 Troubleshooting If you could not pull the jammed paper Put the drum unit and toner cartridge out of the inside of the machine as assembly back in the machine. shown in the step e, take the paper tray completely out of the machine. Close the front cover of the machine.
-
Page 102: Paper Is Jammed In The Duplex Tray (Mfc-7470D / Mfc-7860Dn)
Paper is jammed in the Duplex Tray Pull the duplex tray completely out of the machine. (MFC-7470D / MFC-7860DN) If the LCD shows Jam Duplex, follow these steps: Leave the machine turned on for 10 minutes to cool down. CAUTION... - Page 103 Troubleshooting Make sure that no paper remains under the machine. Put the duplex tray back in the machine.
-
Page 104: If You Are Having Difficulty With Your Machine
If you think there is a problem with your machine, check the chart below and follow the troubleshooting tips. Most problems can be easily resolved by yourself. If you need additional help, the Brother Solutions Center offers the latest FAQs and troubleshooting tips. -
Page 105: Receiving Faxes
If your Brother machine shares a line with other telephones and you want it to automatically answer all incoming faxes, you should select the Fax/Tel mode. In Fax/Tel mode, your Brother machine will automatically receive faxes and produce a fast double-ring to alert you to answer voice calls. -
Page 106: Sending Faxes
Cannot receive a fax. If you are using a telephone answering machine (External TAD mode) on the same line as the Brother machine, make sure your answering machine is set up (continued) correctly. (See Connecting an external TAD on page 32.) Connect the external TAD as shown in the illustration on page 33. - Page 107 ’ the signal can temporarily interrupt or disrupt the faxes. Brother s ECM feature should help overcome this problem. This condition is related to the telephone system industry and is common to all devices that send and receive information on a single, shared line with custom features.
- Page 108 ® 7 and Windows Server ® 2008 R2) Click the Start button and (Windows Devices and Printers. Right-click Brother MFC-XXXX Printer. Make sure that Use Printer Offline is unchecked. (Windows Vista ® ) Click the Start button, Control Panel, Hardware and Sound, and then Printers.
- Page 109 Scanning difficulties Difficulties Suggestions TWAIN errors appear while Make sure that the Brother TWAIN driver is chosen as the primary source. In scanning. Presto! PageManager, click File, Select Source and choose the Brother TWAIN driver. OCR does not work.
-
Page 110: Print Quality Difficulties
Paper handling difficulties (continued) Difficulties Suggestions What paper can I use? You can use thin paper, plain paper, bond paper, recycled paper, envelopes and labels that are made for laser machines. (For details, see Acceptable paper and other print media on page 17.) You can load envelopes from the manual feed slot. - Page 111 Security/Firewall Software to allow PC Rx. To add port 54926 for Network PC FAX Rx, enter the information below: In Name: Enter any description, for example Brother PC-FAX Rx. In Port number: Enter 54926. In Protocol: UDP is selected.
- Page 112 Other Difficulties Suggestions The machine will not turn on. Adverse conditions on the power connection (such as lightning or a power surge) may have triggered the machine’s internal safety mechanisms. Turn the machine off and unplug the power cord. Wait for ten minutes, then plug in the power cord and turn the machine on.
-
Page 113: Setting Dial Tone Detection
If you change the setting and start having Press a or b to choose Basic(for problems with dialling you should change VoIP), Normal or High (MFC-7470D / back to the default No Detection setting. MFC-7860DN). Press Menu, 0, 5. -
Page 114: Improving The Print Quality
Note Brother does not recommend the use of cartridges other than genuine Brother Original cartridges or the refilling of used cartridges with toner from other sources. To get the best print quality, we suggest using the recommended paper. Check that you use paper that meets our specifications. - Page 115 Put in a new drum unit. (See Replacing the drum unit on page 62.) The fuser unit may be contaminated. Call your Brother dealer. Make sure that you use paper that meets our specifications. Rough-surfaced paper may cause the problem. (See Acceptable paper and other print media on page 17.)
- Page 116 The drum unit may be damaged. Put in a new drum unit. (See Replacing the drum unit on page 62.) The fuser unit may be contaminated. Call your Brother dealer. All black Make sure that you use paper that meets our specifications. A rough surfaced paper or thick print media can cause problems.
- Page 117 Troubleshooting Examples of poor print quality Recommendation Make ten copies of a blank, white sheet of paper. (See How to copy on page 48.) If the problem is not solved, the drum unit may have glue from a label stuck on the OPC drum surface. Clean the drum unit.
- Page 118 The toner cartridge may be damaged. Put in a new toner 0 1 2 3 4 cartridge. (See Replacing the toner cartridge on page 57.) The fuser unit may be contaminated. Call your Brother dealer. Black lines down the page Printed pages have toner stains down the page.
- Page 119 Troubleshooting Examples of poor print quality Recommendation Check the paper type and quality. High temperatures and high humidity will cause paper to curl. (See Acceptable paper and other print media on page 17.) If you do not use the machine often, the paper may have been in the paper tray too long.
- Page 120 Examples of poor print quality Recommendation Make sure that the two green envelope levers inside the back cover are pulled down when you print the envelope. Envelope creases Note When you have finished printing, open the back cover and reset the two green levers back to their original position.
- Page 121 Troubleshooting Examples of poor print quality Recommendation Open the back cover and make sure that the two green envelope levers on the left and right hand sides are in the up position. ABCDEFGHIJKLMNOPQRSTUVWXYZ. 0123456789. abcdefghijklmnopqrstuvwxyz. ABCDEFGHIJKLMNOPQRSTUVWXYZ. 0123456789. abcdefghijklmnopqrstuvwxyz. ABCDEFGHIJKLMNOPQRSTUVWXYZ. 0123456789. abcdefghijklmnopqrstuvwxyz. ABCDEFGHIJKLMNOPQRSTUVWXYZ.
- Page 122 Examples of poor print quality Recommendation Choose Reduce Paper Curl mode in the printer driver when you do not use our recommended paper. (See Other Print Options (for ® Windows ) or Print Settings (For Macintosh) in the Software User’s Guide.) ...
- Page 123 Troubleshooting Examples of poor print quality Recommendation Lift up the output tray support flap. Curled...
-
Page 124: Machine Information
IP address information. For MFC-7360, press Menu, 5, 1. 2 Address & Fax For MFC-7470D, press Menu, 6, 1. For MFC-7860DN, press Menu, 7, 1. Address & Fax resets the following settings: The machine will display the machine’s... -
Page 125: How To Reset The Machine
Troubleshooting How to reset the machine Press Menu, 0. Press a or b to display Reset. Press OK. Press a or b to choose the reset function you want to use. Press OK. Do one of the following: To reset the settings, press 1 and go to step e. -
Page 126: Menu And Features
Menu and features On-screen (MFC-7470D) Press 4 for Printer menu. programming Press 5 for Print Reports menu. Your machine has been designed to be easy Press 6 for Machine Info. menu. to use. The LCD provides on-screen (MFC-7360) programming using the menu keys. -
Page 127: Menu Table
Menu and features Menu table The factory settings are shown in Bold with an asterisk. Choose & OK Choose & OK to accept to exit Level 1 Level 2 Level 3 Level 4 Options Descriptions Page 1.Mode Timer — — Sets the time to 1.General 0 Sec... - Page 128 1.TX Lock operations except (MFC-7360) receiving faxes. — — Stops unauthorized 1.Mem users from most Security operations except (MFC-7470D) receiving faxes into the memory. — — Can restrict selected 1.Function machine operation Lock for up to 25 individual (MFC-7860DN) users and all other non-authorized Public users.
- Page 129 Adjusts the scan 1.General 7.Glass area of the scanner Setup ScanSize Letter (MFC-7360 / glass to the size of (Continued) MFC-7470D) the document. — Adjusts the scan 7.Document 1.Glass area of the scanner Scan ScanSize Letter glass to the size of (MFC-7860DN) the document.
- Page 130 Automatically stores 6.Memory any incoming faxes Receive (MFC-7360) in its memory if it runs out of paper. Makes printouts 6.Print Density -nnnno+ (MFC-7470D / darker or lighter. -nnnon+ MFC-7860DN) -nnonn+* 7.Print Density (MFC-7360) -nonnn+ -onnnn+ Sets up your 7.Polling RX...
- Page 131 Menu and features Level 1 Level 2 Level 3 Options Descriptions Page Changes the 2.Fax 2.Setup Send 1.Contrast Auto* lightness or (Continued) (In Fax mode only) Light darkness of faxes you send. Dark Sets the default 2.Fax Standard* resolution for Resolution Fine outgoing faxes.
- Page 132 Level 1 Level 2 Level 3 Options Descriptions Page — Stores up to 8 One 2.Fax 3.Address Book 1.One Touch Touch Dial numbers, Dial (Continued) so you can dial by pressing one key (and Start.) — Stores up to 200 2.Speed Dial Speed Dial numbers, so you can dial by...
- Page 133 (MFC-7360) difficulties. VoIP service High* providers offer fax Normal support using various standards. If Basic(for VoIP) you regularly (MFC-7470D / experience fax MFC-7860DN) transmission errors, choose Basic(for VoIP). Chooses the 2.Fax Mode Easy Mode* transmission Advanced Mode process when sending/receiving the faxes manually.
- Page 134 Level 3 Options Descriptions Page — Chooses the 4.Printer 1.Emulation Auto* emulation mode. (MFC-7470D / HP LaserJet MFC-7860DN) BR-Script 3 Prints a list of the 2.Print Options 1.Internal Font 1.HP LaserJet machine’s internal 2.BR-Script 3 fonts. — Prints a list of the 2.Configuration...
- Page 135 Prints a Report for 4.Print Reports 1.XMIT Verify 1.View on LCD your last (MFC-7360) transmission. 2.Print Report — 5.Print Reports (MFC-7470D / MFC-7860DN) — — Prints the Help List so 2.Help List you can see at-a- glance how to quickly program your machine.
- Page 136 — Enable or Disable 0.IPv6 the IPv6 protocol. If Off* you want to use the IPv6 protocol, visit http://solutions. brother.com/ for more information. See Network User’s Guide. The factory settings are shown in Bold with an asterisk.
- Page 137 Menu and features Level 1 Level 2 Level 3 Level 4 Options Descriptions — — Chooses the 6.Network 2.Ethernet Auto* Ethernet link (MFC-7860DN) 100B-FD mode. 100B-HD 10B-FD 10B-HD — — Shows the 3.Status Active 100B-FD Ethernet link Active 100B-HD status. Active 10B-FD Active 10B-HD Inactive...
- Page 138 — — You can check the 5.Machine 1.Serial No. serial number of your Info. machine. (MFC-7360) 6.Machine Info. (MFC-7470D) — You can check the 7.Machine 2.Page Counter Total number of total Info. Fax/List pages the machine (MFC-7860DN) has printed during its Copy life.
- Page 139 Restores all stored 2.Address & Fax 1.Reset phone numbers (MFC-7860DN) 2.Exit and fax settings. 1.Address & Fax (MFC-7360 / MFC-7470D) Restores all the 3.All Settings 1.Reset machine settings (MFC-7860DN) 2.Exit to factory default. 2.All Settings (MFC-7360 / MFC-7470D) —...
-
Page 140: Entering Text
Entering text When setting certain menu selections, such as the Station ID, you will need to type text characters. The dial pad keys have letters printed on them. The keys: 0, # and l do not have printed letters because they are used for special characters. Press the appropriate dial pad key the number of times shown in this reference table to access the character you want. - Page 141 Menu and features Special characters and symbols Press l, # or 0, then press d or c to move the cursor to the symbol or character you want. Press OK to choose it. The symbols and characters below will appear depending on your menu selection.
-
Page 142: Specifications
Approx. 1.5 W Approx. 55 W at 25 C (77 F) Ready (Average): USB connection to PC When making a copy from one sheet Dimensions 316 mm 477 mm 398.5 mm Weight With Consumables: (MFC-7360) 11.7 kg (MFC-7470D / MFC-7860DN) 11.9 kg... - Page 143 Specifications Noise level Sound power Operating (Copying): (MFC-7470D / MFC-7860DN) d = 6.81 B (A) (MFC-7360) d = 6.74 B (A) Standby: d = 4.30 B (A) Sound pressure Operating (Printing): m = 53 dB (A) Standby: m = 30 dB (A) Measured in accordance with ISO 9296.
-
Page 144: Document Size
Document Size Document Size ADF Width: 147.3 to 215.9 mm (Single-sided) ADF Length: 147.3 to 355.6 mm Scanner Glass Max. 215.9 mm Width: Scanner Glass Max. 297 mm Length:... -
Page 145: Print Media
Face up output tray) Duplex Paper Size Printing (Automatic Duplex): Paper Weight (MFC-7470D / 60 to 105 g/m (Automatic Duplex): MFC-7860DN) Paper Type Plain paper or Recycled paper (Automatic Duplex): For labels, we recommend removing printed pages from the output paper tray immediately after they exit the machine to avoid the possibility of smudging. -
Page 146: Fax
258 stations Automatic Redial 3 times at 5 minute intervals Memory Transmission (MFC-7360) Up to 400 pages (MFC-7470D / MFC-7860DN) Up to 500 pages Out of Paper Reception (MFC-7360) Up to 400 pages (MFC-7470D / MFC-7860DN) Up to 500 pages ‘Pages’... -
Page 147: Copy
Specifications Copy Color/Monochrome Monochrome Copy Width Max. 204 mm Multiple Copies Stacks or Sorts up to 99 pages Reduce/Enlarge 25% to 400% (in increments of 1%) Up to 600 600 dpi Resolution First Copy Out Time Less than 11 seconds (from the READY mode and standard tray) -
Page 148: Scanner
Scanning Width Max. 204 mm Greyscale 256 levels For the latest driver updates for the Mac OS X you are using, visit us at http://solutions.brother.com/. ® ® ® Maximum 1200 1200 dpi scanning with the WIA driver in Windows... -
Page 149: Printer
MFC-7860DN) Print Speed (MFC-7360) Up to 24 pages/minute (A4 size) (MFC-7470D / MFC-7860DN) Up to 26 pages/minute (A4 size) First Print Out Time Less than 8.5 seconds (from the READY mode and standard tray) The print speed may vary depending on the type of document you print. -
Page 150: Interfaces
Interfaces We recommend use a USB cable (Type A/B) that is no more than 2 metres long. Use an Ethernet UTP cable category 5 or greater. Ethernet Your machine has a Hi-Speed USB 2.0 interface. The machine can also be connected to a computer that has a USB 1.1 interface. -
Page 151: Computer Requirements
Specifications Computer requirements Minimum System Requirements and Supported PC Software Functions Computer Platform & Processor Minimum Recommended Hard Disk Space Supported Supported Operating System Minimum to install Version Speed Software Interface Functions Drivers Applications 64 MB 256 MB 150 MB 500 MB Printing, USB,... - Page 152 ® Internet Explorer 6.0 or greater. For WIA, 1200 x 1200 resolution. Brother Scanner Utility enables to enhance up to 19200 x 19200 dpi. Third-party USB ports are not supported. PC-Fax supports black and white only. For the latest driver updates, visit http://solutions.brother.com/.
-
Page 153: Consumable Items
Drum yield is approximate, and may vary by type of use. Note • Brother does not recommend the use of consumables other than genuine Brother consumables. • Your machine warranty may not cover any damage arising from the use of non genuine Brother consumables. -
Page 154: Network (Lan)
Remote Setup . Also included is Brother BRAdmin Light Network Management software. Security Protocols Wired APOP, POP before SMTP, SMTP-AUTH See Computer requirements on page 143. BRAdmin Professional and Web BRAdmin are available as a download from http://solutions.brother.com/. -
Page 155: Index
Control panel overview ......6 Fax codes Copy ............48 changing ..........36 keys ............8 fax receive code ........36 Cordless telephone (non-Brother) ....35 telephone answer code ......36 Fax, stand-alone receiving ..........30 from extension telephone .... 35 Dialling ring delay, setting ......29 a pause ..........40... - Page 156 Greyscale ........138 Paper ..........17 how to load ........... 10 in multi-purpose tray ......12 in paper tray ........10 HELP recommended ........18 LCD messages ........118 size ............18 Menu Table .........119 tray capacity ......... 18 Hook/Hold key ..........35 type ............
- Page 157 Troubleshooting ........77 document jam ......... 84 error messages on LCD ....... 77 Redial/Pause key ......38 if you are having difficulty Replacing copy quality ........99 drum unit ..........62 incoming calls ........99 toner cartridge ........57 network ..........102 Reports paper handling ........
- Page 158 These machines are approved for use in the country of purchase only. Local Brother companies or their dealers will only support machines purchased in their own countries.