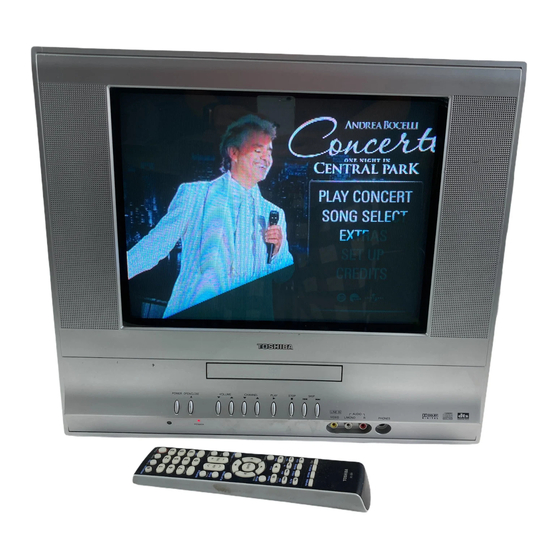

Related Manuals for Toshiba MD14F51


Summary of Contents for Toshiba MD14F51
-
Page 1: Service Manual
FILE NO. 140-200506 (MFR’S VERSION A) SERVICE MANUAL COLOR TELEVISION/ DVD VIDEO PLAYER MD14F51 DOCUMENT CREATED IN JAPAN, February, 2005... -
Page 2: Caution
CAUTION THIS DIGITAL VIDEO PLAYER EMPLOYS A LASER SYSTEM. TO ENSURE PROPER USE OF THIS PRODUCT, PLEASE READ THIS SERVICE MANUAL CARE- FULLY AND RETAIN FOR FUTURE REFERENCE. SHOULD THE UNIT REQUIRE MAINTENANCE, CONTACT AN AUTHORIZED SERVICE LOCATION-SEE SERVICE PROCEDURE. USE OF CONTROLS, ADJUSTMENTS OR THE PERFORMANCE OF PROCEDURES OTHER THAN THOSE SPECIFIED HEREIN MAY RESULT IN HAZARDOUS RADIATION EXPOSURE. -
Page 3: Servicing Notices On Checking
SERVICING NOTICES ON CHECKING 1. KEEP THE NOTICES 6. AVOID AN X-RAY As for the places which need special attentions, Safety is secured against an X-ray by consider- they are indicated with the labels or seals on the ing about the cathode-ray tube and the high cabinet, chassis and parts. -
Page 4: Important Safeguards
IMPORTANT SAFEGUARDS READ INSTRUCTIONS All the safety and operating instructions should be read before the unit is operated. RETAIN INSTRUCTIONS The safety and operating instructions should be retained for future reference. HEED WARNINGS All warnings on the unit and in the operating instructions should be adhered to. FOLLOW INSTRUCTIONS All operating and use instructions should be followed. - Page 5 IMPORTANT SAFEGUARDS (CONTINUED) OUTDOOR ANTENNA GROUNDING If an outside antenna or cable system is connected to the unit, be sure the antenna or cable system is grounded so as to provide some protection against voltage surges and built-up static charges. Section 810 of the National Electrical Code, ANSI/NFPA 70, provides information with respect to proper grounding of the mast and supporting structure, grounding of the lead-in wire to an antenna discharge unit, size of grounding conductors, location of antenna discharge unit, connection to grounding electrodes, and requirements for the grounding electrode.
- Page 6 IMPORTANT SAFEGUARDS (CONTINUED) EXAMPLE OF ANTENNA GROUNDING AS PER THE NATIONAL ELECTRICAL CODE ANTENNA LEAD IN WIRE GROUND CLAMP ANTENNA DISCHARGE UNIT (NEC SECTION 810-20) ELECTRIC SERVICE EQUIPMENT GROUNDING CONDUCTORS (NEC SECTION 810-21) GROUND CLAMPS POWER SERVICE GROUNDING NEC-NATIONAL ELECTRICAL CODE ELECTRODE SYSTEM (NEC ART 250, PART H) S2898A...
-
Page 7: When Replacing Dvd Deck
WHEN REPLACING DVD DECK [ When removing the DVD Deck ] Before removing Pick Up PCB and DVD PCB connector, the short circuit the position shown in Fig. 1 using a soldering iron. If you remove the DVD Deck with no soldering, the Laser may be damaged. [ When installing the DVD Deck ] Remove all the soldering on the short circuit position after the connection of Pick Up PCB and DVD PCB connector. -
Page 8: Parental Control-Rating Level
PARENTAL CONTROL - RATING LEVEL 4 DIGIT PASSWORD CANCELLATION If the stored 4 digit password in the Rating Level menu needs to be cancelled, please follow the steps below. Turn Unit ON. Set the DVD to the Stop Mode. Check that 'No disc' is displayed on the screen. Press and hold the 'STOP' button on the front panel. -
Page 9: About Lead Free Solder (Pbf)
ABOUT LEAD FREE SOLDER (PbF) Distinction of PbF PCB: PCBs (manufactured) using lead free solder will have a PbF printing on the PCB. (Please refer to figures.) Caution: • Pb free solder has a higher melting point than standard solder; Typically the melting point is 50°F~70°F(30°C~40°C) higher. -
Page 10: Table Of Contents
TABLE OF CONTENTS CAUTION ............................ A1-1 SERVICING NOTICES ON CHECKING ..................A1-2 HOW TO ORDER PARTS ......................A1-2 IMPORTANT SAFEGUARDS ..................... A1-3~A1-5 WHEN REPLACING DVD DECK ....................A1-6 DISC REMOVAL METHOD AT NO POWER SUPPLY ............. A1-6 PARENTAL CONTROL-RATING LEVEL .................. A1-7 TRAY LOCK .......................... -
Page 11: General Specifications
GENERAL SPECIFICATIONS CRT Size / Visual Size 14 inch / 357.0 mmV System CRT Type Flat Magnetic Field BV/BH +0.45G / 0.18G Color System NTSC Speaker 2 Speaker Position Front Size 1.5 x 2.7 inch Impedance 8 ohm Sound Output 2.5W + 2.5W 10%(Typical) DVD System... - Page 12 GENERAL SPECIFICATIONS On Screen Menu(TV) Display Menu Type Icon TV Setup Picture Audio Picture Preference Channel Setup TV/CABLE Auto CH Memory Add/ Delete V-chip Setup Language Sleep Timer CH / AV(LINE) / DVD Stereo/Audio Output Bilingual Control Volume Level Brightness / Contrast / Sharpness / Color Tint Bass/Treble/Balance Caption / Text...
- Page 13 GENERAL SPECIFICATIONS G-10 On Screen Menu (DVD) Display Menu Type Icon Language Menu Subtitle Audio OSD Language(Set up Language) Video E.B.L. (Enhanced Black Level) TV Screen Size(4:3) OSD Display On/Off Picture Mode (Video/Film/Auto) JPEG Interval Audio DRC (Dynamic Range Control) Dialogue (On DRC[TV] / Off DRC[Std]) Surround System...
- Page 14 GENERAL SPECIFICATIONS G-13 Remote Unit RC-KG Control Glow in Dark Remocon Remocon Format TOSHIBA Format TOSHIBA Custom Code 40-BF H, 44-BB H, 45-BA H, 45-BC H Power Source Voltage(D.C) UM size x pcs UM-4 x 2 pcs Total Keys 48 Key...
-
Page 15: Tray Lock
GENERAL SPECIFICATIONS G-14 Features CABLE (TV) Auto Shut Off Auto Setup Auto CH Memory V-Chip USA V-chip CANADA V-chip Auto Search Game Position FM Transmitter Energy Star Closed Caption Comb Filter Protect of FBT Leak Circuit Picture Preference Choke Coil Power On Memory Features Tray Lock... - Page 16 1 Corner / 3 Edges / 6 Surfaces Height (cm) Container Stuffing (40' container) 476 Sets G-20 Material Cabinet Front 94V0 DECABROM Rear 94V0 DECABROM Jack Panel Non-Halogen Demand Eyelet Demand G-21 Environment Environmental standard requirement (by buyer) Green procurement of TOSHIBA Pb-free Phase3(Phase3A) A3-6...
-
Page 17: Disassembly Instructions
DISASSEMBLY INSTRUCTIONS 1-3: AV PCB/DVD BLOCK (Refer to Fig. 1-3) 1. REMOVAL OF MECHANICAL PARTS Remove the 2 screws 1. AND P.C. BOARDS Disconnect the following connectors: 1-1: BACK CABINET (Refer to Fig. 1-1) (CP301, CP302, CP401 and CP3800). Remove the 4 screws 1. Remove the AV PCB/DVD Block in the direction of arrow. - Page 18 DISASSEMBLY INSTRUCTIONS 1-5: DVD PCB/DVD DECK (Refer to Fig. 1-5) Short circuit the position shown in Fig. 1-5 using a soldering iron. If you remove the DVD Deck with no soldering, the Laser may be damaged. Remove the 4 screws 1. Remove the DVD Deck in the direction of arrow (A).
-
Page 19: Removal Of Dvd Deck Parts
DISASSEMBLY INSTRUCTIONS 2. REMOVAL OF DVD DECK PARTS NOTE 1. Disassemble only the DVD DECK PARTS parts listed here. Minute adjustments are needed if the disassembly Loader Sub Ass'y is done. If the repair is needed except listed parts, replace the DVD MECHA ASS'Y. - Page 20 DISASSEMBLY INSTRUCTIONS 2-3: LOADING MOTOR PCB ASS'Y/ LOADING BELT 2-4: RACK LOADING/GEAR MAIN/GEAR PULLEY (Refer to Fig. 2-3-A) (Refer to Fig. 2-4-A) Press down the catcher 1 and slide the Rack Loading. Remove the Loading Belt. Remove the screw 1. Unlock the support 2 and remove the Gear Pulley.
- Page 21 DISASSEMBLY INSTRUCTIONS 2-6: HOLDER TRAVERSE/INSULATOR (F)/INSULATOR (R) (Refer to Fig. 2-6-A) Rack Feed Ass'y Remove the Holder Traverse. Remove the 2 Insulator (F). Remove the Insulator (R). Insulator (R) Switch PCB Ass'y Traverse Ass'y Gear Motor Insulator (F) Traverse Ass'y Feed Motor Holder Traverse •...
- Page 22 DISASSEMBLY INSTRUCTIONS [ 5 pin FFC ] ~ FEED MOTOR ~ Reinforcement Plate Reinforcement Plate BLUE (4) 10 ± 1mm ORANGE (3) Printing Surface 55 ± 1mm Switch PCB Ass'y Fold ~ SPINDLE MOTOR ~ Reinforcement Plate BLACK (2) Printing Surface Fold RED (1) Fold...
-
Page 23: Removal Of Anode Cap
DISASSEMBLY INSTRUCTIONS 3. After one side is removed, pull in the opposite direction to 3. REMOVAL OF ANODE CAP remove the other. Read the following NOTED items before starting work. NOTE After turning the power off there might still be a potential Take care not to damage the Rubber Cap. -
Page 24: Removal And Installation Of Flat Package Ic
DISASSEMBLY INSTRUCTIONS 3. When IC starts moving back and forth easily after 4. REMOVAL AND INSTALLATION OF FLAT desoldering completely, pickup the corner of the IC using PACKAGE IC a tweezers and remove the IC by moving with the IC REMOVAL desoldering machine. - Page 25 DISASSEMBLY INSTRUCTIONS INSTALLATION 4. When bridge-soldering between terminals and/or the soldering amount are not enough, resolder using a Thin- 1. Take care of the polarity of new IC and then install the tip Soldering Iron. (Refer to Fig. 4-8.) new IC fitting on the printed circuit pattern. Then solder each lead on the diagonal positions of IC temporarily.
-
Page 26: Service Mode List
SERVICE MODE LIST This unit is provided with the following SERVICE MODES so you can repair, examine and adjust easily. To enter the SERVICE MODE function, press and hold both buttons simultaneously on the main unit and on the remote control for more than the standard time (second). -
Page 27: When Replacing Eeprom (Memory) Ic
WHEN REPLACING EEPROM (MEMORY) IC If a service repair is undertaken where it has been required to change the MEMORY IC, the following steps should be taken to ensure correct data settings while making reference to TABLE 1. NOTE: No need to set data for after position INI 27 due to the adjustment value. Table 1 Enter DATA SET mode by setting VOLUME to minimum. -
Page 28: Electrical Adjustments
ELECTRICAL ADJUSTMENTS BEFORE MAKING ELECTRICAL FUNCTION FUNCTION ADJUSTMENTS OSD H COL. AV(MIN) OSD CONTRAST TINT AV Read and perform these adjustments when repairing the CUT OFF SHARPNESS AV H POSITION SUB BIAS circuits or replacing electrical parts or PCB assemblies. H. - Page 29 ELECTRICAL ADJUSTMENTS 2-4: WHITE BALANCE 2-7: VERTICAL SIZE NOTE: Adjust after performing CUT OFF adjustment. Receive the monoscope pattern. Using the remote control, set the brightness and contrast Place the set in Aging Test for more than 15 minutes. to normal position. Receive the gray scale pattern from the Pattern Activate the adjustment mode display of Fig.
- Page 30 ELECTRICAL ADJUSTMENTS 2-10: OSD POSITION 2-13: TINT Receive the color bar pattern. (RF Input) Activate the adjustment mode display of Fig. 1-1. Using the remote control, set the brightness, contrast, Press the RIGHT/LEFT button on the remote control until the difference of A and B becomes minimum. color and tint to normal position.
- Page 31 ELECTRICAL ADJUSTMENTS 2-14: COLOR CENTER 2-15: CONTRAST MAX Receive the color bar pattern. (RF Input) Activate the adjustment mode display of Fig. 1-1 and Using the remote control, set the brightness, contrast, press the channel button (22) on the remote control to color and tint to normal position.
-
Page 32: Purity And Convergence
ELECTRICAL ADJUSTMENTS PURITY AND CONVERGENCE 3-3: STATIC CONVERGENCE ADJUSTMENTS NOTE Adjust after performing adjustments in section 3-2. NOTE Receive the crosshatch pattern from the color bar Turn the unit on and let it warm up for at least 30 generator. minutes before performing the following adjustments. - Page 33 ELECTRICAL ADJUSTMENTS 4. ELECTRICAL ADJUSTMENT PARTS LOCATION GUIDE (WIRING CONNECTION) CRT PCB CD805 TP024 TP022 J801 CP802B CD802 VR3800 J4201 FB401 CP803A CD3800 AC IN S3801 S3802 CP3800 CP802A CP8002 VR401 CD302 CP302 CD301 SPEAKER CP8001 (SP352) SPEAKER (SP351) AV PCB DVD DECK CP2303 CP8101...
- Page 34 DVD BLOCK DIAGRAM 2K EEPROM IC4002 BR24L02F-WE2 DVD LOADER TV BLOCK DM-3S I CCLK I CDAT +3.3V, 1.9V REG IC4003 A, C BA33E00WHFP-TR RF_A, B, C, D, E, F IRRCV MD_CD, MD_DVD OPE-AMP VR_DVD, VR_CD IC2304 BA10358FV-E2 DVD/CD, DVD_LD, CD_LD MPEG/MICON/DSP/FR_AMP SPDIF IC4001...
-
Page 35: Tv Block Diagram
TV BLOCK DIAGRAM RESET IC103 PST3231NR POWER TU001 ON/OFF OPEN/CLOSE MICON IC101 STOP OEC6084A X101 16MHz PLAY Q105 SKIP FF BUFFER 6 11 12 SKIP REW FROM DVD BLOCK DVD C DVD Y DVD_RESET R.OUT G.OUT V801 B.OUT IC4201 DVD_A_OUT_L Q4209~Q4212 NJM4580M MUTE SW... -
Page 36: Power Block Diagram
POWER BLOCK DIAGRAM Q3003, Q3004, Q3007 P.CON+3.8V OUT P.CON+3.8V 5V REG. DVD_H IC3001 KIA7805API P.CON+D5V L3800 DEGAUSS COIL Q3008 DRIVE AT+5.6V TRANSFORMER D3808, D3809, SWITCHING F3800 T3800 D3815, D3816 RECTIFIER SOUND+B 5V REG. IC3800 IC3002 KIA7805API Q3800 PS2561AL1-1-V(W) Q3803 FEED BACK P.CON+5V FEED BACK POWER... -
Page 37: Dvd
PRINTED CIRCUIT BOARDS DVD (BOTTOM SIDE) DVD (TOP SIDE) CP2303 R2359 R2356 Q2305 Q2303 CP2301 R2303 CP2302 Q2304 R2355 R2337 R2327 R2360 R2324 R2325 R2329 R2330 R2326 S801X R2323 R2328 C2307 Q2302 IC2301 R2361 W875 IC2304 R2335 R4061 R2309 B4009 C4032 C4001 C4096... -
Page 38: Printed Circuit Boards
PRINTED CIRCUIT BOARDS AV/CRT (INSERTED PARTS) SOLDER SIDE CP302 C434_1 C4275 D403 VR401 D411 W094 J2201 R2225 W173 HS301 D404 W172 IC302 W171 R2226 W169 CP401 IC401 W168 W014 W825 R346 W013 W167 W091 R323 HS401_1 S002X W166 B301 J2204 W012 W165 S802Y... - Page 39 PRINTED CIRCUIT BOARDS AV/CRT (CHIP MOUNTED PARTS) SOLDER SIDE R4241 R4210 Q4201 R4242 Q602 R4216 R634 R4201 R4221 R2214 Q4212 IC4201 R147 Q2201 R4238 R123 IC199_1 Q4209 Q4210 Q4211 Q101 R2219 R119 Q4203 R4209 R4237 Q105 IC103 R4236 R2215 Q3007 Q3001 Q605 W859...
- Page 40 PRINTED CIRCUIT BOARDS LOADING MOTOR (INSERTED PARTS) LOADING MOTOR (CHIP MOUNTED PARTS) SOLDER SIDE SOLDER SIDE CD2302 SOLDER SIDE D D0 0 CD2301 M2601 M2602...
-
Page 41: Mpeg/Micon/Dsp
MPEG/MICON/DSP SCHEMATIC DIAGRAM (DVD PCB) C4038 0.01 B D4001 FROM/TO AUDIO/VIDEO JG001 UNREG+3.8V 1SS355 DUPTD1 JG002 SYS_MUTE DVD-H JG003 BOOT2 V_SW LEVEL JG004 BOOT1 CONVERT C4096 D4005 DAC_VIDEO_C JG005 R4052 0.001 B Q4004 DUPTD1 DAC_VIDEO_B KTC3875S_Y_RTK JG006 1SS355 DUPRD1 4.7K ASDATA0 JG007 DUPTD0... -
Page 42: Memory
MEMORY SCHEMATIC DIAGRAM (DVD PCB) 16M SDRAM 16M SDRAM FROM/TO MPEG/MICON/DSP IC4008 HY57V161610ETP-7 IC4009 HY57V161610ETP-7 FLASH IC 8M C4060 C4050_1 SD_A0 IC4007 SST39VF800A-70-4C-EKE SD_A1 0.1 F 0.1 F SD_A2 HA16 HA15 SD_A3 SD_D15 SD_D0 SD_D15 SD_D0 DQ15 DQ15 SD_A4 SD_A5 C4064 HA14 SD_A6... -
Page 43: Motor Drive
MOTOR DRIVE SCHEMATIC DIAGRAM (DVD PCB) FROM/TO MPEG/MICON/DSP OPE AMP IC2304 BA10358FV-E2 DM3S/3O DVD/CD DVD_LD CD_LD VR_DVD/CD VR_DVD/CD FROM/TO LOADER OPU_A R2362 OPU_B OPU_C CP2301 3.3K OPU_D 09-5000-024-001-001 OPU_E OPU_F (W804) HOME (RF_GND) DVD/CDPD MON(DVD) TOUT_SW NC(SW) TIN_SW VR/DVD B2304 VOL(DVD) RF_A5V P.CON+A5V... - Page 44 AUDIO/VIDEO SCHEMATIC DIAGRAM (DVD PCB) C/B/U DAC_C_VIDEO CVBS Y/R/V DAC_B_VIDEO FROM/TO MPEG/MICON/DSP/RF_AMP C8105 DAC_VIDEO_C CVBS CVBS CVBS DAC_VIDEO_C DAC_VIDEO_B 12P CH L8102 P.CON+5V 0305 C8108 RESET W819 DAC_VIDEO_B 12P CH L8103 AMCLK S801Y ABCLK 0305 ALRCLK TP8102 TP8101 ASDATA0 P-H/I-L P-H/I-L DVD-H ASP/FS...
- Page 45 REGULATOR SCHEMATIC DIAGRAM (AV PCB) FROM/TO POWER UNREG+12V UNREG+8V UNREG+5V 5V REG IC IC3001 KIA7805API UNREG+12V 3.8V OUT Q3003 L3000 KTC4369 10uH TSL0808 W860 DRIVER DRIVER Q3004 Q3006 KTA1281_Y KTC3203_Y D3008 R3014 TO STEREO 1N4005-EIC 220 1/2W DRIVER R3006 P.CON+5V Q3010 KTA1281_Y 10K 1/4W...
- Page 46 MICON /TUNER SCHEMATIC DIAGRAM (AV PCB) FROM/TO IN/OUT 0 32.1 I2C_OFF REMOCON KEY_A D106 R119 KEY_B POWER_ON_H MTZJ12B DVD_H1 Q101 2SA1530A-T1 R125 4.7K 1/4W FROM/TO VIF/SIF/CHROMA R140 OSD_Y R144 D101 OSD_B R141 2.7K OSD_G 1SS133 R145 2.7K OSD_R 2.7K W804 SYNC_VIDEO C124 H_CONTROL...
- Page 47 VIF/SIF/CHROMA SCHEMATIC DIAGRAM (AV PCB) FROM/TO REGULATOR DVD_Y DVD_C P.CON+5V P.CON+9V S002X AT5.7VREG C4227 SWD_V_OUT 8.5VREG FROM/TO DEFLECTION R625 V.OUT H.OUT C628 FROM/TO IN/OUT 0.47 SWD_VIDEO CHROMA IC FRONT_VIDEO IC601 LA76319NM-MPB-E W827 C622 R622 W832 CLMP DVD_Y FROM POWER APC1 390 1/4W VIDEO CLMP...
- Page 48 SOUND AMP SCHEMATIC DIAGRAM (AV PCB) SOUND_AMP IC IC302 AN7522N R311 C307 C348 270K 0.01 0.01 FROM/TO SPEAKER HS301 763WAA0310 L CH CP301 CD301 SPEAKER 213213102W1 C3123806 SP OUT L+ SP351 SG04D11BNA SP OUT L- 8 OHM R CH CD302 CP302 SPEAKER 213213102W1...
- Page 49 IN/OUT SCHEMATIC DIAGRAM AT+5.6V (AV PCB) OS2202 PIC-37243SR Vout R2202 1/4W POWER_ON_H Q2201 RT1N241C-T1 R2214 R2216 R2218 R2220 R2221 1.5K 2.7K 5.6K TO STEREO REMOCON A_O_L AT+5.6V A_O_R DVD_H2 SOUND_GND DVD_AUDIO_L KEY_A DVD_AUDIO_R R4206_1 R2215 R2217 R2219 KEY_B FRONT_A_IN_L 1.5K FRONT_A_IN_R 2.2K 1/4W...
- Page 50 STEREO SCHEMATIC DIAGRAM (AV PCB) L904 100uH FROM/TO MICON/TUNER TUNER_AUDIO R911 100 1/4W R912 100 1/4W TO SOUND AMP A_OUT_L A_OUT_R P.CON+12_A R908 C922 KANP FROM IN/OUT A_O_R A_O_L DVD_AUDIO_L NC 0 DVD_AUDIO_R FRONT_A_IN_R OUT SW IIC Decoder St.PLL FRONT_A_IN_L Pilot Input Switch...
- Page 51 DEFLECTION SCHEMATIC DIAGRAM V.OUTPUT IC IC401 AN5522 (AV PCB) THERMAL PROTECTION PUMP UP 25.5 12.9 24.8 W843 TO DY CP401 A1561WV2-A5P L402 FROM/TO VIF/SIF/CROMA ELH5L4113 R412 R413 R416 V.OUT 3.3K 1/4W 1.8K 1/4W 56K 1/4W R420 R448 FB401 2.7K 1K 1W FQI14B007_M C450 383.7...
- Page 52 FROM VIF/SIF/CHROMA CRT SCHEMATIC DIAGRAM CP802B (CP802A) B2013H02-6P CLAMP (CRT PCB) G.OUT R.OUT B.OUT CLAMP OFF FROM DEFLECTION CP803B (CP803A) B2013H02-4P HEATER 180V FROM/TO DEFLECTION CP801 (CD805) A2361WV2-2P 120.0 122.0 115.0 RED AMP GREEN AMP BLUE AMP Q804 Q805 Q806 2SC4217 2SC4217 2SC4217...
- Page 53 POWER SCHEMATIC DIAGRAM (AV PCB) D3823 SB340FL-6737 FROM/TO DEFLECTION D3821 W818 DEGAUSS COIL L3800 RU2AM-EIC UNREG+12V 8R140023 CP3800 A1561WV2-2P R3828 0.22 1W D3818 R3829 R3830 1N4937 100 1/4W 1K 1/4W L3803 TH3800_1 W5T_20X10X10A PTDCA1BF3R0Q100 TO SOUND AMP R3817 C3810 C3812 S3802 WHITE WHITE...
- Page 54 LOADING MOTOR/SW SCHEMATIC DIAGRAM (LOADING MOTOR PCB) (SW PCB) SSS-13-2 CD2302 2H052601 ESE22MH24 CD2301 SW-2(CLOSE) 2H062102 GND(SW) GND(SW) SW-1(OPEN) PICK UP INNER LIMIT SWITCH LOADING MOTOR(+) FEED MOTOR (-) M2602 LOADING MOTOR(-) BCZ3B03 FEED MOTOR (+) M2603 SPINDLE MOTOR (-) BCZ3B52 SPINDLE MOTOR (+) M2601...
- Page 55 INTERCONNECTION DIAGRAM COMMAND TRANSMITTER TM101 TM101 OS2202 Vout DVD PCB PCB130 CD2001 DMD020 CP2301 GND(PDIC) COAXIAL GND(PDIC) WHITE J4201 YELLOW VREF VREF FRONT VIDEO JACK FRONT AUDIO JACK FRONT AUDIO JACK J2203 J2204 J2202 GND(NC) GND(NC) MON(COM) MON(COM) GND(CD) GND(CD) DRIVE VOL(CD) VOL(CD)
-
Page 56: Audio/Video
WAVEFORMS MPEG/MICON/DSP POWER ON 10ns 10µs 500mV 200mV 1.0V POWER ON 100ns 10µs 50µs 1.0V 200mV 1.0V MICON/TUNER VIF/SIF/CHROMA MEMORY POWER ON POWER ON 0.2ms 20µs 500mV 1.0V 0.5V AUDIO/VIDEO POWER ON STANDBY 500µs 0.2ms 0.5µs 500mV 1.0V 100mV POWER ON POWER ON 500µs 0.2ms... -
Page 57: Sound Amp
WAVEFORMS SOUND AMP STEREO POWER ON POWER ON POWER ON 10µs 100mV 50mV 2.0V POWER ON POWER ON POWER ON 10µs 2.0V 100mV 200mV IN/OUT DVD PLAY POWER ON POWER ON 0.5ms 10ms 200mV 0.5V 200mV DEFLECTION DVD PLAY POWER ON POWER ON 0.5ms 20µs... -
Page 58: Power
WAVEFORMS POWER ON 20µs 5.0V POWER ON 20µs POWER ON 20µs POWER STANDBY 5µs 5.0V STANDBY 5µs 5.0V NOTE: The following waveforms were measured at the point of the corresponding balloon number in the schematic diagram. -
Page 59: Mechanical Exploded Views
MECHANICAL EXPLODED VIEW 102B 102C 102A 102C PCB110 (CRT PCB ASS'Y) 101B 101J 101I 101K 101G 101J 101H 101K 101D 101C 101F 101K 101K 101E 101A I1-1... - Page 60 MECHANICAL EXPLODED VIEW PCB130 (DVD PCB ASS'Y) PCBD20 (AV PCB ASS'Y) I1-2...
- Page 61 MECHANICAL EXPLODED VIEW (PACKING DIAGRAM) 125, 126, 127, 128, 129, BL001, TM101 I1-3...
-
Page 62: Dvd Deck Exploded View
DVD DECK EXPLODED VIEW Cannot supply separately. If the repair is needed, replace the LOADER SUB ASS'Y. M2603 PCB610 (LOADING MOTOR PCB ASS'Y) CD2302 CD2301 PCB640 CD2001 (SW PCB ASS'Y) Do not replace the parts. Because, minute adjustments are needed if this condition is disassembled further more. -
Page 63: Mechanical Replacement Parts List
MECHANICAL REPLACEMENT PARTS LIST Location No. TSB P/N Reference No. Description AE007098 7A701A417A FRONT CABI ASS'Y 101A AE007099 701WPJD022 CABINET,FRONT 101B AE007100 712WPBA128 FLAP,DVD 101C AE007101 713WPAA223 GUIDE,REMOCON 101D AE007102 713WPAA222 GLASS,LED 101E AD302193 7235490034 BADGE,BRAND 101F AE007103 735WPAA951 BUTTON,FRAME 2 101G AE007104 735WPAA952... -
Page 64: Dvd Deck Replacement Parts List
DVD DECK REPLACEMENT PARTS LIST Location No. TSB P/N Reference No. Description AE006266 A5R807V650 DVD MECHA ASS'Y A5R807V650 AE005003 92P100109A HOLDER,TRAVERSE AE003550 92P100094A CLAMPER AE003551 92P100088A GEAR,MOTOR AE003537 92AAA0013A FEED RACK ASS'Y AE003538 92P200013A INSULATOR(F) AE003539 92P200014A INSULATOR(R) AE006115 92SBB0029A LOADER SUB ASS'Y AE003541 92P100095A... -
Page 65: Electrical Replacement Parts List
ELECTRICAL REPLACEMENT PARTS LIST Location No. TSB P/N Reference No. Description RESISTORS ! R401 AE005693 R3K58A331J R,METAL OXIDE 330 OHM 2W ! R402 AE005729 R3K58A151J R,METAL OXIDE 150 OHM 2W ! R408 AE006276 R3K58AR68J R,METAL OXIDE 0.68 OHM 2W ! R418 BZ210052 R002T21R8J 1.8 OHM 1/2W... - Page 66 ELECTRICAL REPLACEMENT PARTS LIST Location No. TSB P/N Reference No. Description DIODES D2303 BZ410086 DD7R0S3550 DIODE,SILICON 1SS355 TE-17 D2304 BZ410086 DD7R0S3550 DIODE,SILICON 1SS355 TE-17 D3003 BZ410006 D1VT001330 DIODE,SILICON 1SS133T-77 D3005 BZ410085 D2WXN40050 DIODE,SILICON 1N4005-EIC D3006 BZ410085 D2WXN40050 DIODE,SILICON 1N4005-EIC D3007 BZ410021 D97U05R61B DIODE,ZENER...
- Page 67 ELECTRICAL REPLACEMENT PARTS LIST Location No. TSB P/N Reference No. Description TRANSISTORS ! Q405 BZ510097 TCAT03227Y TRANSISTOR,SILICON KTC3227_Y-AT ! Q406 AE000656 TC1G058850 TRANSISTOR,SILICON 2SC5885 Q601 AE005873 T8RA030520 TRANSISTOR,SILICON 2SC3052-T1 Q602 AE005873 T8RA030520 TRANSISTOR,SILICON 2SC3052-T1 Q605 AE005941 TPRAB05002 COMPOUND TRANSISTOR RT1P141C-T112-1 ! Q804 BZ510009 TC3F042170...
- Page 68 ELECTRICAL REPLACEMENT PARTS LIST Location No. TSB P/N Reference No. Description SWITCHES SW2219 BZ612010 0504101T34 SWITCH,TACT EVQ21505R SW2220 BZ612010 0504101T34 SWITCH,TACT EVQ21505R SW2221 BZ612010 0504101T34 SWITCH,TACT EVQ21505R SW2223 BZ612010 0504101T34 SWITCH,TACT EVQ21505R VARIABLE RESISTORS VR401 BZ210255 V1K62H3BT8 VOLUME,SEMI FIXED NVG6THTB222 VR3800 BZ210265 V1K63Q2BTE...
- Page 69 ELECTRICAL REPLACEMENT PARTS LIST Location No. TSB P/N Reference No. Description MISCELLANEOUS FH3800 AE002634 06710T0009 HOLDER,FUSE EYF-52BCY FH3801 AE002634 06710T0009 HOLDER,FUSE EYF-52BCY OS2202 BZ614199 077Q004017 REMOTE RECEIVER PIC-37243SR ! SP351 BZ614200 070C533019 SPEAKER SG04D11BNA ! SP352 BZ614200 070C533019 SPEAKER SG04D11BNA TM101 AE006056 076D0KG010...
- Page 70 TOSHIBA CORPORATION 1-1, SHIBAURA 1-CHOME, MINATO-KU, TOKYO 105-8001, JAPAN...