Table of Contents
Advertisement
HISTORY INFORMATION FOR THE FOLLOWING MANUAL:
SERVICE MANUAL
MODEL NAME
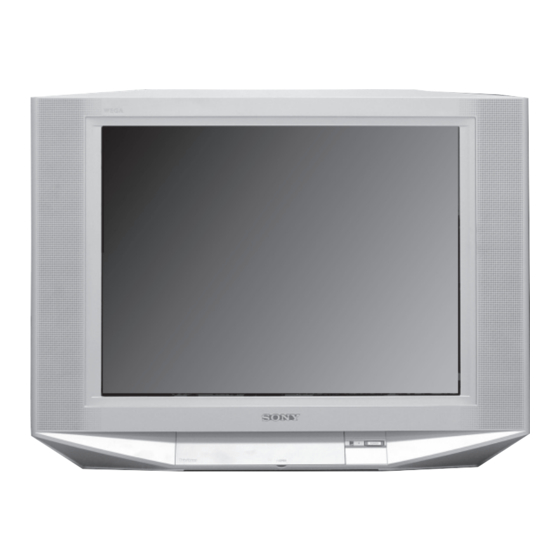
KV-29FS150
KV-29FS150
ORIGINAL MANUAL ISSUE DATE: 1/2007
REVISION DATE
1/2007
9-883-732-01
REMOTE COMMANDER
RM-YA005
LATIN NORTH
RM-YA005
LATIN SOUTH
SUBJECT
No revisions or updates are applicable at this time.
BX-1L
DESTINATION
CHASSIS NO.
SCC-S79I-A
SCC-S79J-A
®
TRINITRON
COLOR TELEVISION
CHASSIS
Advertisement
Chapters
Table of Contents

Related Manuals for Sony TRINITRON KV-29FS150


Summary of Contents for Sony TRINITRON KV-29FS150
-
Page 1: Service Manual
HISTORY INFORMATION FOR THE FOLLOWING MANUAL: BX-1L SERVICE MANUAL CHASSIS MODEL NAME REMOTE COMMANDER DESTINATION CHASSIS NO. KV-29FS150 RM-YA005 LATIN NORTH SCC-S79I-A KV-29FS150 RM-YA005 LATIN SOUTH SCC-S79J-A ORIGINAL MANUAL ISSUE DATE: 1/2007 REVISION DATE SUBJECT 1/2007 No revisions or updates are applicable at this time. ®... - Page 2 Self Diagnosis Supported model BX-1L SERVICE MANUAL CHASSIS MODEL NAME REMOTE COMMANDER DESTINATION CHASSIS NO. KV-29FS150 RM-YA005 LATIN NORTH SCC-S79I-A KV-29FS150 RM-YA005 LATIN SOUTH SCC-S79J-A KV-29FS150 RM-YA005 ® TRINITRON COLOR TELEVISION 9-883-732-01...
-
Page 3: Table Of Contents
KV-29FS150 TABLE OF CONTENTS SECTION TITLE PAGE Specifi cations ........................................4 Warnings and Cautions ......................................5 Safety Check-Out ......................................... 6 Self-Diagnostic Function ...................................... 7 SECTION 1: DISASSEMBLY ......................................10 1-1. Rear Cover Removal ....................................10 1-2. Chassis Assembly Removal ..................................10 1-3. -
Page 4: Specifi Cations
Supplied Accessories Remote Commander RM-YA005 Two Size AA (R6) Batteries Trademarks and Copyrights As an ENERGY STAR® Partner, Sony Corporation has determined that this product meets the ENERGY STAR® guidelines for energy efficiency. ENERGY STAR® is a U.S. registered mark. -
Page 5: Warnings And Cautions
Replace these components with Sony parts whose part numbers appear as shown in this manual or in supplements published by Sony. Circuit adjustments that are critical for safe operation are identifi ed in this manual. Follow these procedures whenever critical components are replaced or improper operation is suspected. -
Page 6: Safety Check-Out
KV-29FS150 SAFETY CHECK-OUT The AC leakage from any exposed metal part to earth ground and from After correcting the original service problem, perform the following all exposed metal parts to any exposed metal part having a return to safety checks before releasing the set to the customer: chassis, must not exceed 0.5 mA (500 microamperes). -
Page 7: Self-Diagnostic Function
KV-29FS150 Self Diagnosis SELF-DIAGNOSTIC FUNCTION Supported model The units in this manual contain a self-diagnostic function. If an error occurs, the STANDBY LED indicator will automatically begin to fl ash. The number of times the LED fl ashes translates to a probable source of the problem. A defi nition of the STANDBY LED fl ash indicators is listed in the instruction manual for the user’s knowledge and reference. - Page 8 KV-29FS150 3. Stopping the STANDBY LED Indicator Flash Turn off the power switch on the TV main unit or unplug the power cord from the outlet to stop the STANDBY LED Indicator from fl ashing. 4. Self-Diagnostic Screen Display For errors with symptoms such as “power sometimes shuts off” or “screen sometimes goes out” that cannot be confi rmed, it is possible to bring up past occurrences of failure on the screen for confi...
- Page 9 KV-29FS150 Self-Diagnostic Circuit A BOARD A BOARD A BOARD A BOARD IC001 IC804 IC001 IC003 Y/CHROMA JUNGLE V.OUT SYSTEM MEMORY SDA1 FROM CV BOARD F.B-PLS IC751 PIN 5 V.GUARD A BOARD RED LED EHTO FROM DISPLAY Q816 COLLECTOR +B overcurrent (OCP) Occurs when an overcurrent on the +B (135V) line is detected by pin 32 of IC001 (A Board).
-
Page 10: Section 1: Disassembly
KV-29FS150 SECTION 1: DISASSEMBLY 1-1. REAR COVER REMOVAL 2 Rear cover 1 12 screws +BVTP2 4X16 1-2. CHASSIS ASSEMBLY REMOVAL KV-29FS150... -
Page 11: Service Position
KV-29FS150 1-3. SERVICE POSITION CV Board 1 Release AC Power Cord 2 Release wires from 3 wire holders 2 Rotate A Board and H2 Board A Board H2 Board KV-29FS150... -
Page 12: Picture Tube Removal
KV-29FS150 1-4. PICTURE TUBE REMOVAL WARNING: BEFORE REMOVING THE ANODE CAP High voltage remains in the CRT even after the power is disconnected. To avoid electric shock, discharge CRT before attempting to remove the anode cap. Short between anode and CRT coated earth ground strap. -
Page 13: Section 2: Set-Up Adjustments
KV-29FS150 SECTION 2: SET-UP ADJUSTMENTS The following adjustments should be made when a complete realignment Perform the adjustments in order as follows: is required or a new picture tube is installed. Beam Landing Convergence These adjustments should be performed with rated power supply voltage Focus unless otherwise noted. -
Page 14: Convergence
KV-29FS150 2-2. CONVERGENCE Horizontal Static Convergence Before starting convergence adjustments: If the blue dot does not converge with the red and green dots, use the 6 pole magnet to adjust as shown: Perform FOCUS adjustments. Set Picture mode to “CUSTOM”. Feed in dot pattern. -
Page 15: Focus Adjustment
KV-29FS150 Convergence Rough Adjustment Before performing this adjustment, perform Horizontal and Vertical Static Convergence Adjustment. Input cross hatch pattern. a) TLH Adjust the horizontal convergence of red and blue dots by inserting TLH Correction Plate to the DY pocket (left or right). b) YCH Adjust YCH to balance Y axis. -
Page 16: Screen (G2)
KV-29FS150 2-4. SCREEN (G2) Before beginning adustment procedure: -Set Picture and Brightness to “STANDARD”. -Set TV to Video mode. -Set WHBL 016 “RGBB” to 01 Connect R, G, B of the CV board cathode to oscilloscope. Adjust Brightness to obtain the cathode value to the value shown below: Cathode setting voltage: 170 V ±... -
Page 17: Section 3: Circuit Adjustments
KV-29FS150 SECTION 3: CIRCUIT ADJUSTMENTS Electrical Adjustments by Remote Commander Use the Remote Commander (RM-YA005) perform the circuit adjustments in this section. Test Equipment Required: 1. Pattern generator 2. Frequency counter 3. Digital multimeter 4. Audio oscillator 3-1. REMOTE ADJUSTMENT BUTTONS AND INDICATORS DISPLAY (Service Mode) MUTING... -
Page 18: Accessing The Service Menu
KV-29FS150 3-2. ACCESSING THE SERVICE MENU 3-3. CONFIRMING SERVICE ADJUSTMENT CHANGES Use the remote commander to access the service menu and perform the following adjusments. After completing adjustments, pull out the plug from the AC outlet, Standby mode (Power off). then replace the plug in the AC outlet again. -
Page 19: Sub Color Adjustment
KV-29FS150 Select Wide Mode to “ON” in TV and Video mode and write “PMAX” Sub Hue Adjustment data - 6 steps (for models with V-Compression features only). Set TV to Video mode. 10. Press MUTING then 0 to write into memory. Input NTSC 3.58 Color Bar(CB) to TV set. -
Page 20: Wide Mode
KV-29FS150 Geometry Adjustment Normal Mode 50Hz/60Hz Geometry adjustment must be done for both color systems PAL and Input PAL Special Color Bar (SPCB) or PAL Monoscope (OTHER NTSC. model) and Video mode or NTSC Monoscope (NTSC model) signal using a pattern generator. H-Trapezoid Adjustment Set Wide Mode to “OFF”. -
Page 21: Service Data
KV-29FS150 3-6. SERVICE DATA Functionality Initial Value Function (4:3) 50 (4:3) 60 (4:3) w50 (4:3) w60 Category Name Horizontal Shift (HS) GEOM HPOS HPAR Horizontal Parallelogram HBOW Horizontal Bow VLIN Vertical Linearity Vertical Scroll VSCR HSIZ EW Width (EW) EWPW EW Parabola/Width (PW) UCOP EW Upper Corner Parabola... - Page 22 KV-29FS150 Functionality Function Initial Value 50pal(TV) 50pal(Video) Pic mode 0 Pic mode 1 Pic Mode 2 Video Category Name Black Level Offset R (OFB = 00), WHBL BKOR Offset B (OFB = 01) Black Level Offset G BKOG RDRV White Point R GDRV White Point G BDRV...
- Page 23 KV-29FS150 Functionality Initial Value Function 60ntsc(TV) 60ntsc(Video) 60palm(TV) 60palm(Video) 50YUV 60YUV Category Name SADJ PMAX Picture Maximum SHUE Sub-Hue SSHP Sub-Sharpness SSHO Sub-Sharpness Offset (Intelligent Pic) SCOL Sub-Color SCOO Sub-Color Offset (Intelligent Pic) Picture Control [GA:0~100(valid); >100(invalid), Others:0~63(valid); ignore bit 6(invalid)] Color Control [GA:0~100(valid);...
- Page 24 KV-29FS150 Functionality Function Initial Value Common Others PAL(TV) NTSC(TV) SECAM(TV) PAL(Video) Category Name Peaking Center Frequency and Delay PFRQ Ratio Pre & Over Shoot Ratio of Positive & Negative Peaks YDLY Y-Delay PAL-SECAM or NTSC (Japan/USA) Matrix CMAT Automatic Color Limiting Chroma Bandpass Center Frequency SECAM Black Offset CHSE...
- Page 25 KV-29FS150 Functionality Function Initial Value Common (4:3) 50 (4:3) 60 Others Video Category Name Synchronization on YSYNC Input SYNC Phase 1 Time Constant Video Ident Mode Forced Slicing Level for Vertical Sync Slicing Level Sync Separator SVID Source Selection for Video Identification FORF Forced Field Frequency Macro Vision Keying...
- Page 26 LNSN RF Amp SN Level Threshold RF Amp SN Level Drop Threshold LNSD 10 RF Amp check SN Drop Timing LNEX CHTR 11 Channel Threshold after Auto Prg to set RF Amp User Mode TUSO 12 Sony Tuner used KV-29FS150...
- Page 27 KV-29FS150 Functionality Function Initial Value Common Others Pic mode 0 Pic mode 1 Pic Mode 2 SECAM Category Name Delay of RGB Output to VM Output RGBD Amplitude of VM Output VMAP VM setting (0:High , 1:Low , 2,3: OFF) VMMO VM Mode CRAO...
- Page 28 KV-29FS150 Functionality Function Initial Value Common Video SRS/WOW Trusurround Istereo Imono Category Name BBE Contour SDSP BBE Process BBLW BBE Contour Offset SVOF Surround /Effect Mode Volume Offset Decoder Level Adjust Mono Level Adjust Nicam Level Adjust SAP Level Adjust ADC Level Adjust Incredible Mono/Stereo Effect 10 Main Bass Offset...
- Page 29 KV-29FS150 Functionality Function Initial Value Common Category Name SPTU Upper Threshold forSAP carrier detection SDEC SPTL Lower Threshold for SAP carrier detection SPTH Noise Threshold for automute of SAP SPHY Hysteresis size for automute of SAP FMTH Noise Threshold for automute of SC2 in FM A2 standard FMHY Hysteresis size for automute of SC2 in FM A2 standard NILE...
- Page 30 KV-29FS150 Functionality Function Initial Value Common Others Category Name SOFF stay off (0: follow last memory with AC on, 1: standby with AC on) OPUS SPCH Channel Number after Shipping Condition SPCA Cable Selection after Shipping Condition (1 = Cable On) CCBR CC Brightness (only for US) CCHP...
-
Page 31: Section 4: Diagrams
KV-29FS150 SECTION 4: DIAGRAMS 4-1. CIRCUIT BOARDS LOCATION CV Board H2 Board A Board : B+line. 4-2. PRINTED WIRING BOARD AND : B-line. SCHEMATIC DIAGRAM INFORMATION (Actual measured value may be different). All capacitors are in µF unless otherwise noted. pF : µµF 50WV or less : signal path. -
Page 32: Block Diagram
KV-29FS150 4-3. BLOCK DIAGRAM & & KV-29FS150... -
Page 33: Schematics And Supporting Information
KV-29FS150 4-4. SCHEMATICS AND SUPPORTING INFORMATION A BOARD SCHEMATIC DIAGRAM (1 OF 6) TO A BOARD CN905 A BOARD WAVEFORMS TO CV BOARD TO CV BOARD CN711 CN701 CN007 CN004 CN003 — W066 C006 C005 W075 R377 W079 JR801 2.5 Vp-p (V) 5.4 Vp-p (H) 3.2 Vp-p (H) 1 . -
Page 34: A Board Schematic Diagram (2 Of 6)
KV-29FS150 A BOARD SCHEMATIC DIAGRAM (2 OF 6) TO h2 BOARD CN4110 — CN2105 — R237 R238 — 1/10W RN-CP 1/10W RN-CP D200 C235 C217 1PS226-115 C214 470p 1000 1000 R2151 R2152 C234 IC200 470p 1608 AN17808A AUDIO-AMP R234 1608 R235 —... -
Page 35: A Board Schematic Diagram (3 Of 6)
KV-29FS150 A BOARD SCHEMATIC DIAGRAM (3 OF 6) IC606 KIA78D33P1 3 . 3 V R E G D635 PDZ3.6B-115 3 . 3 V — C672 C641 0 . 0 1 CN605 IC607 BA18BC0FP-E2 1608 1 . 8 V R E G CHOKE(PFC) 1.8V_MAIN CHOKE(PFC) -
Page 36: A Board Schematic Diagram (4 Of 6)
KV-29FS150 A BOARD SCHEMATIC DIAGRAM (4 OF 6) +B_2 — R500 1/10W RN-CP HORIZONTAL DEFLECTION CN507 H-DRIVE R5032 R596 TO CV BOARD CN1801 -15V 200V SW R579 ROT_CTRL D517 Q501 — BY228GP OCP CIRCUIT 1 3 4 . 3 R562 L515 KTA1279 10mH... -
Page 37: A Board Schematic Diagram (5 Of 6)
KV-29FS150 A BOARD SCHEMATIC DIAGRAM (5 OF 6) — A BOARD TUNER SWF104 — SWF102 — C138 0 . 0 1 — 1608 JR1100 R106 TU101 8 . 2 k CHIP 1/10W RN-CP L101 — 0.33UH R108 C116 R128 4700p 1/10W RN-CP CHIP... -
Page 38: A Board Schematic Diagram (6 Of 6)
KV-29FS150 A BOARD SCHEMATIC DIAGRAM (6 OF 6) F O R J I G CN904 — JR1903 MON-OUT CHIP R9028 TU-AGC L902 1/10W 47uH B_INT RN-CP — B_DAT C956 B_CLK C916 0 . 1 C093 C096 C095 C094 0 . 1 0 . - Page 39 KV-29FS150 [AUDIO-VIDEO PROCESSOR, AUDIO, POWER SUPPLY, DEFLECTION, TUNER] [AUDIO-VIDEO PROCESSOR, AUDIO, POWER SUPPLY, DEFLECTION, TUNER] COMPONENT SIDE CONDUCTOR SIDE CN903 D008 R008 L101 R111 W031 C329 C335 CN014 R114 ID JUMPERS 1-868-156-23 R154 D007 R007 Q104 C1329 1-868-156-23 A-1199- 697-A CN903 CN904 C138...
-
Page 40: Cv Board Schematic Diagram
KV-29FS150 CV BOARD SCHEMATIC DIAGRAM CV BOARD WAVEFORMS NTSC NTSC NTSC — CN704 TO FBT 2.400Vp-p 2.280Vp-p 1.760Vp-p NTSC NTSC NTSC J751 C786 R760 — C752 4700p 100k 158.0Vp-p C1805 4700p 112.0Vp-p 148.0Vp-p 1/2W C1809 IC1801 LA6500-FA C754 R773 2 . 2 250V ROTATION AMP 1/2W... - Page 41 KV-29FS150 [RGB AMPLIFIER, ROTATION CIRCUIT, VELOCITY MODULATION] [RGB AMPLIFIER, ROTATION CIRCUIT, VELOCITY MODULATION] COMPONENT SIDE CONDUCTOR SIDE CN1801 (TO A CN507) CN1801 EY704 Q1802 Q719 Q717 A704 C785 JW1881 C712 A703 R797 R797 EY703 A751 JW1880 JW761 C785 C712 A704 C790 A703 D1803...
-
Page 42: H2 Board Schematic Diagram
KV-29FS150 H2 BOARD SCHEMATIC DIAGRAM TO SPEAKER TO A BOARD TO A BOARD CN2105 CN9201 CN4106 CN4110 CN4105 TO A BOARD CN3102 CN4113 — R4123 D4111 1/4W 1SS133T-77 GND_2 GND_2 R4120 C4117 C4116 — 1/4W D4110 1SS133T-77 R4121 1/4W CN4101 FH4102 FH4101 R4110... - Page 43 KV-29FS150 [FRONT PANEL] COMPONENT SIDE L/250V EY4117 EY4199 EY4217 EY4008 EY4009 CN4113 JW4661 EY4219 F4101 JW4662 FH4101 FH4102 C4605 CN4103 C4603 (TO K BRD EY4101 JW4135 CN4109 CN207) EY4216 EY4215 R4123 JW4104 JW4664 CN4107 C4111 EY4213 EY4214 CN4106 C4112 (TO SPEAKER) EY4118 EY4111 AC OUT...
-
Page 44: Semiconductors
KV-29FS150 4-5. SEMICONDUCTORS 2SB709A-QRS-TX 2SB734-T-34 2SA1309A-QRSTA 2SC3840K 2SA1837 2SD601A-QRS-TX 2SC3209LK-TP 2SC3311A-QRSTA LETTER SIDE 2SD2144S-TP-UVW LETTER SIDE 2SA1091O-TPE2 IRF614 2SK2663 2SC4793 2SD2578-YB RU-1P ERA38-06TP1 ERB44-06TP1 RD9.1EW-T1 MA111-TX ERC06-15S ERA82-004TP5 UDZ-TE-17.5.1B 1SS83TD EGP20DPKG23 1SS133T-77 UDZ-TE-17.91B GP08DPKG23 MTZJ-T-77-5.1C CATHODE D1NS0R-TA CATHODE RGP10GPKG23 MTZJ-T-77-5.6C MTZJ-T-77-12C CATHODE RU4AM-T3... -
Page 45: Section 5: Exploded Views
BUTTON, POWER The high-voltage leads associated with the FBT on this 2-666-831-31 DOOR A Board are not included and must be ordered separately. [See 17-19] 4-046-160-31 EMBLEM, SONY NO.9 A-1227-136-A A BOARD, COMPLETE [17-19] (LATIN SOUTH MODELS ONLY) 2-666-833-01 COVER, CONTROL... -
Page 46: Picture Tube
KV-29FS150 NOTE: The components identifi ed by shading and mark are critical for safety. Replace only with part number specifi ed. 5-2. PICTURE TUBE 2-580-662-01 SCREW, HEXW TP 7X40 REF. NO. PART NO. DESCRIPTION [ASSEMBLY INCLUDES] REF. NO. PART NO. DESCRIPTION [ASSEMBLY INCLUDES] 2-656-888-02... -
Page 47: Section 6: Electrical Parts List
KV-29FS150 SECTION 6: ELECTRICAL PARTS LIST NOTE: The components identifi ed by shading RESISTORS mark are critical for safety. Replace only • All resistors are in ohms with part number specifi ed. • F : nonfl ammable • All variable and adjustable resistors have characteristic curve B, unless otherwise noted. - Page 48 KV-29FS150 REF. NO. PART NO. DESCRIPTION VALUES REF. NO. PART NO. DESCRIPTION VALUES C091 1-162-927-11 CERAMIC CHIP 100pF C232 1-137-374-11 MYLAR 0.047µF 5% C092 1-107-826-11 CERAMIC CHIP 0.1µF C234 1-164-315-11 CERAMIC CHIP 470pF C093 1-107-826-11 CERAMIC CHIP 0.1µF C235 1-164-315-11 CERAMIC CHIP 470pF C094...
- Page 49 KV-29FS150 NOTE: The components identifi ed by shading mark are critical for safety. Replace only with part number specifi ed. REF. NO. PART NO. DESCRIPTION VALUES REF. NO. PART NO. DESCRIPTION VALUES C527 1-162-970-11 CERAMIC CHIP 0.01µF C639 1-126-933-11 ELECT 100µF C537 1-107-911-11...
- Page 50 KV-29FS150 NOTE: The components identifi ed by shading mark are critical for safety. Replace only with part number specifi ed. REF. NO. PART NO. DESCRIPTION VALUES REF. NO. PART NO. DESCRIPTION VALUES C922 1-164-315-11 CERAMIC CHIP 470pF D108 8-719-036-94 DIODE RD5.6SB-T1 C925 1-164-315-11...
- Page 51 KV-29FS150 REF. NO. PART NO. DESCRIPTION VALUES REF. NO. PART NO. DESCRIPTION VALUES D614 8-719-036-41 DIODE MA4300-L(TA) FB601 1-469-578-11 FERRITE 1.1µH (LATIN SOUTH MODELS ONLY) FB603 1-469-578-11 FERRITE 1.1µH D615 6-500-175-01 DIODE 1E3-TB FB605 1-469-578-11 FERRITE 1.1µH (LATIN SOUTH MODELS ONLY) FB608 1-412-911-31 FERRITE...
- Page 52 KV-29FS150 NOTE: The components identifi ed by shading mark are critical for safety. Replace only with part number specifi ed. REF. NO. PART NO. DESCRIPTION VALUES REF. NO. PART NO. DESCRIPTION VALUES JR204 1-216-864-11 SHORT CHIP JR2110 1-216-864-11 SHORT CHIP JR205 1-216-864-11 SHORT CHIP...
- Page 53 KV-29FS150 REF. NO. PART NO. DESCRIPTION VALUES REF. NO. PART NO. DESCRIPTION VALUES TRANSISTOR R029 1-216-809-11 METAL CHIP 1/10W R030 1-216-809-11 METAL CHIP 1/10W Q001 8-729-038-67 TRANSISTOR KRC102S R038 1-216-809-11 METAL CHIP 1/10W Q010 8-729-600-22 TRANSISTOR 2SA1235-F R039 1-216-809-11 METAL CHIP 1/10W Q016 8-729-038-67...
- Page 54 KV-29FS150 REF. NO. PART NO. DESCRIPTION VALUES REF. NO. PART NO. DESCRIPTION VALUES R205 1-218-867-11 METAL CHIP 6.8K 0.50% 1/10W R389 1-218-285-11 METAL CHIP 1/10W R206 1-216-809-11 METAL CHIP 1/10W R393 1-216-809-11 METAL CHIP 1/10W R207 1-218-867-11 METAL CHIP 6.8K 0.50% 1/10W R394 1-216-829-11...
- Page 55 KV-29FS150 NOTE: The components identifi ed by shading mark are critical for safety. Replace only with part number specifi ed. REF. NO. PART NO. DESCRIPTION VALUES REF. NO. PART NO. DESCRIPTION VALUES R562 1-243-683-71 METAL OXIDE R647 1-216-821-11 METAL CHIP 1/10W R568 1-249-383-11...
- Page 56 KV-29FS150 NOTE: The components identifi ed by shading mark are critical for safety. Replace only A CV with part number specifi ed. REF. NO. PART NO. DESCRIPTION VALUES REF. NO. PART NO. DESCRIPTION VALUES R5001 1-216-841-11 METAL CHIP 1/10W SWITCH R5002 1-216-833-11 METAL CHIP...
- Page 57 KV-29FS150 NOTE: The components identifi ed by shading mark are critical for safety. Replace only with part number specifi ed. REF. NO. PART NO. DESCRIPTION VALUES REF. NO. PART NO. DESCRIPTION VALUES C714 1-107-648-91 ELECT 100µF 200V C718 1-106-383-00 MYLAR 0.047µF 10% 200V IC751...
- Page 58 KV-29FS150 NOTE: The components identifi ed by shading mark are critical for safety. Replace only with part number specifi ed. REF. NO. PART NO. DESCRIPTION VALUES REF. NO. PART NO. DESCRIPTION VALUES R737 1-249-385-11 CARBON 1/4W SPARK GAP R752 1-249-415-11 CARBON 1/4W SG701...
- Page 59 1-216-811-11 METAL CHIP 1/10W R4120 1-249-411-11 CARBON 1/4W R4121 1-249-411-11 CARBON 1/4W R4122 1-243-994-91 METAL 820K 0.5W R4123 1-249-393-11 CARBON 1/4W Sony Corporation English Sony Technology Center 2007AJ74WEB-1 Technical Services Printed in USA 9-883-732-01 Service Promotion Department © 2007.1 KV-29FS150...
- Page 60 In an effort to reduce the size of this pdf fi le the tiled schematics are not attached to this Service Manual. To receive a complete set of the tiled schematics for this manual please submit a request to: Service_Promotion@am.sony.com.
- Page 61 Connecting Optional Equipment 2-898-781-21(1) Operating Instructions KV-25FS150 KV-29FS150 © 2007 Sony Corporation...
- Page 62 Operating Instructions...
- Page 63 TV screen. These types of imprints are not covered by your warranty because they are the results of misuse. ® Sony, FD Trinitron, WEGA , Steady Sound and Intelligent Picture are Sony Corporation’s trademarks.
-
Page 64: User Guide
User Guide IMPORTANT SAFEGUARDS Object and Liquid Entry Never push objects of any kind into the set through the cabinet slots as they may touch For your protection, please read these instructions dangerous voltage points or short out parts completely, and keep this manual for future reference. that could result in a fire or electric shock. -
Page 65: Replacement Parts
Connecting Additional Equipment ❏ ❏ Never block the slots and openings by When the power cord or plug is placing the set on a bed, sofa, rug or damaged or frayed. other similar surface. ❏ If liquid has been spilled into the set ❏... - Page 66 Contents Introduction ........................1 About this Manual.......................... 1 Batteries for the Remote Control ....................1 Front Panel Menu Controls ......................1 Using the Remote Control ....................2 Remote Control Description......................2 Connecting your TV ......................3 TV Rear Panel ..........................3 Basic Connections ...........................
-
Page 67: Introduction
Introduction ® Congratulations on your purchase of the Sony FD Trinitron WEGA About this Manual This manual provides instructions to help you enjoy your new TV. It shows you how to connect to an antenna or cable, VCR, DVD or satellite receiver. Once your TV is connected, follow the instructions and use the remote control to access the on-screen menus. -
Page 68: Using The Remote Control
Using the Remote Control Remote Control Description Button Description 1 MUTING Press to turn off the sound. Press again or press restore the sound. MUTING POWER DISPLAY 2 DISPLAY Press once to display the channel number, the channel label (if set) and the status of the stereo mode. PICTURE MODE TV/VIDEO... -
Page 69: Connecting Your Tv
Connecting your TV Read this section before setting up your TV for the first time. This section covers basic connections in additions to any optional equipment you may be connecting. TV Rear Panel VIDEO 3 IN MONITOR OUT VIDEO 1 IN VIDEO VIDEO (MONO) L... -
Page 70: Basic Connections
Basic Connections TV with Cable, Indoor or Outdoor Antenna Depending on the cable available in your home, choose one of the connections below: Use this to connect the TV to a cable system or an antenna with a 75-ohm cable. 300-ohm (Rear of TV) twin lead cable... -
Page 71: Connecting Additional Equipment
Connecting Additional Equipment Connecting a DVD Player using Composite Video (VIDEO/AUDIO L(MONO), R) Use audio/video cables (not supplied) connect AUDIO/VIDEO OUT on your DVD player to VIDEO IN on your TV. Rear of TV Rear of DVD Player VIDEO 1 IN VIDEO 3 IN MONITOR OUT VIDEO... - Page 72 Connecting a TV and VCR Connect the coaxial cable from your TV antenna or cable service to the IN jack on your VCR. Connect a coaxial cable (not supplied) from the OUT jack on your VCR to the VHF/UHF jack on the Coaxial cable (not supplied) Rear of TV...
-
Page 73: Using Basic Functions
Using Basic Functions Setting Up the TV After you have finished connecting your TV, use Auto Program to set up your analog and digital channel lists. During Auto Program, the TV will automatically search for available channels and program receivable channels. Initial Setup Initial Setup Language:... -
Page 74: Introducing The Wega Gate Navigator
Introducing the WEGA GATE Navigator WEGA GATE is a gateway that allows you to access to preset list of Favorites channels, TV channels, connected external inputs, listening FM Radio and “Settings”. WEGA GATE Favorite Channels To select a list of Favorite Favorites Channels "Favorites"... -
Page 75: Listening To The Fm Radio
Listening to the FM Radio You are able to listen to the FM Radio stations using your TV. To Access to FM Radio Mode: WEGA GATE Press and select "FM Radio", or Press FM button on the front control panel (see page 1). To Exit From FM Radio Mode: WEGA GATE WEGA GATE... -
Page 76: Using The Picture Menu
Using the Picture Menu Picture Picture Adjustment Picture Mode: Vivid Picture Picture Adjustment Brightness Color Temperature: Cool Color High Intelligent Picture: Sharpness Signal Level Indicator: Move Select Move Select WEGA GATE WEGA GATE Press v to highlight an option; then press Picture Mode Use the V or v buttons to highlight one of the following options, then press Customized picture... -
Page 77: Using The Sound Menu
Using the Sound Menu Sound Sound Adjustment Sound Mode: Dynamic Adjust Sound Adjustment Effect: Balance Steady Sound: MTS: Stereo 100 100 300 300 1k 1k 3k 3k 8k 8k Move Select Move Select WEGA GATE WEGA GATE Press v to highlight an option; then press Sound Mode Select any of the modes: “Dynamic”... -
Page 78: Using The Channel Setup Menu
Using the Channel Setup Menu Press v to highlight an option; then press Channel Setup Favorite Channels Cable: Auto Program Channel Edit FM Radio Setup Move Select WEGA GATE Favorites Press V or v to highlight the position (1 to 8) where you want to set a favorite Channels channel, then press Quick access to... -
Page 79: Using The Parental Control Menu
FM Radio Setup Preset up to nine FM radio stations. You can manually preset FM radio stations that can be received in your area and then store the radio frequency of the desired FM radio stations. Press V or v to select the desired FM radio station position, then press Press V or v to search the FM radio stations. -
Page 80: Using The Setup Menu
Using the Setup Menu Press v to highlight an option; then press Setup Mover Seleccionar Salir Language: English Closed Captions (CC): Info Banner: Video Label Wake-up Timer: Move Select WEGA GATE Display all menus in the language of your choice. Language Use the V or v buttons to select from one of the following options: English and Español (Spanish). -
Page 81: Other Information
❏ You can use the buttons on the front panel to access the menus (page 1). I lost the remote control. Contact your local Sony authorized dealer to request a replacement. Picture ❏ No picture, no Make sure the power cord is pluged in. - Page 82 Perform Auto Program to add channels that are not presently in the memory (page 7). If after reading this instruction manual you have more questions about the use of your Sony television, contact your local Sony authorized dealer to get technical assistance or visit our internet page http://www.sony.net/.
-
Page 83: Specifications
Specifications Television System American TV standard/NTSC Channel Coverage VHF: 2-13/UHF: 14-69/CATV: 1-125 ® Picture tube FD Trinitron tube Power Requirements 120 V AC, 60 Hz Accessories included 2 AA batteries 1 Remote control RM-YA005 Inputs 1 video, 1 audio (front panel) 1 S Video (rear panel) 1 YP 1 audio (rear panel) -
Page 84: Index
Index 0-9 buttons 16:9 Enhanced Menus Channel Setup Parental Control Auto Program Picture Setup Balance Sound Basic Connections Antenna and cable Auto SAP Connecting a DVD Player Mono Connecting a TV and VCR Stereo Connecting a TV, VCR, and Satellite Receiver using Component Video Picture Mode R/L) - Page 85 Operating Instructions Printed in the U.S.A. http://www.sony.net...