
Related Manuals for Akai KHS888W1


Summary of Contents for Akai KHS888W1
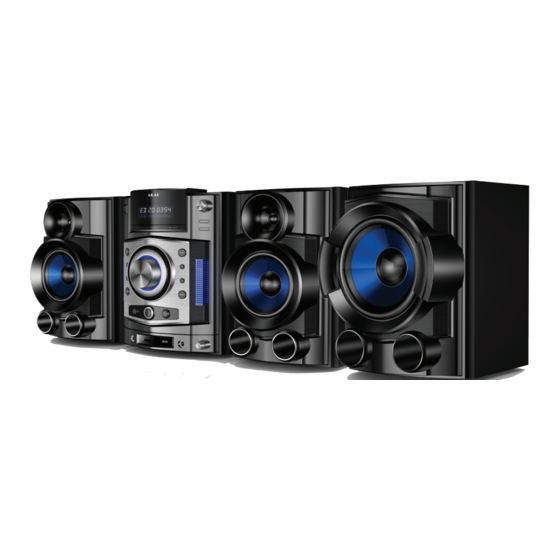
- Page 1 Mini Hi-Fi System with DVD Player & Bluetooth KHS888W1 Instruction Manual AFTER SALES SUPPORT NZ: 0800 836 761 N13275...
-
Page 2: Table Of Contents
Contents General Safety Instructions Parts & Controls -Remote Control -Main Unit Connections Getting Started -Installing Batteries -Start Up -Connect the Coaxial In & Line In Instructions -Playing Radio Function -Media Operating Instruction -USB Copy Function -Bluetooth Operating Instructions -Playing a DVD -Playing a Disc -Playback Controls -Description of Functions... - Page 3 Contents (cont.) -Video Setup -Speaker Setup -Digital Setup Care and Maintenance Responsible Disposal FAQs/Troubleshooting...
-
Page 4: General Safety Instructions
General Safety Instructions Read this manual thoroughly before first use and keep it in a safe place for future reference, along with the warranty card, purchase receipt and carton. The safety precautions enclosed herein reduce the risk of fire, electric shock and injury when correctly adhered to. - Page 5 General Safety Instructions (Cont.) • Power socket: This equipment can only be disconnected from the power supply by unplugging it from the mains socket. Make sure the mains socket is readily accessible at all times. • Disconnect: Unplug the unit when it is not going to be used for a while. This will prevent damage to the product due to lightning and power line surges.
- Page 6 General Safety Instructions (Cont.) • Clearance: Allow at least 10cm spacing at the back and top of the product, and 5cm on both sides, to prevent overheating. • Protect the equipment: Prevent metal objects falling into the equipment. Do not place heavy objects on top of the equipment or step on it.
-
Page 7: Parts & Controls
Parts & Controls Remote Control 1. On/Off 2. Mute 3. Open/Close disc tray Jump to previous / next track, chapter. Rewind backwards / fast forward 6. Number buttons 7. GOTO Stop 9. PROG (programme) 10. Volume increase / decrease 11. Source 12. -
Page 8: Main Unit
Parts & Controls (Cont.) Main Unit / CH+ 1. Digital display- displays track number, radio station or time etc. 13. USB / Card 2. On/Off Play / Pause 3. Tone Source 4. Treble 16. EQ 5. Bass 17. Earphone Jack Stop 18. -
Page 9: Connections
Connections Composite Video Output Terminals (AV Input) • One set of AV cable is included. • Connect the unit's Video Output to the TV's Video Input terminal (yellow). • Connect the unit's Audio Output to the TV's Audio Input terminals (white for left speaker and red for right speaker). - Page 10 Connections (Cont.) Connecting to Progressive Scan TV Set If the TV has Y, Cb, Cr Input connector, connect the unit via Y, Cb, Cr Output connector. This provides a better picture quality. Connect the unit's Audio Output to the TV's Audio Input terminals (white for left speaker and red for right speaker). Note: the cable is not included.
- Page 11 Connecting the AC-3 Decoding Amplifief Connections (Cont.) Connect the unit’s video output to the video input terminals(Video,S-Video or Y Cb Cr) of the TV set. Connect the AC-3 Decoding Amplifier Connect the digital output(optical or coaxidl)to the AC-3 built-in amplifier. •...
- Page 12 Connecting the COAXIAL IN and LINE IN Connections (Cont.) Connect the unit’s video output to the video input terminals(Video,S-Video or Y Cb Cr) or the TV set. Connect the Coaxial In and Line In • Connect the unit's Video Output to the video input terminals (Video, S-Video or Connect the coaxiai in or line in to the mini hi-fi system.
-
Page 13: Getting Started
Getting Started Installing Batteries Remove the battery cover. Insert two AAA batteries (supplied) into the battery compartment, making sure to match the polarity symbols (+/-). Only use fresh batteries of the same type and size. Close the battery cover. NOTE: •... -
Page 14: Connect The Coaxial In & Line In
Getting Started (Cont.) Connect the Coaxial In and Line In • Connect the unit's Video Output to the video input terminals (Video, S-Video or Y, Cb, Cr) of the TV set. • Connect the Coaxial In or Line In to the unit. •... -
Page 15: Instructions
Instructions Playing Radio Function The FM receiving frequency of this unit range from 87.50MHz ~ 108.00MHz. When the unit is in DVD mode, press the SOURCE button to switch to FM Radio mode. Press SEARCH button to start searching for radio channels automatically. When radio channels are found, it will be stored form 1-40. -
Page 16: Bluetooth Operating Instructions
Instructions (Cont.) The speed of the copying process may vary depends on different file sizes. If the USB flash drive does not work, please format it and try again. NOTE: We recommend you to back up your USB flash drive before formatting it. -
Page 17: Playing A Dvd
Instructions (Cont.) Playing a DVD • Connect the unit to your TV (or amplifier, if desired). • Switch on your TV set and select AV mode. • Plug the DVD Player into an appropriate power point and switch on power to the outlet. -
Page 18: Playing A Disc
Instructions (Cont.) Playing a disc Once it has read the disc, the machine will start playing automatically. • If the disc is in DVD format, the machine will show the DVD menu or title menu. • If the disc is in VCD 2.0 format, the machine will active PBC playback control status. -
Page 19: Play Mode
Instructions (Cont.) Play mode (N/P) Press the N/P button repeatedly to toggle between NTSC, PAL and AUTO play mode. Number buttons Press the relevant number buttons for playing favourite tracks/chapters according to their numbers in the menu. Subtitles Press the SUBTITLE button to display or change the subtitles when watching movies/recordings on multi-subtitle encoded discs. -
Page 20: Menu
Instructions (Cont.) Menu The MENU button will return you to the main DVD playback menu. (This function works only with multi-chapter encoded discs.) • When playing VCD 2.0 discs, press the RETURN button to return to the PBC playback menu. •... -
Page 21: Basic Dvd Operations
Basic DVD Operations Menu Operations Press SETUP button on the remote control to enter the menu setting. Select related SETUP PAGE using / buttons. The selected menu will be highlighted. System Setup Press SETUP and select System Setup page using / buttons. TV System Press buttons to select TV System. - Page 22 Basic DVD Operations (Cont.) Screen Saver Press buttons to select Screen Saver. Press button to enter submenu. Press buttons to select ON or OFF. Screen saver will help product colour of the screen when images has been paused for a long period of time. When select ON, screen saver will activate 3 minutes after the image freeze.
- Page 23 Basic DVD Operations (Cont.) Password Press buttons to select Password. The initial password is locked, you will need to enter the default password to unlock Rating and to set a new password. The default password is "1234". Press ENTER button to confirm. Enter a 4 digit new password, and enter again to set new password.
-
Page 24: Language Setup
Basic DVD Operations (Cont.) Language Setup Press SETUP and select Language Setup page using / buttons. OSD Language Press buttons to select OSD Language. Press button to enter submenu. Press buttons to select preferred On Screen Display Language: English, Spanish, French or Portuguese. Press ENTER button to confirm selection. Audio Language Press buttons to select Audio Language. - Page 25 Basic DVD Operations (Cont.) Subtitle Language Press buttons to select Subtitle Language. Press button to enter submenu. Press buttons to select preferred Subtitle Language: Chinese, English, Japanese, French, Spanish, Portuguese or German .Press ENTER button to confirm selection. Menu Language Press buttons to select Menu Language.
-
Page 26: Audio Setup
Basic DVD Operations (Cont.) Audio Setup Press SETUP and select Audio Setup page using / buttons. Audio Output Press buttons to select Audio Output. Press button to enter submenu. Press buttons to select preferred Audio Output option: SPDIF/OFF, SPDIF/RAW or SPDIF PCM. - Page 27 Basic DVD Operations (Cont.) ECHO Press buttons to select Echo. Press button to enter submenu. Press buttons to increase or decrease Echo volume level. Press ENTER button to confirm selection. Mic Vol Press buttons to select Mic Volume. Press button to enter submenu. Press buttons to increase or decrease microphone volume level.
-
Page 28: Video Setup
Basic DVD Operations (Cont.) Press buttons to select Audio Output. Press button to enter submenu. Press buttons to increase or decrease key volume level. Press ENTER button to confirm selection. Video Setup Here you can adjust the colour, brightness etc of the picture on screen. Press SETUP and select Video Setup page using / buttons. - Page 29 Basic DVD Operations (Cont.) Contrast Press buttons to select Contrast. Press button to enter submenu. Press buttons to adjust image contrast level. Press ENTER button to confirm selection. Press buttons to select Hue. Press button to enter submenu. Press buttons to adjust image hue level. Press ENTER button to confirm selection. Saturation Press buttons to select Saturation.
-
Page 30: Speaker Setup
Basic DVD Operations (Cont.) Speaker Setup Press SETUP and select Speaker Setup page using / buttons. Downmix Press buttons to select Downmix. Press button to enter submenu. Press buttons to select your preferred speaker output option: LT/RT, Stereo or VSS. Press ENTER button to confirm selection. - Page 31 Basic DVD Operations (Cont.) Dynamic Range If you choose Line Out mode. Press buttons to select Dynamic Range. Press button to enter submenu. Press buttons to adjust compression ratio for different effect. When select FULL, the compression ratio will be set to the lowest. When select OFF, the compression radio will be set to be the highest.
-
Page 32: Care And Maintenance
and those marked onthe unit. Retain this guide for future his set has been designed and manufactured to assure ety. This set has been designed and manufactured to assure afety. Care and Maintenance Maintaining your Hi-Fi System You should clean your Hi-Fi System carefully and regularly, to stop from dust entering the lens. -
Page 33: Responsible Disposal
Responsible Disposal At the end of its working life, do not throw this appliance out with your household rubbish. Electrical and electronic products contain substances that can have a detrimental effect on the environment and human health if disposed of inappropriately. -
Page 34: Faqs/Troubleshooting
FAQs/Troubleshooting Problem Possible Cause Solution The unit has no The power plug is not fully Insert the power plug into power. inserted into the socket. the socket securely. The batteries are flat. Replace old with new batteries. The remote control The front end of the remote Make sure to aim at the does not work. - Page 36 Warranty We pride ourselves on producing a range of quality home appliances that are both packed with features and completely reliable. We are so confident in our products, we back them up with a full 1 year warranty. Now you too can relax knowing that you are covered. Customer Helpline NZ: 0800 836 761 This Product is covered by 1 year warranty when accompanied by proof of purchase.