Table of Contents
Advertisement
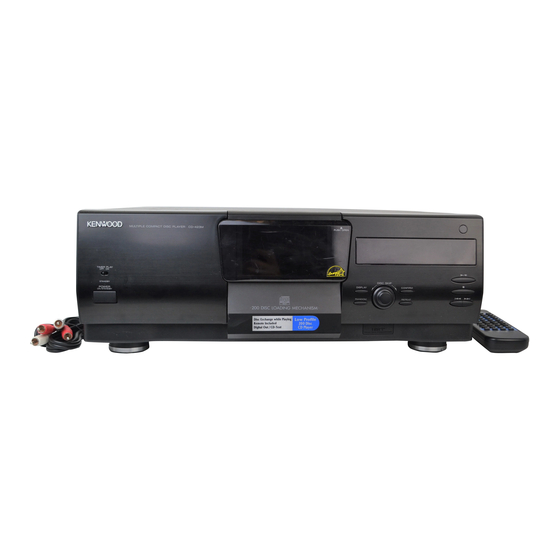
MULTIPLE COMPACT DISC PLAYER
DPF-J3030
CD-423M
INSTRUCTION MANUAL
KENWOOD CORPORATION
This unit is designed for home use only. If the unit is
used in a location other than at home, such as in a
shop (for commercial use), in a car or in a ship, etc.,
and is damaged, a service fee may be charged even
during the warranty period.
This instruction manual is used to describe multiple
models listed above.
Model availability and features (functions) may differ
depending on the country and sales area.
COMPACT
COMPACT
DIGITAL AUDIO
DIGITAL AUDIO
TEXT
B60-4446-08 (EN)
Advertisement
Table of Contents

Related Manuals for Kenwood DPF-J3030


Summary of Contents for Kenwood DPF-J3030
- Page 1 MULTIPLE COMPACT DISC PLAYER DPF-J3030 CD-423M INSTRUCTION MANUAL KENWOOD CORPORATION This unit is designed for home use only. If the unit is used in a location other than at home, such as in a shop (for commercial use), in a car or in a ship, etc., and is damaged, a service fee may be charged even during the warranty period.
-
Page 2: Before Applying Power
Before applying power Units are designed for operation as follows. U.S.A. and Canada ... AC 120 V only Europe and U.K..AC 230 V only Safety precautions WARNING : TO PREVENT FIRE OR ELECTRIC SHOCK, DO NOT EXPOSE THIS APPLIANCE TO RAIN OR MOISTURE. -
Page 3: Table Of Contents
Special features CD player with 200-disc changer Title registerable Filing functions suitable for a 200-disc changer Low standby power consumption Contents Before applying power ... 2 Safety precautions ... 2 Special features ... 3 Quick-Start Guide ... 5 System connections ... 6 Controls and indicators ... - Page 4 Before applying power Unpacking Unpack the unit carefully and make sure that all accessories are put aside so they will not be lost. Examine the unit for any possibility of shipping damage. If your unit is damaged or fails to operate, notify your dealer immediately. If your unit was shipped to you directly, notify the shipping company without delay.
-
Page 5: Quick-Start Guide
Quick-Start Guide Naming Discs Discs can be given disc names up to 25 characters. Although the most convenient time to enter disc names is when you insert the discs into the player for the first time, (that way the player keeps track of the disc names for you as you insert the discs), you can use this procedure to enter or change disc names any time you want. -
Page 6: System Connections
To avoid possible damage to the audio system, the consumer should take proper pre-cautions when the analog stereo outputs of the CD player is connected to an am- plification system. To enjoy DTS Digital Surround™ playback, an external 5.1 channel DTS Digital Surround™... - Page 7 2. Do not connect system control cords to any components other than those specified by KENWOOD. It may cause a malfunction and damage your unit. 3. Be sure the system control plugs are inserted all the way in to the system control terminals.
-
Page 8: Controls And Indicators
Controls and indicators Play indicator • Pause indicator MULTIPLE COMPACT DISC PLAYER TIMER PLAY STANDBY STANDBY POWER ON/STANDBY ON/STANDBY 1 POWER key/STANDBY indicator (For the U.S.A. and Canada) key/STANDBY indicator (For other countries) 2 TIMER PLAY switch Used for timer play ON/OFF. 3 Door panel 4 RANDOM key Press to start random playback. -
Page 9: Operation Of Remote Control Unit
Operation of remote control unit CONFIRM POWER BEST SELECTION REPEAT RANDOM DISPLAY +100 – DISC SELECTOR MODE DELETE SPACE CHARAC. /CLEAR /CHECK /P.MODE DISC SKIP DOWN ENTER CURSOR CHARACTER LEFT RIGHT DOWN ¡ ¢ REMOTE CONTROL UNIT RC-P0714 Model: RC-P0714 Infrared ray system Loading batteries 1 Remove the cover. -
Page 10: Preparation
Preparation Up to 200 CDs can be loaded in the carousel. Disc exchange also is possible during playback. Never let your hand or any object enter inside the unit. Loading discs in the carousel Switch power ON. Press the POWER ( ) key. - Page 11 When the disc is CD-TEXT ÷ Repeat the above procedure so that the complete disc information is read into the CD player. ÷ In the case of a non-CD-TEXT disc, the “D001:NO CD TEXT” display will appear for approx. 3 seconds.
-
Page 12: Normal Play (Track Mode)
Normal play (TRACK mode) Playing tracks in order from track No.1 Use the following procedure to play a CD in the original order of tracks from track No.1. Select the disc. DISC SKIP DOWN Previous disc Go to step 2 within 8 sec. Start playback. -
Page 13: Direct Disc Selection
Disc No. 100 : How to input numeric values The input method for this product is of two different types. One can either use the traditional KENWOOD +10 key approach, or direct numeric input. Special input method for CD player with 200-disc changer... -
Page 14: Playback From Desired Track
Playback from desired track Select the disc. 1 Select the disc number. DISC SKIP DOWN Previous disc Within 8 seconds! 2 Set the input. Go to step 2 within 8 sec. Select the track number. 1 Input the track number. +100 Within 8 seconds! 2 Set the input. -
Page 15: Displays
Displays Displays scrolling Some track titles contain so much text information that the full titles will not fit on the display. In cases like this, the letters on the display move from right to left so that the non-visible part of the title is revealed. -
Page 16: Programming Tracks In Desired Order (Pgm Mode)
Use the following procedure to select desired tracks (up to 32 tracks) from different discs and program them in the desired order. Preparation ÷ Set the CD player to stop mode. Press so that the “PGM” indicator lights. CHARAC. /P.MODE Select the disc. -
Page 17: To Check The Programmed Tracks
To check the programmed tracks SPACE /CHECK To add a track to the program 1 Set the CD player to stop mode. 2 Perform steps 2 and 3 of “Programming tracks in desired order”. To change a track in the program 1 Set the CD player to stop mode. -
Page 18: Repeated Playback (Repeat Mode)
Repeated playback To repeat only the desired tracks 1 Program the desired tracks by performing steps 1 to 3 of “Programming tracks in desired order”. 2 Switch REPEAT ON. REPEAT 3 Start playback. ENTER To repeat one selected disc 1 Check that the unit is in the normal play TRACK mode. -
Page 19: Playback In A Random Order (Random Mode)
Playback in a random order Use the following procedure to activate random playback which selects a track at random after every track. This fea- ture may allow you to play CDs for long hours without getting tired of. Check that the unit is in the normal play TRACK mode. -
Page 20: Registration Of Title
(max. 25 characters). Operation is possible also when the door panel is open. We recommend to register titles while discs are being inserted. Preparation ÷ Set the CD player to stop mode. ÷ Check that the unit is in the normal play TRACK mode. Assigning Title (TITLE INPUT mode) Switch to title input mode. -
Page 21: To Change The Character Type
In regard to disc information reading The entered title is read in to the disc with the following timing. ÷ When the door panel is closed. ÷ When the title input mode is exited while the door panel is closed. The display flashes. -
Page 22: To Change Or Delete A Title
Preparation ÷ Close the door panel. To change or delete a title Perform steps 1 and 2 of “Assigning Title”. Change or delete characters one by one. Change 1 Move the cursor to the desired character (to be changed). CURSOR LEFT RIGHT ¡... -
Page 23: Listening To Music By Genre (Music Type Mode)
Listening to music by genre Discs can be registered separately by 26 types of music genres. Preparation ÷ Close the door panel. ÷ Check that the unit is in the normal play TRACK mode. Registration of music type Activate the music type set mode. 1 Press the MODE key. -
Page 24: Playing The Music Type
By registering one of music types to each disc, it is pos- sible to enjoy playback of discs of a selected music type. Random playback of only the discs belonging to a selected music type is also available. Preparation ÷ Close the door panel. ÷... -
Page 25: Reorganizing Discs To Desired Groups
Reorganizing discs to desired groups Eight user files are available for registering desired discs. This makes the user possible to create files registering the discs of a favorite artist(s) or the user's favorite discs.The user files can be named as desired. Preparation ÷... -
Page 26: Playing The User File
When user files have been registered for the discs, it is possible to enjoy playback of discs of the selected user file. Random playback for a selected user file is also possible. Preparation ÷ Close the door panel. ÷ Register user file. ÷... -
Page 27: Assigning User File Names
Preparation ÷ Close the door panel. ÷ Register user file. ÷ Check that the unit is in the normal play TRACK mode. Assigning user file names Activate the file name input mode. 1 Press the MODE key. MODE 2 Select “USER FILE”. DISC SKIP DOWN 3 Select “FILE NAME INPUT”. -
Page 28: To Clear The User File (User File Clear Mode)
Preparation ÷ Close the door panel. ÷ Register user file. ÷ Check that the unit is in the normal play TRACK mode. To clear the user file The following procedure clears the registration of all discs in the user files and the user file names. The user file names return the default names after clear. -
Page 29: Disc Search (Disc Search Mode)
Disc search (DISC SEARCH mode) Preparation ÷ Input the title. ÷ Check that the unit is in the normal play TRACK mode. Searching a disc by the disc title By inputting the initial letter of the desired disc title, discs which have the disc titles beginning with that character can be searched in sequence. -
Page 30: Searching The Music Type (M.type Search Mode)
Preparation ÷ Register music type. ÷ Check that the unit is in the normal play TRACK mode. Searching the music type The discs registered in the specified music type can be searched in sequence. Activate the music type search mode. 1 Press the MODE key. -
Page 31: Searching The User File (U.file Search Mode)
Preparation ÷ Register user file. ÷ Check that the unit is in the normal play TRACK mode. Searching the user file The discs registered in the specified user file can be searched in sequence. Activate the user file search mode. 1 Press the MODE key. -
Page 32: Listening To Your Favorite Titles
Register other favorite tracks by performing steps 1 and 2 for each of them. Playing the best selection file Preparation ÷ Set the CD player to stop mode. ÷ Check that the unit is in the normal play TRACK mode. Press the BEST SELECTION key. -
Page 33: Timer Operation
Timer operation As this unit incorporate the timer standby function, play- back can be started at desired moment if a commercially available audio timer is combined with this unit. Preparation ÷ Close the door panel. ÷ Connect the system components so that their power can be switched on by the timer. -
Page 34: Important Items
2. Confirm that the flashing “NO DISC” display has changed to steady lighting, and then switch off the power. 3. Wait a few seconds, then disconnect the power plug. TAR ® Partner, Kenwood Corpora- As an NERGY tion has determined that this products meets the TAR ®... -
Page 35: In Case Of Difficulty
Unplug the power cord from the power socket and plug the power cord into the socket again. Remote control unit Symptom Remote control operation is not possible. CD Player Symptom No power is applied with the POWER( key ON. Sound is not heard with the 6 key on. -
Page 36: Specifications
Fixed ... 2.0 V/1 k Digital output Optical ... –15 dBm ~ –21 dBm (Wave length 660 nm) 1. KENWOOD follows a policy of continuous advancements in development. For this reason specifications may be changed without notice. Notes Notes 2. The full performance may not be exhibited in an extremely cold location (under a water-freezing temperature).