Table of Contents
Advertisement
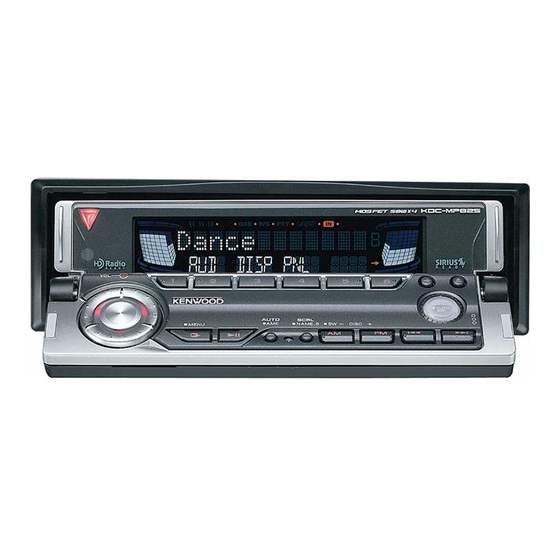
KDC-MPV8025
KDC-MP825
CD-RECEIVER
INSTRUCTION MANUAL
Take the time to read through this instruction manual.
Familiarity with installation and operation procedures will help
you obtain the best performance from your new CD-receiver.
For your records
Record the serial number, found on the back of the unit, in the spaces
designated on the warranty card, and in the space provided below.
Refer to the model and serial numbers whenever you call upon your
KENWOOD dealer for information or service on the product.
Model KDC-MPV8025, KDC-MP825
Serial number
© B64-2743-00/01 (KV)
Advertisement
Table of Contents

Related Manuals for Kenwood KDC-MP825


Summary of Contents for Kenwood KDC-MP825
-
Page 1: Instruction Manual
Record the serial number, found on the back of the unit, in the spaces designated on the warranty card, and in the space provided below. Refer to the model and serial numbers whenever you call upon your KENWOOD dealer for information or service on the product. Model KDC-MPV8025, KDC-MP825 Serial number... -
Page 2: Table Of Contents
Contents Warning Safety precautions Notes About CDs Notes on playing MP3/WMA Notes on Multi-function Key System 10 General features Power Hiding the Control Panel Selecting the Source Volume Attenuator System Q Audio Control Rotary Volume knob operation mode select Speaker Setting Subwoofer Output Dual Zone System Display Mode Switching... -
Page 3: Warning
KENWOOD CORPORATION 2967-3, ISHIKAWA-CHO, HACHIOJI-SHI TOKYO, JAPAN KENWOOD CORP. CERTIFIES THIS EQUIPMENT CONFORMS TO DHHS REGULATIONS N0.21 CFR 1040. 10, CHAPTER 1, SUBCHAPTER J. Location : Bottom Panel FCC WARNING This equipment may generate or use radio frequency energy. -
Page 4: Safety Precautions
• If the unit starts to emit smoke or strange smells, turn off the power immediately and consult your Kenwood dealer. • Make sure not to get your fingers caught between the faceplate and the unit. • Be careful not to drop the unit or subject it to strong shock. - Page 5 KENWOOD disc changers/ CD players released in 1998 or later can be connected to this unit. Refer to the catalog or consult your Kenwood dealer for connectable models of disc changers/ CD players. Note that any KENWOOD disc changers/ CD players released in 1997 or earlier and disc changers made by other makers cannot be connected to this unit.
-
Page 6: Notes
Notes Cleaning the Unit If the faceplate of this unit is stained, wipe it with a dry soft cloth such as a silicon cloth. If the faceplate is stained badly, wipe the stain off with a cloth moistened with neutral cleaner, then wipe neutral detergent off. -
Page 7: About Cds
About CDs Handling CDs • Don’t touch the recording surface of the CD. • CD-R and CD-RW are easier to damage than a normal music CD. Use a CD-R or a CD-RW after reading the caution items on the package etc. •... -
Page 8: Notes On Playing Mp3/Wma
Notes on playing MP3/WMA Note, however, that the MP3/WMA recording media and formats acceptable are limited. When writing MP3/WMA, pay attention to the following restrictions. Acceptable media The MP3/WMA recording media acceptable to this unit are CD-ROM, CD-R, and CD-RW. When using CD-RW, do full format not quick format to prevent malfunction. - Page 9 MP3/WMA playing order When selected for play, Folder Search, File Search, or for Folder Select, files and folders are accessed in the order in which they were written by the CD writer. Because of this, the order in which they are expected to be played may not match the order in which they are actually played.
-
Page 10: Notes On Multi-Function Key System
Notes on Multi-function Key System Multi-function Key System serves to control various functions with the [2] — [5] buttons. The basic operation of the Multi-function Key System is described below. What’s the Multi-function Key System? This unit is equipped with the Multi-function Key System that enables the operation of multiple functions with one button. -
Page 11: General Features
General features indicator Power Turning ON the Power Turn the vehicle ignition ON. The panel appears. Turing OFF the Power Turn the vehicle ignition OFF or press the [SRC] button for at least 1 second. The panel hides. • Do not apply force to the panel during operation. It can cause damage. -
Page 12: Selecting The Source
General features Selecting the Source Press the [SRC] button. Display Source required SIRIUS tuner (Optional accessory) "SIRIUS" Tuner or HD Radio (Optional accessory) "TUNER" or “HD RADIO” "CD" External disc (Optional accessory) "CD CH"/"CD2" Auxiliary input (Optional accessory) "AUX EXT" Auxiliary input (KDC-MPV8025 only) "AUX"... - Page 13 Select the Audio Control item for adjustment Press the [2] — [5] button. Each time the [2] — [5] button is pressed the adjustable audio items are switched among ranges of all stage section’s tables on the following pages. Adjust the Audio Control item Press the [ ] or [ ] button.
-
Page 14: Rotary Volume Knob Operation Mode Select
General features Rotary Volume knob operation mode select The rotary volume knob can be used for volume adjustment and various function setups. Available setup functions The rotary volume knob can be used for the following setup: • Menu system : Item selection •... -
Page 15: Display Mode Switching
Enter the Dual Zone System Control mode Press the [5] ("2-ZN") button. Select the item for adjustment Press the desired [2] — [3] button. Each time the button is pressed the items that can be adjusted switch as shown below. Adjustment Item Button Display Dual Zone System... -
Page 16: Text Display Switching
General features Text Display Switching Switching the text display. Select the key function section Press the [NEXT] button. Repeatedly press the button until "DISP" is displayed above the [3] button. Refer to 'Notes on Multi-function Key System' (page 10). Enter display control mode Press the [3] ("DISP") button. -
Page 17: Station/Disc Naming (Snps/Dnps)
Enter display control mode Press the [3] ("DISP") button. Quick call up the preset color Press the [4] ("CLR") button. Each time the button is pressed the Color mode switches as shown below. Color mode Display The color changes in sequence. "COL Scan"... -
Page 18: Auxiliary Input Display Setting
General features Auxiliary Input Display Setting Selecting the display when this device is switched to Auxiliary input source. Select Auxiliary input source Press the [SRC] button. Select the "AUX"/"AUX EXT" display. Enter Auxiliary input display setting mode Press the [NAME.S] button for at least 2 seconds. -
Page 19: Tel Mute
• The back panel is a precision piece of equipment and can be damaged by shocks or jolts. For that reason, keep the back panel in its special storage case while detached. • Do not expose the Backpanel or its storage case to direct sunlight or excessive heat or humidity. -
Page 20: Tuner Features
Tuner features Band display Tuning Mode Choose the tuning mode. Press the [AUTO] button. Each time the button is pressed the Tuning mode switches as shown below. Tuning mode Display Operation Auto seek "Auto 1" Automatic search for a station. Preset station seek "Auto 2"... -
Page 21: Direct Access Tuning
Function of remote Direct Access Tuning Entering the frequency and tuning. Select the band Press the [FM] or [AM] button. Enter Direct Access Tuning mode Press the [DIRECT] button on the remote. "– – – –" is displayed. Enter the frequency Press the number buttons on the remote. -
Page 22: Cd/Mp3/Wma/External Disc Control Features
CD/MP3/WMA/External disc control features Track number Playing CD & MP3/WMA When there is no disc inserted Open the panel to insert disc Press the [ ] button. Insert a disc. • When the faceplate has been slid open, it might interfere with the shift lever or something else. -
Page 23: Playing External Disc
Playing External Disc Playing discs set in the optional accessory disc player connected to this unit. Press the [SRC] button. Select the display for the disc player you want. Display examples: Display Disc player "CD2" CD player "CD CH" CD changer "MD CH"... -
Page 24: Track/File/Disc/Folder Repeat
CD/MP3/WMA/External disc control features Track/File/Disc/Folder Repeat Replaying the song, disc in the Disc changer or MP3/WMA folder you’re listening to. Select the key function section Press the [NEXT] button. Repeatedly press the button until "REP" is displayed above the [4] button. Refer to 'Notes on Multi-function Key System' (page 10). -
Page 25: Folder Select
Function of MP3/WMA Folder Select Quickly selecting the folder you want to listen to. Select the key function section Press the [NEXT] button. Repeatedly press the button until "FSEL" is displayed above the [5] button. Refer to 'Notes on Multi-function Key System' (page 10). -
Page 26: Sirius Tuner Control Features
SIRIUS tuner control features Select SIRIUS Satellite Radio Mode Selecting the SIRIUS Satellite Radio Tuner (optional accessory) connected to this unit. Selecting SIRIUS Mode Press the [SRC] button. Select the "SIRIUS" display. • You need to subscribe to SIRIUS to receive the service by SIRIUS Satellite Radio. -
Page 27: Direct Access Tuning
Select the item for adjustment Press the desired [2] — [5] button. Each time the button is pressed the items that can be adjusted switch as shown below. Adjustment Item Search down in category Search up in category Search down for channel in selected category Search up for channel in selected category •... -
Page 28: Channel Scan
SIRIUS tuner control features Channel Scan Every receivable Channel is checked for 10 seconds. Start Channel Scan Press the [AUTO] button for at least 1 second. The channel number display blinks. Release it when the song you want to listen to is received Press the [AUTO] button for at least 1 second. -
Page 29: Hd Radio Control Features
HD Radio control features Band display Tuning Selecting the station. Select HD Radio source Press the [SRC] button. Select the "HD Radio" display. Select the HF band Press the [FM] button. Each time the [FM] button is pressed it switches between the HF1, HF2, and HF3 bands. -
Page 30: Auto Memory Entry
HD Radio control features Auto Memory Entry Putting a station with good reception in the memory automatically. Select the band for Auto Memory Entry Press the [FM] or [AM] button. Enter Menu mode Press the [MENU] button for at least 1 second. "MENU"... -
Page 31: Menu System
Menu system Menu System Setting during operation beep sound etc. functions. The Menu system basic operation method is explained here. The reference for the Menu items and their setting content is after this operation explanation. Enter Menu mode Press the [MENU] button for at least 1 second. "MENU"... -
Page 32: Security Code
Menu system In Standby mode Security Code Because authorization by the Security Code is required when it’s removed from the vehicle, personalizing this unit is by using the Security Code is a help in preventing theft. • When the Security Code function is activated, the code can’t be changed and the function can’t be released. -
Page 33: Selectable Illumination
Selectable Illumination Selecting the button illumination color as green or red. Display Setting "Button Red" The illumination color is red. "Button Green" The illumination color is green. Triangle indicator setting Sets the blinking mode during triangle indicator system adjustment (such as audio control, multi- key system setup). -
Page 34: Switching Preout
Menu system In Standby mode Switching preout Switching the preout between the rear and subwoofer. (In subwoofer it outputs without effect from the fader control.) Display Setting "SWPRE Rear" Rear preout. "SWPRE Sub-W" Subwoofer preout. In Standby mode Built-in Amp Mute Setting Toggles ON or OFF the mute control on the built- in amplifier. -
Page 35: Rotary Volume Operation Select
• Setting "CD READ 2" cannot play MP3/WMA. Some music CDs may not be played back even in the "CD READ 2" mode. Rotary volume operation select Various items can be set using the rotary volume knob. Display Setting "Rotary ON" The rotary volume knob can be used for item setup. -
Page 36: Loading And Replacing The Battery
Basic Operations of remote VOL. – FM/AM/DISC /DISC DNPP Not Used [0] — [9] Loading and Replacing the battery Use two "AA"-size batteries. Slide the cover while pressing downwards to remove it as illustrated. Insert the batteries with the + and – poles aligned properly, following the illustration inside the case. -
Page 37: In Tuner Source
In Tuner source [FM]/ [AM] buttons Select the band. Each time the [FM] button is pressed it switches between the FM1, FM2, and FM3 bands. ]/ [ ] buttons Tune up or down band. [0] — [9] buttons Press buttons [1] — [6] to recall preset stations. [DIRECT]/ [OK] button Enters and cancels the 'Direct Access Tuning' (page 21) mode. -
Page 38: Accessories/ Installation Procedure
Accessories/ Installation Procedure Accessories English Installation Procedure 1. To prevent a short circuit, remove the key from the ignition and disconnect the - battery. 2. Make the proper input and output wire connections for each unit. 3. Connect the speaker wires of the wiring harness..1 4. -
Page 39: Connecting Wires To Terminals
Car fuse box Ground wire (Black) - (To car chassis) – Front right output (Red) Front left output (White) To KENWOOD disc changer/ Sirius satellite radio tuner/ External optional accessory To connect these leads, refer to the relevant instruction manuals. -
Page 40: Installation
Installation non-Japanese cars Metal mounting strap (commercially available) Firewall or metal support Bend the tabs of the mounting sleeve with a screwdriver or similar utensil and attach it in place. Phillips truss head sheet metal screw (commercially available) Screw (M4X8) (commercially available) •... -
Page 41: Locking The Backpanel To The Unit
Installation Locking the Backpanel to the unit If you want to fasten the faceplate to the main unit so that it does not fall off. Refer to the Removing the Backpanel function of the section on 'Theft Deterrent Panel' (page 18) and remove the Backpanel. -
Page 42: Removing The Unit
Removing the Unit Removing the hard rubber frame Engage the catch pins on the removal tool and remove the two locks on the upper level. Upper the frame and pull it forward as shown in the figure. Accessory2 Removal tool When the upper level is removed, remove the lower two locations. -
Page 43: Troubleshooting Guide
Troubleshooting Guide What might seem to be a malfunction in your unit may just be the result of slight misoperation or miswiring. Before calling service, first check the following table for possible problems. General The power does not turn ON. ✔... - Page 44 Troubleshooting Guide Tuner source Radio reception is poor. ✔ The car antenna is not extended. ☞ Pull the antenna out all the way. ✔ The antenna control wire is not connected. ☞ Connect the wire correctly, referring to the section on 'Connecting Wires to Terminals' . The desired frequency can’t be entered with the Direct Access Tuning.
- Page 45 The messages shown below display your systems condition. EJECT: No disc magazine has been loaded in the changer. The disc magazine is not completely loaded. ➪ Load the disc magazine properly. No CD in the unit. ➪ Insert the CD. No Disc: No disc has been loaded in the disc magazine.
-
Page 46: Specifications
Specifications Specifications subject to change without notice. FM tuner section Frequency range (200 kHz space) : 87.9 MHz – 107.9 MHz Usable sensitivity (S/N = 30dB) : 9.3dBf (0.8 µV/75 Ω) Quieting Sensitivity (S/N = 50dB) : 15.2dBf (1.6 µV/75 Ω) Frequency response (±3 dB) : 30 Hz –...