Table of Contents
Advertisement
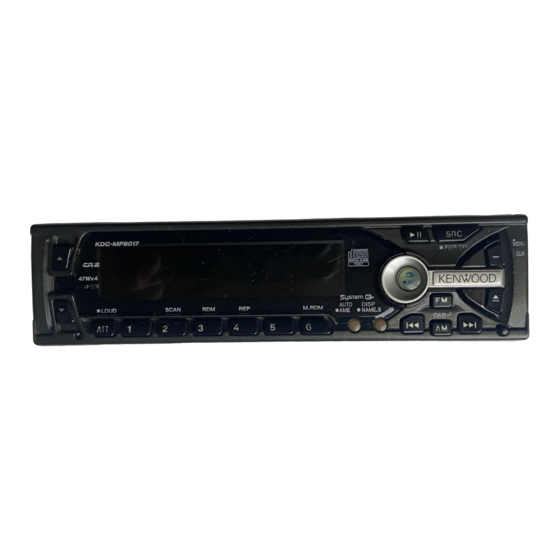
KDC-MP8017
Take the time to read through this instruction
manual.
Familiarity with installation and operation pro-
cedures will help you obtain the best perfor-
mance from your new CD-receiver.
For your records
Record the serial number, found on the back of
the unit, in the spaces designated on the warranty
card, and in the space provided below. Refer to
the model and serial numbers whenever you call
upon your KENWOOD dealer for information or
service on the product.
Model KDC-MP8017
Serial number
CD-RECEIVER
INSTRUCTION MANUAL
AMPLI-TUNER-LECTEUR DE CD
MODE D'EMPLOI
REPRODUCTOR DE DISCOS COMPACTOS RECEPTOR DE FM/AM
MANUAL DE INSTRUCCIONES
COMPACT
DIGITAL AUDIO
© B64-1879-00 (KW)
Advertisement
Table of Contents

Related Manuals for Kenwood KDC-MP8017


Summary of Contents for Kenwood KDC-MP8017
-
Page 1: Instruction Manual
Refer to the model and serial numbers whenever you call upon your KENWOOD dealer for information or service on the product. Model KDC-MP8017 Serial number... -
Page 2: Table Of Contents
Contents Safety precautions Warning...3 Safety precautions ...4 Handling Compact discs ...6 Notes on playing MP3 files...8 General features Power...10 Switching Modes ...10 Volume ...11 Attenuator ...11 Loudness ...11 System Q ...12 Audio Control Setting...12 Speaker Setting...13 Clock display ...13 Theft Deterrent Faceplate...14 Tuner features Tuning...16 Station Preset Memory...16... -
Page 3: Warning
KENWOOD CORPORATION 2967-3, ISHIKAWA-CHO, HACHIOJI-SHI TOKYO, JAPAN KENWOOD CORP. CERTIFIES THIS EQUIPMENT CONFORMS TO DHHS REGULATIONS N0.21 CFR 1040. 10, CHAPTER 1, SUBCHAPTER J. Location : Bottom Panel FCC WARNING This equipment may generate or use radio frequency energy. -
Page 4: Safety Precautions
DNPS, DNPP, Magazine random play, and CD Text display. Note that none of the KDC-C100, KDC-C302, C205, C705, and non-Kenwood CD changers can be connected. 2CAUTION You can damage both your unit and the CD changer if you connect them incorrectly. - Page 5 NOTE • If you experience problems during installation, consult your Kenwood dealer. • Press the reset button if the disc auto changer is first controlled and operates incorrectly. The original operating condition will return. Reset button • We recommend the use of the Security Code function (see p.
-
Page 6: Handling Compact Discs
Handling Compact discs Playing a CD that is dirty, scratched or warped can cause the sound to skip and the unit to operate incorrectly, resulting in worsened sound quality. Take the following precautions to prevent your CDs from getting scratched or damaged. Handling CDs •... - Page 7 Do Not Load CD Accessories Do not use commercially available CD accessories that can be loaded into the CD slot, such as stabilizers, protective sheets, or CD cleaning discs, since they can cause the unit to malfunction. Removing the CD Only remove the CD from the machine in a horizontal direction, holding it flat.
-
Page 8: Notes On Playing Mp3 Files
Notes on playing MP3 files This unit can play MP3 files. Note, however, that the MP3 file recording media and formats acceptable are limited. When writing MP3 files, pay attention to the following restrictions. Acceptable media The MP3 file recording media acceptable to this unit are CD-ROM, CD-R, and CD-RW. - Page 9 For example, a medium with the following folder/file hierarchy is subject to folder search, file search, or folder select as shown below. Folder File Virtual folder Example of a medium's folder/file hierarchy Medium's virtual folder/file hierarchy for a folder select (For a file search or folder search ) Level 1 Level 3...
-
Page 10: General Features
General features 5 / ∞ Q / AUD ATT/LOUD DISP Clock indicator LOUD indicator ATT indicator Speaker Setting indicator Power SRC / PWR OFF Turning on the power: Press the SRC (source) button. NOTE Turn the power on before carrying out the following procedures. Turning off the power: Press the PWR OFF button for at least one second. -
Page 11: Volume
NOTE • The mode switches to the next mode from any mode which cannot be used. • The external disc control mode will differ depending on the unit that is connected. • To enable the selection of External disc control mode 2/AUX mode, you should connect optional switching adapter KCA- S210A (which allows you to select both External disc control mode 2 and AUX mode) or CD changer (KDC-CPS87, KDC-... -
Page 12: System Q
General features System Q You can recall the best audio setting preset for different types of the music. Switching the Preset Sound Setting: Each time you press the Q button, the preset sound setting switches as follows: Scan of Flat – Easy Easy (Default setting) Jazz... -
Page 13: Speaker Setting
Speaker Setting This function allows you to adjust the setting that is recalled with the System Q, according to types of speakers. Press the SRC button repeatedly to select the standby mode. "ALL OFF" is displayed when the standby mode is selected. Press the Q button to enter the speaker setting mode. -
Page 14: Theft Deterrent Faceplate
General features Theft Deterrent Faceplate The faceplate can be reversed to hide the control panel or detached form the unit, helping to deter theft. Removing the Faceplate: • When the control panel is visible: Press the release button. • When the control panel has been hidden: Press the upper side of the faceplate. - Page 15 NOTE While the control panel is sliding, only available buttons are 0, ATT, L, M and SRC. Tuner features DISP/NAME.S #1-6 Band display Frequency AUTO indicator ST indicator — 15 — AUTO/ ¢ Preset station number...
-
Page 16: Tuner Features Tuning
Tuner features Tuning You can choose from three tuning modes: auto seek, preset station seek, and manual. The AUTO 1 indicator lights up when auto seek tuning is selected, and the AUTO 2 indicator lights when preset station seek tuning is selected. Selecting Tuning Mode: Press the AUTO button. -
Page 17: Station Name Preset (Snps)
Recalling a Preset Station: Press the preset station button (#1-6) for the desired station. The number of the recalled station is displayed. Station Name Preset (SNPS) You can assign names to radio stations with the Station Preset Memory. Up to 32 FM stations and 16 AM stations can be assigned names. -
Page 18: Cd/External Disc Control Features
CD/External disc control features SCAN DISP/ NAME.S M.RDM Track number Track time IN indicator Playing CDs Playing CDs: Press the release button to slide open the faceplate, showing the CD insertion slot. Holding the CD with the labeled side facing up, insert it in the slot. -
Page 19: Playing Other Disc Mode
NOTE • When you load a CD and eject it right away, the next time you try to insert the CD may not load. In such a situation, take the CD out for a moment and then reinsert it. • While the control panel is sliding, only available buttons are 0, ATT, L, M and SRC. -
Page 20: Fast Forwarding And Reversing Disc Play
CD/External disc control features Fast Forwarding and Reversing Disc Play Fast Forwarding Disc Play: Hold down on the ¢ button. Release your finger to play the disc at that point. Reversing Disc Play: Hold down on the 4 button. Release your finger to play the disc at the point. NOTE You cannot use reverse play between tracks depending on the model being connected. -
Page 21: Track Scan
Repeat play is canceled when you eject the disc. Track Scan Successively play the beginning of each track on a disc until you find the track that you want to listen to. Starting the Track Scan: Press the SCAN button. "Scan ON" is displayed and the first 10 seconds of each track will be played, in order. -
Page 22: Text / Title Scroll
CD/External disc control features Text / Title Scroll This function permits the text to be scrolled and the entire text to be displayed. The scrolling method differs depending on the setting of scrolling in the menu. To scroll automatically: Press the DISP button to display the disc title or the track title. The display of the text will be scrolled repeatedly. - Page 23 • Pressing the reset button erases the disc names stored in this unit, but does not erase the names stored in a disc changer. • MP3 recorded media allows you to register a single media name only. Registration for each CD as it is available with the CD cannot be achieved.
-
Page 24: Mp3 Player Features Playing Mp3 Files
MP3 player features Playing MP3 Files Play: Press the Release button to slide open the faceplate, showing the CD (insertion) slot. Holding the media with the labeled side facing up, insert it in the slot. The media will start playing. Push back the bottom of the faceplate with your hand until it locks. -
Page 25: Folder Search
Folder Search Search forward or backward through the folders on the media. Making a Backward Folder Search: Press the AM button. Pressing the button moves back to the previous folder. The unit plays the medium starts at the beginning of the selected folder. -
Page 26: Folder Select
Pressing the #2 button enters the folder select mode. The display reads as shown below. <Folder name display> Displays the current folder name. (KENWOOD) <Hierarchical level display> Displays the hierarchical level of the current folder. NOTE The unit cannot enter the folder select mode if the loaded medium contains no folder recorded. -
Page 27: Random Play
Random Play Play all the files on the current folder in random order. Press the RDM button to switch random play on and off. "Random ON" is displayed when random play is turned on. When the file has been selected, play will begin. To change the file being heard, press the ¢... -
Page 28: Menu Settings
Menu settings #1-4 DISP Menu display Menu System MENU You can set the defaults for additional functions in the menu mode. Make a setting for each function, referring to the following operations. Enter the menu mode Press the MENU button for at least one second. "MENU"... -
Page 29: Touch Sensor Tone
You must follow steps 1 to 8 to be able to use the Security Code function. Turning off the power during the procedure will deactivate the security code setting. Once the security code function has been activated, disappears from the MENU system. Note that it will no longer be possible to cancel this function afterwards. -
Page 30: Manual Time Adjustment
Menu settings Manual Time Adjustment Adjust the time manually. Display and setting: Select the display "Clock Adjust" during the selecting function in the menu system. Press either the 4 or ¢ button for at least one second to enter the Manual time adjustment mode. The time display will blink. -
Page 31: Clean Reception System Circuit (Crsc)
Clean Reception System Circuit (CRSC) <In FM reception of Tuner mode> Temporarily have reception switched from stereo to mono to reduce multi-path noise when listening to the FM station. Display and setting: "CRSC ON" : The CRSC is on. (Default setting) "CRSC OFF"... -
Page 32: Accessories
Accessories External view ...1 ...1 ...2 ...4 ...4 ...1 ...1 ...1 2CAUTION The use of any accessories except for those provided might result in damage to the unit. Make sure only to use the accessories shipped with the unit, as shown above. Installation Procedure 1. -
Page 33: Connecting Wires To Terminals
Dimmer control wire (Orange / White) Ignition wire (Red) Car fuse box Battery wire (Yellow) Ground wire (Black) - (To car chassis) — 33 — To KENWOOD disc changer/ DAB control input/ KPA-SD100/KPA-HD100/KPA- SS100 NOTE To connect these leads, refer to the relevant instruction manuals. -
Page 34: Installation
Installation Installation Firewall or metal support Accessory6 Self-tapping Accessory2 Metal mounting screw strap (commercially available) NOTE Make sure that the unit is installed securely in place. If the unit is unstable, it may malfunction (for example, the sound may skip). Installing in Japanese-Made Cars Refer to the section “Removing the hard rubber frame (P. - Page 35 Installation Removing the hard rubber frame Refer to the section “Theft deterrent faceplate (P. 14)” and then remove the faceplate. Engage the catch pins on the removal tool and remove the two locks on the upper level. Push upward the frame and pull it forward as shown in the figure.
- Page 36 Installation Locking the faceplate to the unit If you want to lock the faceplate to the unit so that it does not fall off, follow the directions below. Refer to the function "Theft Deterrent Faceplate" (page 14) and remove the faceplate. Insert the provided screw into the hole at the center of the bottom side of the faceplate which you have removed from the unit.
-
Page 37: Troubleshooting Guide
Troubleshooting Guide What might seem to be a malfunction in your unit may just be the result of slight misoperation or miswiring. Before calling service, first check the following table for possible problems. PROBLEM The power does not turn on. The fuse has blown. - Page 38 Troubleshooting Guide PROBLEM Can’t remove disc. The cause is that more than 10 minutes has elapsed since the vehicle ACC switch was turned OFF. Free switching of the sound The system Q function is set on Scan mode. quality. Audio control setting cannot be The system Q function is set on Scan mode.
- Page 39 Troubleshooting Guide CD/MP3/External disc control mode PROBLEM The disc control mode cannot No wire has been connected to the disc changer input be selected. terminal on the unit. The specified disc does not The specified CD is quite dirty. play, but another one plays The CD is upside-down.
- Page 40 Troubleshooting Guide The following messages are displayed when certain problems are occurring in your system. Take the recommended actions. No disc magazine has been loaded in the changer. The disc magazine is not completely loaded. Eject ] Load the disc magazine properly. No CD in the unit.
-
Page 41: Specifications
Specifications Specifications subject to change without notice. FM tuner section Frequency range (200 kHz space) ...87.9 MHz – 107.9 MHz Usable sensitivity (S/N = 30dB) ...9.3dBf (0.8 µV/75 Ω) Quieting Sensitivity (S/N = 50dB) ...15.2dBf (1.6 µV/75 Ω) Frequency response (±3 dB) ...30 Hz – 15 kHz Signal to Noise ratio (MONO) ...70 dB Selectivity (±400 kHz)...≥...