Table of Contents
Advertisement
Available languages
Available languages
Owner's Manual and
Installation Instructions
®
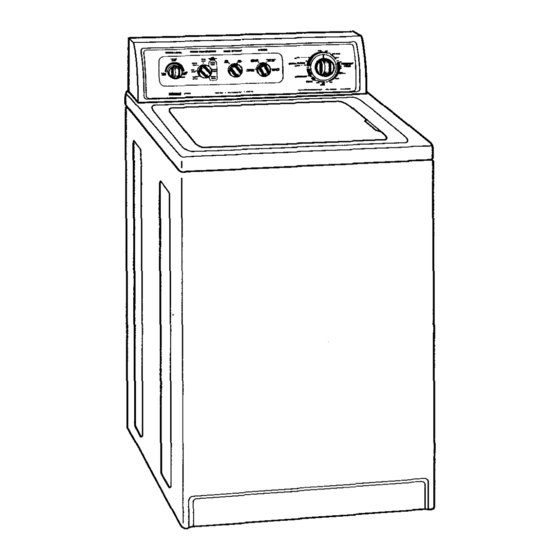
Two-Speed
Speed Control
AUTOMATIC WASHERS
IMPORTANT:
Read and follow all safety
and operating
instructions
before first use of this product.
Your washer may look different
from the washer shown.
Sears,
Roebuck
and Co., Hoffman
Estates,
IL 60179
U.S.A.
PART NO. 3950145
Rev. A
PRINTED IN U.S.A.
_
g
g
g
g
H
l
/
Advertisement
Table of Contents
Troubleshooting

Related Manuals for Kenmore 110.29882890


Summary of Contents for Kenmore 110.29882890
- Page 1 Read and follow all safety and operating instructions before first use of this product. Sears, Roebuck and Co., Hoffman PART NO. 3950145 Rev. A PRINTED IN U.S.A. ® Your washer may look different from the washer shown. Estates, IL 60179 U.S.A.
- Page 2 Kenmore washer in the safest most economical way. For more information about the care and operation of Kenmore appliances call your nearest Sears store. need the complete model and serial numbers when requesting information.
- Page 3 Owner's Manual, Sears will repair or replace any mechanical or electrical parts in this washer, if defective in material or workmanship. LIMITED 5-YEAR WARRANTY ON GEARCASE PARTS...
- Page 4 • Before the washer is removed from service or discarded, remove the lid. • Do not reach into the washer if the tub or agitator is moving. • Do not install or store this washer where it will be exposed to the weather.
- Page 5 INSTALLATION OVERVIEW For a complete list of tools and parts needed, see pages 6-8. A. SELECT LOCATION FOR YOUR WASHER (pgs. 10-12) Recessed Area/ Closet Installation Instructions (p. 10) Standpipe Drain System (p. 12) LaundryTub Drain System (p, 11) Floor Drain System (p.
- Page 6 B. REMOVE SHIPPING STRAP (p. 13) Tools Needed: Scissors Flashlight (optional depending on installation) C. CONNECT DRAIN HOSE (pgs. 14-15) Tools Needed: Pliers that open to 19/_8inches Flashlight (optional depending on installation) Parts Needed: 1 yellow, single-wire 1 silver, double- hose clamp (top of wire hose clamp drain hose)
- Page 7 D. CONNECT INLET HOSES TO WASHER (pgs. 15-16) Tools Needed: Parts Needed: hoses Pliers that open to lg/_s inches Flashlight (optional depending on installation) 4 flat water inlet hose washers E. CONNECT INLET HOSESTO WATER FAUCETS (p. 16) Tools Needed:...
- Page 8 F. SECURE DRAIN HOSE (p. 17) Tools Needed: Flashlight (optional depending on installation) G. LEVEL WASHER (p. 18) Tools Needed: 9/_6-1nch open-end wrench Wood block Flashlight (optional depending on installation) Parts Needed: Shipping strap with fastener Parts Needed: 2 front leveling legs with nuts...
- Page 9 Selecting the proper location for your washer will improve its performance and minimize concerns like washer walk or noise. ELECTRICAL REQUIREMENTS 120-Volt, 60-Hz., AC-only, 15- or 20-ampere fused electrical supply required. (Time-delay fuse or circuit breaker is recommended.) Connect individual branch circuit.
- Page 10 RECESSED AREA/ CLOSET INSTALLATION INSTRUCTIONS This washer may be installed in a recessed area or closet. 4('_'1" Front V iew (Door NotShown) *Additional clearance forwall,doorandfloormoldings may herequired. Toreduce transfer ofwasher s ounds, a clearance ol I inchonthesides ofthewasher is recommended.
- Page 11 Support: Floor must be sturdy enough to support a total weight of 315 pounds (including washer, water, and load weight). Do not store or operate washer at or below 32°F (some water may remain in washer). See page 32 for Winterizing Information.
- Page 12 17 gallons per minute. Top of standpipe must be at least 39 inches above floor and no higher than 96 inches from bottom of washer. If you have: Laundry tub or standpipe taller...
- Page 13 There should be three cotter pins on the end of the shipping strap when it is pulled out of the washer. The electrical plug is attached to this shipping strap. Electrical plug Shipping strap STEP 3. Pull firmly to remove the other end of the shipping strap pinned to the back of washer.
- Page 14 1/4inch from the end. c. Open clamp. Twist hose back and forth while pushing down onto drain connector at the bottom of the washer. Continue until hose contacts ribbed stop on the cabinet. If you have: Drain hose that is too short...
- Page 15 STEP 1. Insert one new, flat washer (from the parts bag) into each end of the inlet hoses, Check that washers are firmly seated in couplings.
- Page 16 Call 1-800-366-PART (1-800-366-7278). E. CONNECTINLETHOSES inlet TOWATER FAUCETS STEP 1, Make sure washer basket empty. Run water through turn with into a bucket or laundry tub to get rid of particles in the water lines that might clog hoses. Determine hot and which is cold.
- Page 17 F. SECURE DRAIN HOSE Securing the drain hose properly will protect your floors from damage due to water leakage, STEP 1. Move washer to its final location. STEP 2. Locate the remaining of shipping strap (not the end with the three cotter pins) from STEP 4 of "REMOVE...
- Page 18 STEP 5. Move washer to its final location. STEP 6. Tilt washer forward until rear of washer is at least 3 inches off floor. You may hear the self-adjusting rear legs click into place. Lower washer to floor. Check levelness of the washer by placing a level on top of the washer, first side-to-side;...
- Page 19 [] Check that the water faucets are turned on. Take a few minutes Operating Instructions to fully understand film on Then, start the washer and allow it to complete the ULTRA CLEAN or NORMAL Cycle. and read the (pages 20-29)
- Page 20 Failure to follow these instructions can result in death, explosion, or fire. STARTING WASHER STEP 1. Add measured directly into washer a load of sorted clothes in the washer. please STEP 2. (OPTIONAL add measured liquid chlorine the liquid bleach dispenser STEP 3.
- Page 21 SET WATER LEVEL CONTROL This control gives you the flexibility save water when washing small loads. Your washer lets you select a water setting based on the size of your wash load. • For normal loads, start with the MEDIUM LOAD Setting.
- Page 22 SET WATER TEMPERATURE CONTROL Your washer lets you select a wash and rinse water temperature setting based on the type of load you are washing. • Using warm rinse water will leave loads dryer after the spin cycle than if you use cold rinse water. However, warm rinses may increase wrinkling when line drying.
- Page 23 AUTOMATIC TEMPERATURE CONTROL (ATC) Some Kenmore washers feature Automatic Temperature Control (ATC). ATC takes away the worry undissolved detergent and ensures consistent cleaning results from season to season with warm and cold washes. ATC electronically senses and maintains a uniform...
- Page 24 YOUR CYCLE SELECTOR (TIMER) CONTROL Use this control to choose the agitation time and to start the washer. • For heavy soil and sturdy fabrics, use the full time (SUPER if indicated). • For light soil and delicate fabrics, use less time (SHORT if indicated).
- Page 25 Washers with a RINSE OPTIONS Control Your washer allows you to add an auto- matic second rinse to the ULTRA CLEAN Cycle or PERMANENT PRESS Simply set the RINSE OPTIONS on 2ND RINSE before you start the washer.
- Page 26 QUIET PAK The QUIET PAK" system is designed reduce water sounds and ringing This feature is available on select Kenmore washers. On these models, the cabinet is insulated with sound-dampening rials for superior vibration and sound- damping characteristics.
- Page 27 Use less with smaller loads. Follow manufacturer's directions for safe use. A cup with a pouring spout will help you avoid spilling. bleach, After loading the washer, liquid chlorine bleach carefully dispenser. • Do not let bleach splash, down into washer basket. bleach will damage any fabric it touches.
- Page 28 USING THE LIQUID FABRIC SOFTENER DISPENSER After loading the washer, measure and add the recommended amount of fabric softener into the dispenser. Follow manufacturer's directions. NOTE: Pouring too much fabric softener into the dispenser will cause the fabric softener to dispense...
- Page 29 (reset to wash Fill for • cycle Wash SOAK • no spin selected Spin selected level (reset to SPIN to Fill to drain washer) Rinse no spin Drain - Spin 2ND RINSE off or level Wash time • no spin • Spin •...
- Page 30 • Close zippers, snaps, and hooks to avoid snagging other items. Remove pins, buckles, and other hard objects to avoid scratching the washer Remove non-washable trim and ornaments. • Empty pockets and turn them inside out.
- Page 31 • Drop items into washer loosely. to the top of the basket (top row of holes). Do not wrap items around agitator. Items should move...
- Page 32 If you will be on vacation not using your washer period of time, you should: • Unplug the power off electrical • Turn off the water supply to the washer. This helps avoid (due to a water pressure you are away. where Because...
- Page 33 Spray Redistribute the load. Fills Reduce load size. Straighten or unplug hose (see "INSTALLATION:' After a wash or rinse, the washer will drain without spinning. After draining, the spinning begins. Close the lid. Lower drain hose (see "INSTALLATION: Use less detergent.
- Page 34 (see "INSTALLATION," Section C). Do not seal off drain hose with tape. The drain hose needs an air gap. Redistribute load. Level washer. Reset rear legs (see "INSTALLATION;' Section G). Tighten nuts (see "INSTALLATION_' Section G). Remove strap with cotter pins (see "INSTALLATION,"...
- Page 35 The top of the agitator is much Too Low/Not higher than the highest water Completely level, This creates a perception Filling of the washer not being full, Tub is Tub pulled forward when Crooked unloading, Tub moves. Unit not level.
- Page 36 Sort dark clothing from whites and lights. Unload the washer as soon as it stops. Unload the washer as soon as it stops. Use cold rinses and cycles with slow spin speeds to reduce wrinkling. Loads should move freely during wash.
- Page 37 "We Service What We Sell." Sears Maintenance Agreement Maintain the value of your Kenmore washer with a Sears Maintenance Agreement. Kenmore washers are designed, manufactured, and tested for years of dependable operation.
- Page 38 Fortherepairorreplacement p artsyou needdelivereddirectly to yourhome Call7 am - 7 pm, 7 daysa week 1-800-366-PART (1-800-366-7278) Forin-homemajorbrandrepairservice Call24 hoursa day,7 daysa week 1-8OO-4-REPAIR (1-800-473-7247) Forthe location of a SearsPartsand RepairCenterin yourarea Call24 hoursa day,7 daysa week 1-800-488-1222 Forinformation onpurchasing a Sears Maintenance Agreement o rto inquire aboutan existing Agreement Call9 am - 5 pm, Monday- Saturday...
- Page 39 Manual del propietario e instrucciones de instalaci6n LAVARROPAS AUTOMATICOS Con dos velocidades Control de velocidades .__.---_ IMPORTANTE: Lea y siga todas las instrucciones de seguridad y de modo de empleo antes de usar este producto por pdmera vez. Seam, Roebuck and Co., Hoffmsn DOCUMENTO NO.
- Page 40 Para obtener informaci6n adicional sobre el cuidado y funcionamiento los electrodomdsticos Kenmore, al establecimiento Sears mds cercano. Necesitard tener a mano los ndmeros completos del modelo y de serie de su lavarropas,...
- Page 41 GARANT|A INTEGRAL DE 1 AI_IO EN LAS PIEZAS MEC.&.NICAS COMPONENTES ELECTRICOS Por un a_o a partir de la fecha de compra, si se instala y pone en funcionamiento el lava- rropas de conformidad con las instrucciones incluidas en el Manual del propietario, Sears reparara o reemplazard cualquier pieza mec_nica o componente eldctrico de este lavarropas, si aquellos exhiben algt_n defecto...
- Page 42 SU SEGURIDADNOSIMPORTA MUCHISIMO ADVERTENClA: a fin de reducir el riesgo de incendio, descarga eldctrica o lesi6n sufrida per las personas que usen el lava- rropas, deben seguirse precauciones basicas, incluidas las siguientes: • Lea todas las instrucciones antes de usar el lavarropas. •...
- Page 43 RESUMENDE INSTALACION Si desea ver unalistacompleta deherramientas y piezas necesarias, consulte lasp_.ginas 6-8. A. ESCOJA EL LUGAR DONDE DESEA INSTALAR EL LAVARROPAS (pdgs.10-12) Instruccionesparala instalaci6nen un lugarempotrado/guardarropas ( pdg.10) Sistemade desagiiepor tuberiavertical (pdg.12) Sistema de desag_Je por pila para lavar ropa (pdg. 11) Sistema de desag_Je por el suelo (pdg.
- Page 44 B. REMUEVALA BANDA DE SUJECI(_NPARATRANSPORTE(prig. 13) Herramientas necesarias: Linterna (opcional; Tijeras depende del tipo de instalaci6n) C. CONECTE LA MANGUERA Herramientas necesarlas: Pinzas que se abran a 3,95 cm (19/16 pulg.) Lintema (opcional; depende del tipo de instalaci6n) DE DESAGUE (pdgs, 14-15) Piezas necesarias: desagee...
- Page 45 D. CONECTE LAS MANGUERAS (p&gs. 15-16) Herramientas necesarias: Pinzas que se abran a 3,95 cm _,'_ _\_\ (19/16pulg,) Linterna (opcional; depende del tipo de instalaci6n) E. CONECTE LAS MANGUERAS DE AGUA (pdg. 16) Herramientas necesarias: Pinzas que se abran a 3,95 cm (19/16pulg.) ?u ceto'na..
- Page 46 F. ASEGURE LA MANGUERA Herramientas necesarias: Linterna (opcional; depende del tipo de instalaci6n) G. ARANDELA NIVELADORA Herramientas necesarlas: Llave de boca de 1,45 cm (9/18pulg.) Linterna (opcional; Bloque de madera depende del tipo de instalaci6n) DE DESAGUE (pdg. 17) Piezas necesarias: La banda de sujeci6n para transporte con ajustador...
- Page 47 La selecci6nde la Iocalizaci6n adecuada parasu lavarropas mejorardsu rendimiento y reducir_inquietudestales como la "caminata"o ruido producido por el lavarropas. DEMANDA ELECTRICA Se necesita una alimentaci6n el_ctrica de 120 voltios, 60 hertzios, CA solamente, de 15 o 20 amperes y protegida con fusibles. Se recomienda el empleo de un fusible retardador o disyuntor.
- Page 48 A, ESCOJA EL LUGAR DONDE EL LAVARROPAS INSTRUCClONES PARA LA INSTALAClON EMPOTRADO/GUARDARROPAS Este lavarropas se puede instalar en un lugar empotrado o en un guardarropas. 48,26 "2_4.._ _=r_'88,58-__ [_.__'2,54 Vista defrente (no se ilustra la puerta) * Quiz=is sea neeesariodejar espacioslibres adicionales para las molduras de pared, puertay piso. Para reducir la transferenciade sonidosdel lavarropas, se recomienda dejar una distanciade 2,54 cm (1 pnlg.) de cada lado del lavarropas.
- Page 49 SISTEMA DE DESAGOE POR TINA DE LAVADO Compruebe la Iocalizaci6n de la instalacion del lavarropas. Este lavarropas puede instalarse con uno de estos sistemas: • sistema de desag_e por tina de lavado (a continuaci6n) • sistema de desag0e por tubo vertical (p_lg.
- Page 50 LOCALIZACIONES ALTERNATIVAS: POR TUBO VERTICAL Y POR DESAGUADERO Sistema de desagOe por tubo vertical: se necesita un tubovertical de un di&metmmfnimo de dos pulgadasy con una capacidad mfnima de desagOe de 64,6 litros (17 galones) por minuto. La parte superior del tubo de desagOe debe estar por Io menos a 99,06 cm (39 pulg.) sobre el piso y no m_lsalto de 2,44 m (96 pulg.)de la )arte inferior del lavarropas.
- Page 51 B. QUITE LA BANDA DE SUJECION PARA TRANSPORTE Es necesario quitar la banda de sujecidn para transporte para facilltar el funciona- miento sin dificultades. Si no se la quita, el lavarropas hard un ruido excesivo. Para prevenir daSos al piso, coloque el lavarropas sobre cartbn antes de trasladarlo por el piso.
- Page 52 C, CONECTELAMANGUERA DE DESAGUE La conexi6n correcta de la manguera de desagOe protegerd sus pisos del da_o producido por la p_rdida de agua. PASO 1. Para evitar que la manguera de desag0e se salga o pierda agua, debe instal&rsela seg_n estas instrucciones: IMPORTANTE: Este procedimiento se debe seguir con exactitud para asegurar una...
- Page 53 Para los sistemas de desagOe por tubo vertical o por tina de lavado: PASO 2. Abra la abrazadera amarilla de un solo alambre con pinzas y desffcela sobre et extremo con forma de gancho de la manguera de desag0e para asegurar que se unan las secciones de hule y arrugadas.
- Page 54 PASO 2. Conecte la manguera con el acoplamiento rojo con la Ilave de entrada de agua caliente (inferior). AI conectar el acoplamiento rojo primero se hace rods facil apretar la conexi6n con pinzas. Atomille el acoplamiento con la mano. Gire el acoplamiento un tercio de vuelta adicional con pinzas para apretarlo.
- Page 55 R AJUSTE LA MANGUERA DESAGOE Asegure la manguera de desagOe adecuadamente para proteger sus plsos contra dafios cauaados por fugas de agua. PASO 1. Mueva la arandela a su lugar final. PASO 2. Encuentre la pieza restante de la cuerda de embalaje (no el extremo con los tres pasadores de chaveta) del PASO 4 =QUITE LA CUERDA DE EMBALAJE"...
- Page 56 G. NIVELE EL LAVARROPAS La nivelaci_n correcta de! |avarropas previene la generaci6n de ruldo y vibraciones excesivas. Para instalar las patas delanteros: PASO 1. Levante la parte frontal del lavarropas hacia arriba (aproximadamente 10,16 cm [4 pulg.]). Utilice un bloque de madera u otro objeto que pueda soportar el peso del lavarropas.
- Page 57 Le ayudard a asegurarse de que se ha Iogrado una instalaci6n adecuada y asi aumentar su saUsfacci6n su lavarropas Kenmore. Revise los requisitos de suministro electrico. Asegerese de que cuenta con el suministro electrico adecuado y de que est_ usando el mStodo recomendado puesta a tierra.
- Page 58 Para obtener la limpieza y cuidado mdximos de los tejidos co n su lavarropas, le invita- mos a leer y seguir estas instrucciones. NOTA: Los dibujos de esta seccibn muestran las funciones bdsicas de todos los modelos que se cubren en este manual. Consulte "Hoja de funciones"...
- Page 59 POSICIONAMIENTODEL CONTROL DE NIVEL DEL AGUA Este control otorga al usuario la flexibilidad de ahorrar agua al lavar peque_as cargas de ropa. Su lavarropas le permite seleccionar una posici6n de agua segl3n el volumen de la carga de ropa para lavar. •...
- Page 60 POSICIONAMIENTO DEL CONTROL DE TEMPERATURA DEL AGUA El lavarropas le permite seleccionar posici6n del agua para lavado y enjuague segun el tipo de carga de ropa que vaya a lavar. • El agua de enjuague tibia proporciona extraccibn mejor que el agua de enjuague frfa, pero puede aumentar las arrugas al colgar las prendas para secar.
- Page 61 CONTROL AUTOMATICO LA TEMPERATURA (ATC) Algunos lavarropas Kenmore utilizan un control automdtico de la temperatura, ATC (Automatic Temperature Control, ATC). El ATC elimina la preocupaci6n de que quede detergente sin disolver y asegura resultados consistentes de limpieza de una temporada a otra con lavados tibios y frlos.
- Page 62 POSICIONAMIENTO DEL CONTROL (TEMPORIZADOR) DE SELECCI()N DE CICLOS Use este control para escoger el tiempo de agitaci6n y para poner en marcha el lavarropas. • Use tiempo completo para los tejidos sumamente sucios y prendas fuertes (SUPER si asi Io indica). •...
- Page 63 C(_MO FIJAR EL CONTROL DE OPCIONES DE ENJUAGUE Un segundo enjuague remover=t m8s residuoa de detergente. Es especialmente OUl si se ha usado detergente adicional para remover manchas rebeldes. Lavarropas con control de opciones de enjuague (RINSE OPTIONS) Su lavarropas le permite ahadir un segundo enjuague automdtico al ciclo Ultralimpio (ULTRA CLEAN) o al ciclo de Inarrugables (PERMANENT...
- Page 64 Esta funci6n estd disponible en algunos lavarropas Kenmore. En estos modelos, el gabinete cuenta con una insulaci6n de materiales que opacan los sonidos, Io cual proporciona caracter_sticas de reducci6n de sonidos y vibraci6n.
- Page 65 USO DEL RECIPIENTEDISTRIBUIDOR DE LEJEACLORADA LJQUIDA Diluya la lejia automdticamente para asegurar las cargas mds limpias y brillantes. Siempre mida la lejfa clorada liquida. Use una taza rnedidora, no adiviee la medida. No vierta la lej{a directamente de la botella. No use nunca mds de 1 taza por carga.
- Page 66 USO DEL REClPIENTE DISTRIBUIDOR DEL SUAVIZADOR DE TEJIDOS L|QUlDO Despu6s de cargar el lavarropas, mida y agregue la cantidad recomendada de suavi- zador de tejidos en el recipiente distdbuidor. Siga las instrucciones del fabric, ante. NOTA: No vierta demasiado suavizador de tejidos en el recipiente distribuidor, ya que esto causar_ que el suavizador de tejidos se distfibuya instant&neamente en la carga de...
- Page 67 COMPRENDA LO QUE SUCEDE EN CADA ClCLO ULTRALIMPIO/NORMAL (ULTRA CLEAN/NORMAL) (PERMANENT Llenar hasta el __• Lavar por el tiempo nivel seleccionado selec;nado centrifugado Centrifugado Oesaguarsin Llenar hasta el nivel seleccionado • Desaguar sin Enjuagar centrifugado Centrifugado 2DO ENJUAGUE Apagado o INARRUGABLES PRELAVADO PRESS)
- Page 68 PREPARACI(_N DE LA ROPA PARA LAVAR En esta secci6n se proporciona informacibn de lavanderfa para que el electrodomdstico le dd el mejor rendimiento en cuidado de los tejidos. • Cierre las cremalleras, los cierres y ganchos para evitar enganchar otras prendas. Quite alfileres, hebillas y dema.s objetos duros para evitar rayar el interior del lavarropas.
- Page 69 CARGA La carga adecuada del lavarropas contribuye a la limpleza correcta y al culdado de los tejidos, y reduce el ruido producido por el electrodome_sUco. • Deje caer las prendas en el lavarropas de modo que queden sueltas. Llene el lavarropas hasta el borde del tambor (borde superior de orificios).
- Page 70 LIMPIEZA DEL LAVARROPAS El cuidado adecuado del lavarropas puede prolongar su vida 6til. En esta seccion explicaremos c6mo cuidar el lavarropas correcta y seguramente. Exterior Limpie todo resto de detergente, lejfa u otros derrames con un patio o esponja suave y hL_meda apenas aquellos ocurran.
- Page 71 La mayor parte de los problemas con el lavado de ropa se solucionan f_.cilmente si se entiende la causa. Repase estas listas para identificar los problemas comunes con Problema Causa probable El lavarropas La instalaci6n sanitaria de la pierde agua casa tiene pOrdidasde agua.
- Page 72 Problema Causa probable El lavarropas Baja tensi6n, o empleo de no vacfa el aguaJ cables de prolongaci6n, no cantrlfuga/ Enjuagues frios. da cargas mojadas (cont.) Sigue La manguera de desagt3e Ilendndose se encuentra a menos de de agua/sigue de 99,06 cm (39 pul9.) vaclando encima del piso, aguaJciclo...
- Page 73 probable Problema Causa La mdquina El cable de alimentaci6n se detlene no estd enchufado. No pasa electricidad pot el cable de alimentaci6n, Fusible quemado o disyuntor abierto. Uso de un cable prolongador. El temporizador no est_ alineado, La perilla del temporizador no ha salide hacia afuera, El lavarropas estd en pausa en el ciclo de inarrugables...
- Page 74 Problema Causa probable Desgarrones Sobrecarga. Uso incorrecto del lavarropas. Uso incorrecto El cloro no diluido da5ar#, la tela de su ropa. No se hen quitado los elementos puntiagudos de los botsillos; los cierres no est_.n cerrados. Articulos dahados antes del lavado, Uso incorrecto del suavizador Manchas de tejidos en el lavarropas o...
- Page 75 "Reparamos Io que vendemos:' Acuerdo de mantenimiento Sears Mantenga el valor de su iavarropas Kenmore con URAcuerdo de mantenimiento Sears. Los lavarropas Kenmore se ban disefiado, fabricado y probado para brindar afios de funcionamiento fiable.
- Page 76 Para la reparaci6no entregadirectaa domiciliode piezasde repuesto Ll_menos de 7 am a 7 pm, los siete aliasde la semana 1-8OO-366-PART (1-800-366-7278) Para el serviciode reparaci6nde marcas reconocidasa domicilio Ll_menos las 24 horas del alia, los siete dfas de la semana 1-800-4-REPAIR (1-800-473-7247) Para la Iocalizaci6nde un Centrode...