Advertisement
Table of Contents
- 1 Placement of Needle
- 2 Removing Bobbin Casefromshuttle
- 3 Winding the Bobbin
- 4 Threading Upper Machine
- 5 Picking Upbobbin Thread
- 6 Setting Stitchlength
- 7 Reverse Stitching
- 8 Fastening a Seam
- 9 Turning a Corner
- 10 Changing the Presser F Eet
- 11 Presser Foot
- 12 Sewing on Buttons
- 13 Parts List
- 14 Sewing Machine
- Download this manual
Advertisement
Table of Contents

Related Manuals for Kenmore 1206


Summary of Contents for Kenmore 1206
- Page 1 N S T RUCTION MODEL 20/21 / 23/1206/1300. ZIG-ZAG SEWING MACHINE...
- Page 2 IRDEX Adjusting for Good Stitching Bobbin: Inserting & Threading - ... Picking up Bobbin Thread Removing Winding Buttonholes Buttons Cleaning Connecting Machine Corner, Turning Darning Fastening a Seam Feed Dog Control Hems: Blind Stitched Identification, Head Parts Installing Machine Head in Cabinet Inserting &...
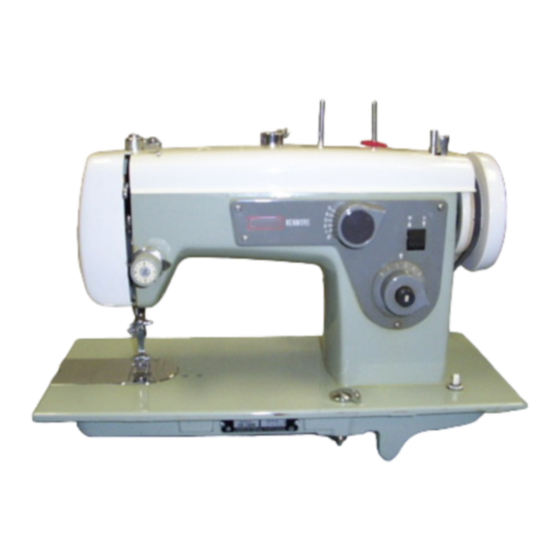
- Page 3 FRONT VIEW ® @" q,,, 1. Bobbin WinderSpmdle Feed Dog Controi 2. Bobbin Winder Latch 9. Nomenclature 3. Stitch Width Control Needle Plate Stttch Width Limlter 1 t_ Needle Clamp Screw 5. Stitch Length Control Feed Dog Reverse Stitch Push Button 13.
- Page 4 BACK VIEW Presser Foot Pressure Regulator Face Plate Clutch Release Presser Foot Lever Thread Cutter Thread Hand Wheel Blind Stitch Knob {Models 21, 1300 Spool Pins only}...
- Page 5 It may be turned on or off by pushing the light switch. TO remove the bulb, disconnect the sewing machine the face plate. Push bulb m slightly, turn it counterclockwise remove. To replace, push...
-
Page 6: Placement Of Needle
NEEDLE THREAD TABLE THREAD SIZE _i_-r._EDLE ISIZE Cotton 60-100 Sheer cottons, Synthetic Fine Laces Silk A Cotton 60-80 Medium Mercerized Medium Synthetic Medium Silk A Light weight Cotton 40-60 Heavy weight Mercerized 50 Medium Mercerized heavy duty Heavy drapery Heaviest Cotton 30-50 Mercerized heavy duty Heaviest... -
Page 7: Removing Bobbin Casefromshuttle
REMOVING BOBBIN CASEFROMSHUTTLE lever Take at its highest position. Pull latch. .° Pull bobbin case straight out. -
Page 8: Winding The Bobbin
WINDING THE BOBBIN Place thread spool post. Draw thread shown. Wind thread around bobbin times, front to back. Place bobbin onto bobbin winder shaft. Push bobbin winder latch until it clicks. Release clutch turn- clutch knob toward you. 8tart machine. When bobbin is full, wind- mechanism... - Page 9 INSERTING BOBBININTO BOBBIN CASE_CASE iNTO SHUTTLE O" Guide bobbin Pull thread Pull thread Holding latch, onto center pm of bobbin case. through slot. under tension spring. position case into shuttle, then release latch. I,,_,,ILJ,II i...
-
Page 10: Threading Upper Machine
THREADING UPPER MACHINE Place thread as illustrated between discs of the Thread Tension Control. Prevent spool thread from 1;urntng holding thread pull spr_ng wire loop past hook unti_ thread slipped into hook. When thread tension Js released, spring wire loop will return to posit_on... -
Page 11: Picking Upbobbin Thread
PICKING UPBOBBIN THREAD Rinse presser foot lever. Hold needle thread loosely in left hand wheel toward you one complete Bring bobbin thread up by pulling upper illustration). Place threads back under presser foot. ADJUSTING THEPRESSURE OFTHEPRESSER FOOT Push down outer ring of presser foot pressure _See illustration). -
Page 12: Setting Stitchlength
SETTING STITCHLENGTH Turn knob toany desired stitch lengthposition between 0 and 5. At No. 5, the longes_stitchis obtained.The sizeof stitch you select willdepend on the fabricyou are sewing. The blindstitch knob must be on the "OFF" for alloperationsexcept blind stitching. {Models 21, 1300 only) For straightstitchingthe stitch width control must be se_ at 0. - Page 13 Fig. PROBLEM Upper thread tight Fig. Upper thread loose Fig. NOTE: ADJUSTING TENSIONS A perfect stitch wilt have threads of fabric with no loops on top or bottom. Decrease Tension ,.._!! li Increase Tension Never adjust more than one number at a time÷...
- Page 14 When stitching is unsatisfactory as in figures 2 and 3, adjust the upper thread tension. Lower thread tension requires adjustment less frequently than upper thread tension. When stitch is satisfactory, as in figure I and seam is badly puckered, the cause may be tight tensions...
- Page 15 INSERTING A NDREMOVING T HE MATERIAL For all kinds of sewing, consult chart page 5. Before placing the material on the machine • The presser foot and needle clamp screws are both tight. • The sizes of needle and thread suit the kind of work to be done.
-
Page 16: Turning A Corner
TURNING A CORNER Stop your sewing machine and make sure needle thbric, Raise presser foot. Turn fabric to desired tion. Lower presser foot and go on with your stztching. FEED COHTROL This knob is situated on right front of machine When knob is turned to the left, feed dog does not move... - Page 17 ZIGZAG CONTROL To produce a zigzag stitch, turn the stitch width The indicator on the stitch width control knob A points to a higher number, but the limiter must be rolled downward Increases from No. I setting to the No. 5 setting. Zig-zag stitching will be practical...
- Page 18 BUTTONHOLES Stitch length Stitch width about 2 Feed dog control Stitch forward until desired length for buttonhole dog, set stitch width control on 2Vz and take one stitch Raise presser foot and turn material with needle in material. 3. Turn stitch width control...
- Page 19 HEMS BLIND STITCH (Models 21, 1300 only) The Blind Stitch Knob must on the "OFF" position for all operations except blind stitching. 1, Prepare the hem with a turned and edgestitched finish, or Apply seam tape along raw edge with eitner straight or zig zag stitching,...
- Page 20 Make second fold as shown. Turn blind stitch knob (black arrow) to the "ON" position. stitch width stitch length 2-3 €as desired). Then, blind stitch along fold until hem is completed. Unfold, exposing right side of material with completed blind stitching.
-
Page 21: Presser Foot
WITH PRES51ER FOOT : 1. Turn feed dog control Press down outer ring of presser tion mending, monogram Stretch fabric tightly The presser bar can be raised to accommodate foot lever. Lower presser bar so thread forth to cover darning stitching. -
Page 22: Sewing On Buttons
SEWING ON BUTTONS 1. Turn feed dog control to left. Place needle into left hole of button, align holes with slot of presser foot Set stitch width control at width between width by turning handwheet slowly. Take several zigzag stitches sew on button, ending with needle on left side. - Page 23 When a drop of KENMORE sewing the holes on the top cover top cover plate by unsm_ewing (Model 1206) of machine hexad.
- Page 24 ShuttleRace Cover ShuttleAssembly It may be necessary to clean the shuttle Raise the needle bar to its highest Push levers sideways of the shuttle Clean the shuttle race of any tint or small particles Put a drop of oil on the center pin of the shuttle To reassemble, hold shuttle by center...
- Page 25 PROBLEM PROBABLE Incorrect s_ze needte. Improper [breading, Loose upper thread trregular Pulling fabric. Stitches Light pressure on presser toot. Loose presser foot. Unevenly wound Pulling fabric. Incorrect size needle. Breakmg Needles Incorrect setting Loose presser foot. Upper and lower Bunching drawn back under Th read...
- Page 26 PROBLEM PROBABLE CAUSE tncorrect size needle, Bent or blunt needle. Skipping Incorrect setting of needle. Stitches Tight upper thread tension. Light pressure on presser foot. Starting to stitch too fast. Improper threading. Breaking Upper Tight upper thread tension. Thread Incorrect size needle.
- Page 27 ADJUSTING YOUR SEWING MACHIHE FORGOOD When your sewing machine does not sew a properly Insert a new needle of.the correct for needle size. The upper and bobbin thread Check threading carefully. See page 8-9. Check the thread tension balance. using.
-
Page 28: Parts List
All parts listed hem may be ordered through mail order house. When ordering these parts, please be sure to mention 1. Model & serial numbers of machine 2. Parts number(s) and description(s) When ordering by mail, prices will be furnished on request, be billed accordingly. -
Page 29: Sewing Machine
SEWING MACHINE SEARS; ROEBUCK AND CO., Chicago, IL 60684 U.S.A. SIMPSONS-SEARS LiMiTED, Toronto, Ontario, Canada Part No. 55053.